Introduction
Generally, while using Arduino one face the problem of uploading different codes again and again as he changes some part of the codes. Using evive’s user-defined function submenu, the user can store different Arduino programs at once. He can switch to a different program while navigating inside the menu. Here is how to do it:
Creating a new User Defined Function

- In Arduino IDE, the user will add his custom codes in space provided in file named AddUserDefinedFunctions.cpp in similar fashion to “void setup_user_defined_function(){….}” and “void loop_user_defined_function(){….}”.
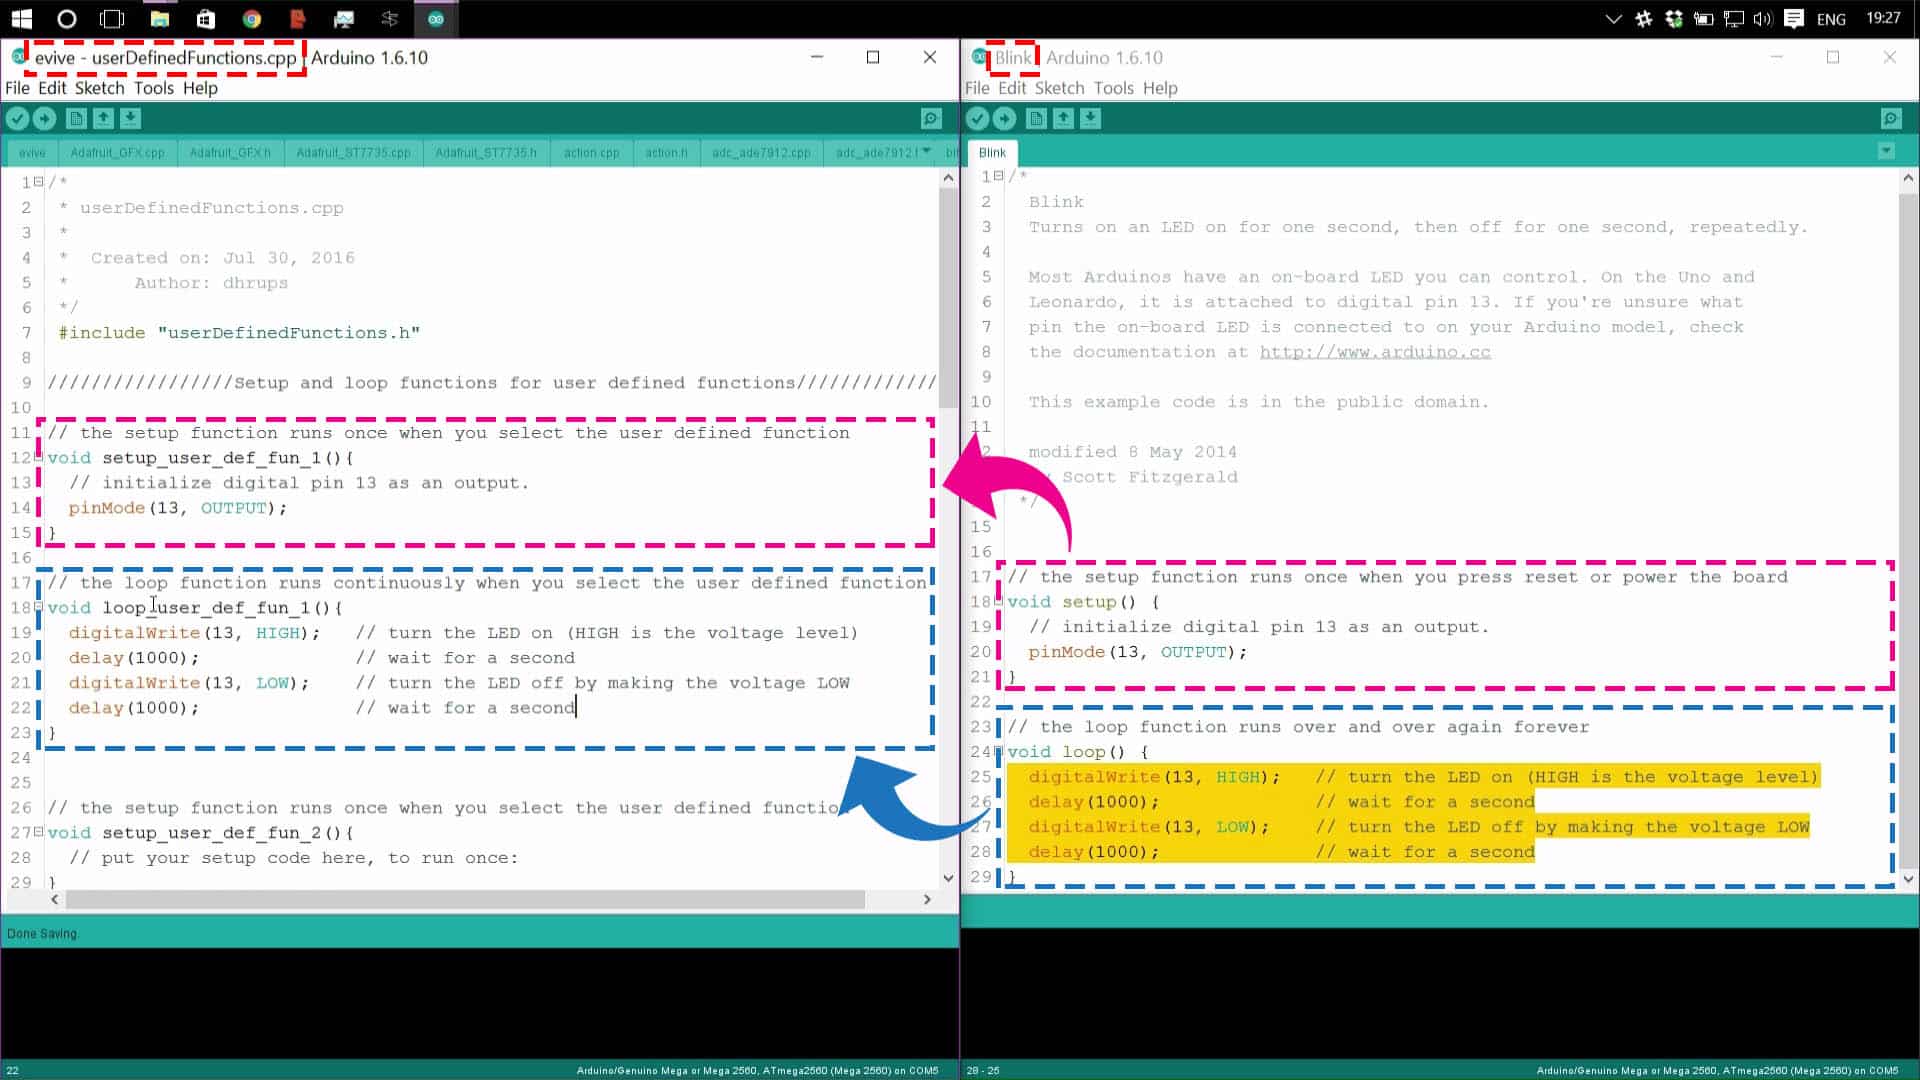
- The user has to uncomment the desired user defined functions and give the desired name in AddUserDefinedFunctions.h.
- Upload the program to evive using Arduino IDE via USB cable.
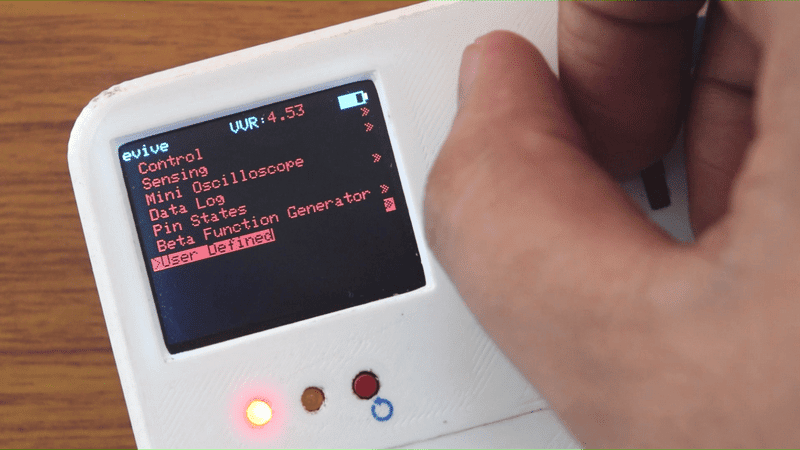
So the code will be available under the user-defined menu list item. When the user will select that particular user-defined function in the sub-menu of user defined function, the code will start running in a loop.
Blink with Firmware on evive
Let’s see how we can access evive firmware even when some other code is running on evive. To explain this feature of the evive library an example of blinking an onboard LED “M1” on evive is taken. Here blinking is achieved by switching between code of glowing the bi-color led at “M1” in two colors and firmware. Led stops changing its color as soon as the firmware is opened and when we exit firmware led starts changing color again.

Flow of activity
- Make sure that the evive library is installed on Arduino IDE. To learn library installation navigate to the getting started page for Arduino IDE. If you are already familiar with library installation on Arduino IDE then download the zip of evive from here.
- Download the code given below.
- As soon as the code is uploaded to evive led start glowing. Led is glowed in two colors by changing the status of digital pin 28 and 29 on which led is connected.
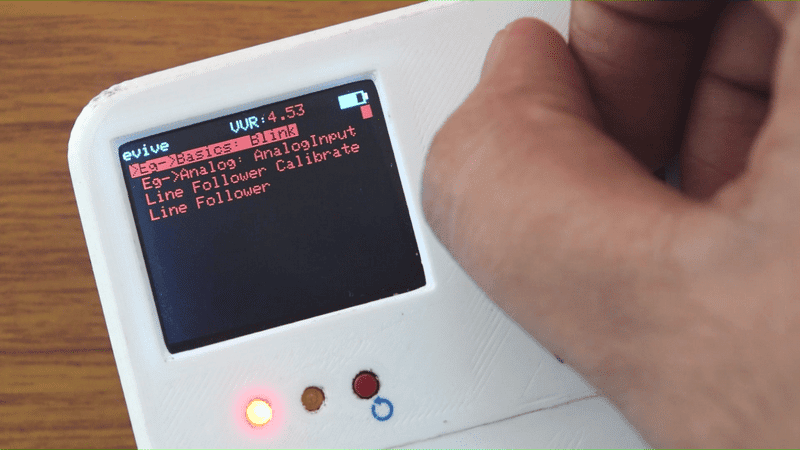
- Now center press the Navigation key. As soon as the navigation key is pressed evive firmware appears on the evive screen and the LED stops glowing in two colors and remains constant in one color suggesting that code has stopped working because the firmware is currently running on the evive screen.
- Exit firmware by using the “Exit Firmware” option in the menu. As soon as one exits firmware led starts glowing in two colors again.
This example basically highlights the fact that we can access evive firmware anytime even when some other code is running on evive. Just one point necessary to be kept in mind is that the evive library should be included in the code sketch.
Code
/* Here we are blinking bi-color LED "M1" of evive connected on Pin 28 and 29.
 * Unlike basic blinking code that uses delay for blink action here blinking
 * is achieved by switching between firmware and code of glowing LED.
 * Library of evive is included in code which makes this task possible.
 * Intially LED glows in two colours namely red and green now as the
 * navKey is center pressed we navigate to firmware and the uploaded code
 * stops running hence led stops changing color for a while till we exit from the firmware
 * by using Exit from the menu. As we exit firmware the code to glow led in
 * two colours starts again.In this code status bar is also shown for
 * information related to battery level and variable voltage value.
 *
 * Created by Nihar Shah.
 * This code is in public domain.
 * Explore more at https://thestempedia.com/tutorials/blink-with-firmware-on-evive
 */

#include <evive.h>            // Include evive library

void setup() {
  pinMode(LED28, OUTPUT);     // Set pin as output mode (LED28 = Pin 28)
  pinMode(LED29, OUTPUT);     // Set pin as output mode (LED29 = Pin 29)
  drawStatusBar();            // shows variable voltage value (VVR) and battery level
}

void loop() {
 //By center pressing navigation key evive Firmware opens.
  drawStatusBar();            // shows variable voltage value (VVR) and battery level
  digitalWrite(LED28, HIGH);  // glows led in green
  digitalWrite(LED29, LOW);
  delay(1000);                // wait for a second
  digitalWrite(LED29, HIGH);  // glows led in red
  digitalWrite(LED28, LOW);
  delay(1000);                // wait for a second
}
Output
Carefully observe that before the navigation key is center pressed M1 led glows in red and orange color. As soon as the navigation key is center pressed the led stops changing its color and remains still and as soon as you exit the firmware LED starts changing its color again.
Conclusion
In conclusion, this lesson showed how to use evive‘s user–defined function submenu to store and access different Arduino programs. Using the evive library, the user can also access the evive firmware even when some other code is running on evive. This allows the user to switch between different Arduino programs or access the evive firmware while running the same program.


