Introduction
A relay is an electrically operated switch that uses an electromagnet to mechanically operate a switch. Relays are used where it is necessary to control a circuit by a separate low-power signal, or where several circuits must be controlled by one signal. For example, if you want to control an AC bulb using evive, you have to use a relay. Similarly, it is used in high current applications.
5V Relay
Relay operating at 5V can be directly used with evive using its digital pins. Given below is the circuit for controlling an AC bulb using a relay:
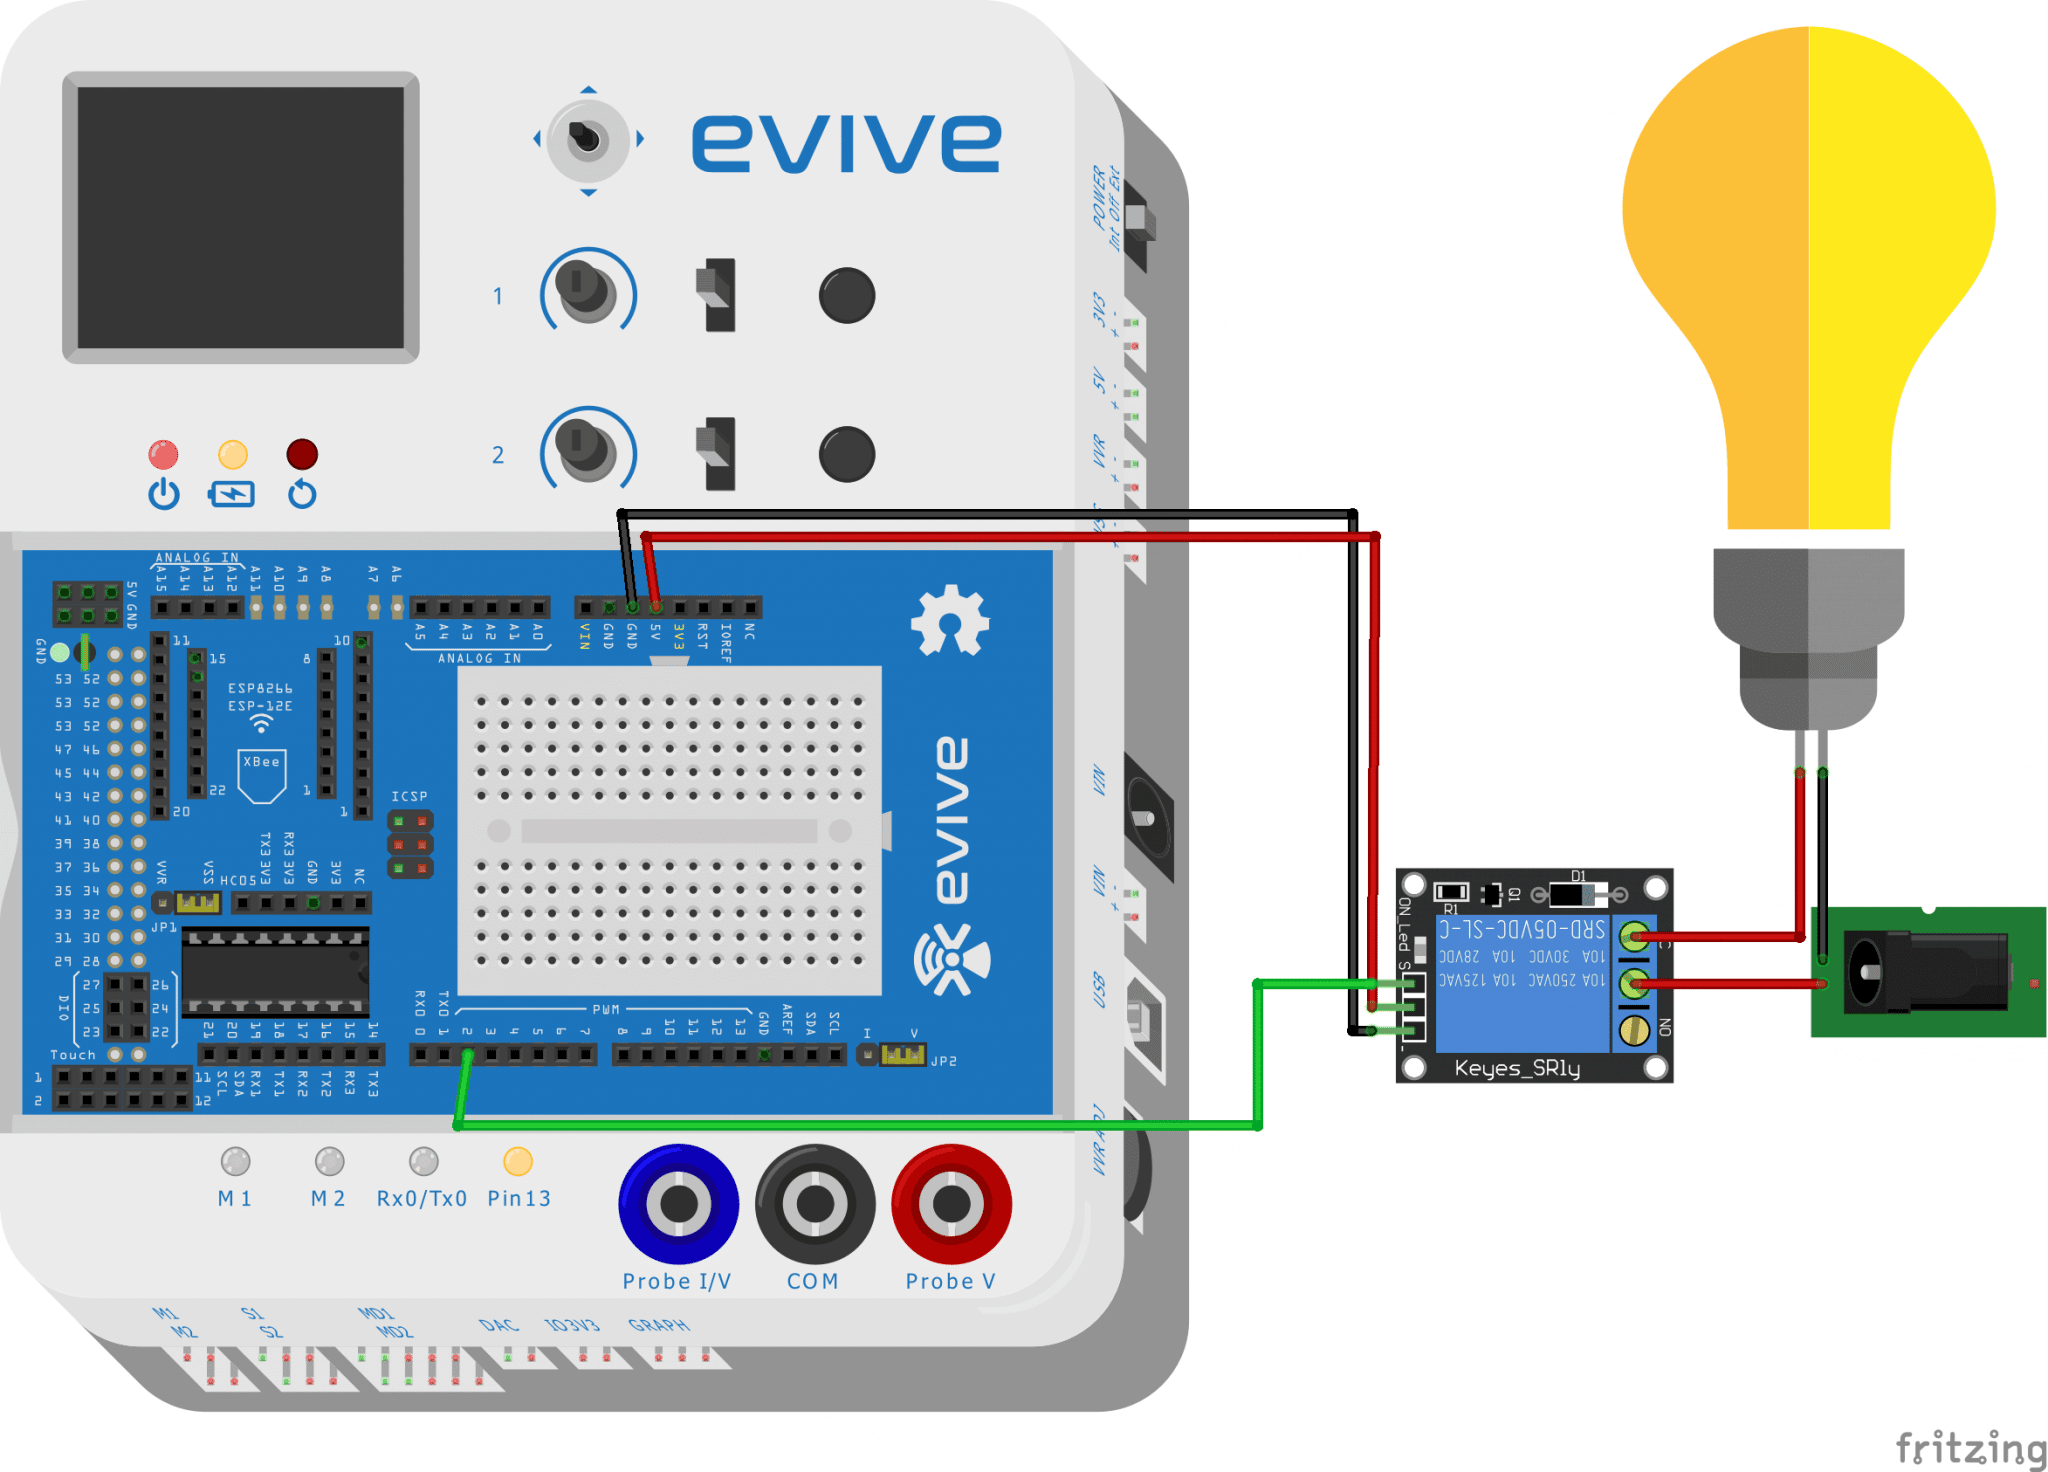
We are using Keyes 5V Relay Module. It has three pins, the VCC, GND, and Signal. It can act as a switch if the circuit and the load circuit have different supply voltages. It is commonly used if the load circuit is AC. It is a switch used to connect isolated connections from the circuit using a circuit signal. It has a red LED that turns on every time the coil is energized or the signal pin has a high input.
Specifications
- 5V – 12 V TTL control signal
- Maximum AC current and voltage: 10A 250VAC
- Maximum DC current and voltage: 10A 30VDC
- The control signal DC or AC, 220V AC load can be controlled
- There is a normally open and one normally closed contact
- To make the coil of the relay energized you just need to have an input of 1 in the signal pin.
Pin Configuration
- + : 5V power supply
- -: Ground
- S: Signal from the Arduino
- NC: normally closed
- NO: normally open
- COMMON: common
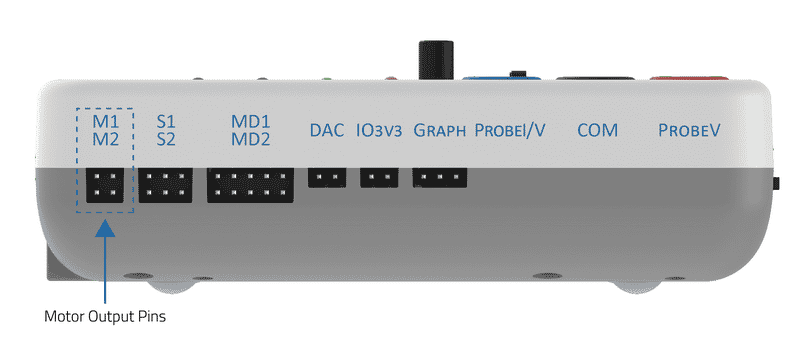
12V Relay
A Relay operating at 12V can be used via motor output pins configured to work on the 12V output.
Pin Configuration
- Coil A
- Coil B
- NC: normally closed
- NO: normally open
- COMMON: Common
You have to connect Coil A and Coil B pin to evive motor output pin 1. Then using motor functions in Arduino IDE or by the “control” option in the menu, you can control the relay directly.
Conclusion
In this lesson, we learned about the different types of relays and their uses. We also learned about how to use the 5V and 12V relays with evive. We now understand that relays are used in various applications to control circuits using a separate signal. With this knowledge, we can now use relays in our projects.


