Table of Contents

get () from DHT sensor at pin ()

get from DHT sensor at pin

Description

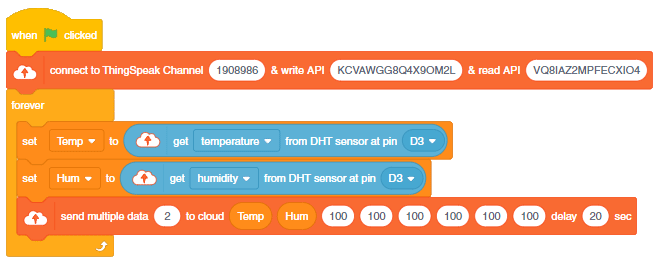
Get () from DHT sensor at pin () block is a stack block available in sensors extension for evive and all Arduino boards. The block reports either the temperature or humidity (selected from the dropdown menu) from the DHT sensor connected to the digital pin selected from the drop-down menu.
get from DHT sensor 2

evive Notes Icon
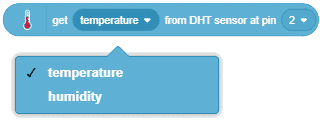
Note: This block is available in both Upload mode and Stage mode.
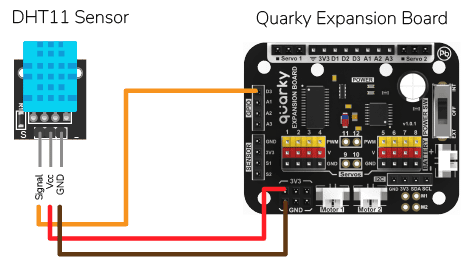
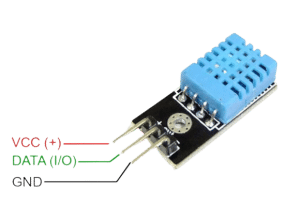
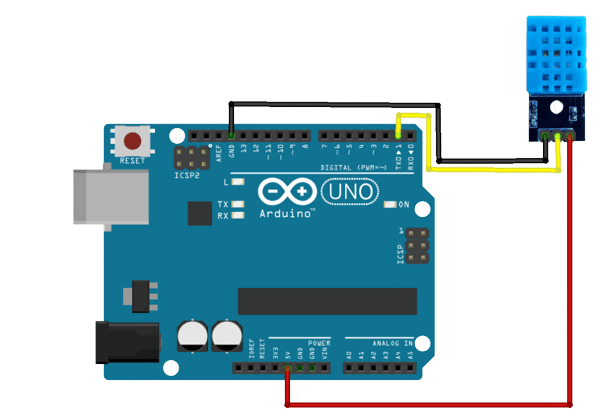
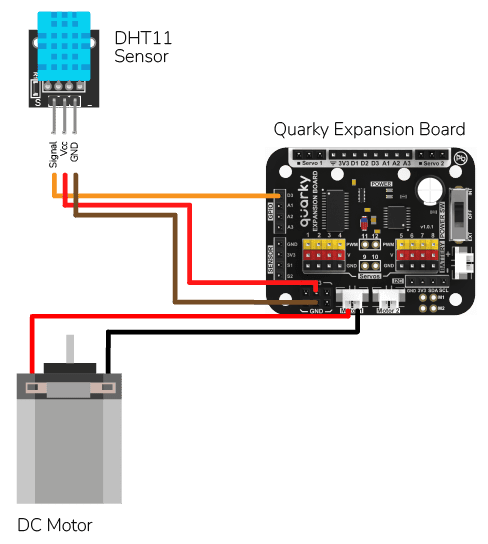
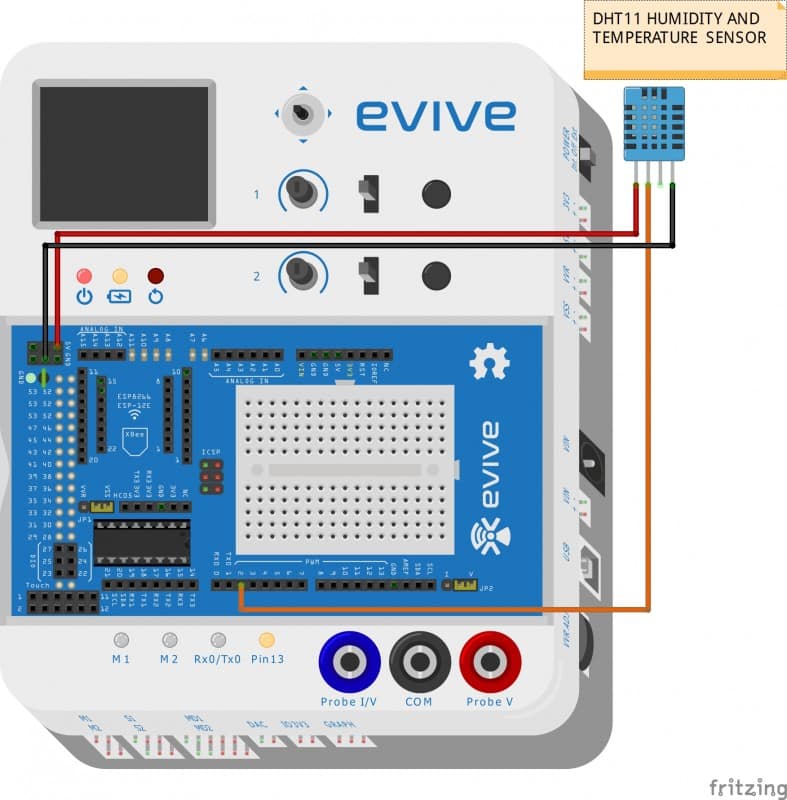
Circuit Diagram

The connections between humidity and temperature  sensor are explained below

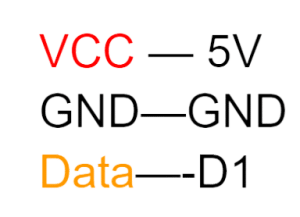
  • + Pin is connected with the female jumper wire and the male end to the 5V power supply on evive board.
  • – Pin is connected with the female jumper wire and the male end to the ground on evive board.
  • OUT Pin is connected with the female jumper wire and the male end to the digital pin.
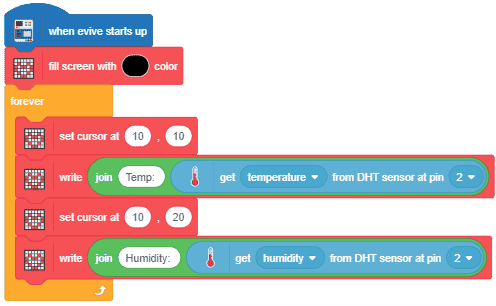
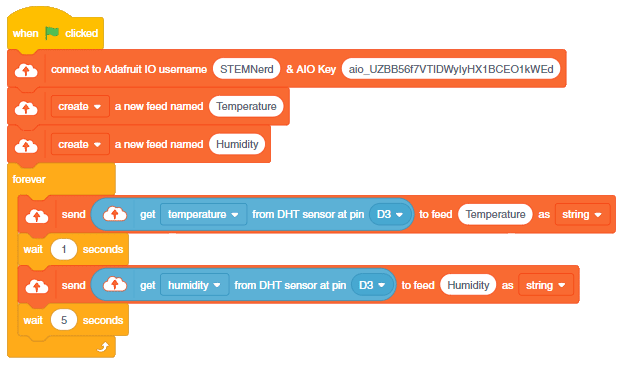
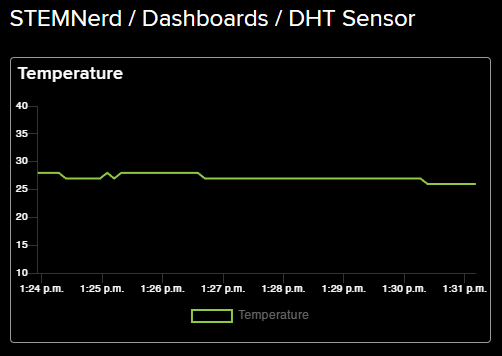
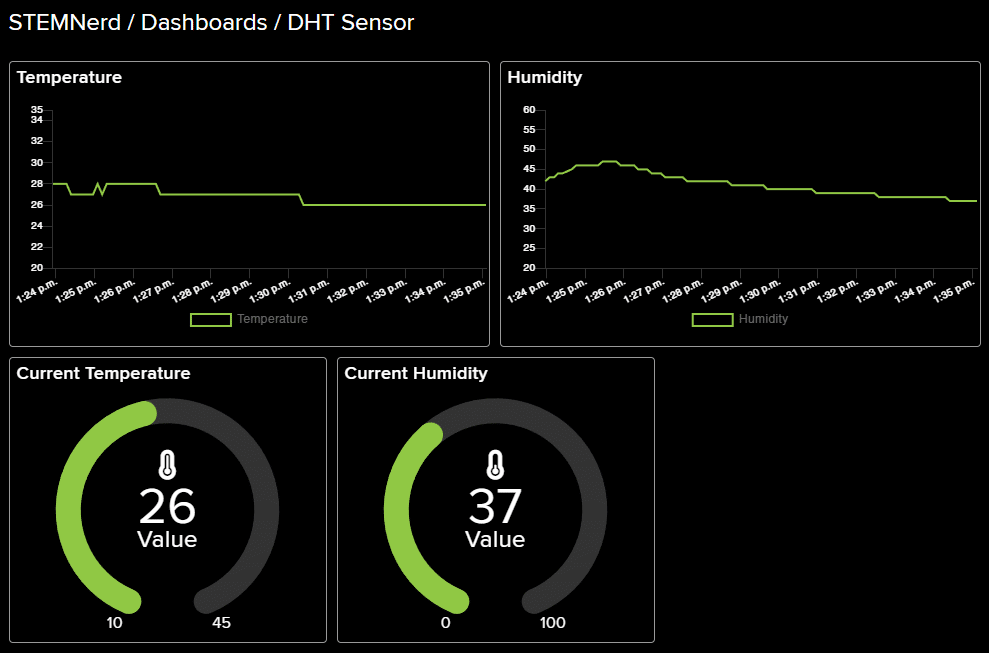
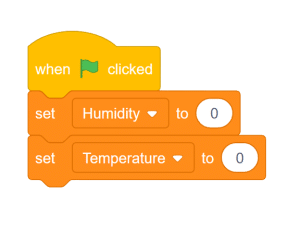
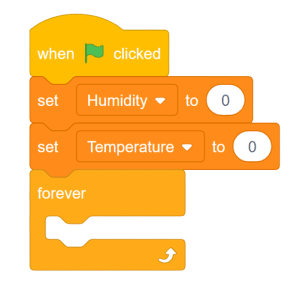
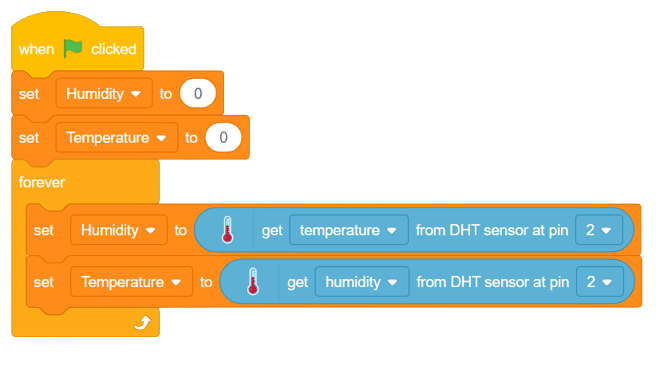
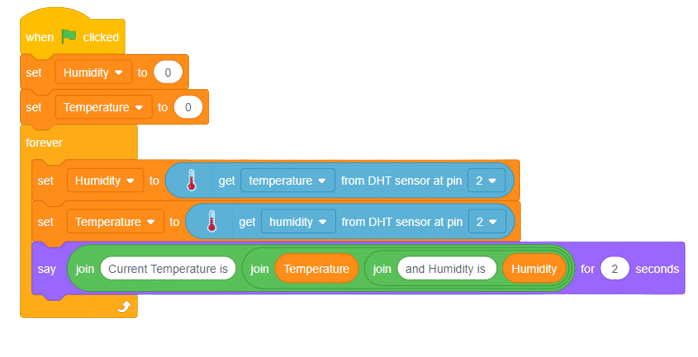
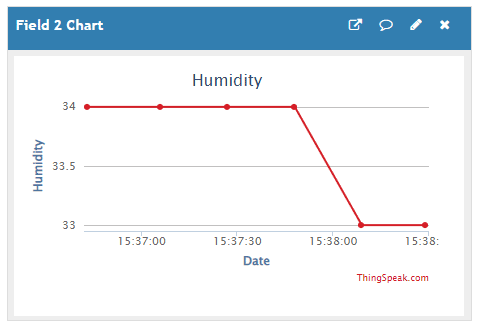
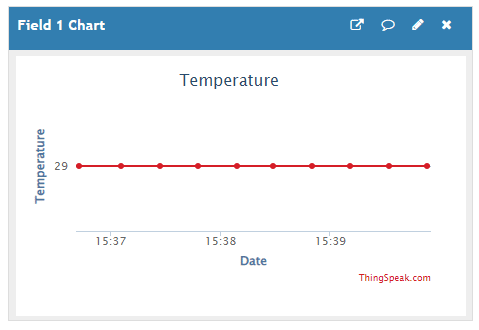
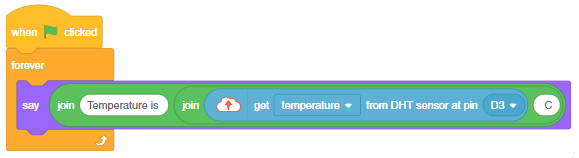
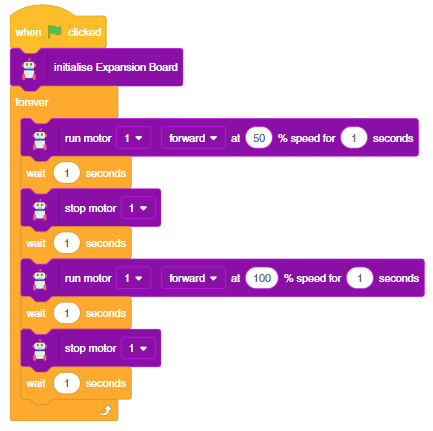
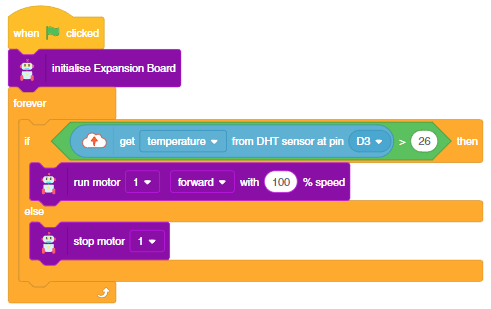
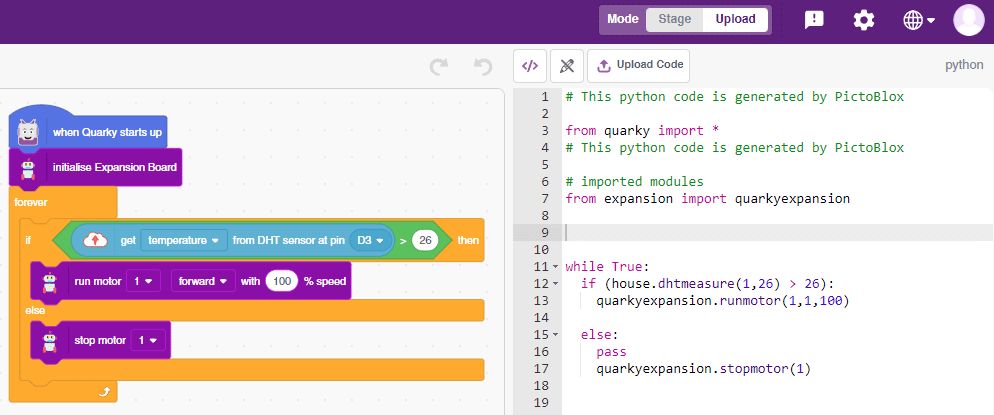
humidity sensor

Example

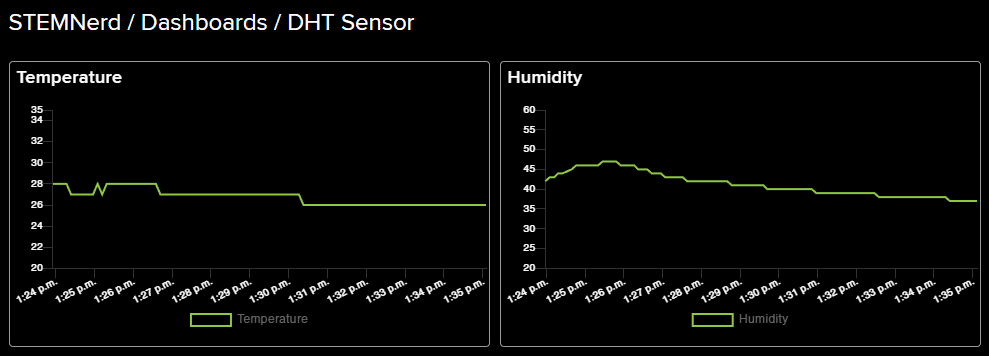
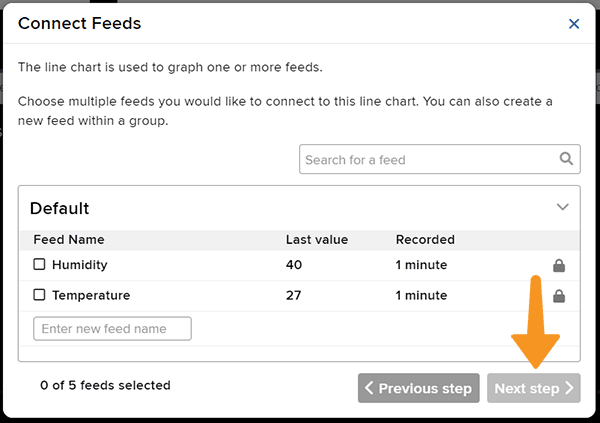
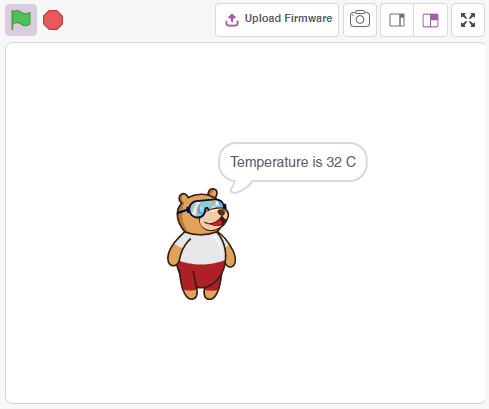
  1. This script displays the temperature and the humidity readings from the DHT sensor connected to digital pin 2
    DHT sensor example

Example

We will use the Adafruit IO cloud service to send data from a humidity and temperature sensor to the cloud.

We will use the Adafruit IO cloud service to send data from a humidity and temperature sensor to the cloud. Adafruit IO is a cloud service that allows you to send data from sensors and other devices to the cloud, where it can be stored and analyzed.

Adafruit IO Key

You can find the information about your account once you log in from here:

Note: Make sure you are login on Adafruit IO: https://io.adafruit.com/

DHT Sensor Connection to Quarky

DHT sensors have 3 pins: GND, VCC, and Signal. You have to connect the following 3 pins to the Quarky Expansion Board:

  1. GND to Ground Pin of Quarky Expansion Board
  2. VCC to 3.3V or VCC Pin of Quarky Expansion Board
  3. Signal to the D3 (Digital Pin) of the Quarky Expansion Board

Script

The following feeds are created:

Creating Dashboard

Follow the steps:

  1. Go to the dashboard and click on New Dashboard.
  2. Add the Dashboard Name and Description and click on Create.
  3. Open the New Dashboard. Click on the Setting icon in the top right corner and then click on Create New Block.
  4. From the options, click on the line chart.
  5. Select the Temperature Feed and click on Next Step.
  6. Add the Block Title and the Y-Axis Minimum – Maximum value. Click on Create Block.
  7. You will find the block added on the dashboard.
  8. Add a Humidity block as well. Also, add two gauge elements showing the current temperature and humidity value.
  9. Click on the Setting button and Edit Layout to align all the buttons.
Read More
Learn to Interface DHT11 (Temperature and Humidity) sensor and measure Temperature and Humidity with Arduino

Understanding DHT 11 Sensor


DHT11 is a low-cost digital sensor for sensing temperature and humidity.  This sensor can be easily interfaced with any micro-controller such as Arduino, Raspberry Pi etc.  to measure humidity and temperature instantaneously. It comes with a dedicated NTC to measure temperature and an 8-bit microcontroller to output the values of temperature and humidity as serial data. The DHT11 sensor has three pins- VCC, GND and Data Pin. A pull-up resistor of 5k to 10k ohms is provided for communication between sensor and microcontroller.

Circuit Diagram

Code

  1. From  event add  when green flag clicked.
  2. Create two variable temp & humidity for storing the temperature and humidity respectively.
  3. From  control  add  forever
  4. From sensor palette of  Arduino  select get humidity and set it variable humidity do same for temperature
  5. From  look  palette  add  say ()  for() block.
  6. From operators add three join () ()  display temperature and humidity with some message.

Script

Output


Read More
In this example, we will send the humidity and temperature sensor data to the cloud on the ThingSpeak servers.

In this example, we will send the humidity and temperature sensor data to the cloud on the ThingSpeak servers.

ThingSpeak Channel

Create a channel on ThingSpeak with 2 fields – Temperature and Humidity.

DHT Sensor Connection to Quarky

DHT sensors have 3 pins: GND, VCC, and Signal. You have to connect the following 3 pins to the Quarky Expansion Board:

  1. GND to Ground Pin of Quarky Expansion Board
  2. VCC to 3.3V or VCC Pin of Quarky Expansion Board
  3. Signal to the D3 (Digital Pin) of the Quarky Expansion Board

Script

The following script reads the temperature and humidity reading from the DHT sensor and sends them to the ThingSpeak channel.

Output

Read More
In this example, we are going to learn how to program Quarky to detect the temperature (using DHT Sensor) and make the fan ON and OFF accordingly.

In this example, we are going to learn how to program Quarky to detect the temperature (using DHT Sensor) and make the fan ON and OFF accordingly.

DHT Sensor Connection to Quarky

  1. DHT sensors have 3 pins: GND, VCC, and Signal. You have to connect the following 3 pins to the Quarky Expansion Board:
    1. GND to Ground Pin of Quarky Expansion Board
    2. VCC to 3.3V or VCC Pin of Quarky Expansion Board
    3. Signal to the D3 (Digital Pin) of the Quarky Expansion Board
  2. Fan Motor: Connect the Fan Motor to Motor 1 (M1) of the Quarky Expansion Board.

Getting Sensor Reading

The following script displays the real-time sensor reading.

Download Code: https://pictoblox.page.link/eHAFsRRW6CoEifmn9


Connect Quarky and you will start getting the readings.

Controlling Fan

The following makes the fan motor turn ON at 50% speed for 1 second, then turn OFF for 1 second, then turn ON at 100% speed for 1 second and finally turn OFF for 1 second. This will repeat in a loop.

Download Code: https://pictoblox.page.link/vWTfiWkgi2w8BhsNA

Automatic Fan Control

The following scripts, make the fan turn ON whenever the temperature is greater than 26 degrees.

Uploading Code

You can also make the automatic lighting work independent of PictoBlox using the Upload Mode. For that switch to upload mode and replace the when green flag clicked block with when Quarky starts up block.

Click on the Upload Code button.

Read More
All articles loaded
No more articles to load