
Introduction
“We don’t stop playing because we grow old; we grow old because we stop playing.”
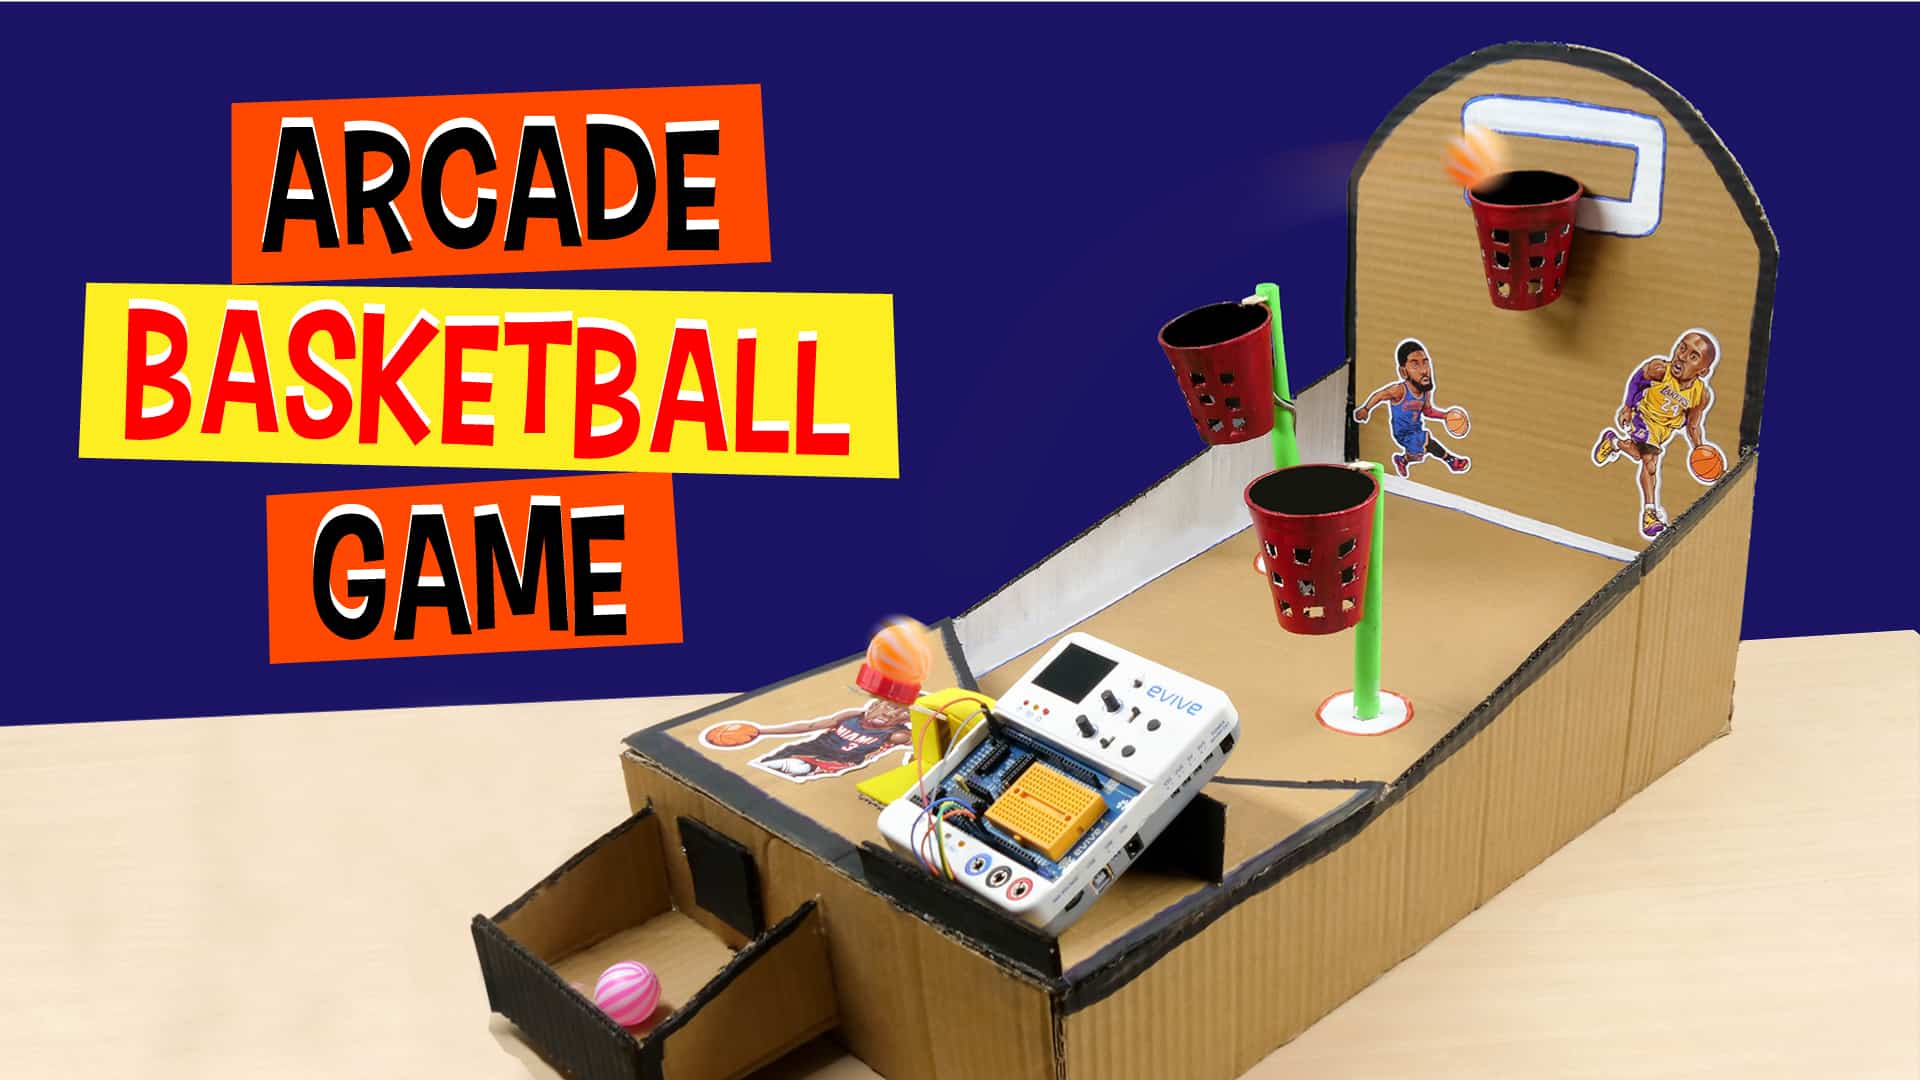
And we couldn’t agree more! The key to staying young is to never stop playing, and to never EVER stop DIYing! So, we thought why not combine the two! And voila – here we have for you the DIY Arcade Basketball Game! This super fun game will be the best DIY game you’d have ever played so far. With lucid step-by-step instructions and easy programming in PictoBlox, this game is going to be as amusing to make as it will be to play.
So, what are you waiting for? Download PictoBlox from HERE and begin right away!
The cutouts
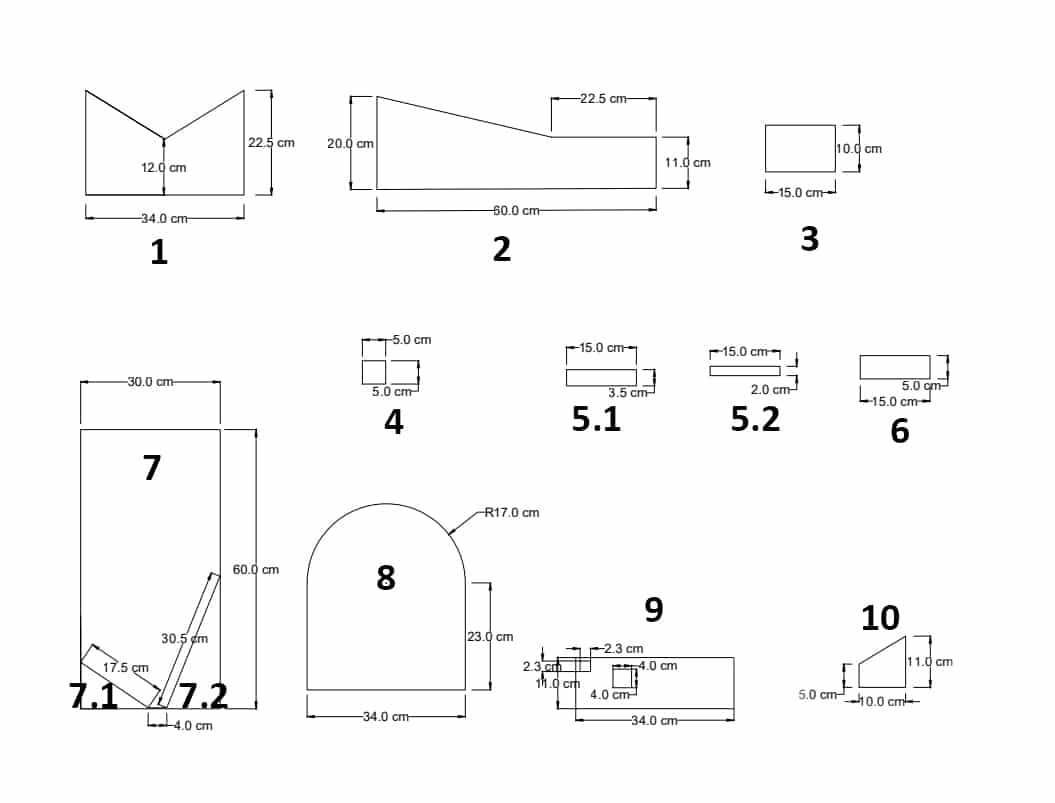
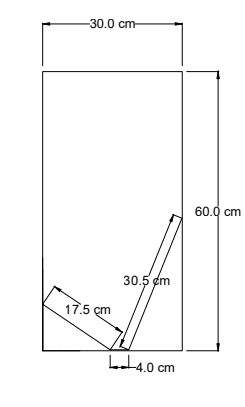
Making such a precious piece of art ain’t gonna be easy, and we’ll require a lot of parts for the same. Go grab a piece (a big big piece) of cardboard and draw outlines for the following according to the dimensions provided in the image above. If you wish your arcade to stay with you for years, use MDF sheets instead of cardboard.
You need to take the following cutouts. The names are given with the corresponding to the numbers given in the image above.
- The Roof of the Ball-street
- The Hawaiian Wall and the Cuban Wall
- The Base of the Garage
- The Peek-a-boo
- The walls to keep the scoreboard
- The Neckpiece
- The Legpiece
- The Mexican Border
- The Ball-street
- The Red Carpet
- Bodyguard – 1
- Bodyguard – 2
- Dunk-in Trudeau
- The Gateway of Ball-street
- The side walls of the Garage
- Watchman – 1
- Watchman – 2
Making the Ground
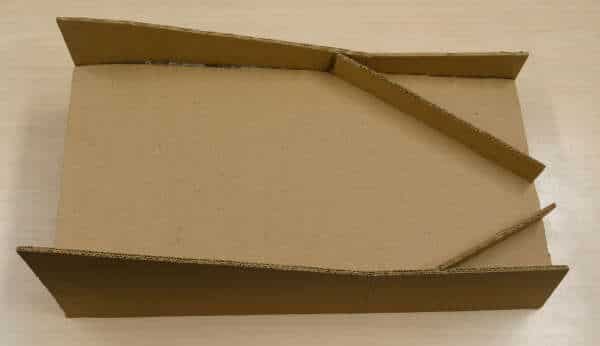
- Once you have all the cardboard pieces ready, let’s begin with the assembly. Firstly, we are going to make the Ground of the Basketball Arena.
- Attach the two bodyguards to the Red Carpet as shown in the image. They direct the wrecking ball right to the garage!
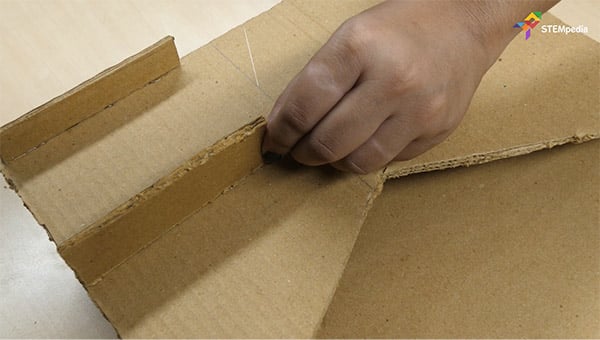
- Draw a horizontal center line across the Hawaiian and Cuban walls. Now, bring the red carpet and attach it to the lines drawn on the walls. Wonder why? This will elevate the red carpet which helps the balls to roll down easily and prevent them to stay on the ground.
- Take the Gateway of Ball-street and attach it to the red carpet using Hot Glue.
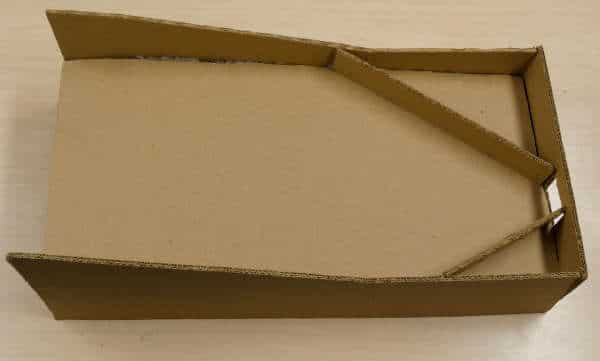
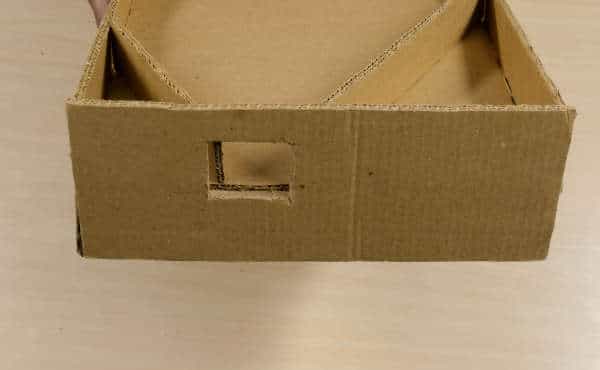
 Note: Make sure that you align the window on the Gateway of Ball-street to the gap between the bodyguards.
 - Now, glue Dunk-in Trudeau to the ground, i.e. to the red carpet and edges of Hawaiian and Cuban walls.
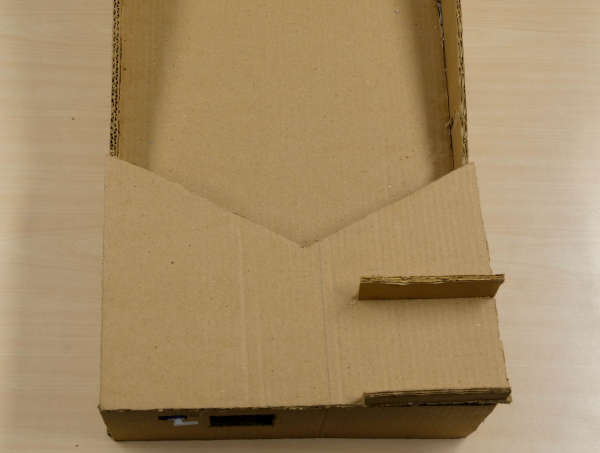
- Thus, we have successfully made the ground of our basketball arena.
Attaching the Servo
- Take a micro servo and calibrate it using evive’s firmware. Switch ON the evive, go to Controls, then select Servos, choose Servo 1, and there you go!
- Now attach it to the small hole given in the Gateway of Ball-street. Why servo? Will discuss in the later steps.
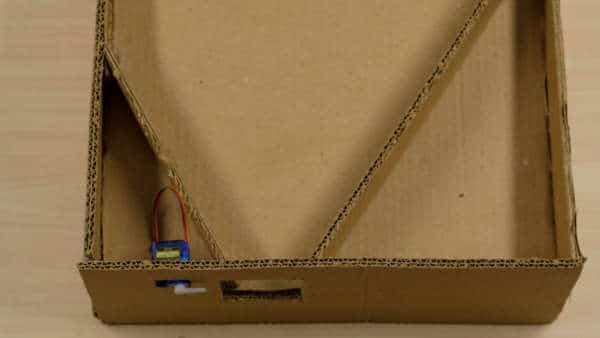
- We will make sure that no wires are seen on the ground. Thus, make a small hole besides servo in the red carpet and pass the wires of the servo through it.
Attaching the Roof and the Window
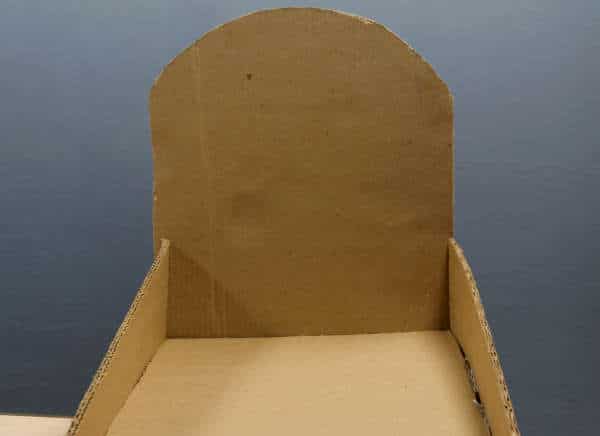
- Time to cover the servo. Take the two walls of the scoreboard i.e the neck piece and the leg piece and glue them on the Roof of the Ball-street.
- Now, fix the Roof of the Ball-street to the red carpet.
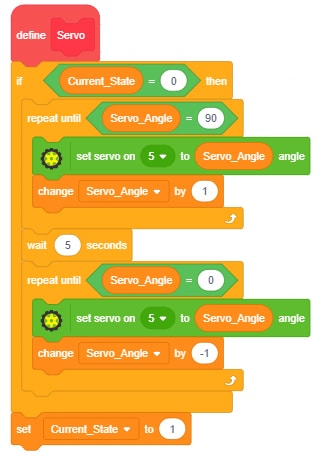
- Once done, take the Peek-a-boo and fix a servo horn to it. Once the game starts, the servo head turns 90 degrees, which in turn opens the window to set the balls free. The Peek-a-boo remains closed through the game giving you a fixed number of chances.
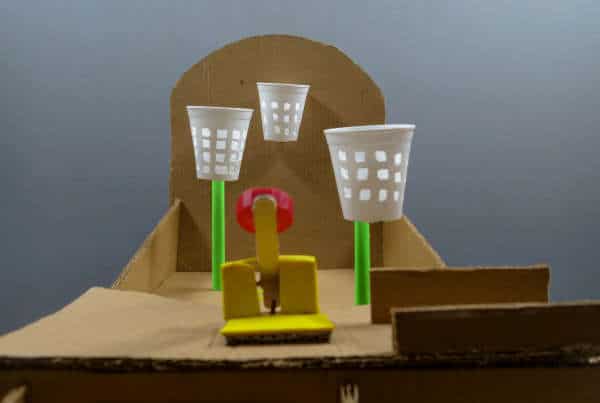
Making the Basketball Nets
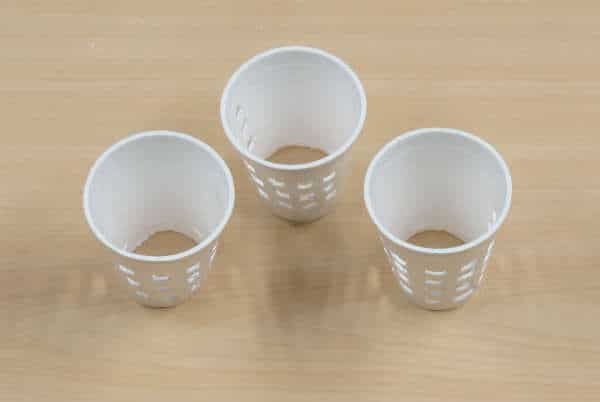
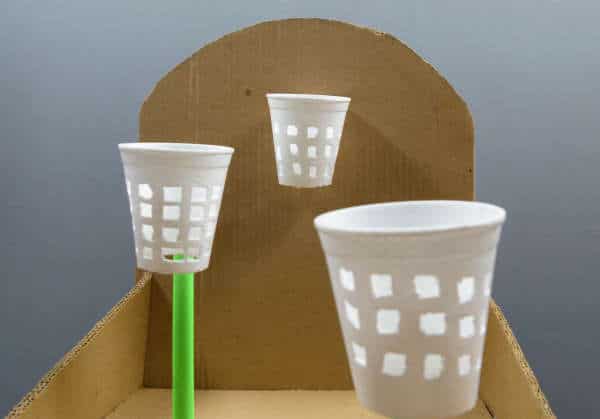
- Take three glasses of Polystyrene (the number depends on the difficulty level that you want to have for your game). Cut the base of the glasses so that the balls can easily pass through them.
- Wait, we want basketball nets, not glasses. Let’s turn glasses into nets by perforating them to death. We have the nets now (the dumb nets).
- Let’s make them smarter so that they can count the number of time the balls pass through them and multiply it by the score assigned to the net, thus giving you the total score.
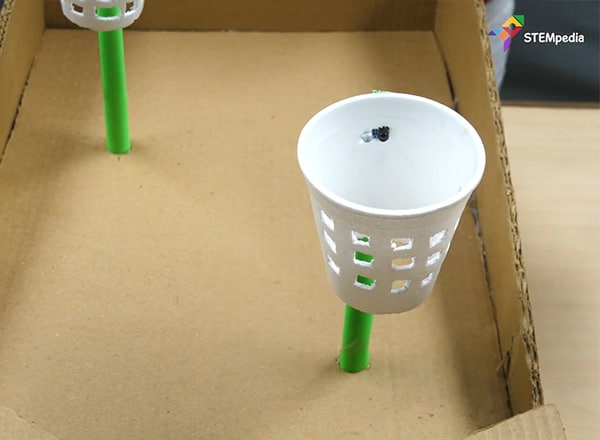
- Sounds like a lot of work? No, all we need is an IR Sensor. Roll a piece of paper using ice cream sticks and attach the IR sensor to it. We already have holes in our nets, so simply glue the IRs in one of the holes.
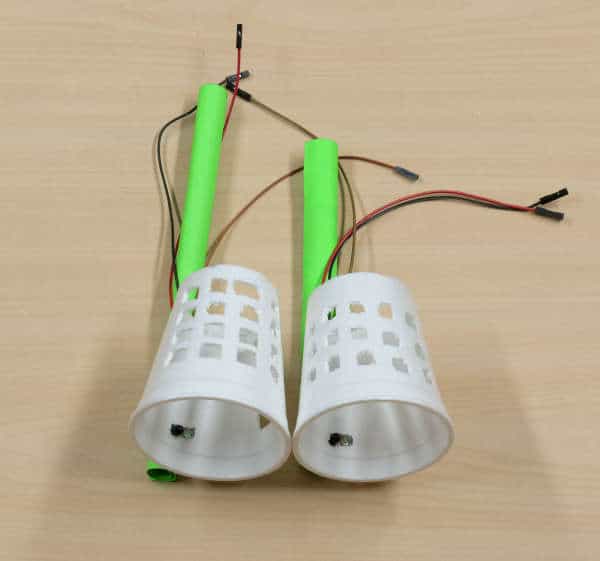
- Now attach the (now smart) nets to the red carpet at the places of your choice.
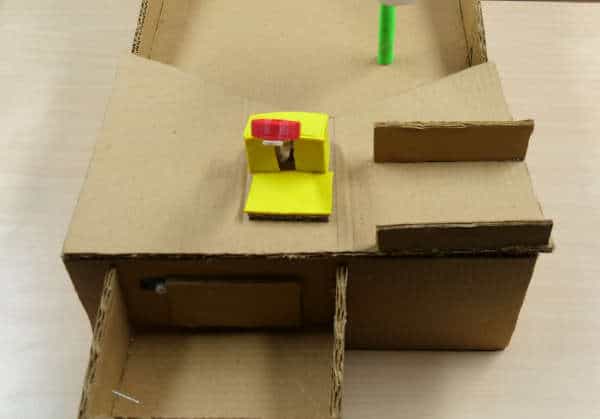
Making the Catapult
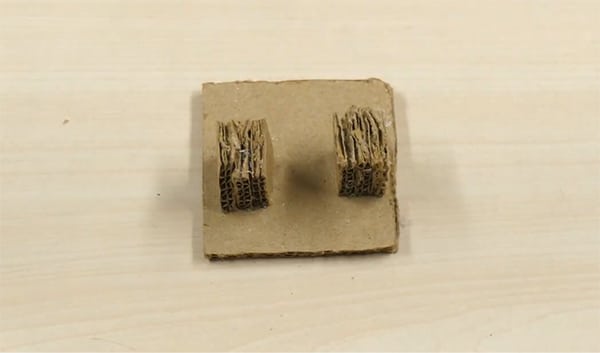
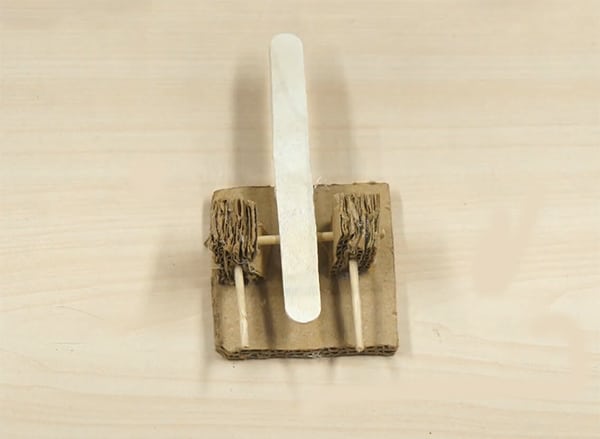
- Take 6 small pieces (nearly 2 cm x 2 cm) of cardboard and make two stacks each of 3 pieces using glue. Now cut another cardboard of size (5 cm x 5 cm) and place these two stacks on the opposite side. Take a small and thin yet pointy stick (go pick a toothpick) and pass it through both the stacks.
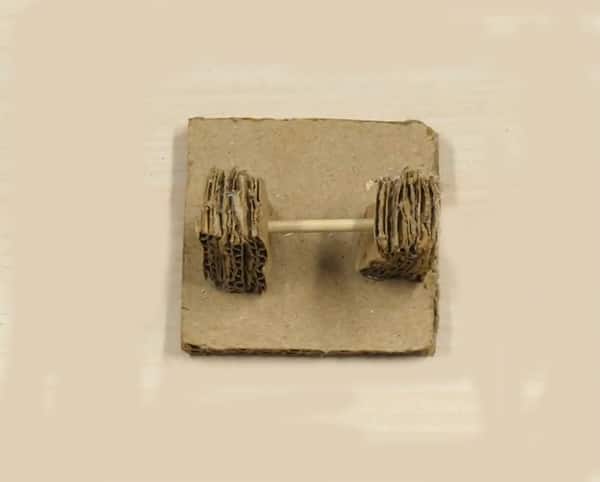
- Buy an ice cream and eat it, coz we will need the ice cream stick. Take the ice cream stick and place it on the center of the small stick using glue.

- Now, take the similar small, thin, pointy sticks and fix them in the two stacks such that they face forward.
- Now attach a rubber band across these sticks. Attach a cap on the ice cream stick to hold the ball.
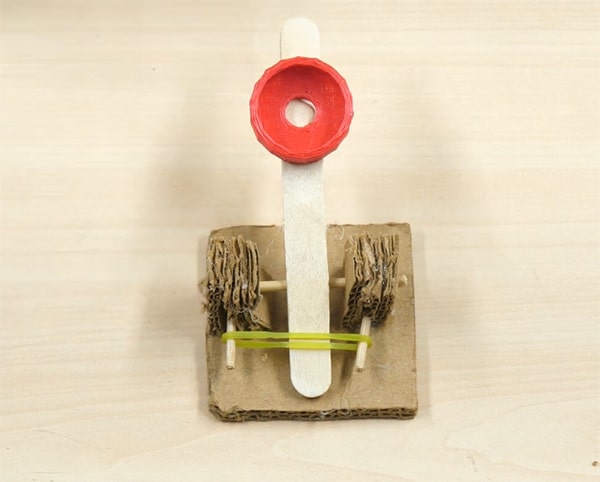
- You catapult is now ready, decorate it the way you want.
- Once done, attach it to the Roof of the Ball-Street.
Making the Garage
Once the balls walk out of the red carpet we need something to hold them. We’ll make a small box or garage for the same. Take the Base of the Garage and attach it to the Gateway of the Ball-street. Place the watchmen on both the sides of the garage. Finally, close the garage using the Mexican Border.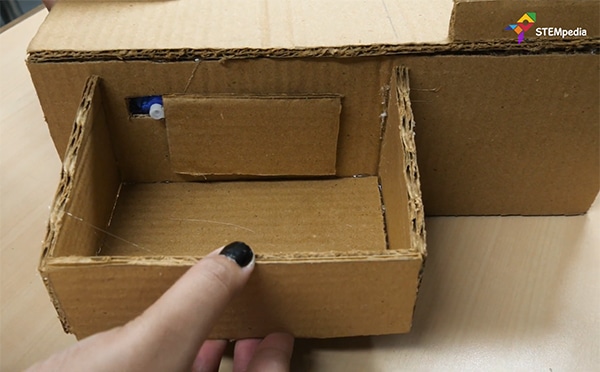
Beautification of the Arena
The basketball arena seems so cardboardish, let’s add some colors to it. We’ve done it a certain way, you can color it the way you want to.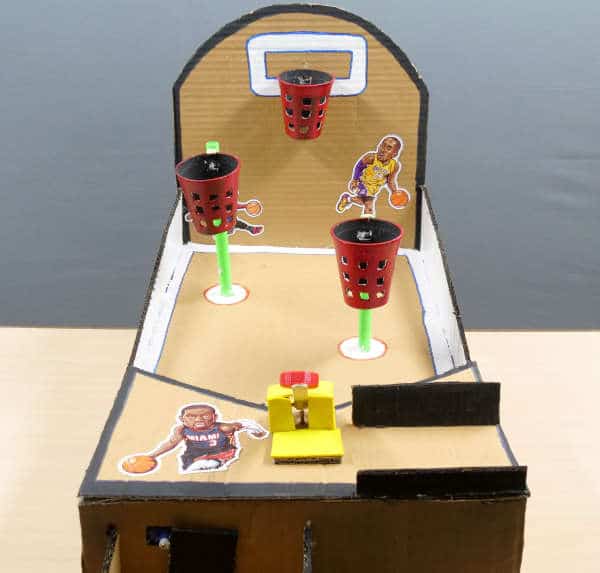
Adding the Scoreboard
Now, both the arena and the players are ready all you need to do is to add the scoreboard.
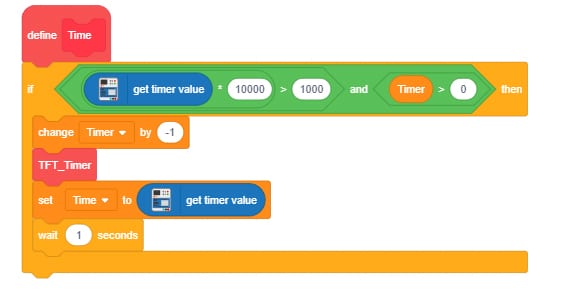
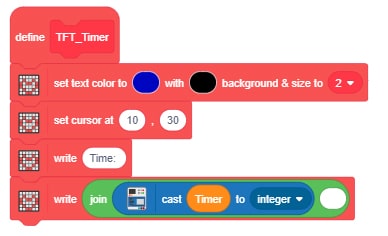
We are going to use the TFT Display of evive to show the score, timings, and instructions.
Connect all the IR sensors and servo to evive and play.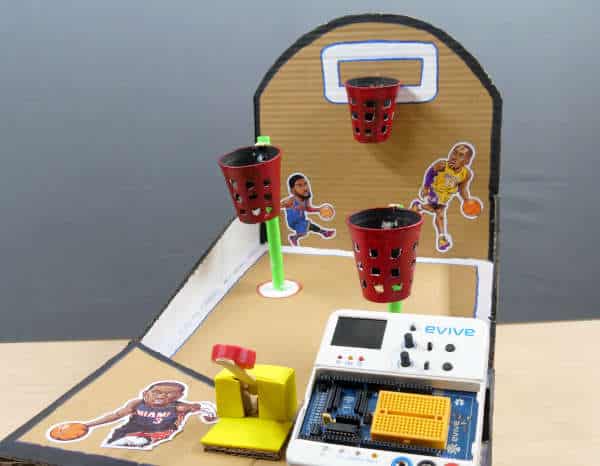
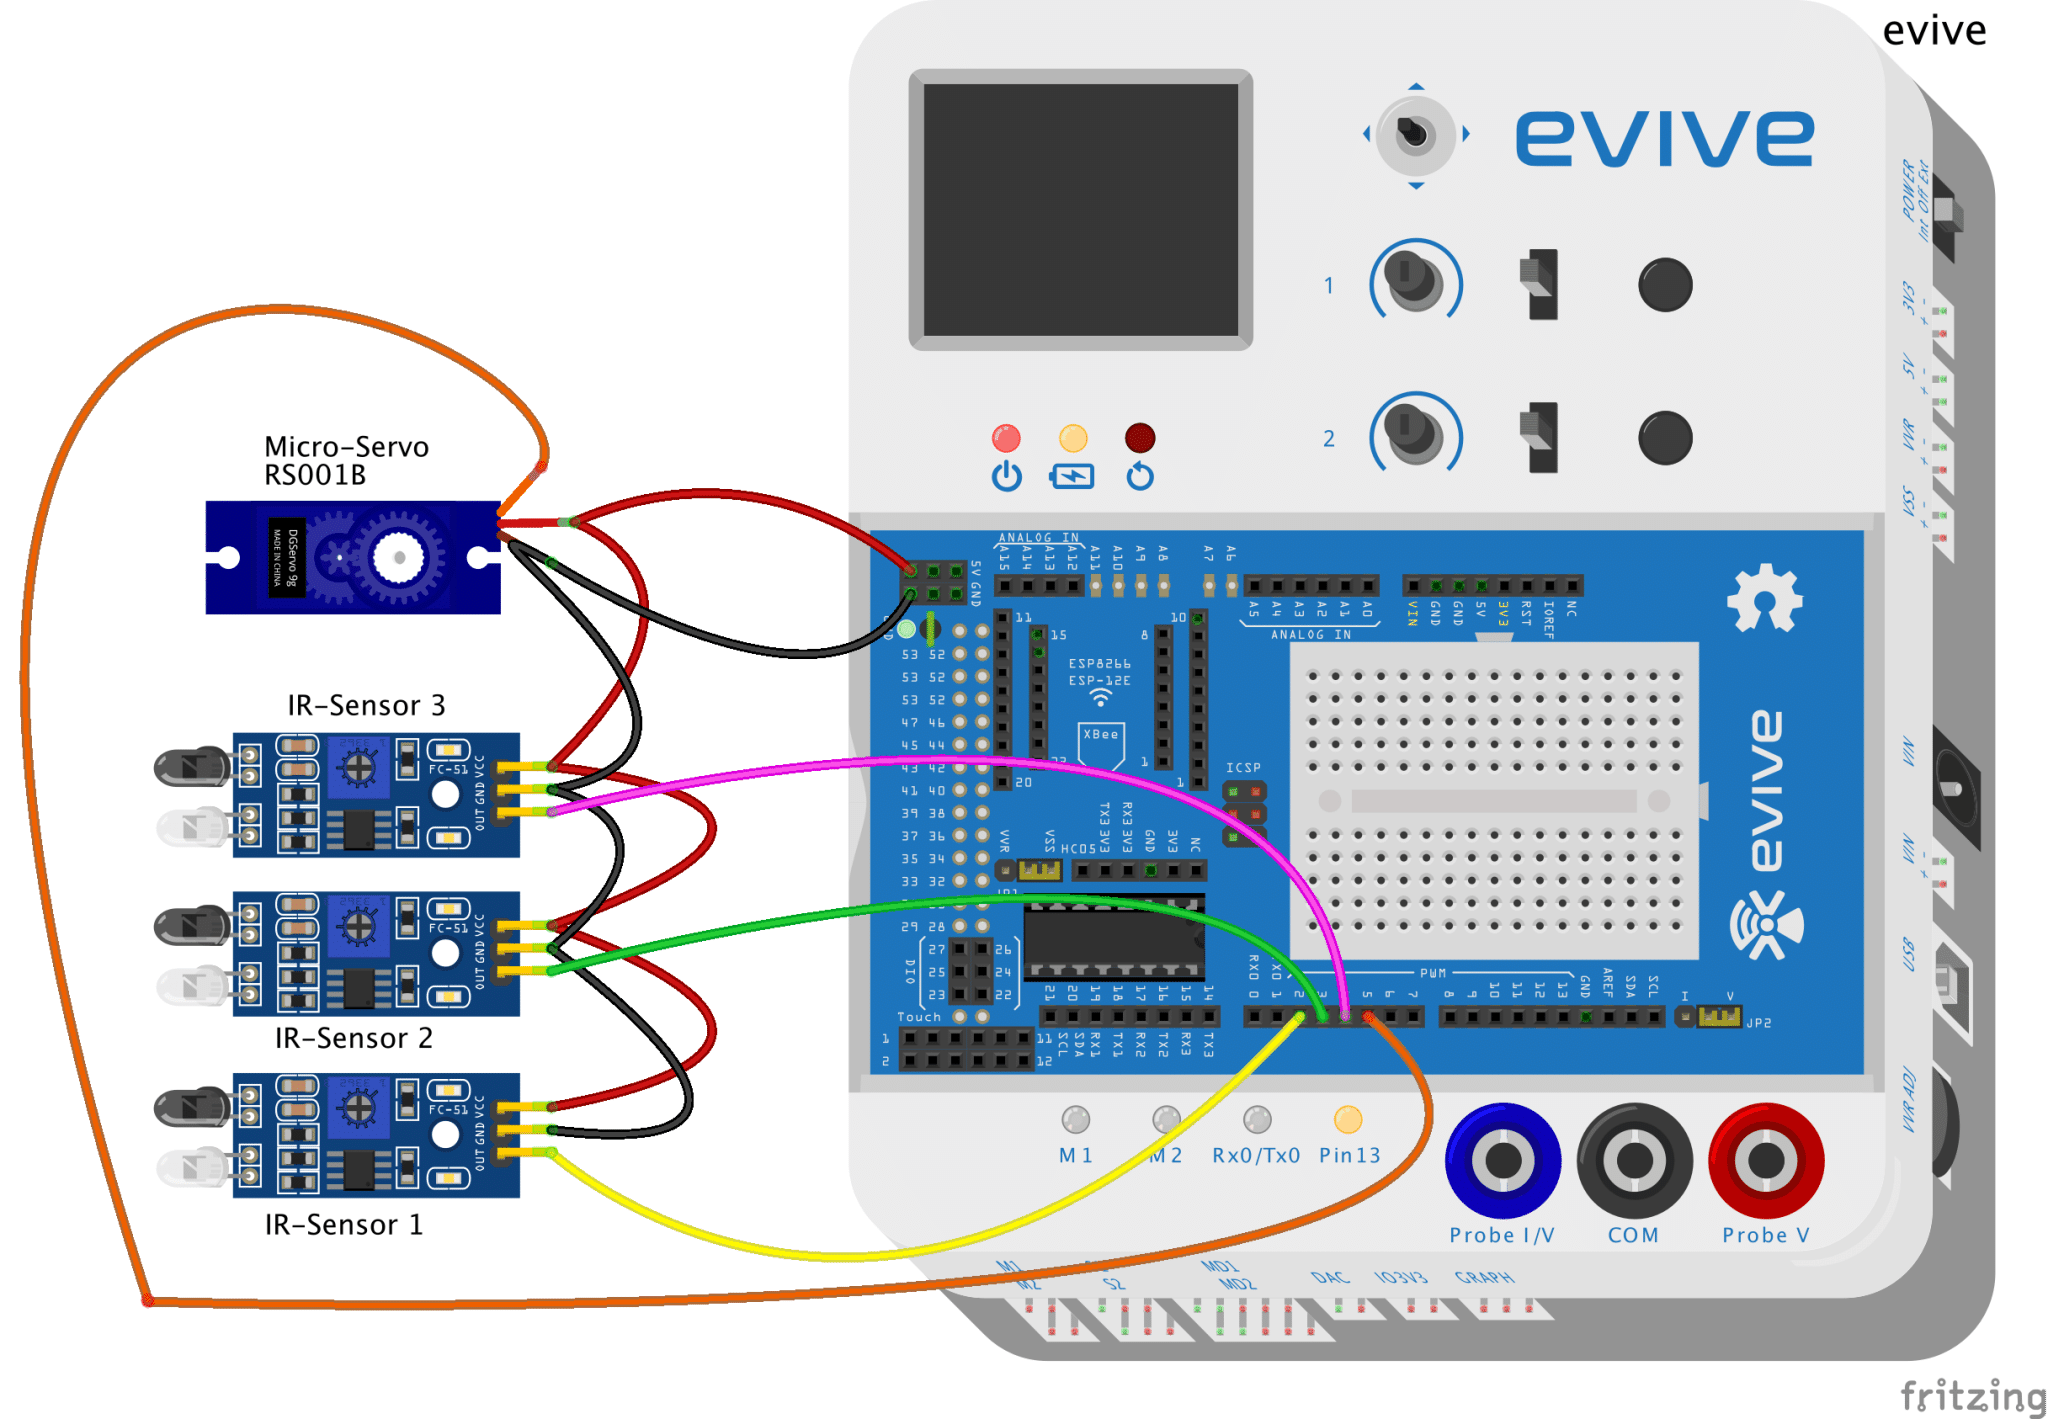
Connect all the three IR Sensors and the micro servo in parallel and connect their GND to evive’s GND pin and VCC to evive’s 5V pin.
Now, time to connect the Signal Pins:
- IR Sensor 1 – Digital Pin 2 of evive
- IR Sensor 2 – Digital Pin 3 of evive
- IR Sensor 3 – Digital Pin 4 of evive
- Servo Motor – Digital Pin 5 of evive
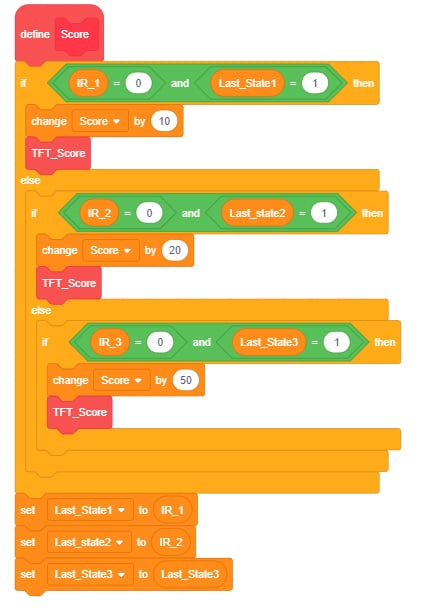
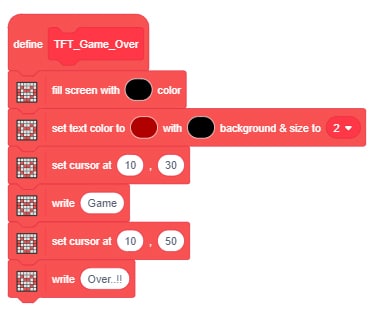
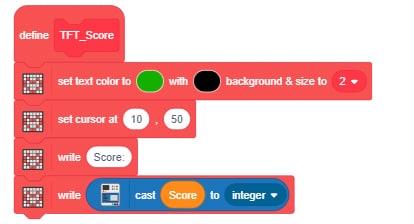
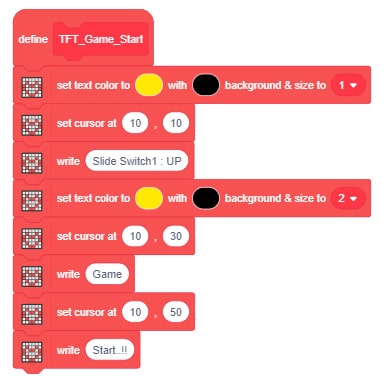
Code the Rules
You know the rules, your opposite player knows the rules – the last net gives you 50, the middle net gives you 20 and the net closest to you give 10. But, how will our scoreboard/ umpire know it? Just upload the PictoBlox code given below and its all set now.
Conclusion
With this, your DIY Arcade Basketball Game is ready! Challenge your friends and make the most baskets to win the game!


 _ Naga Pranav Patcha 3-39 screenshot")


