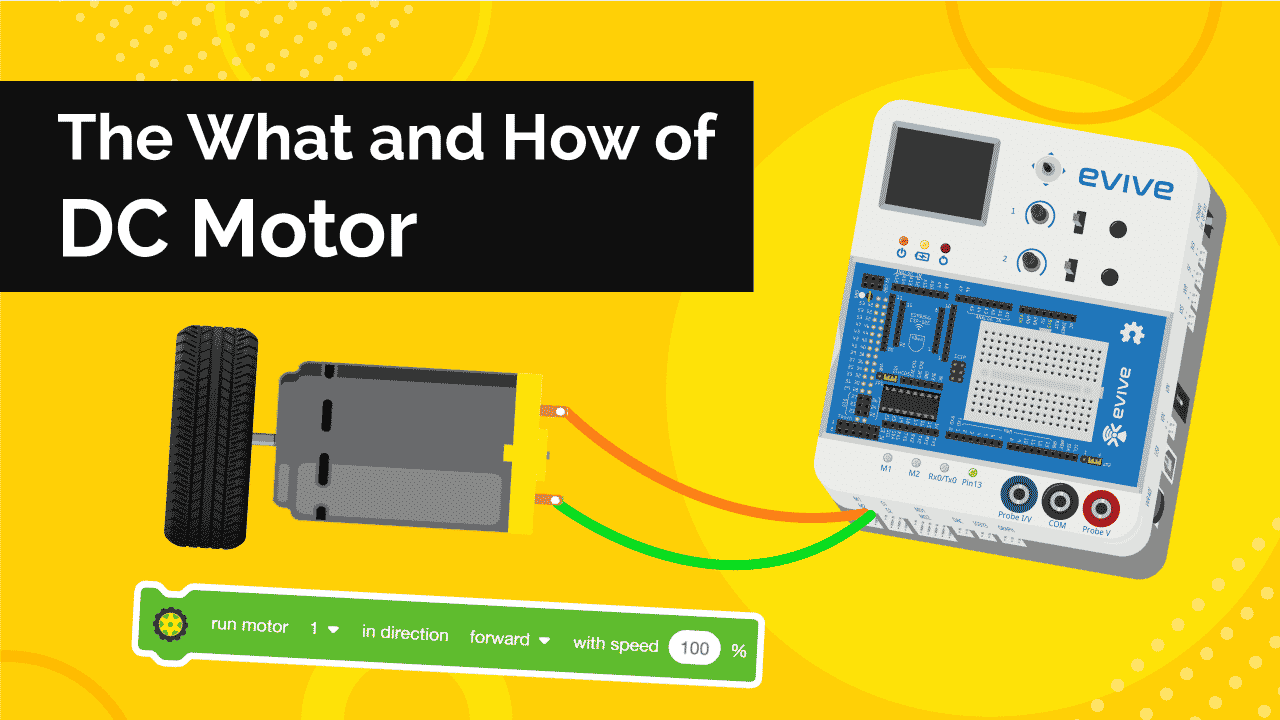
Introduction
Learn all about DC motors with us in this tutorial on electronics for beginners: what is a DC motor, how it works, how to interface it with evive and program it with ease in PictoBlox – our Scratch blocks-based graphical programming platform with advanced hardware interaction abilities. Once you’re equipped with the basic knowledge about the IR sensor, we’ll show some DIY projects that you can make using the DC motor.
To work in PictoBlox, you’ll first need to download it from HERE:
Ready? Set. Go!
What is a DC Motor and how does it work?
The motors that run on direct current are termed as DC motors. The current that constantly flows in one direction is called direct current(DC). The dual-shaft BO motor a.k.a a battery-operated DC motor has a gearbox along with a DC motor inside its casing to control its speed.
Working Principle of the DC motor
A Direct current (DC) motor, as the name suggests, takes in direct current from one end and uses it to rotate the axle/rod at its other end; we can then connect some other machine to the axle/rod that works when it rotates.
There are two characteristics of DC motor that can be controlled:
- Direction: We can control the direction of rotation of the motor by reversing the direction of the current that flows into it.
- Speed: We can control the voltage of the motor by varying the supply voltage to it.
How to interface a DC motor with evive
Now that we have a little idea about DC motor’s working, let’s take a look at how to interface it with evive and see it in action.
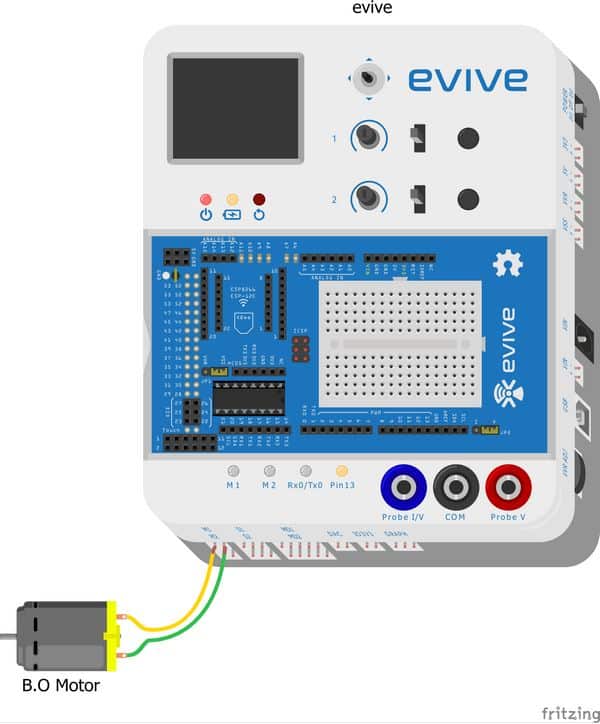
- You can directly connect and control 2 DC motors at a time with evive as it has two dedicated motor channels for it, M1 and M2.
- To visualize the working of the motor better, attach a wheel to any one of the two shafts of the DC motor.
- Once you have the wheel attached, let’s connect the motor to the M1 motor channel.
Testing the DC motor
- Switch ON evive.
- Open evive’s menu.
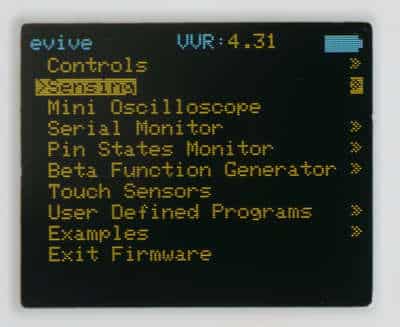
- Using the NAV key, navigate to Controls.
- Then select Motors, and finally select Motor1 as we have connected to our DC motor to M1.
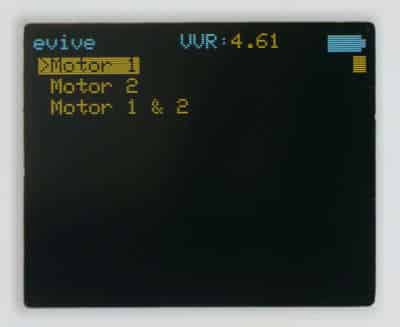
- PWM: It determines the speed of the motor which can be controlled using the potentiometer knob. You will observe two terms on evive’s screen.
- DIR: It stands for direction. We can change the direction using evive’s slide switch. Dir1 represents a rotation in one direction. Dir2 represents the other direction.
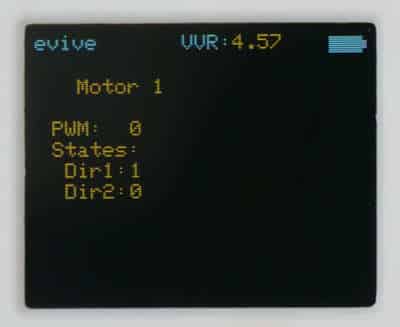 Now that we have made the connections, let’s test whether the DC motor is working or not and see how to display and read the motor’s direction and speed on the evive screen.
Working with DC Motor in real-time
Follow the steps below to write the script to control the DC motor in real-time. The DC motor should rotate in one direction on pressing the UP arrow key and should rotate in another direction on pressing the DOWN arrow key.
Follow the steps below to write the script:
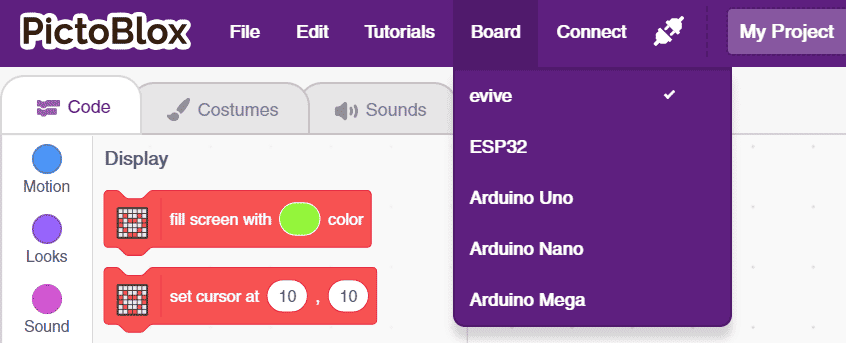
- Connect evive to your computer and open PictoBlox.
- Go to the toolbar and click on the Board menu. Then select evive as your board.
- Next, select the Port to which evive is connected e.g. COMXX or ttyXX from the dialogue box that appears. Once you select the port, the icon beside the Connect tab will become connected.

 Before writing the script, make sure that the firmware is uploaded. If not, upload it using the Upload firmware button.
 - You can control a DC motor in PictoBlox with the help of the following blocks:
- run motor () in direction () with speed ()%: This block controls the speed of the specified motor in the specified direction.

- () motor (): This block allows you to halt/lock or free the motor.
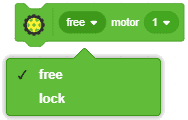 You can find these blocks in the Actuators palette
- run motor () in direction () with speed ()%: This block controls the speed of the specified motor in the specified direction.
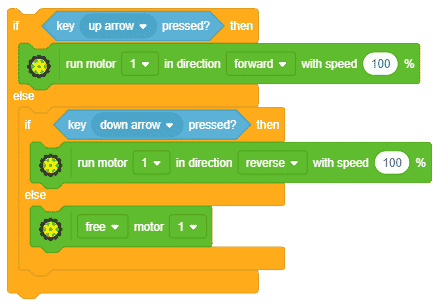
- We’ll use an if-else block to check whether the up arrow key is pressed or not.
- Into the hexagonal space of the if arm, place key pressed? block and choose up arrow from the drop-down block.
- Now, to run the motor, drag and drop run motor block below the if arm.
- Next, to make it rotate into the other direction on pressing the down arrow key, duplicate the entire if-else tree and place it below the else arm.
- From the drop-down of the key pressed? block select down arrow and from the direction drop-down of the run motor block select reverse.
- Now, to stop the motor when none of the keys are pressed, drag and drop the free motor block into the else arm.
- To run the script continuously, we’ll use the forever block.
- Place a when flag clicked hat block above the forever block. It will ensure that the script runs when the green flag is clicked.
- Click the flag and press the arrow keys to test the script to ensure that it is working perfectly fine.
Below is the complete script: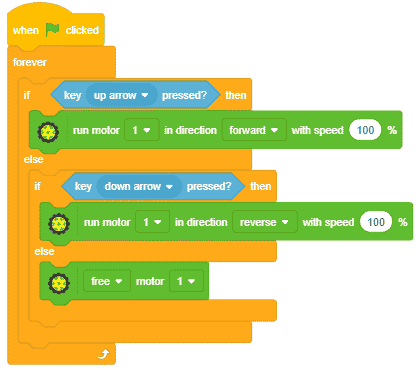
You can download the entire code from here.
Working with the DC Motor In Upload Mode
Now, let’s make a script to use the IR sensor without having evive connected to the computer. For that, we’ll have to work in Upload mode. We’ll write the script to run the motor according to the values entered using the potentiometer 1.
- To work in the upload mode, click the toggle button.
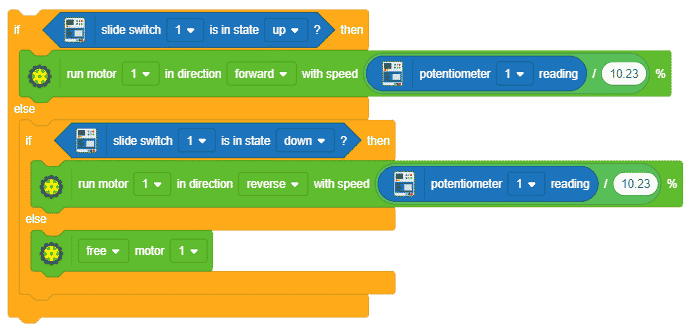
- Now, add an if-else block to monitor whether the slide switch 1 is in the up state or not? In to the hexagonal space of the if arm add slide switch () block.
- If the slide switch is in up state that the motor should rotate in the clockwise direction with the speed obtained from the potentiometer 1 reading. Place the run motor block and into the white space given enter the division operator. Drag and drop the potentiometer 1 reading into the first space of the division operator and write 10.23 in the second one. As the value obtained from the potentiometer 1 is 1023 thus we need to bring it in the range of 0 – 100.

- Duplicate the if-else block and place it below the else arm.
- Into the drop-down of the slide switch select down and into the drop-down of the run motor select reverse direction.
- Now, if the slide switch is in the centre, the motor should stop rotating. Thus, drag and drop a free motor block the else arm.
- Use a forever block to run the code continuously. Place the when evive starts up hat block to execute the program.
- Finally, upload the code using the upload button.
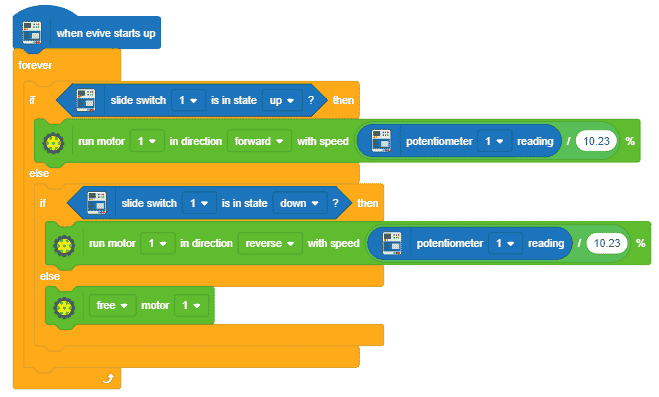
You can download the entire code from here.

Conclusion
In this tutorial, we have explored the basics of DC motors, how to interface it with evive and program it in PictoBlox using both real–time and upload mode. We have written sample codes and tested the working of the DC motor. Now that you have the basic knowledge about DC motors and have seen them in action, you can make cool projects with them.


