Introduction
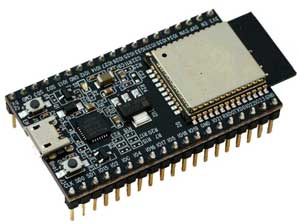
ESP32 is a microcontroller developed by Espressif Systems which has builtin Wifi and dual mode Bluetooth support. Dual mode bluetooth support refers to the fact that its supports Bluetooth Classic as well as Bluetooth Low Energy(BLE). There are various kinds of development board available that have esp32 chip on them like ESP32-DevKitC, NodeMcu-32S, LOLIN series etc. All of them function the same way. It can be programmed through various programming platforms like Arduino IDE, Espressif IoT Development Framework, Micropython, PlatformIO etc. In this tutorial you will guided for programming it on Arduino IDE.
Installing ESP32 board support
For programming ESP32 board with Arduino IDE first step is to add ESP32 board support on Arduino IDE. For this follow the steps below:
- Before going to Arduino IDE make sure you have internet access in your computer because further steps will need internet access for installing esp32 board files on Arduino IDE.
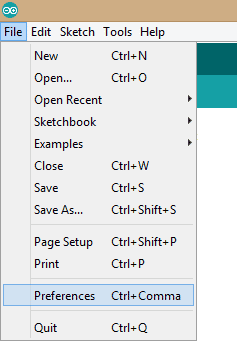
- Open Arduino IDE go to “File” in menu bar and open “Preferences”.
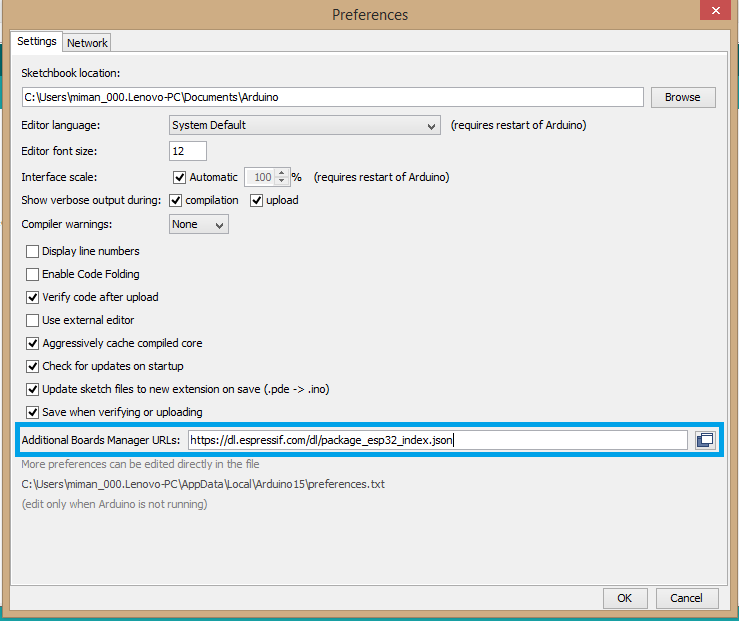
- As “Preferences” dialog box opens, copy the URL in “Additional Board Manager URLs” box highlighted in image below.After this select “OK”.URL- https://dl.espressif.com/dl/package_esp32_index.json
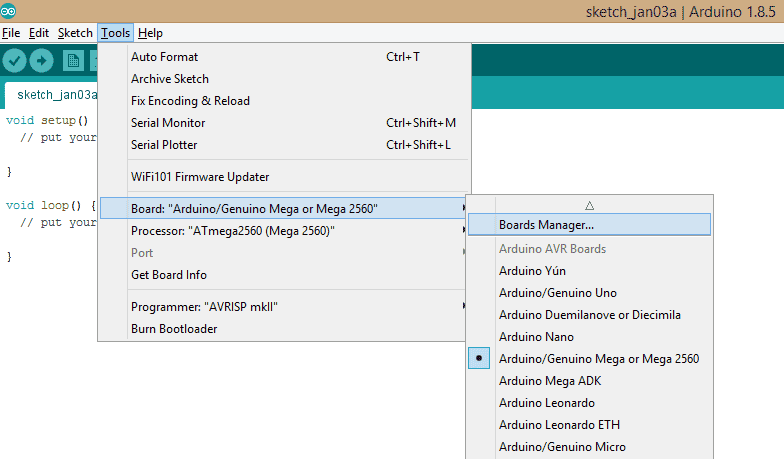
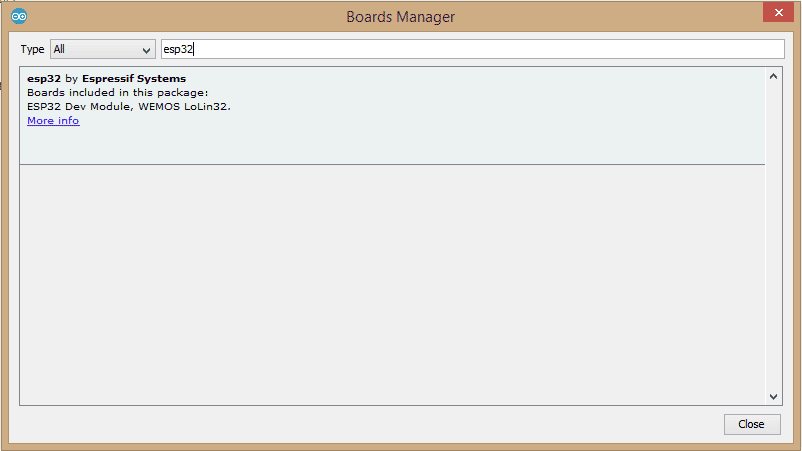
- Now go to “Tools>Board>Board Manager”.
- As soon as you open Board Manager you can see certain download process going at the bottom of screen. Wait till this process gets completed. Once this process is completed search for “esp32” in search box.
If you see a screen like the one shown below then make sure you have internet access. Because the error shown below mainly occurs due to failure in adding boards corresponding to URL added by you in Preferences previous steps. For successful board addition internet access is must.
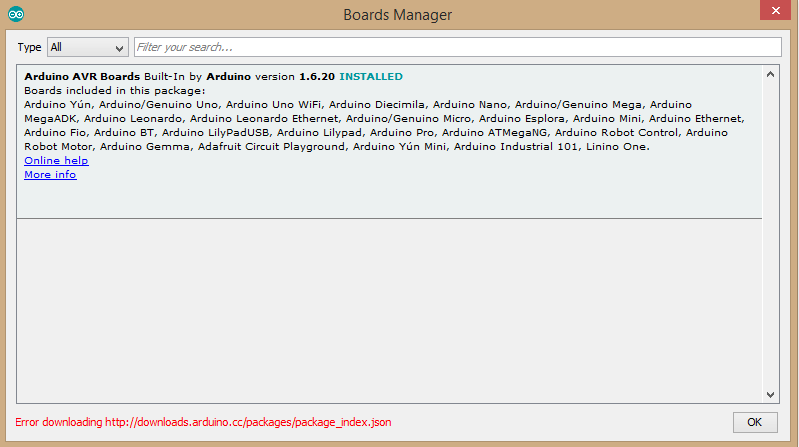
After connecting to internet close this window and again open Board Manager as stated in step 3.
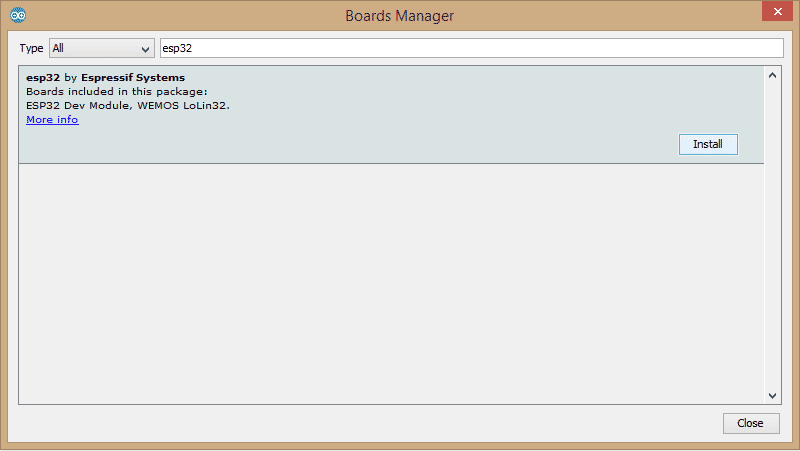
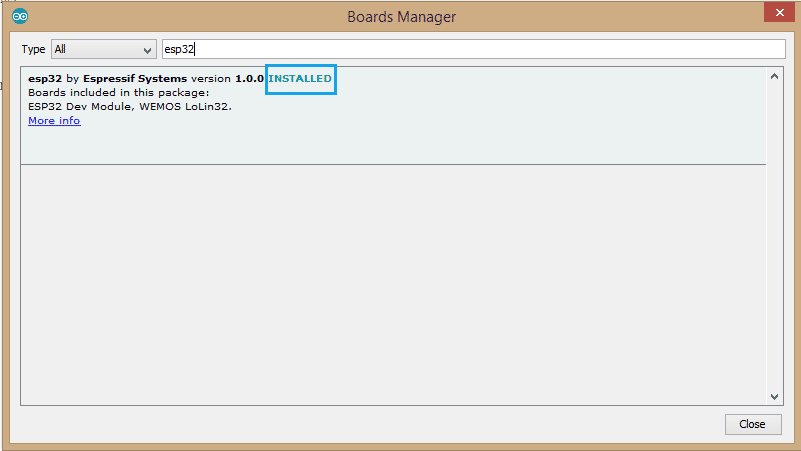
- You can see the esp32 package by Espressif Systems in Board Manager select it and then select “Install”.
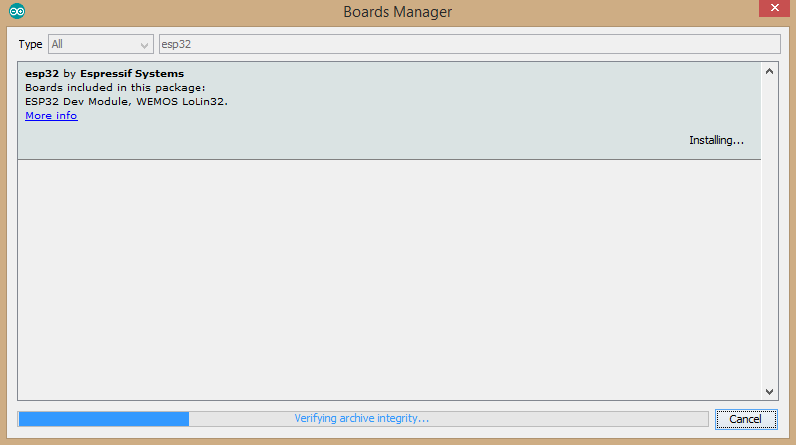
- Once installation starts wait for a while till installation process gets completed. As the process is completed you can see “INSTALLED” written beside esp32 board name.
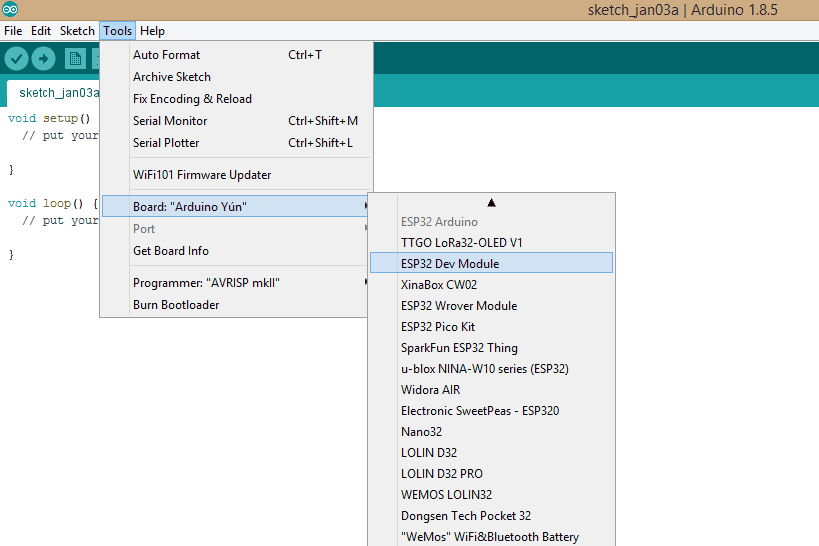
- Now close the Board Manager and goto “Tools>Board” and scroll down, there you can see a complete category of different esp32 boards under the name “ESP32 Arduino” written in grey colored fonts. In that select “ESP32 Dev Module” if you are using standard ESP32 board made by Espressif Systems or select any other depending on which board you are using.
- After selecting esp32 board you can see the board name at the bottom right corner of your Arduino screen changes to board name selected by you. Beside board name you can see certain other parameters,this are mainly parameters related to the code upload process on esp32. You can change them from “Tools” in menu bar. For now let them remain as it is.

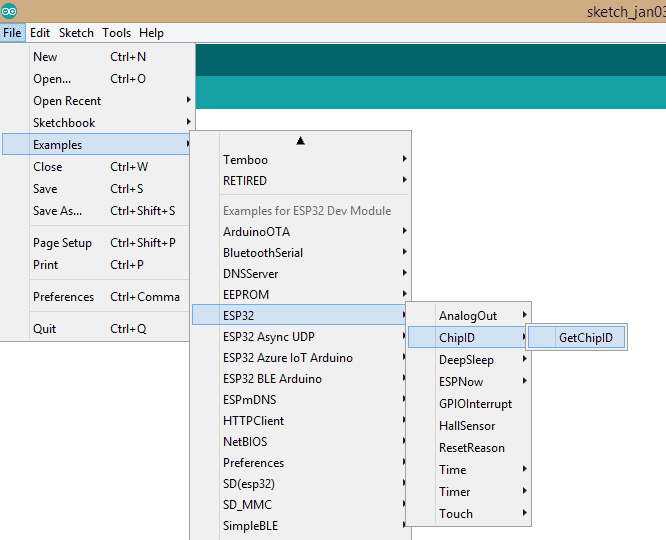
- Let’s flash one of the example code in esp32. Goto “Files>Examples”. Scroll across the examples list you can see separate sections of examples titled as “Built-in Examples” , “Examples for any board” etc is grey colored fonts. One such section is “Examples for ESP32 Dev Module” . This section consists of examples exclusively made for esp32 boards.Flash the example “GetChipID” that gives you chipId of your esp32 chip present on your board.
-
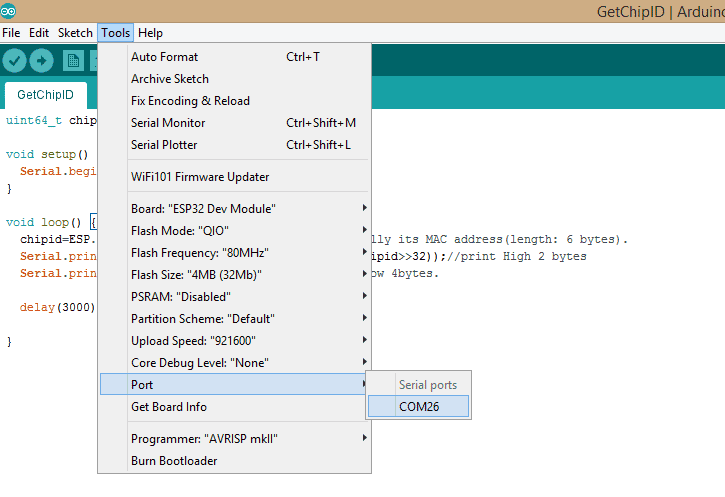
Goto “Tools>Port” and select the port available in the list and then upload the code.

Conclusion
In this tutorial, you learned how to setup Arduino IDE for the ESP32 board, install board files, and how to upload code on the ESP32 board. This tutorial also showed you how to flash a simple example code on an ESP32 board to check if everything is working fine. After completion of this tutorial, you should be able to program and upload code on the ESP32 board.


