Introduction
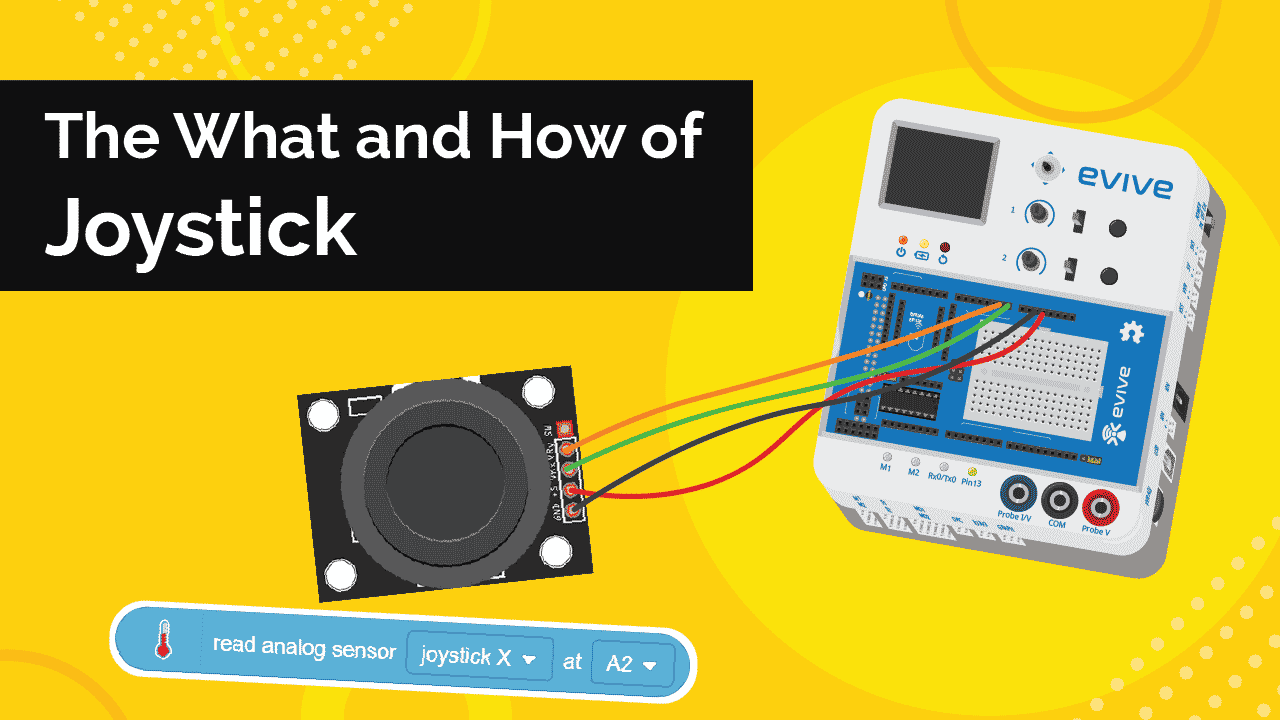
Joysticks are extremely versatile electronic components. From gaming to controlling unmanned aerial vehicles, joysticks are pretty useful! Learn what is a joystick, how a joystick works, how to interface it with evive and program them in PictoBlox – our Scratch blocks-based graphical programming platform with advanced hardware interaction abilities, and finally what exciting DIY projects you can make using the joystick available in the evive Starter Kit.
To work in PictoBlox, you’ll first need to download it from HERE.
Ready? Set. Go!
What is a Joystick?
You must have either used a joystick a lot while playing your favorite game or at least seen someone play with it; it has a stick that moves left, right, front, and back, and lets you control the position of the character you play in the game and a device that detects the position of the stick. It is, therefore, a position sensor.
The joystick is a device that translates your hand movement into an electrical signal, and the movements are converted by the computational unit in to entirely mathematical, in other words, joystick translates entirely physical movement.
How does Joystick work?
The joystick gives values along the X and Y axes. It contains two potentiometers, one for each axis. The two potentiometers allow us to measure the movement of stick in 2-D. The potentiometer is basically a variable resistor. As we move the joystick, the value of resistance of both the potentiometer changes. This change, in turn, gives us values along the X and Y axes.
The joystick gives out an analog input that is voltage varying in the range of 0 and 5v. By default, the joystick will give a value in the range of 400-600 and the value will increase or decrease as we move the joystick around.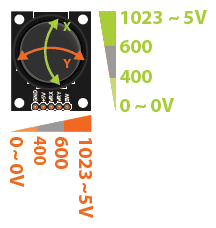
It also has a push-button on it for input.
How to interface Joystick with evive
Now that we know what is a joystick, let’s take a look at how to interface it with evive and see it in action.
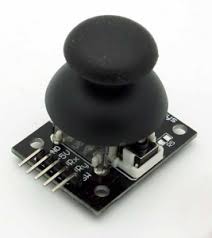
Pin description
The Joystick module has 5 pins( 2 as Power Supply Pins and as Signal Pins)
- VCC
- GND
- VRX ( Signal Pin for X-direction )
- VRY ( Signal Pin for Y-direction )
- SW ( Signal Pin for Switch button )
The analog output obtained for each direction
| Direction | Analog output (Between 0 to 1023) |
| REST | X = 530 Y = 518 |
| UP | X = 1023 Y = 518 |
| DOWN | X = 0 Y = 518 |
| RIGHT | X = 530 Y = 1023 |
| LEFT | X = 530 Y = 0 |
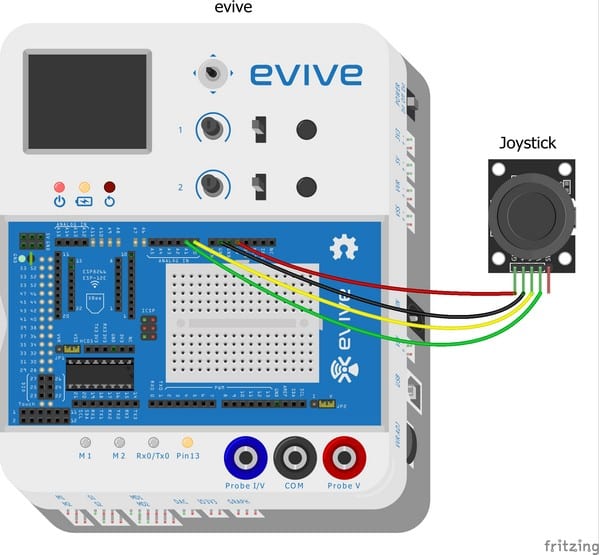
Connecting the Joystick Module with evive
- Connect “VCC” of joystick module to “VCC” of evive.
- Connect “GND” of joystick module to “GND” of evive.
- Connect “VRX” of joystick module to analog pin “A0” of evive.
- Connect “VRY” of joystick module to analog pin “A1” of evive.
Making the Tobi Jump in Real-Time using Tactile Switch
Now, we have a Joystick connected to the evive, let’s write a script to make Tobi movie according to the movement of the Joystick connected on evive. Follow the steps to write the script to make the Tobi move.
- Open PictoBlox. Connect evive/your prototyping board to the computer using the USB cable.
- Click on the board button and select evive from the drop-down.
- Next, from the dialogue box that appears, select the appropriate serial port.
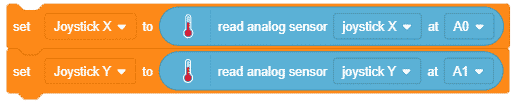
- To store the values obtained from the Joystick we will make two variables namely Joystick X or Joystick Y.

- First, to store the values from the joystick into the variables, we will use the set () to () block from the Variables Palette.
- Select Joystick X from the first drop-down and as to know the value place the read analog sensor () at () from the Sensors palette. Select joystick x from its first drop-down and A0 from the second drop-down.
- Duplicate the above block and place it below. From the set block select Joystick Y from and from the read analog sensor’s block select Joystick Y from the first drop-down and A1 from the second drop-down.
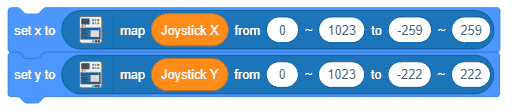
- Now, to set the coordinates of Tobi, use the set x to () block and set y to () block according to the values obtained from the joystick.
- Now, we need to map the values obtained from the joystick to in terms of the coordinates of the stage so that we can move Tobi around using the joystick. Set the map function as shown below.
- To make the script run forever, add the forever block around the script.
- Now, we’ll place a when flag clicked hat block above the forever block. It will ensure that the script runs when the green flag is clicked.
Press the flag and control Tobi’s movement using the Joystick. The following is the complete script.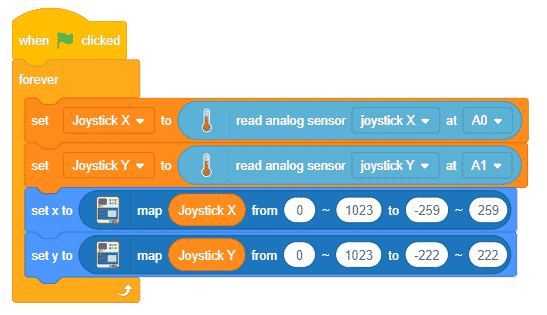
You can download the entire code from here.
Working with the Tactile Switch in Upload Mode
Now, let’s create a script to control the emoji’s movement on the evive’s screen using the joystick. Follow the steps to make the script.
- Switch to the Upload Mode.
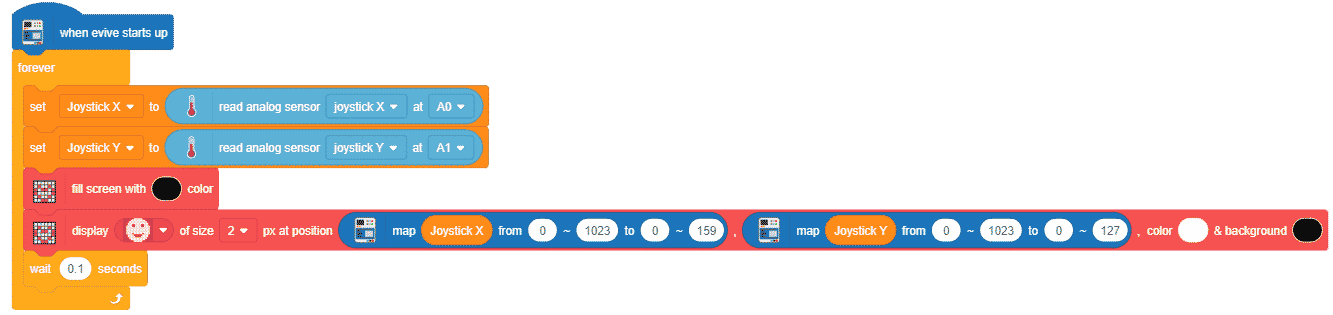
- Make the variables to store the values obtained from the Joystick as done in steps 5, 6 and 7 from the above step.
- Now, let’s the screen color as black color and display the emoji at the position obtained from the joystick. Use the fill screen with () color block from the Display palette and select black.
- Now, to display the emoji use the display emoji block from the Display palette, select the emoji of your choice. Next, set the size.
- Now, into the coordinates, use the map function to map the values obtained from the joystick to in terms of the screen coordinated to display the emoji.
- Select the color of emoji and the background of your choice.

- Use a forever block to run the code continuously. Place the when evive starts up hat block to execute the program.
- Upload the code using the upload button.
You can download the entire script from here.
Conclusion
In conclusion, joysticks are incredibly versatile electronic components that can be used for a variety of applications. Joysticks are used to control a range of devices, from gaming consoles to unmanned aerial vehicles. In this lesson, you have learned about the basics of joysticks, how to interface them with evive and program them in PictoBlox, and how to make exciting DIY projects with the joystick available in the evive Starter Kit. With this knowledge, you are now ready to explore the world of joysticks and create amazing projects.


