
Introduction
We got you the DIY Shopping Cart that could be controlled with your Smartphone. But what if you forgot the phone or its battery died? Well, don’t you worry fellas! There’s a solution for it as well. Here’s presenting the RC Shopping Cart – a shopping cart that can be controlled using a remote control transmitter. It’s just like controlling a remote control car, only that a ‘T’ has been added to the car.
This year’s Black Friday shopping is now going to be nothing short of exceptional amusement!
Why are you still here? Go ahead and transform your shopping experience!
Making
We are going to integrate the Remote Control with our previously made projects:
2) Mobile Robot
The entire process of connection of RC to evive is a three-step process
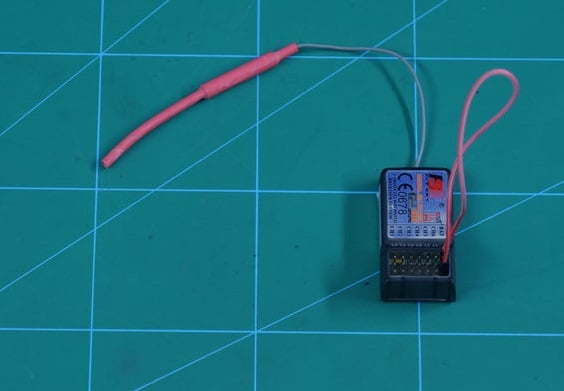
RC consists of a pair of Receiver and Transmitter.
The one we are using is the FLYSKY CT6B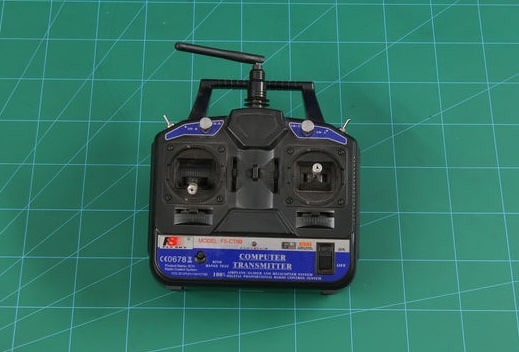
Also, the transmitter is the MOD2.
Both the transmitter and receiver have 6 Channels.
The three steps are as follows:
- Binding the transmitter and the receiver.
- Channel Identification
- Connection to evive
Binding the transmitter and the receiver
BAT pin on the receiver is used to bind receiver and transmitter.
Take receiver, short SIGNAL and GND of bat pin and power it up(connecting to evive).
You need to connect the GND and VCC pin of any other channel to evive.
The light on the receiver module will start blinking
Press and hold the binding button on the Transmitter and turn on the transmitter
NOTE: Make sure you ON the transmitter after receiver, not before it.
The blinking light on the receiver will be steady.
Thus, binding is done.
Once the binding is done, remove BAT and power.
Channel Identification
Give power to the receiver, take servo and insert the jumper cable in any of the channel except BAT.
The light on the receiver will be OFF until the transmitter is turned ON.
Now Switch ON the transmitter.
With the two Joysticks or simply sticks, and the two potentiometers at the top.
Upon moving or changing the values of any of these, if the servo starts increasing or decreasing channel. Thus, that particular key or stick will control that channel.
Thus, check for all the channel excluding BAT.
You will have the stick movement or potentiometer dedicated to one particular channel.
You must be wondering why do we need to identify the channels. We need to identify so that we can code and control them properly. Also, connect the components to those channels, which will be best suited.
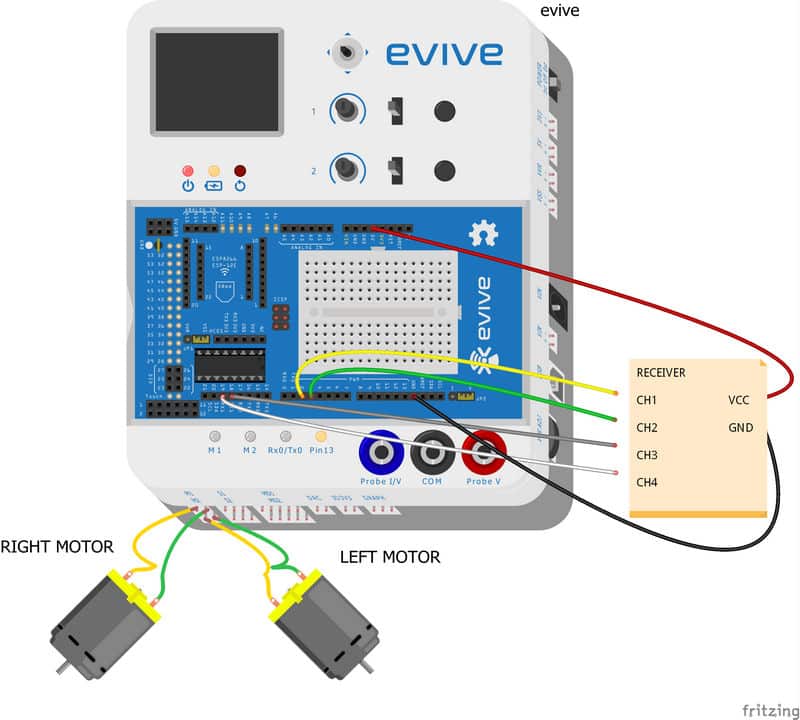
Connection to evive
The connection of Mobile Robot and Cart will be same as told.
We will connect Channel 1, Channel 2, Channel 3, and Channel 4 to evive.
Note: We will be using 4 Channel out of 6 Channels of the Receiver.
Their SIgnal pins are connected as follows:
- Channel 1 to Digital Pin 2 of evive
- Channel 2 to Digital Pin 2 of evive
- Channel 3 to Digital Pin 18 of evive
- Channel 4 to Digital Pin 19 of evive

Working
Receiver and Transmitter work on PPM = Pulse Position Modulation.
In PPM, the position of the pulse varies.
Whereas, the DC Motor works on PWM = Pulse Width Modulation.
We will upload the Arduino Code to evive to convert PPM to PWM.
Finally, this PWM is then given to motors.
Code
The following Arduino Code is uploaded to evive.
Conclusion
With this, the RC Shopping Cart is ready to spin heads right round as you fill your cart this Black Friday.
Have fun shopping!