Introduction
RGB stands for Red, Green, and Blue. It is a dynamic light color system that produces over 16 million hues of light, allowing for limitless shades and colours. LED lights using the RGB system have greater capabilities for producing wide-ranging light colors than other lighting systems.

Types of LED strips
There are two basic kinds of LED strips, the “analog” kind and “digital” kind. Analog-type strips have all the LEDs connected in parallel and so it acts like one huge tri-colour LED; you can set the entire strip to any colour you want, but you can’t control the individual LED’s colours. They are very very easy to use and fairly inexpensive.
The Digital-type strips work in a different way. They have a chip for each LED, to use the strip you have to send digitally coded data to the chips. However, this means you can control each LED individually! Because of the extra complexity of the chip, they are more expensive.
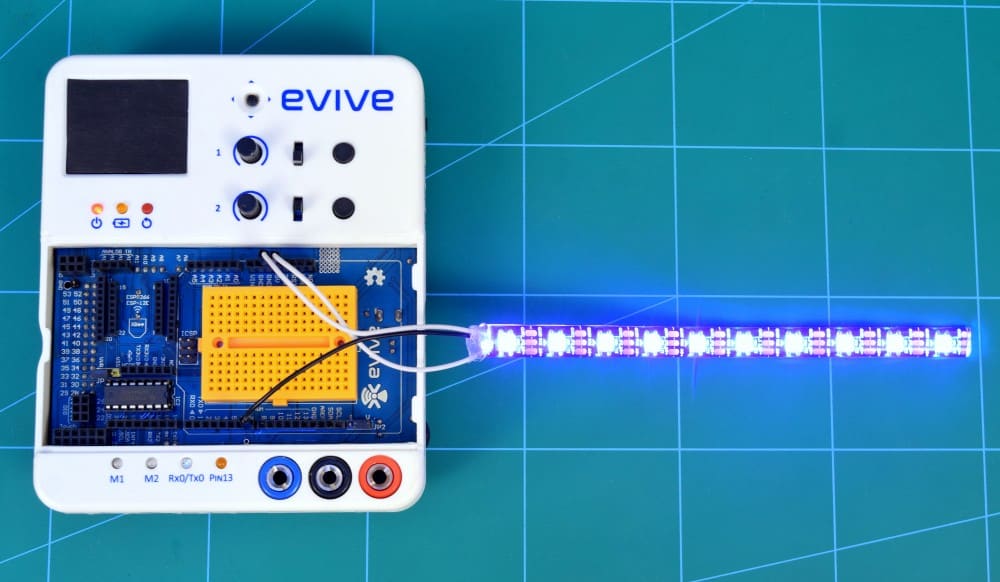
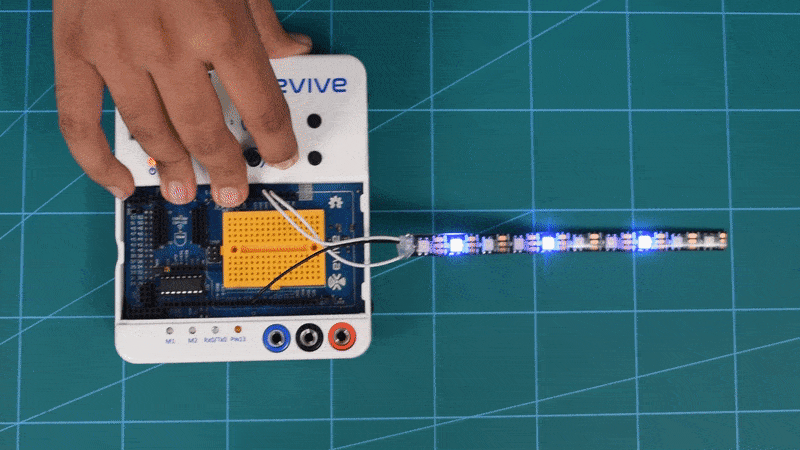
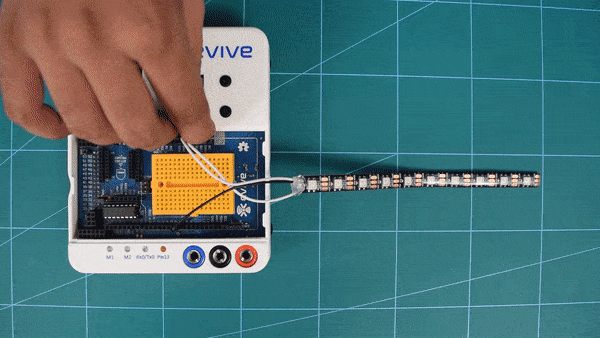
We will be using digital LED strip here.
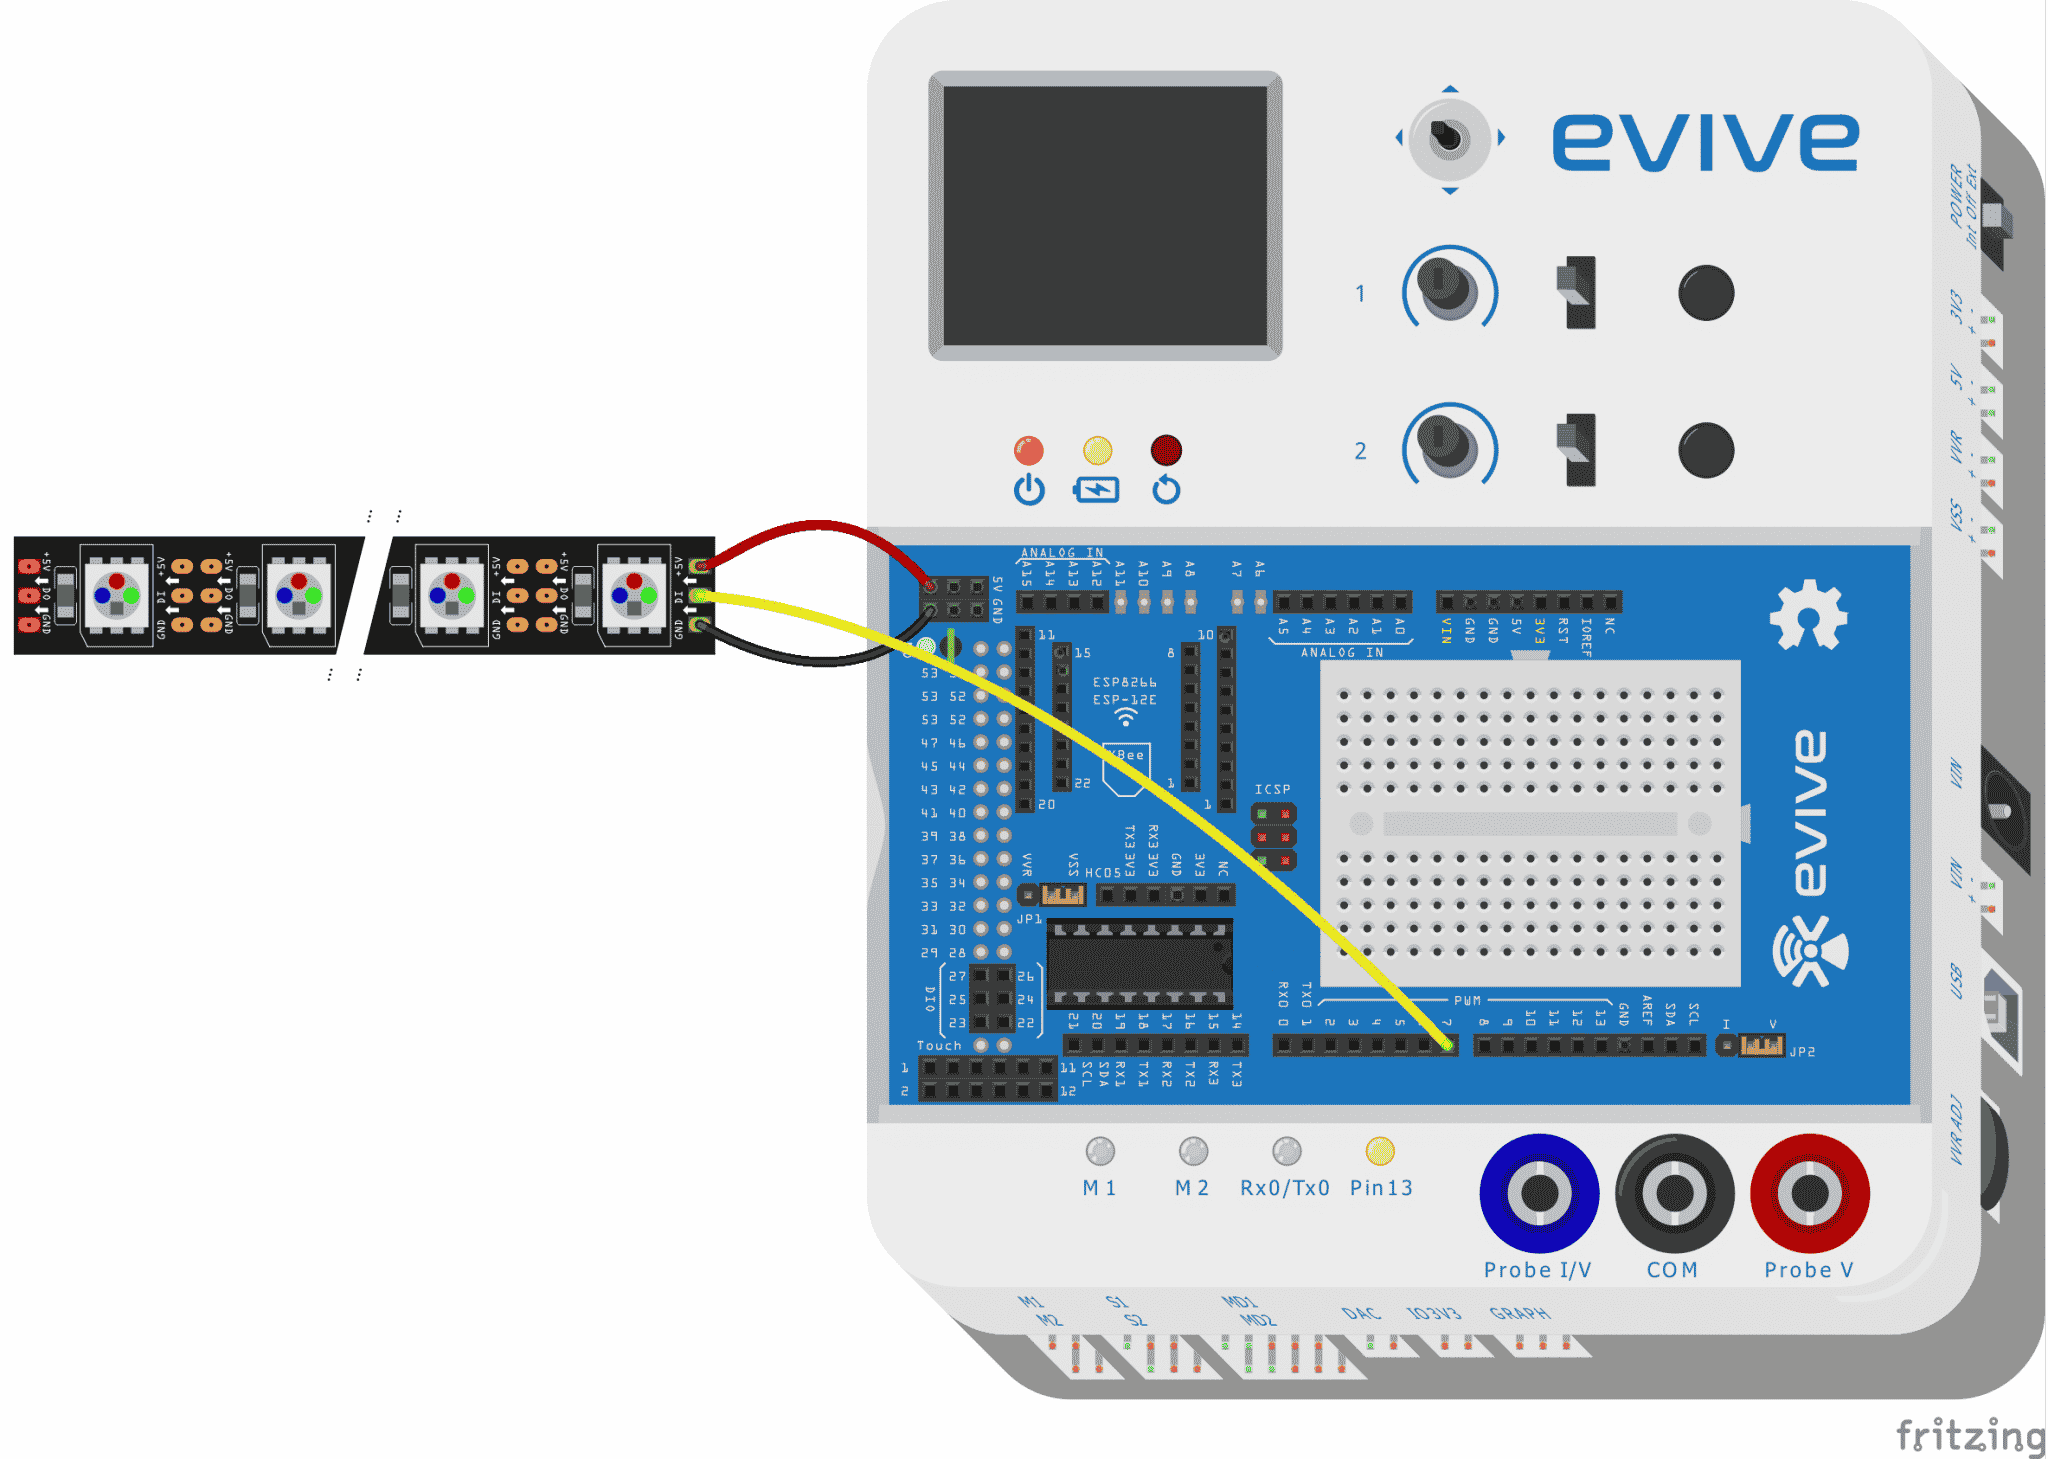
The LED strips have 3 pins as you can see above. One is for +5V, one is for Ground, and the last one is for digital input.
How to interface LED strip
- Firstly, you have to solder three male jumpers on each pin.
- connect +5v jumper to the 5v power supply and the GND jumper to the ground pin.
- connect Din jumper to digital pin no. 7 on evive as shown below.

Below is the complete circuit diagram:
PictoBlox Code
- Connect evive to your laptop/PC, and select the appropriate port.
- Open PictoBlox; if not yet installed, please refer to the Getting Started with PictoBlox tutorial HERE.
- If it is already installed and open and working on a project, save that project. Then, click on New.
- First, let’s interface evive to the PictoBlox.
- In PictoBlox, go to the toolbar and click on the Board menu. Select evive.
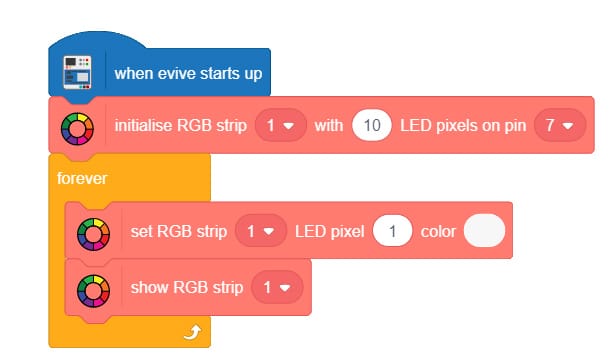
- Go to the evive palette and drag and drop the when evive starts up block in the scripting area.
- Add Lighting extension from the extension library by clicking on the purple-coloured Add Extension button in the bottom-left corner of the window.
- Drag and drop the initialize RGB strip () block in the scripting area from Lighting extension.
- From the Control palette, drag and drop the forever block below the initialize RGB strip () block.
Now you can give different lighting effects to your LED
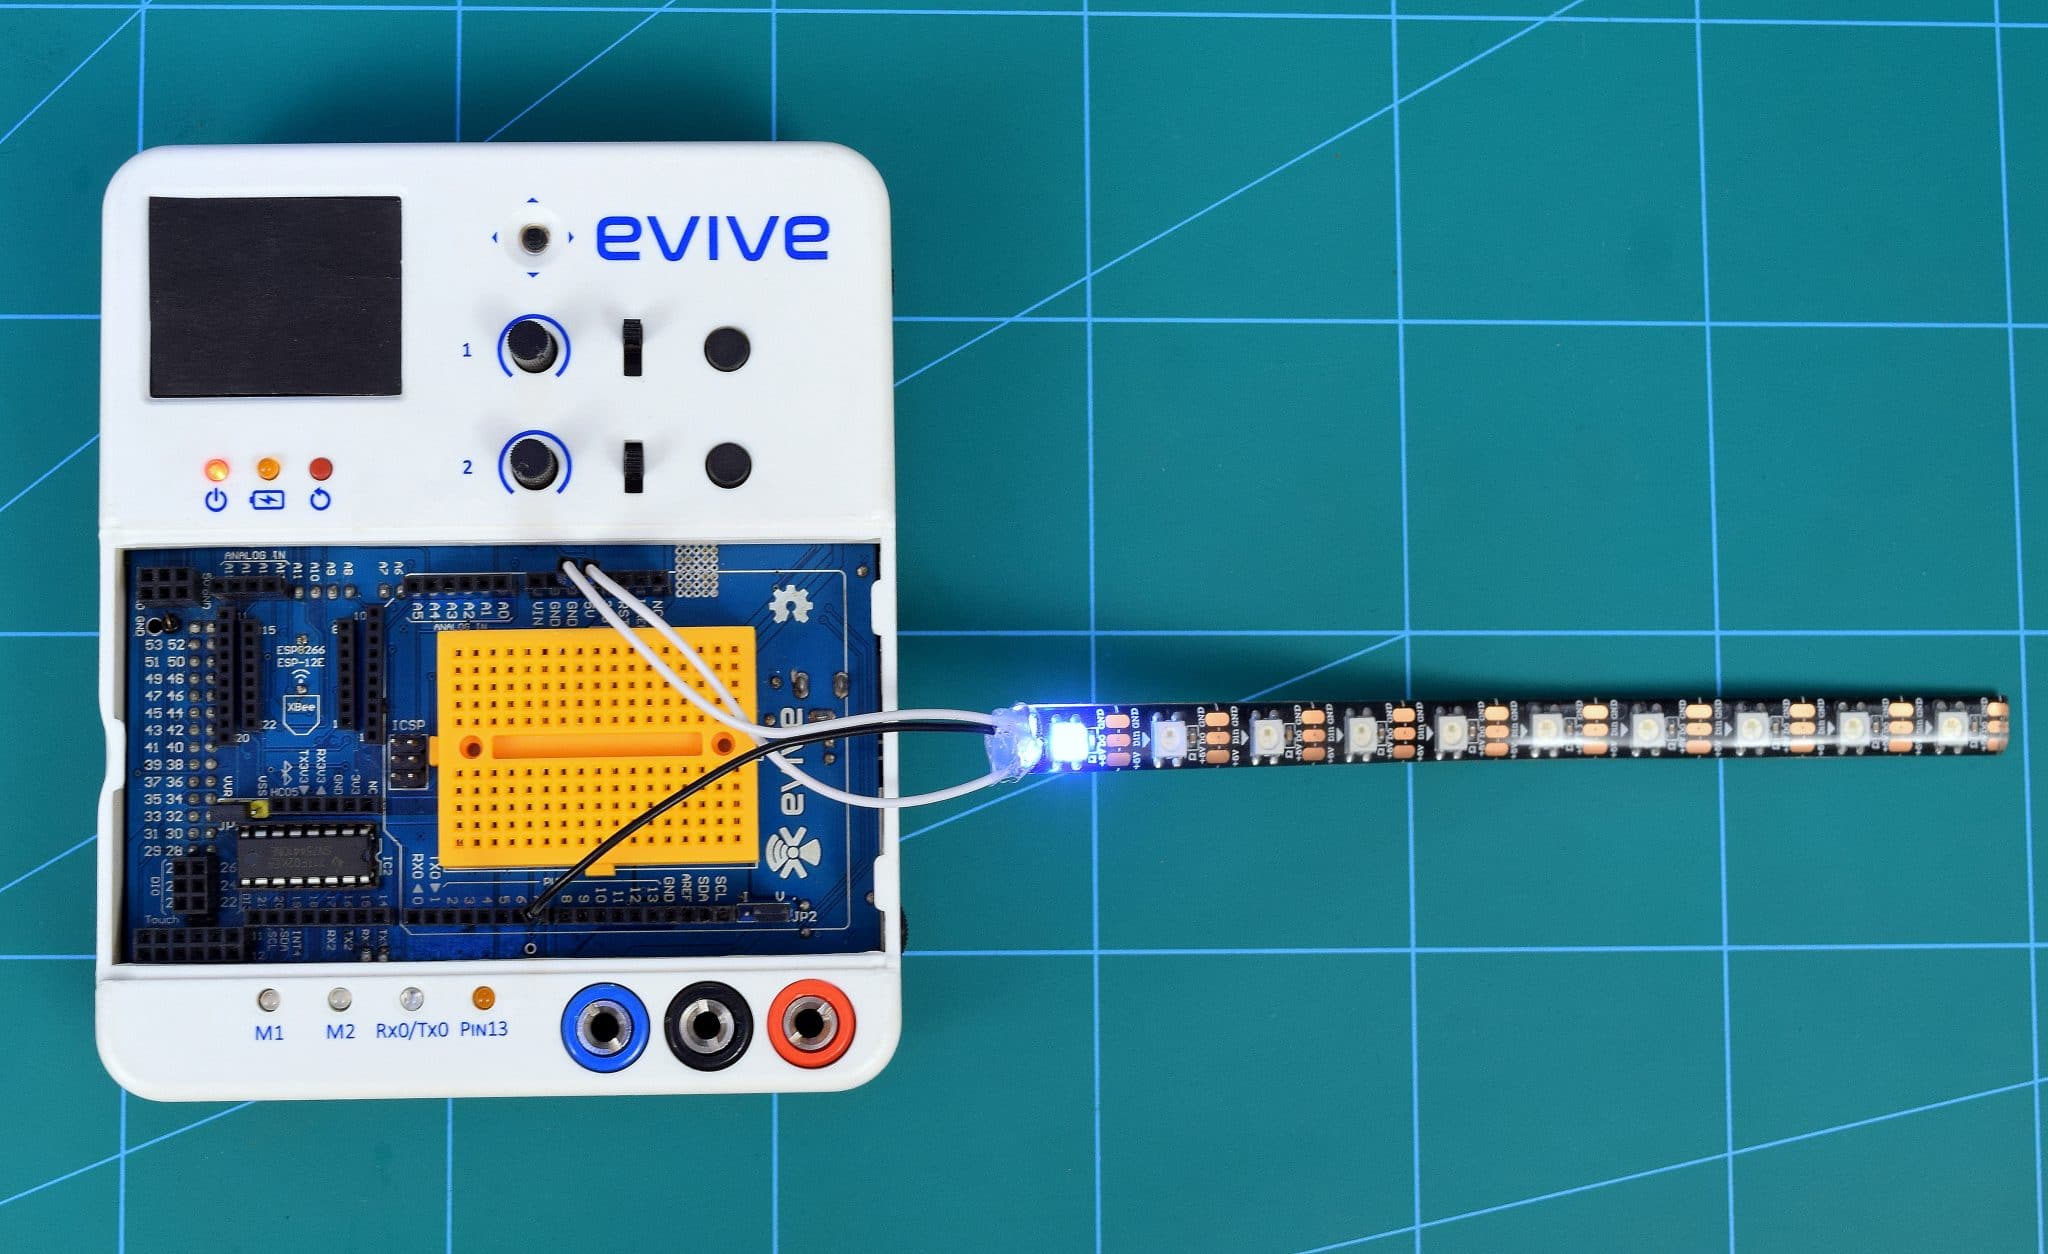
Controlling a Single LED
- Drag and drop the set RGB strip () block in the scripting area from the Lightning extension inside forever block. Now you can give the LED number you want to control and what colour you want in the RGB colour code.
- Now, drag and drop Show RGB strips ().
- Upload the script in evive.
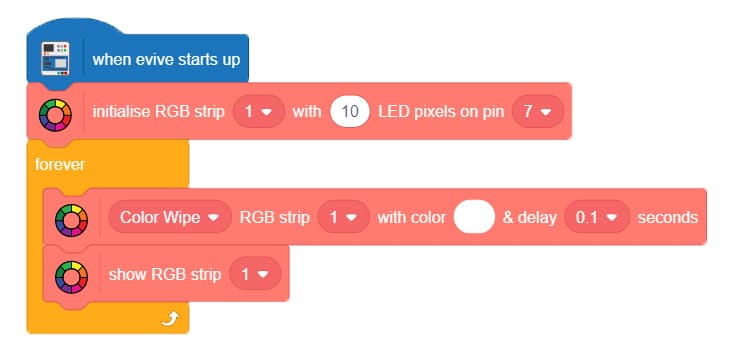
Controlling Full strip with one Colour
- Drag and drop the Color Wipe LED strip () block in the scripting area from the Lighting extension inside forever block. Now you can give what color you want in RGB color code and set a delay for how much time you want the effect.
- Now, drag and drop show RGB strips ().
- Upload the script in evive.

Theater Chase Effect
- Drag and drop the Color Wipe RGB strip () block in the scripting area from the Lighting extension inside forever block. And from the drop-down select Theater Chase. Now you can give what colour you want in RGB colour code and set a delay for how much time you want the effect.
- Upload the script in evive.

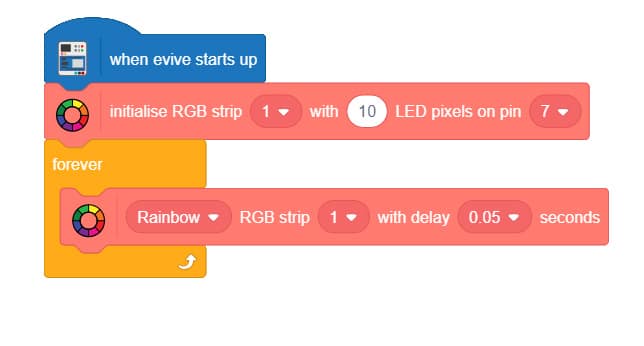
Rainbow Effect
- Drag and drop the Rainbow LED strip () block in the scripting area from the Lighting extension inside forever block. You have to set a delay for how much time you want the effect.
- Upload the script in evive.
Sample Project
Let’s have a look, at where we can make use of the above tutorial: https://thestempedia.com/project/diy-unique-christmas-tree/
Conclusion
In conclusion, the RGB LED strip is a versatile and powerful way to create colorful, exciting lighting designs. With the RGB LED strip, you can create a variety of lighting effects, from single colors to complex animations. By using PictoBlox, controlling the LED strip is easy and straightforward. With this tutorial, you can now apply the RGB LED strip to create beautiful lighting designs.


