In this tutorial, we’re going to introduce you to evive, an extraordinary device that makes DIY-ing super-easy, smart, and fun, how to install its battery, how to charge it and discuss the various power input and output modules available.
evive has 4 power output ports, multi-modal power input, internal rechargeable Li-ion battery, and the main power switch.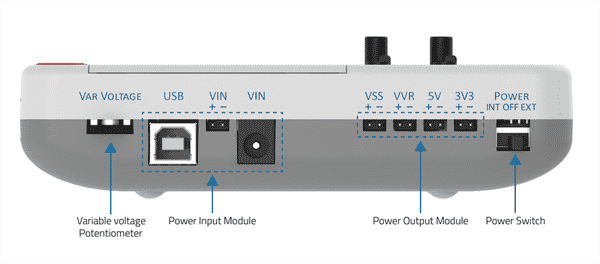
Let’s begin!
What is evive?
evive is a palm-sized all-in-one electronics prototyping device that makes STEM learning for kids easy and project-making for hobbyists fun.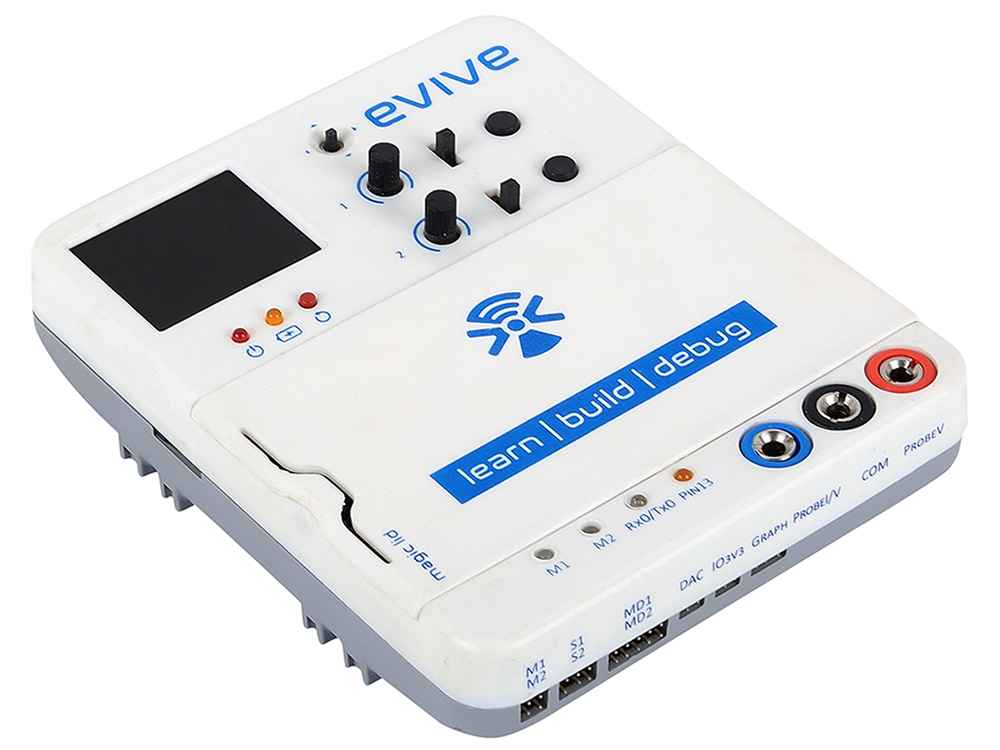
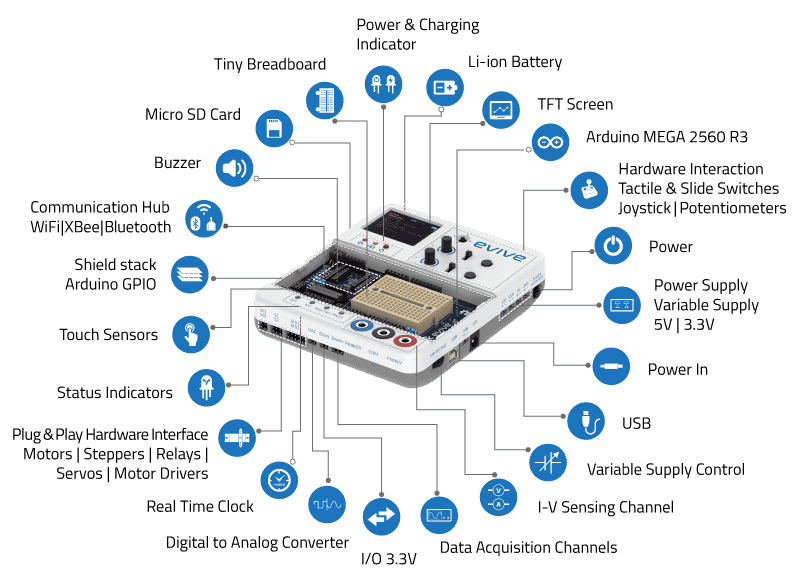
evive’s core is made of Arduino MEGA-2650, thus providing us with all the features of Arduino along with a number of extra features like the easy plug-and-play interface, re-programmable menu-based visual interface, precise voltage and current sensing with data visualization and logging features, inbuilt mini-oscilloscope, function generator, and many others.
Installing the Battery
evive comes without any internal battery inside it. The battery is provided with it separately in the basic kit. To get started with evive you have to first insert the battery inside evive first. Here is the complete battery installation guide.
Follow the steps given here for the same:
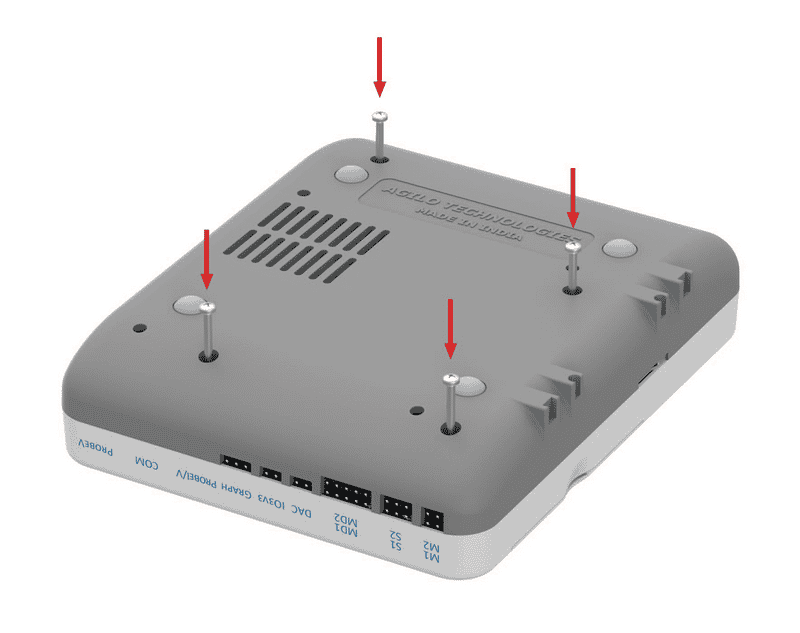
- Unfasten the screws at the back(circled blue in the given below) using the screwdriver provided in the kit.
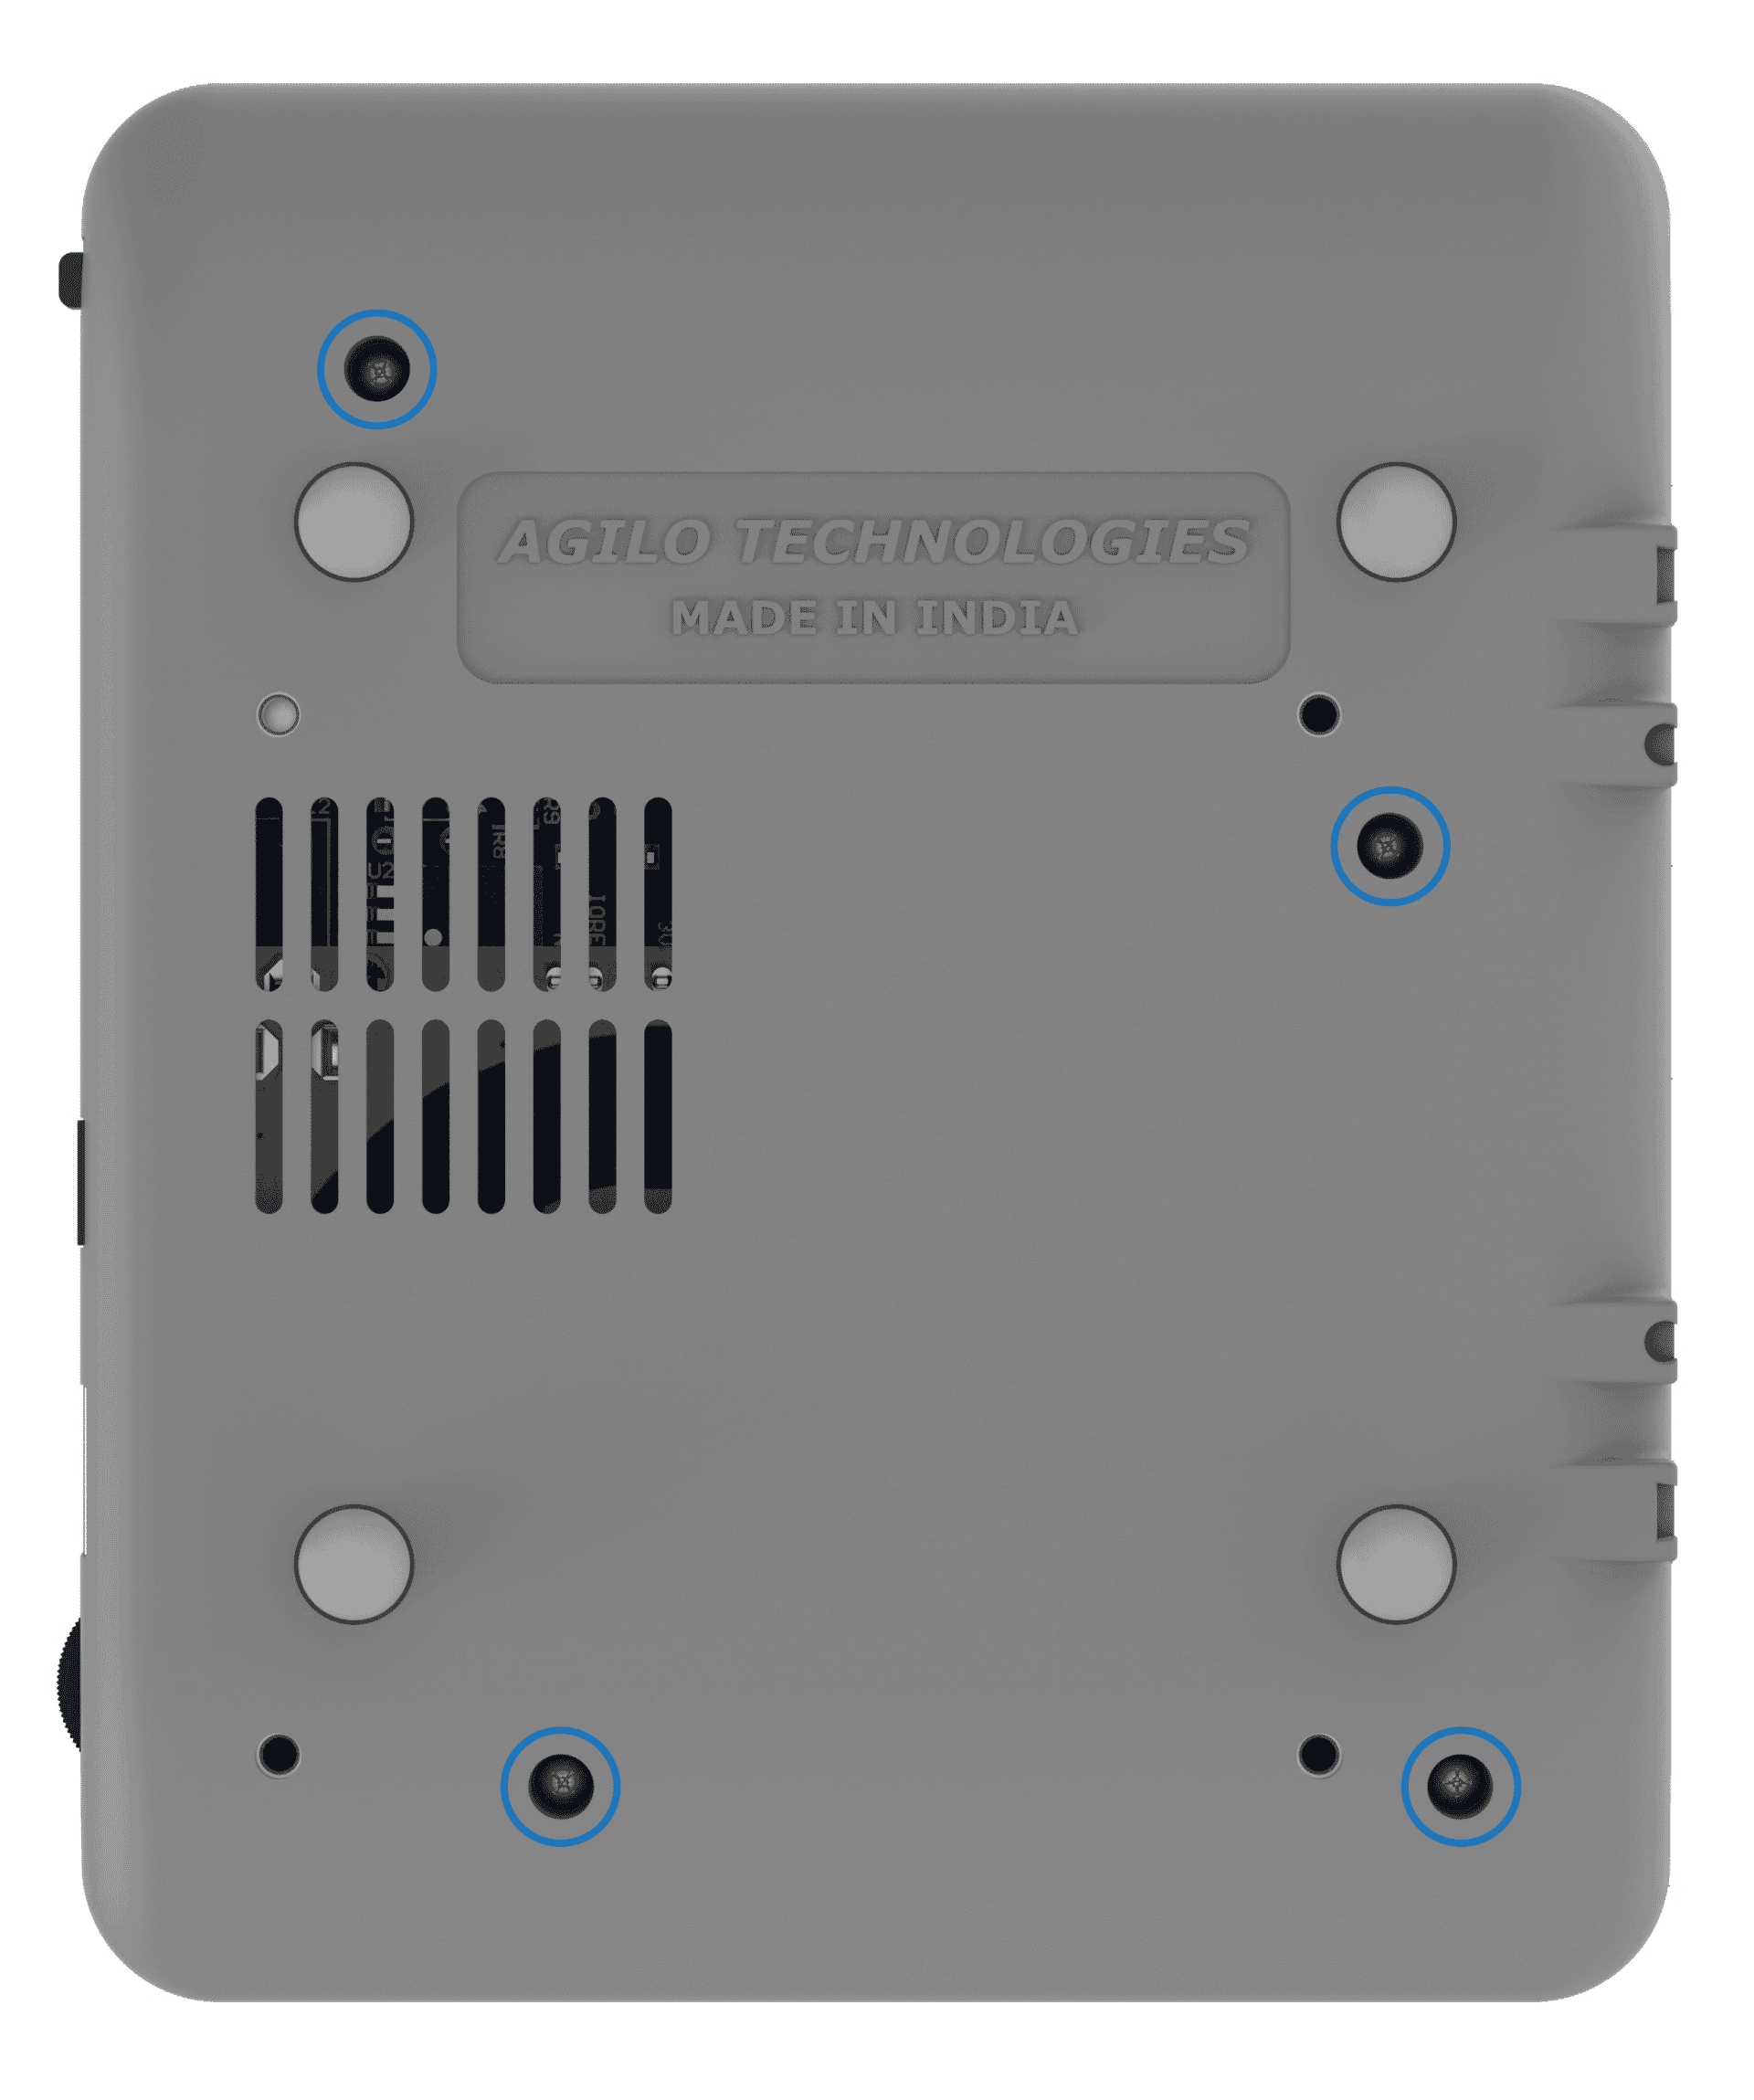
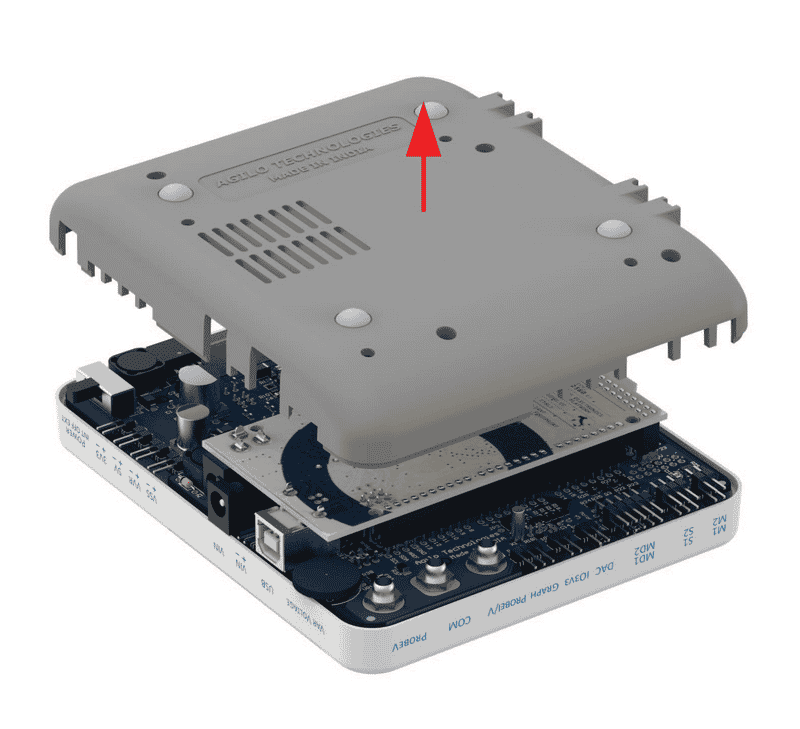
- Remove the bottom half of the casing gently.
- Now, take the battery provided in the kit and plug the battery connector into the empty male socket given here.
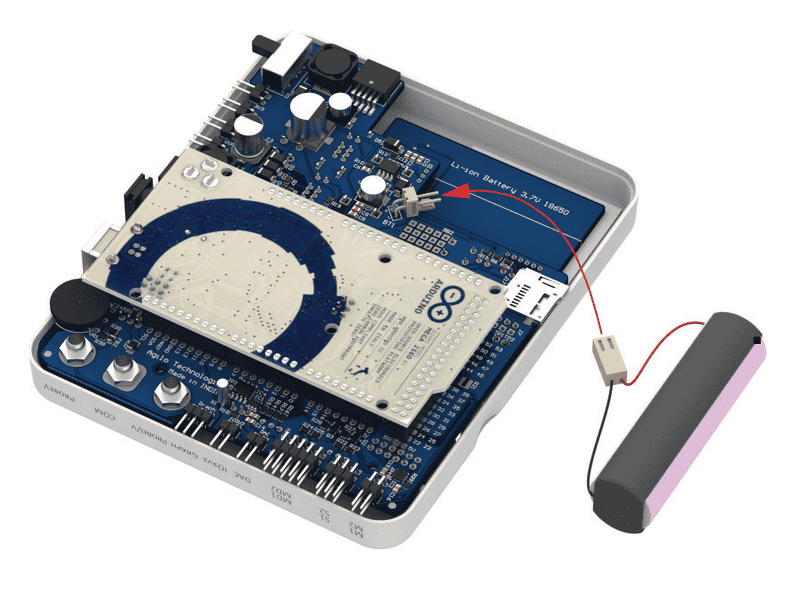
 The connector is unidirectional, i.e. it can be connected only in one way.
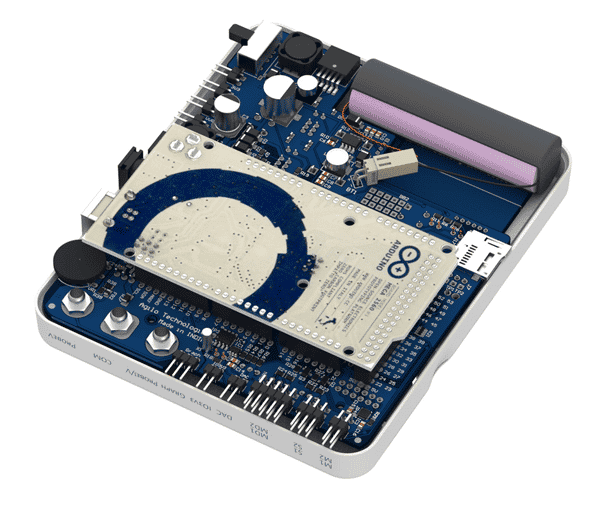
 - Secure the battery in the slot provided using double-sided tape.
- Take care that the battery wire remains within the case.
- Now, place the bottom half back, and fasten all four screws.
Within, your evive is now all powered up to get started with DIY-ing.
evive’s Power Switch
The battery is in its place now. Time to power evive up!
The power switch is located on the top corner of the right surface. It is a three-way switch.
- The middle state corresponding to ‘OFF’.
- Sliding the switch to the downwards corresponds to ‘INT’ internal state, which means evive will be powered by the internal 3.7V battery
- Sliding the switch upwards corresponds to ‘EXT’ external state, which means the external power supply is required to power evive up through the power inputs are given here.
For now, let’s select the internal state by sliding the power switch downwards.
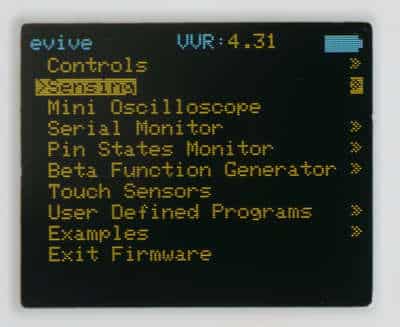
As it turns ON, a menu will appear on the TFT screen and the power LED will turn ON.
Now, let’s see how to charge evive. after it has used up all the power of the battery.
Power Indication LEDs
There are 2 power indication LEDs, both located below the TFT screen as shown below.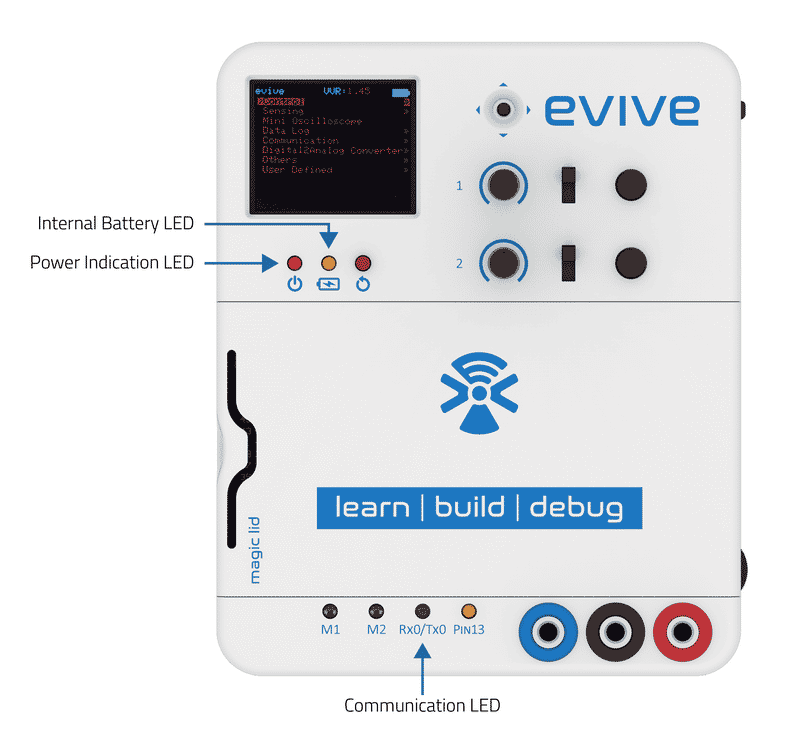
- The red LED glows when evive is powered on.
- The orange LED glows when the battery is being charged.
Charging evive / Power Input Module
To check whether it is charged or not, check the battery status; it is displayed on the top right corner of the screen.
When the battery is low, you can power evive externally in three ways: via
- a USB cable
- DC adapter
- external battery.
Let’s have a look at all three one by one.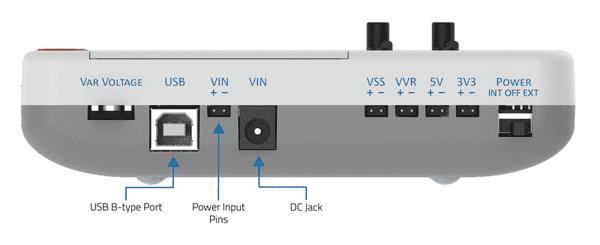
- First, let’s use the USB cable. Connect evive to your computer via the cable and slide the power switch upward. The Status LED for Charging will turn ON. Once the battery is fully charged, it will turn OFF.
- Now, let’s charge it using a DC adapter of 12v-2amps rating here. If you want to just charge evive, the power switch should be in the OFF state. If you want to work AND charge at the same time, slide the power switch to EXT.
- Finally, let’s see how to charge evive using an external battery via the VIN. While connecting the external battery, pay extra attention to its polarity. In our case, the red wire is the positive terminal. Therefore, we will connect the red wire to the positive terminal of VIN and black to the negative terminal of VIN.
If you want to just charge evive, the power switch should be in the OFF state. If you want to work AND charge at the same time, slide the power switch to EXT.
You don’t have to worry too much about the battery being overcharged or any other damage while powering up evive externally as it comes with reverse polarity and overvoltage protection that keep evive safe and sound!
Power Output Modules
Now that we have had a look at the power input modules and how to charge evive using them, let’s have a look at the output modules.
Just like you can power evive in multiple ways, you can also take output in several ways, four to be precise.
- The first is the VSS. Here, you will get an output power that is exactly the same as it supplied to the evive externally.
- The second is the VVR. You can vary the external input power using the VAR Voltage knob. You can monitor this variable voltage on the evive’s screen and take it as output at VVR.
- Next is the fixed 5V supply.
- And the last one is 3V3. where you will get a fixed 3.3V supply.
Conclusion
In this lesson, we learned about evive and its features, how to install its battery, and how to charge it, and discussed the various power input and output modules available. With evive, you can easily make a variety of interesting projects, and have a great time learning about electronics. We hope you have a great time DIY–ing with evive!


