Introduction
Monitoring plant health is very important for its fast growth. In this busy world, people usually forget to water their plants which leads to bad growth and health of their plants. For ensuring complete development of plants it is necessary to develop proper surrounding conditions in which plants grow.
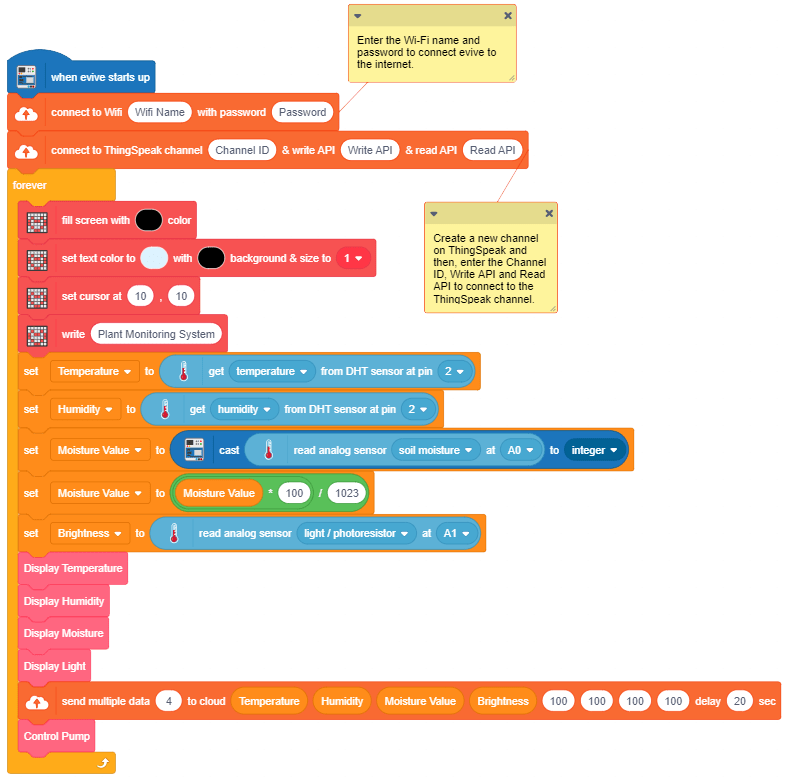
Not everyone has enough time to take care of their plant in the most efficient way. Thus in the project, you will automate the plant watering system made in the previous project. Your evive will monitor the moisture of the soil using the moisture sensor, surrounding temperature, humidity and brightness. All the data will then will be sent to the internet on ThingSpeak, where you will be able to see it anywhere from the world. Whenever the water shortage in the soil is detected, evive will start the pump until the soil has enough moisture in the soil.
LDR sensor
LDR (wikipedia) are light sensitive devices most often used to indicate the presence or absence of light or to measure the light intensity. An LDR can be applied in light-sensitive detector circuits and light-activated and dark-activated switching circuits.
How does LDR sensor work?
The resistance of a photoresistor decreases with increasing incident light intensity. In other words, it exhibits photoconductivity. A photoresistor is made of a high resistance semiconductor. In the dark, a photoresistor can have a resistance as high as several megohms (MΩ), while in the light, a photoresistor can have a resistance as low as a few hundred ohms.
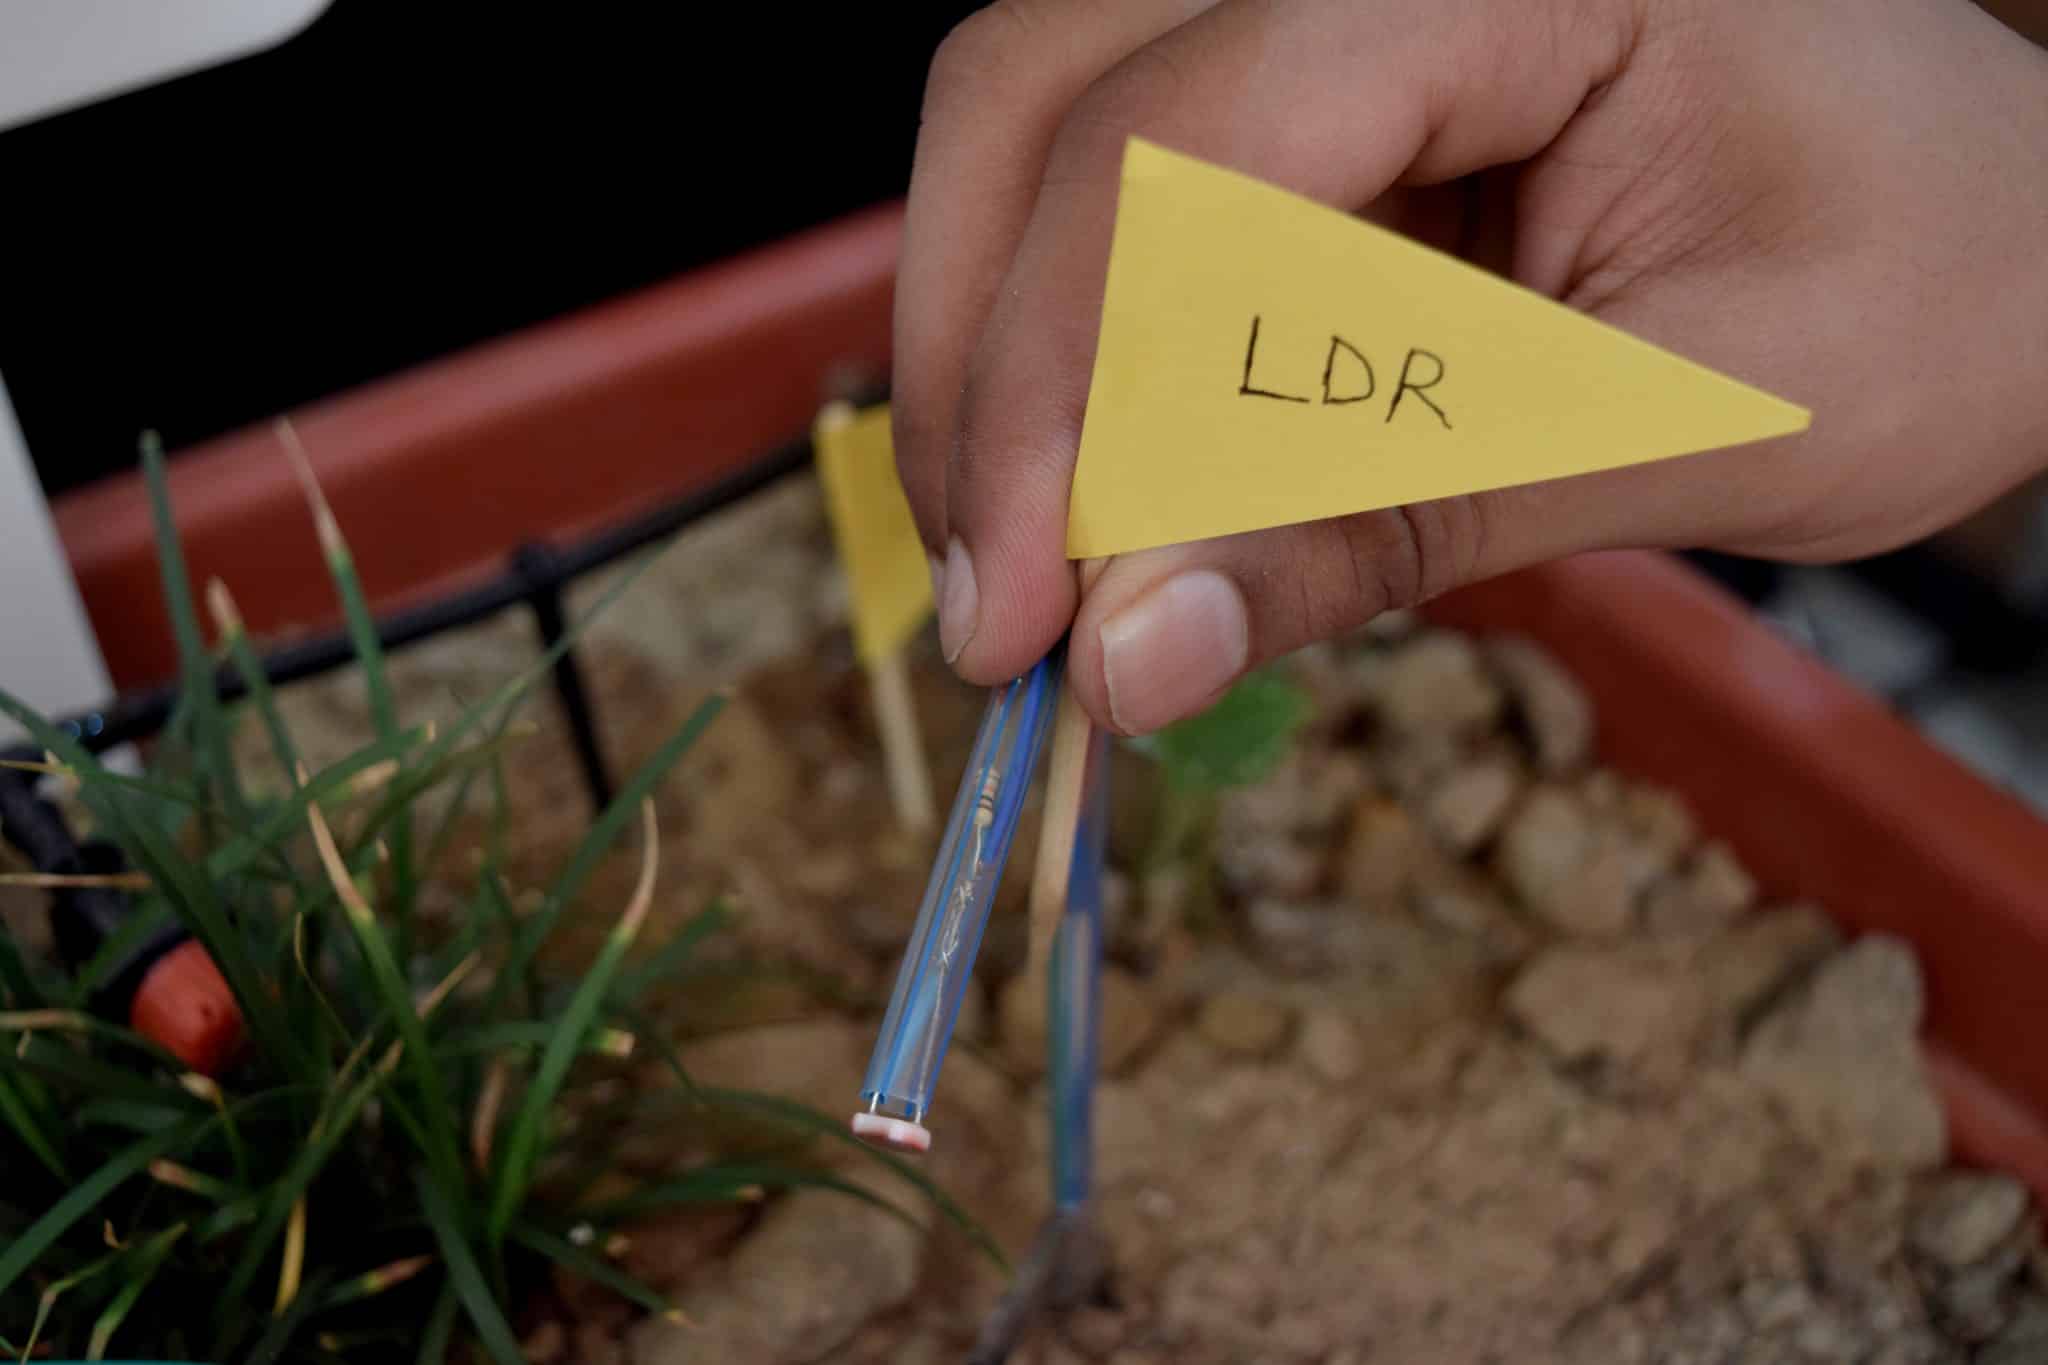
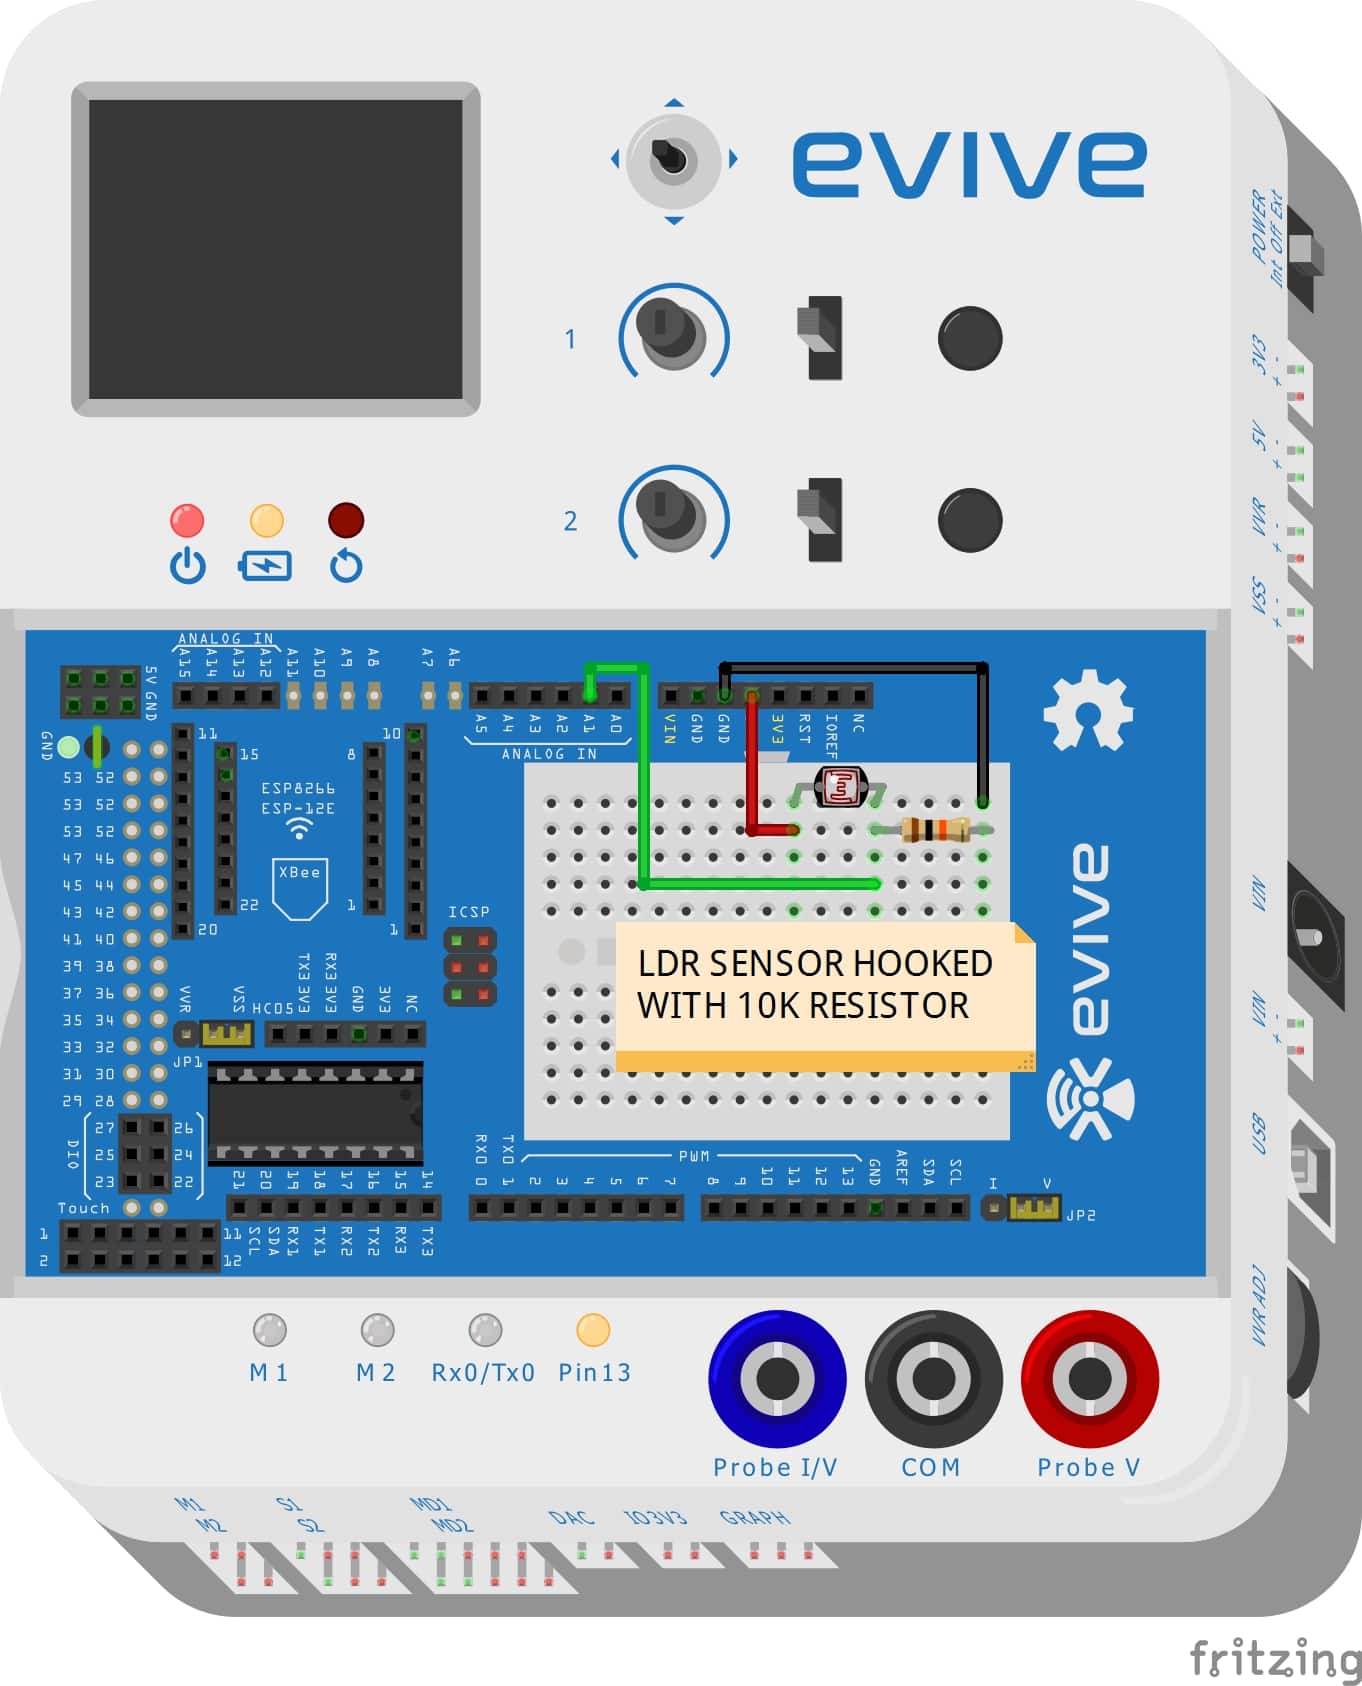
Setting up the circuit for LDR sensor
The circuit of LDR sensor is explained below
-
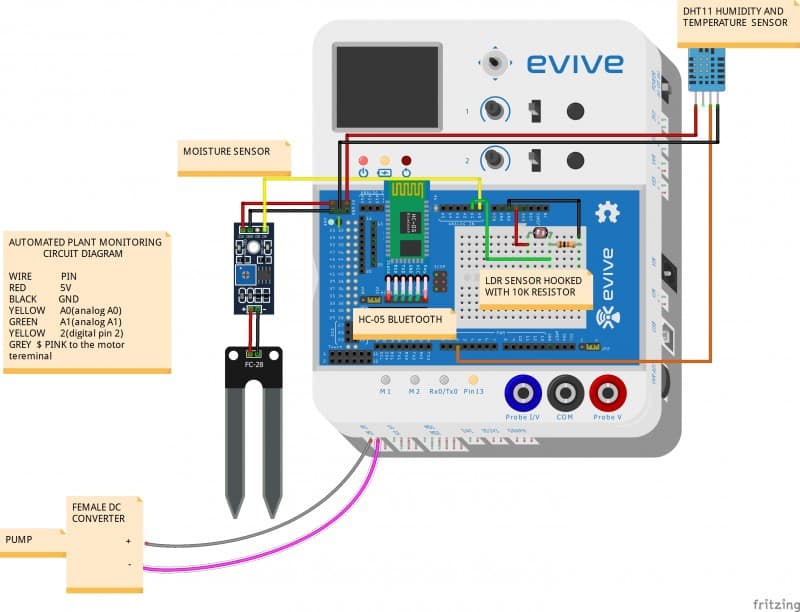
One end of LDR is connected through jumper wire(red wire ) to the 5V power supply in the evive board.
-
Another end of LDR is soldered with 10K resistor. Through the common junction of LDR and 10K resistor, a jumper wire is taken and hooked into the analog input(here we have used A1 pin number in the evive board) of the evive board.
-
The free end of the resistor is grounded with the help jumper wire(to make it more attractive the circuit can be placed inside the straw).
Soil Moisture sensor
Soil moisture sensors (Wikipedia) measure the volumetric water content in the soil. The two probes of moisture sensor are connected to LM293 comparator. This sensor uses the two probes to pass current through the soil, and then it reads that resistance to get the moisture level.
How does soil moisture sensor work?
The Soil Moisture Sensor uses capacitance to measure the water content of soil (by measuring the dielectric permittivity of the soil, which is a function of the water content).M393 IC do the voltage comparing here, a reference voltage (UR) is set by the adjustable potentiometer, when the analog output value over this value, the LM393 comparator will output a digital value to indicate this sensor is triggered by reaching this setup threshold.For more visit soil-moisture-sensor-interfacing-evive
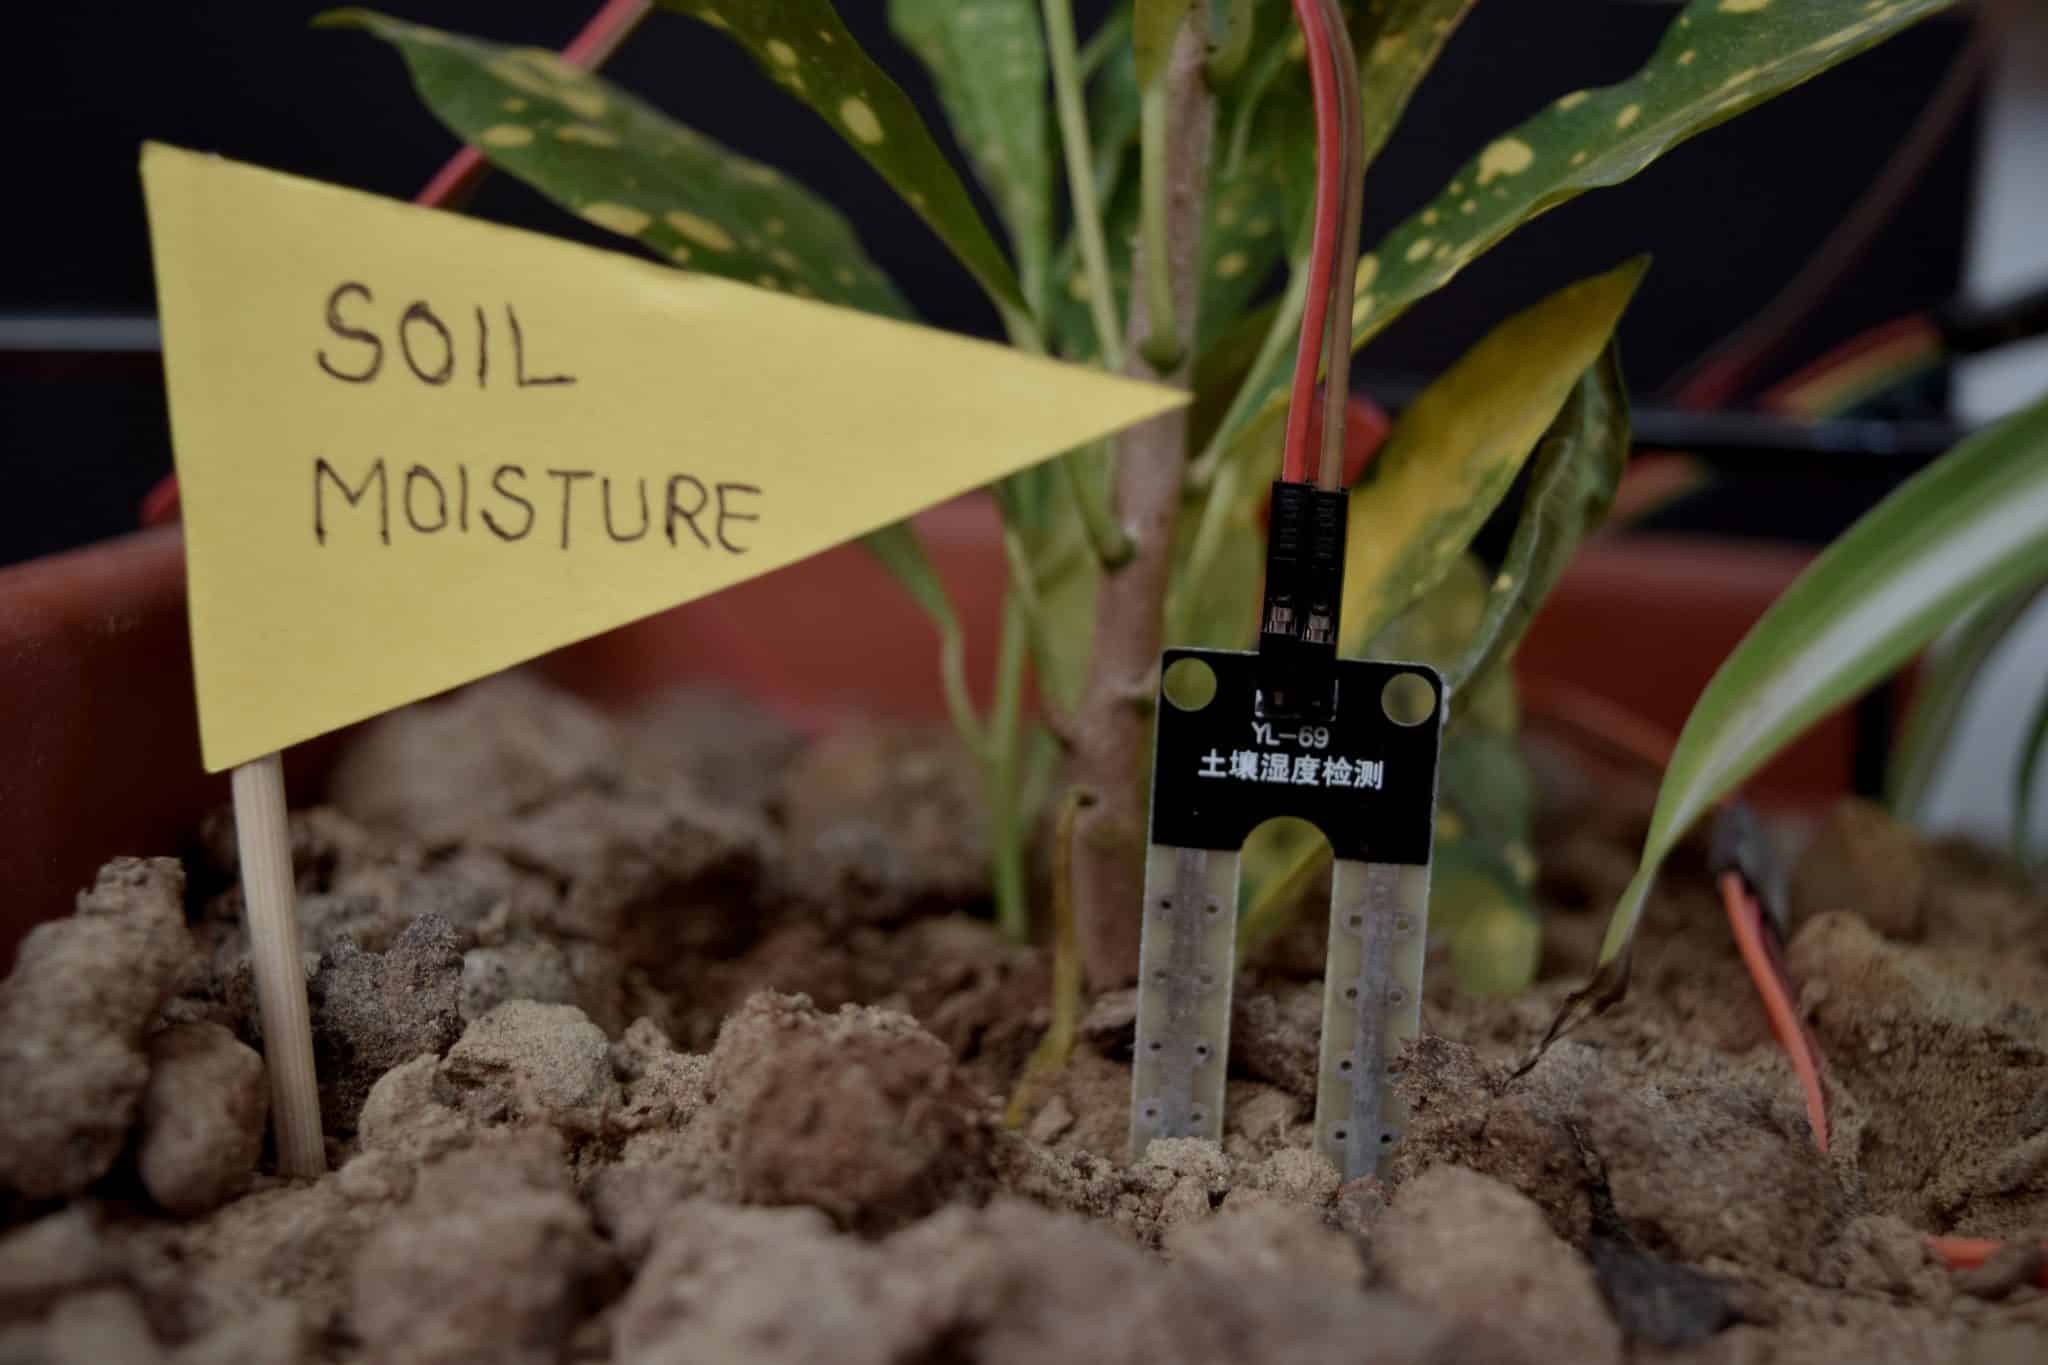
Setting up the circuit for soil moisture sensor
The circuit of soil moisture sensor is explained below:
- + pin of the comparator is connected to the 5V pin of the evive board.
- – pin of the comparator is connected to GND pin of the evive board.
- Out of AO(Analog output) and DO(digital output) AO pin is connected to the analog pin(here in our code we have used A0 pin) of the evive board.

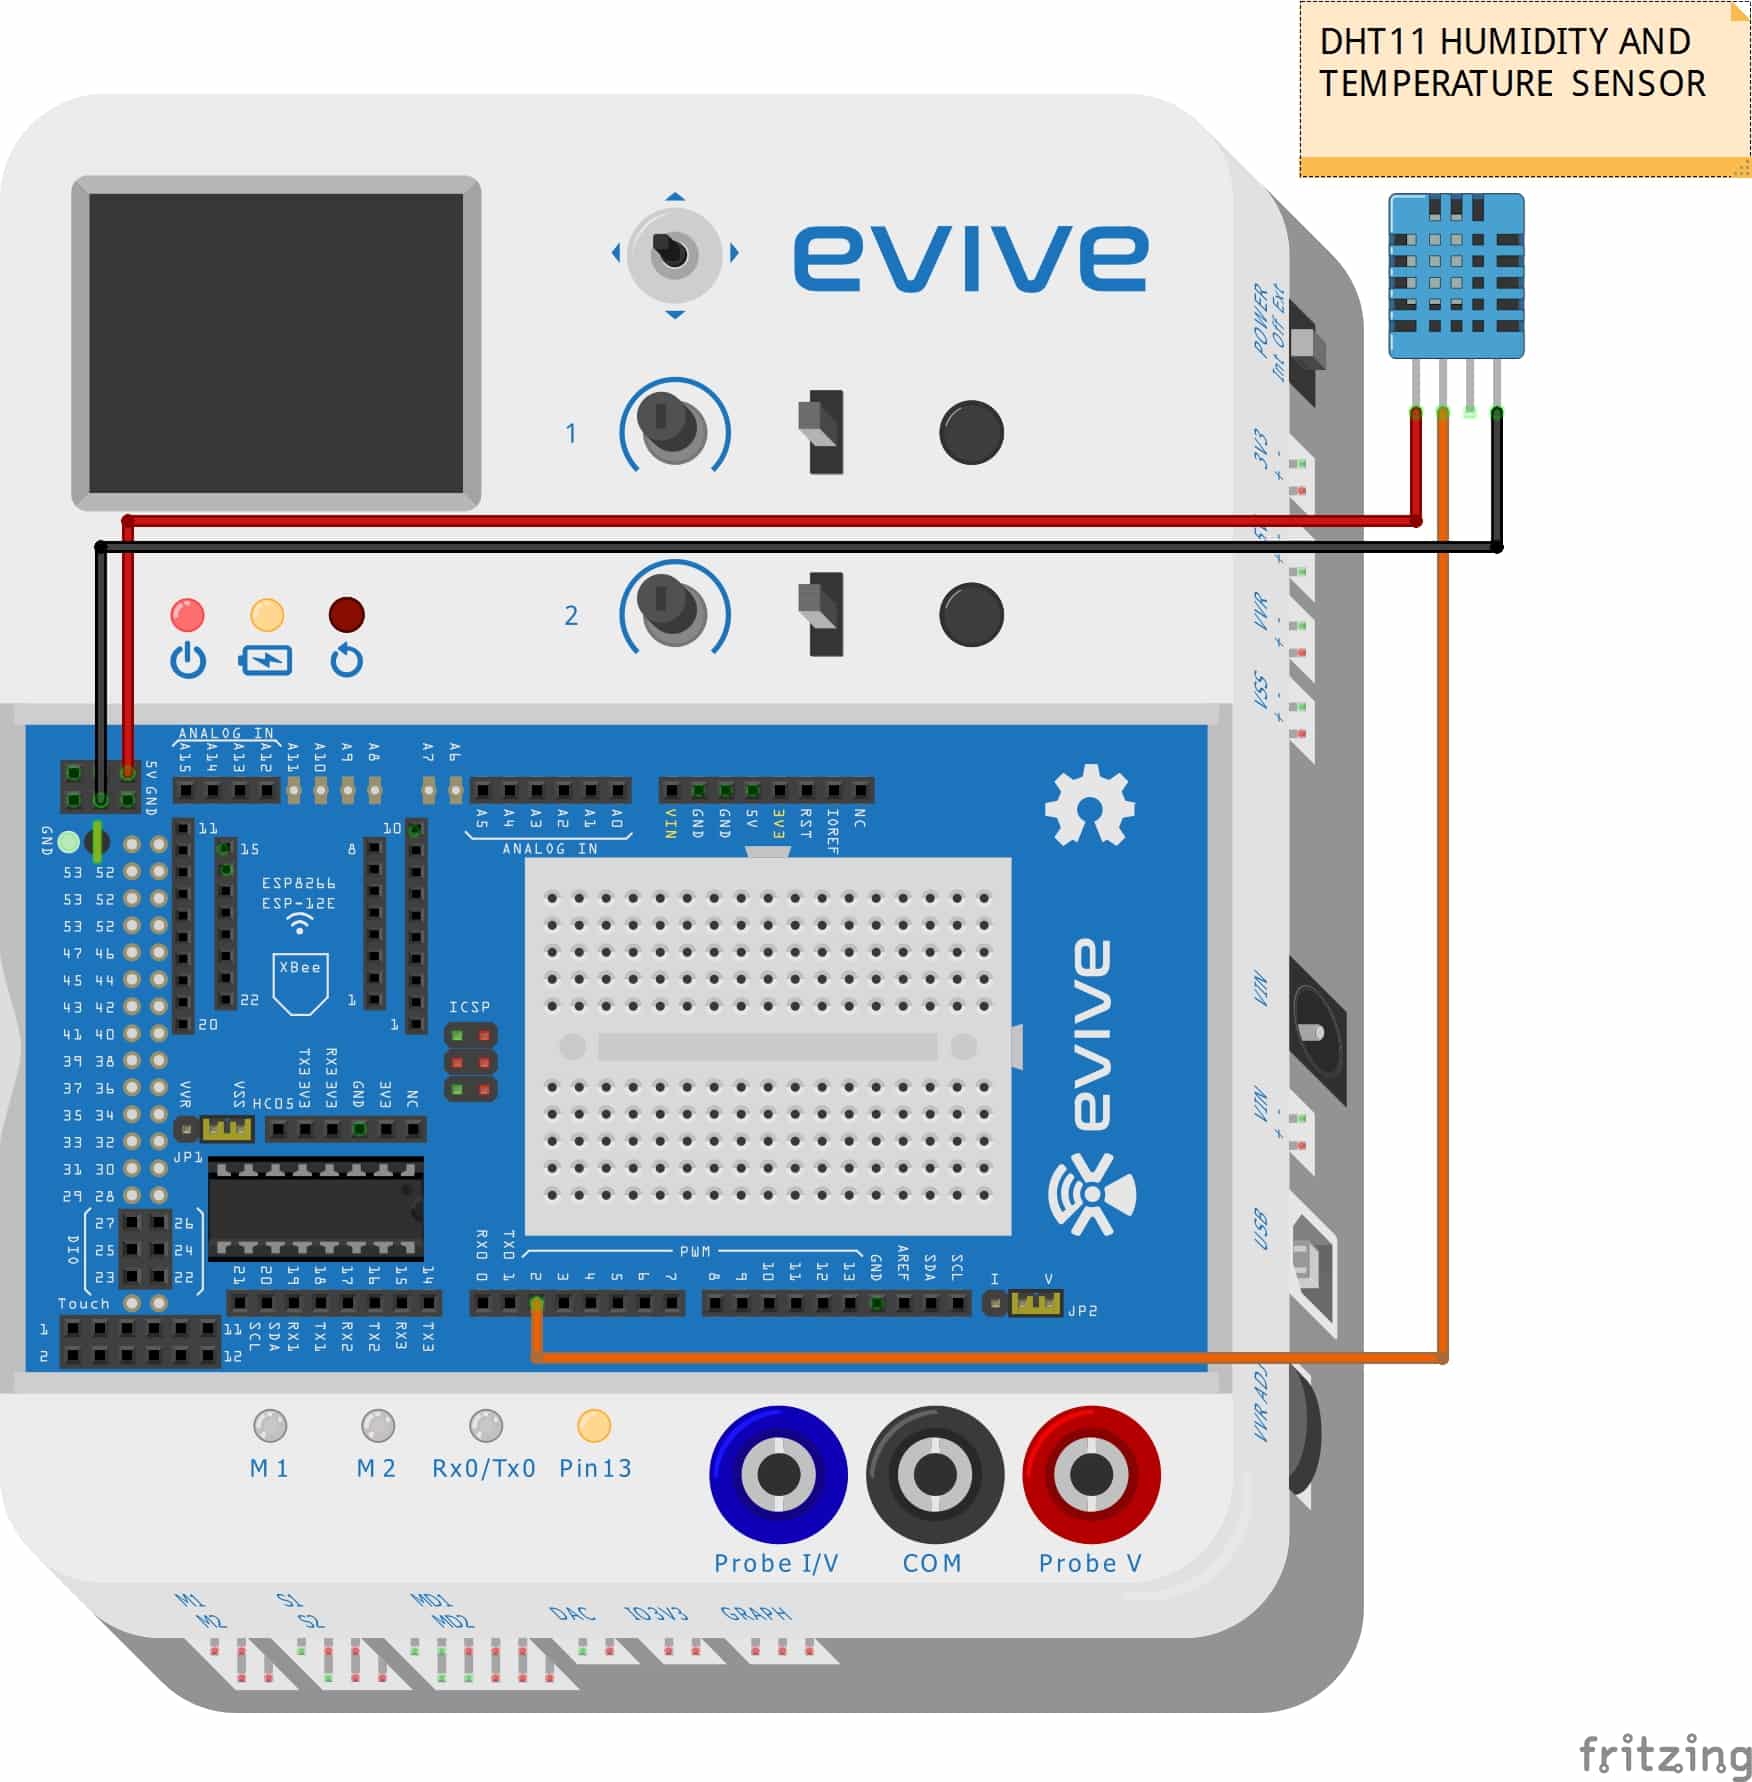
Humidity and temperature sensor
DHT11 is a temperature and humidity sensor which uses a capacitive humidity sensor and a thermistor to measure the surrounding air and spits out a digital signal on the data pin (no analog input pins needed).
How does Humidity and temperature sensor work?
The DHT11 Humidity and Temperature Sensor consists of 3 main components. A resistive type humidity sensor, an NTC (negative temperature coefficient) thermistor (to measure the temperature) and an 8-bit microcontroller, which converts the analog signals from both the sensors and send out single digital signal.
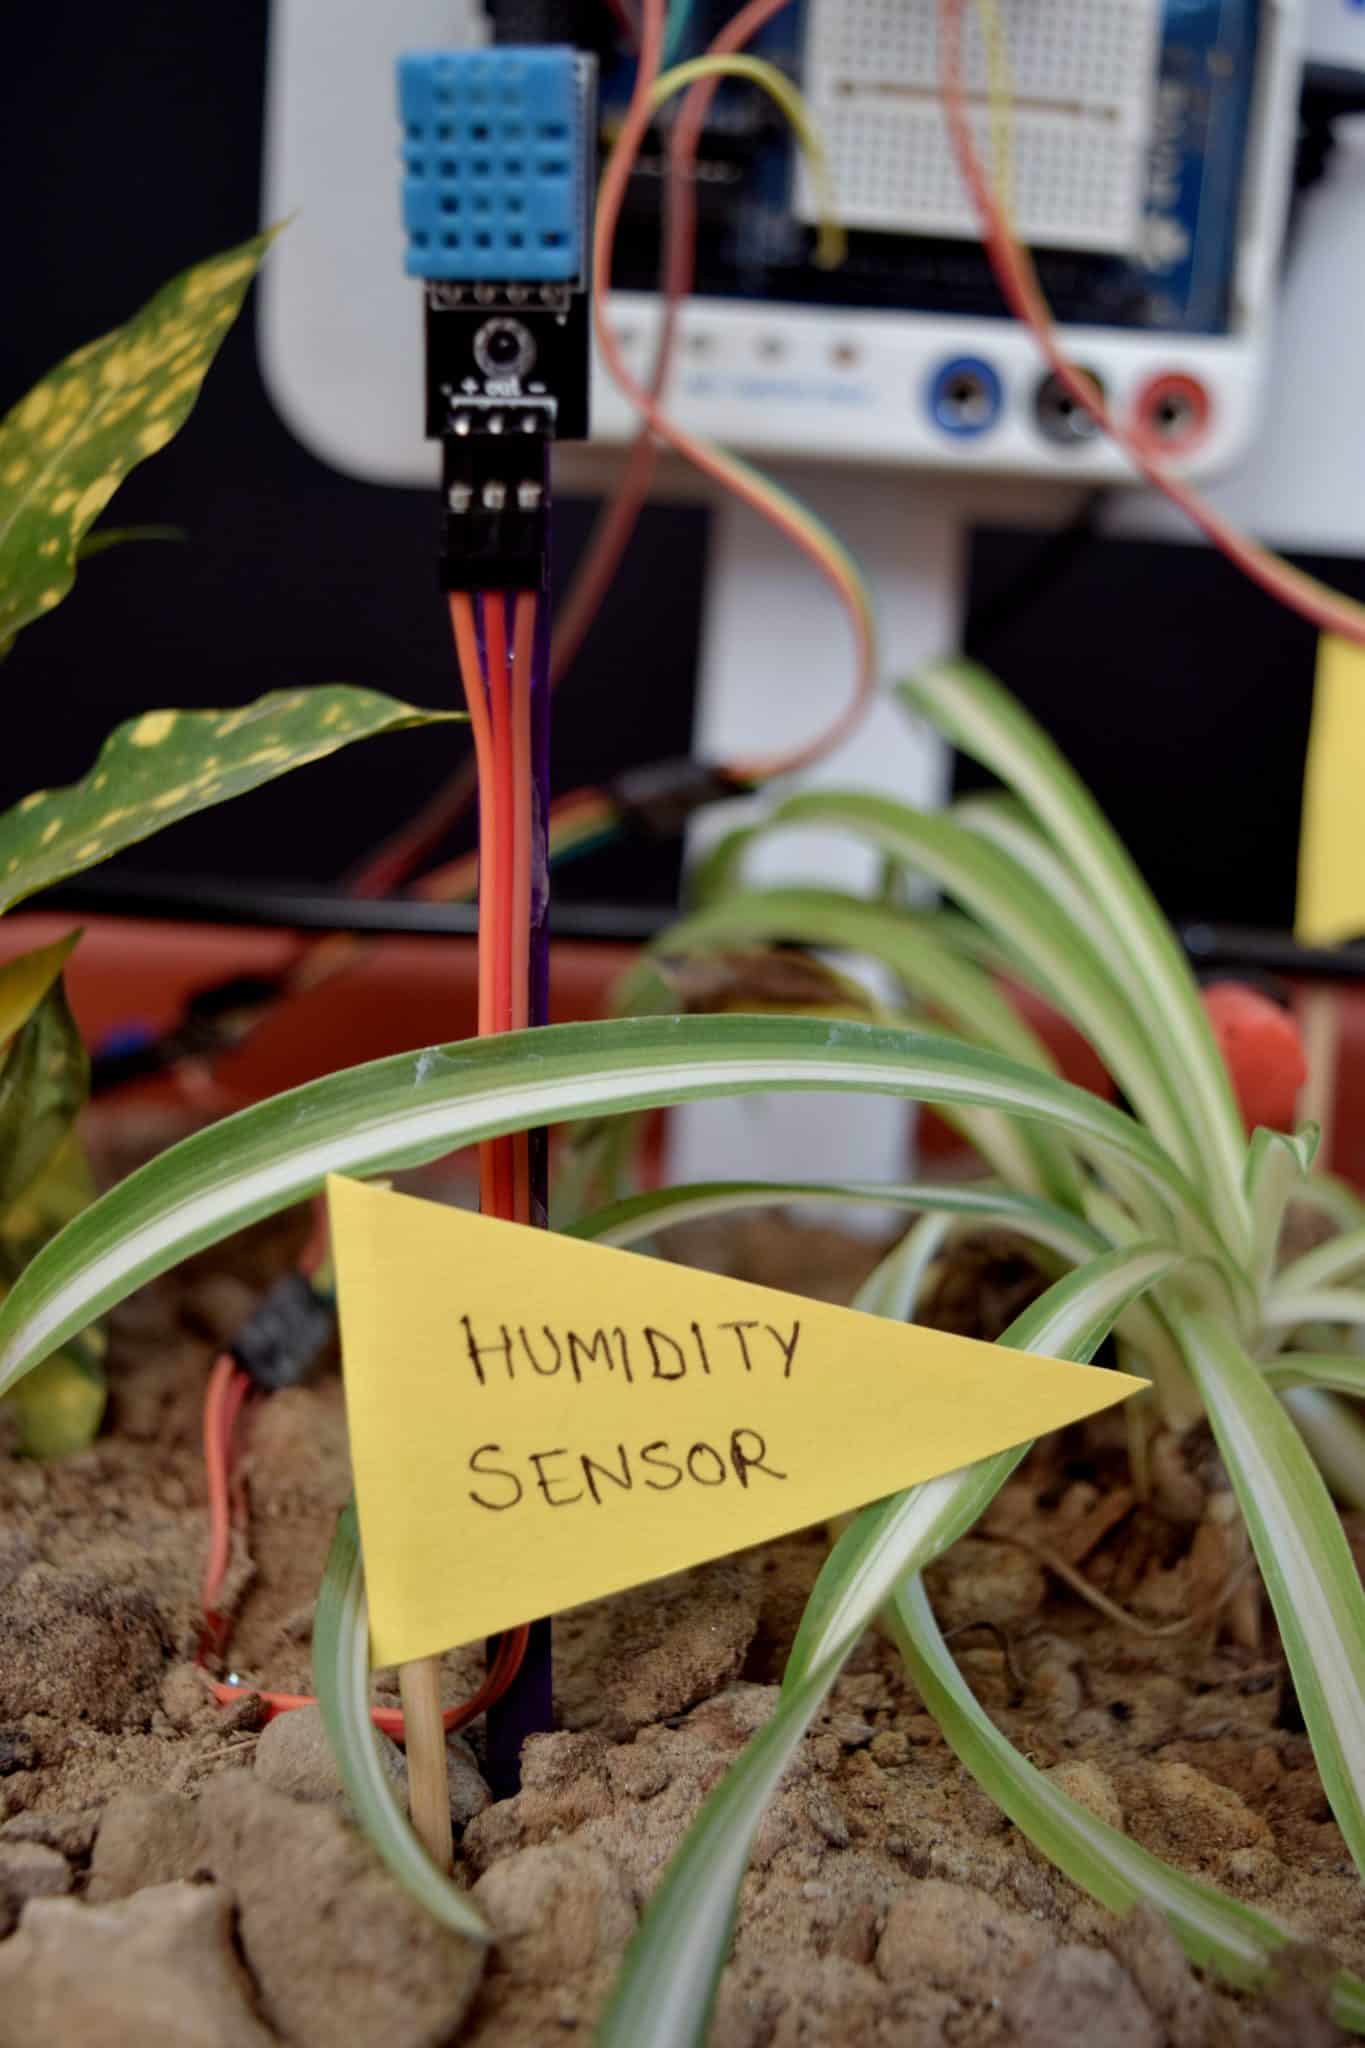
Setting up the circuit for humidity and temperature sensor
The connections between humidity and temperature sensor are explained below
- + Pin is connected with the female jumper wire and the male end to the 5V power supply on evive board.
- – Pin is connected with the female jumper wire and the male end to the ground on evive board.
- OUT Pin is connected with the female jumper wire and the male end to the digital pin.
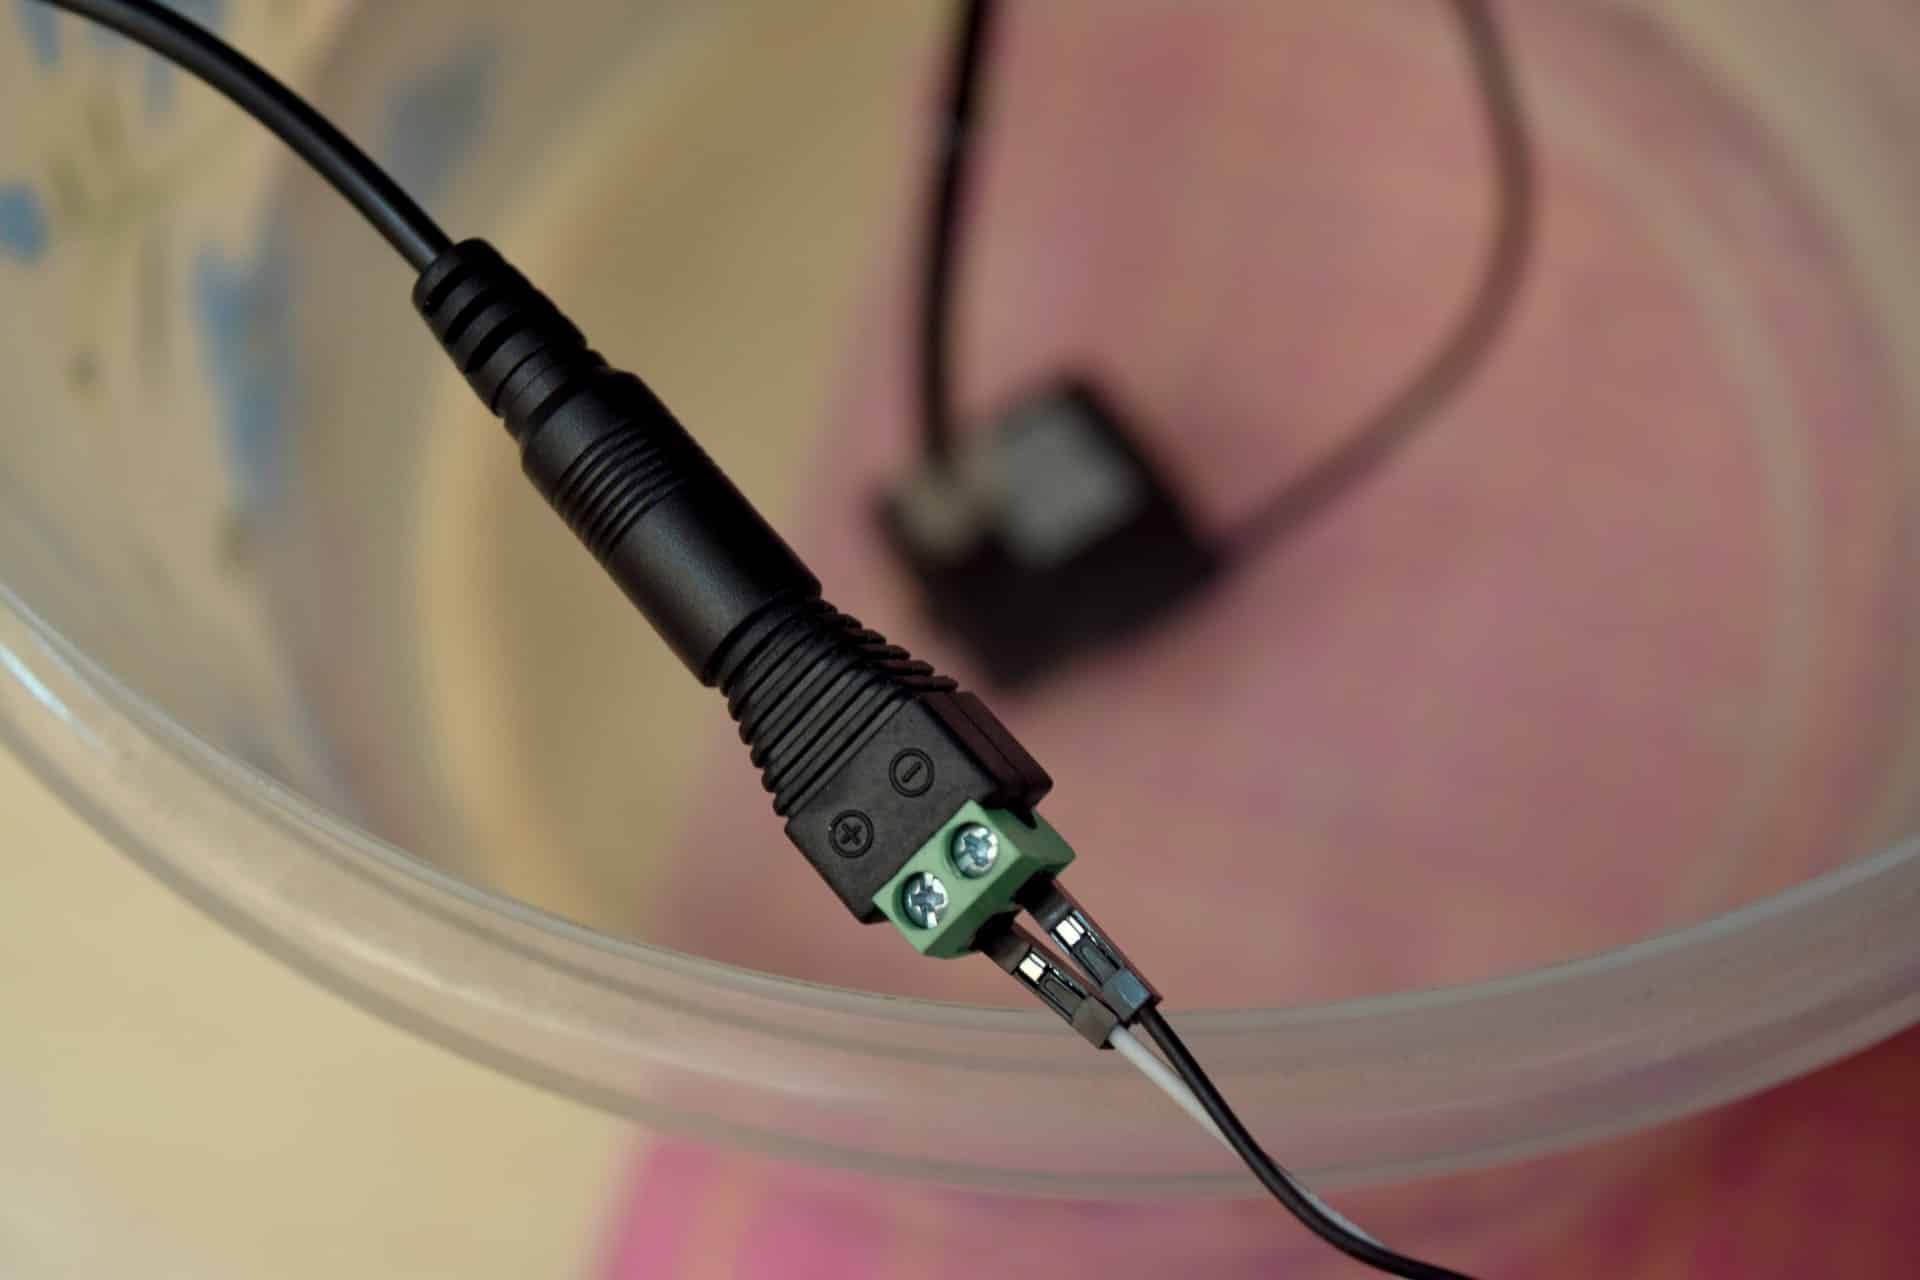
Water Pump
A water pump is a device that moves fluids by mechanical action. Water pump consumes electrical energy to perform mechanical by moving the fluid.

Setting up the circuit for water pump
- First of all, a 3W-12V water pump is interfaced with evive.
-
The end wire of the pump containing male connector is connected to female DC connector as shown in GIF.

-
The male end of jumper wires(2 wires) are connected to female DC connector.
-
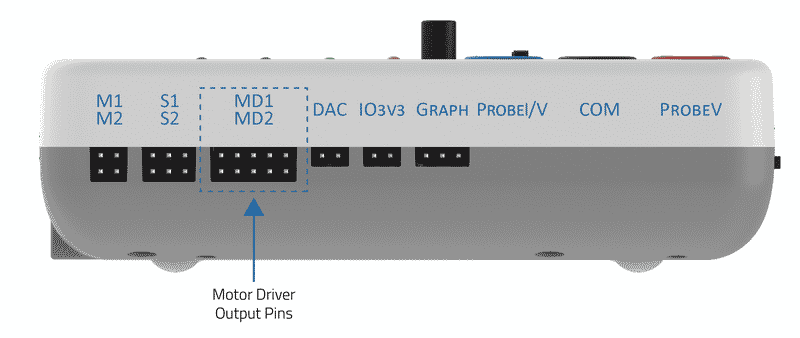
The female end of jumper cables is connected to evive motor M1 slot as shown in the figure.
-
Dip the water pump in the water reservoir.
-
Finally, a 12V,2A power adapter powers the evive.

Enabling Wi-Fi connection
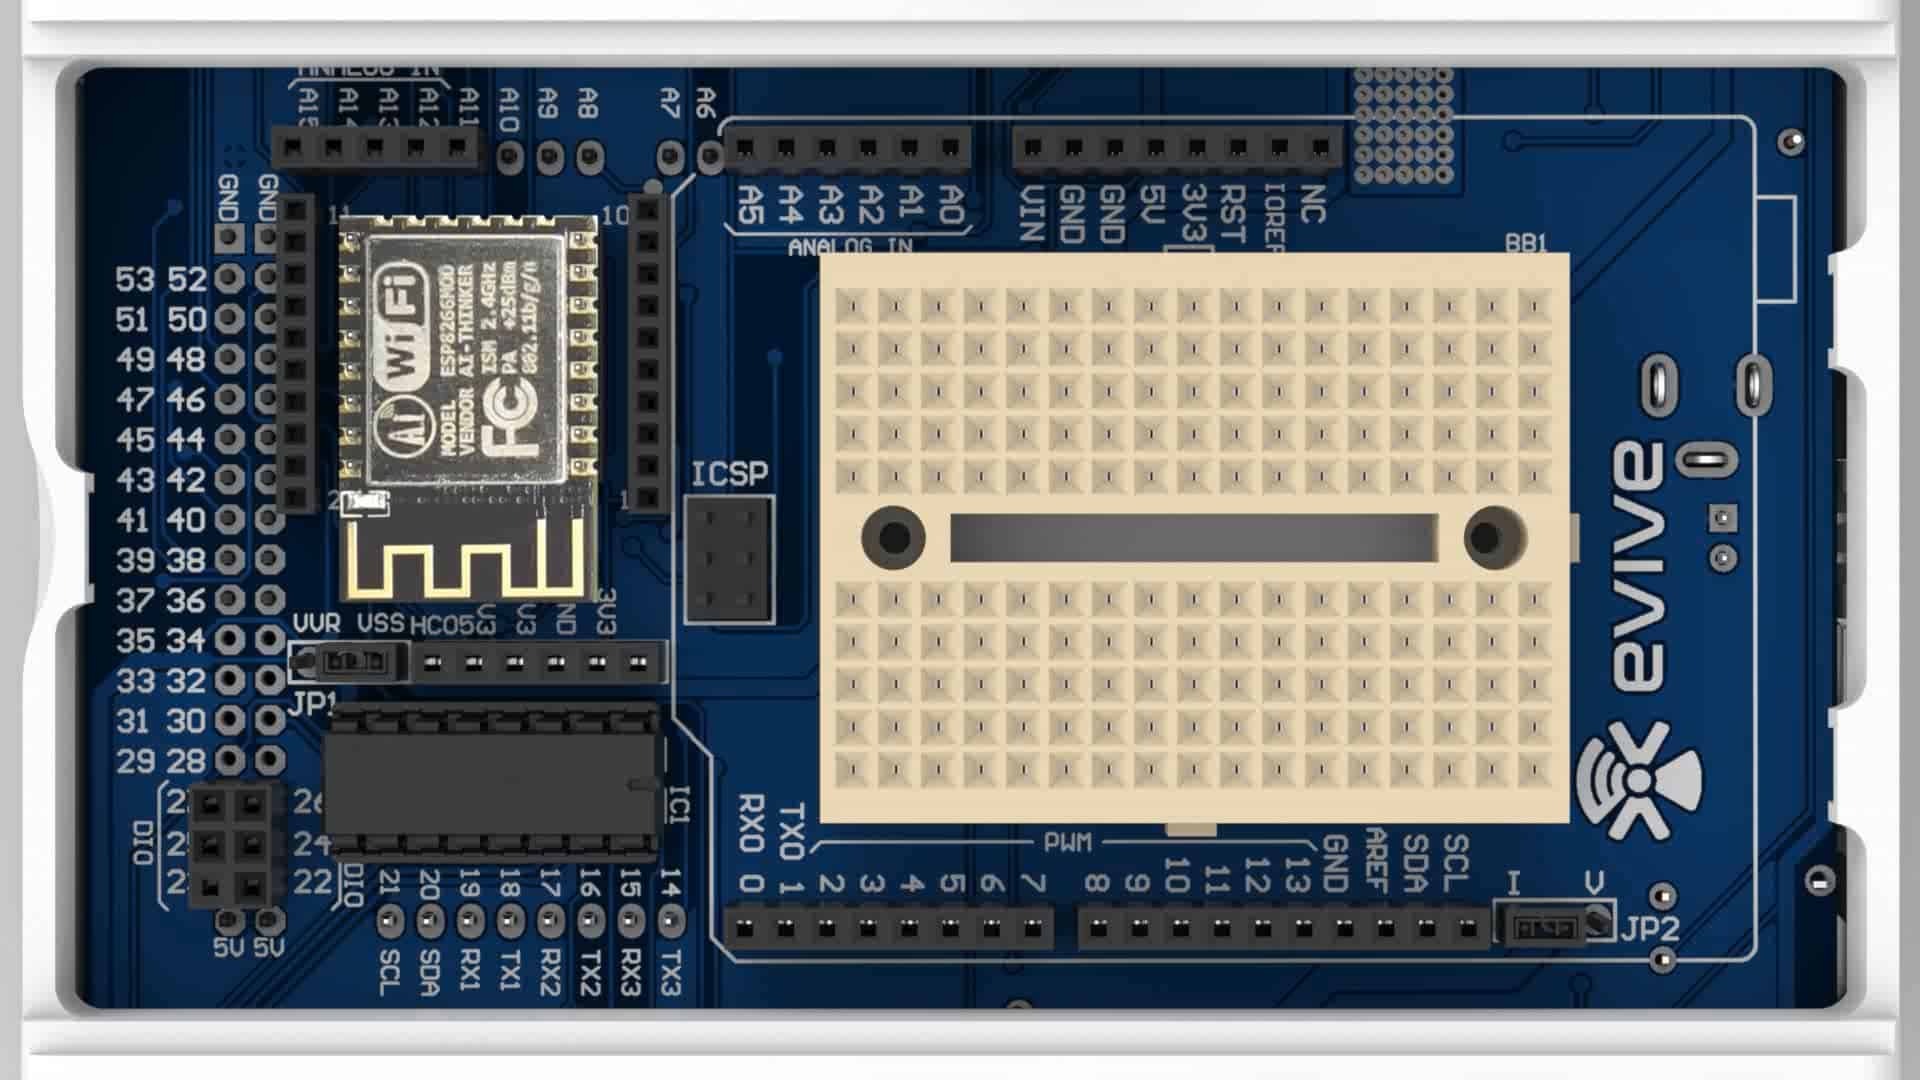
To connect evive with the internet we will use the ESP8266 module.

Connect ESP8266 Module to its header on evive:
Logic
There are a lot of things we are doing in this project so we have divided it into smaller parts:
- Connecting evive to Wi-Fi.
- Measuring sensors data:
- Temperature
- Humidity
- Soil Moisture
- Brightness
- Displaying sensor data on TFT.
- Sending Sensor data on ThingSpeak
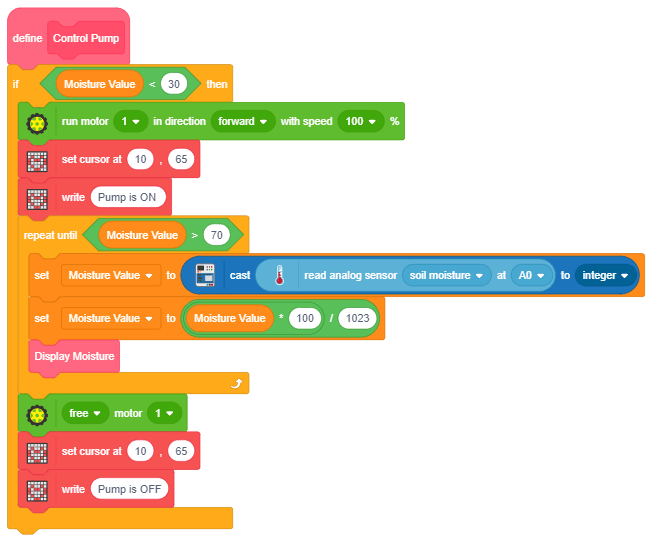
- Controlling the pump according to the moisture level:
- If the moisture level is less than 30, we will start the pump.
- The moisture will gradually increase when the pump is ON.
- When the moisture level increases to 70, we will stop the pump.
ThingSpeak
ThingSpeak is a free to use website to store data on the cloud, which you can access anywhere from the world. We will make a channel on ThingSpeak to store our data onto the cloud:
- Create a ThingSpeak account.
- Create a new channel:

- You can store up to 8 fields on 1 channel. We will store 4 parameters:
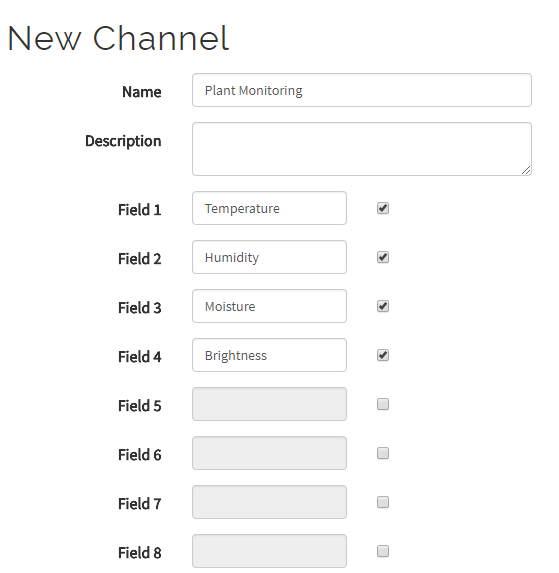
- When a new channel is created, you can see four graphs for each parameter:

- Get the Channel ID of your Channel (To be used while connecting to the channel):

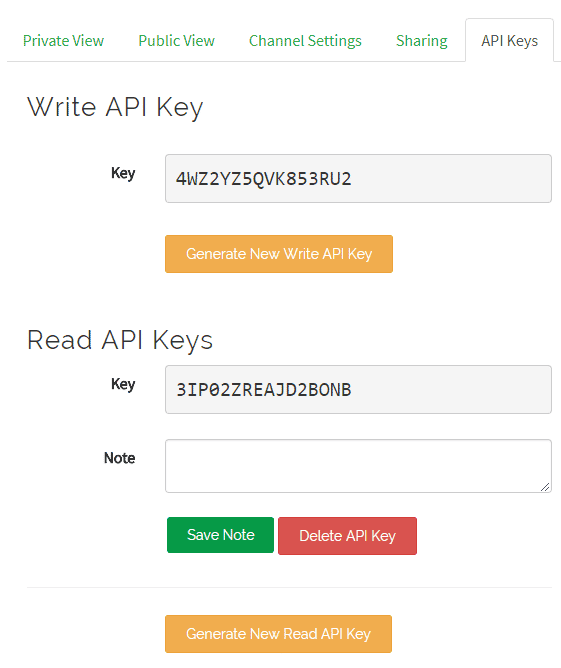
- Get the Read and Write API from API tab:
PictoBlox Code
Follow the steps:
- Open PictoBlox, select the board as evive.
- Connect your COM port to evive.
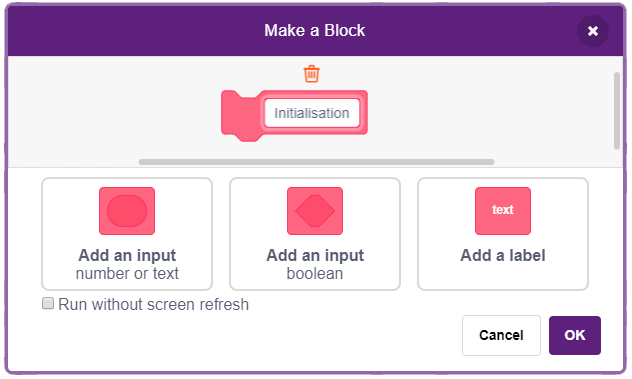
- Make five blocks:
- Display Temperature
- Display Humidity
- Display Moisture
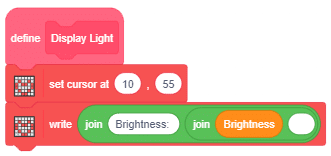
- Display Ligh
- Control Pump
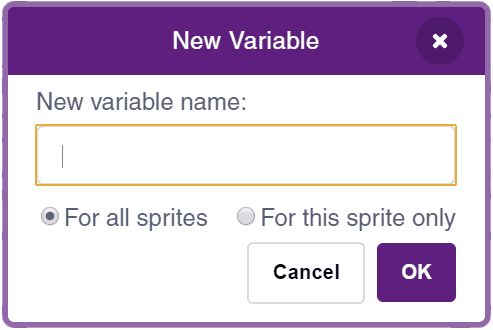
- Make four variables to store the values of the parameters:
- Temperature
- Humidity
- Soil Moisture
- Brightness
- Create the main script when evive starts up block:
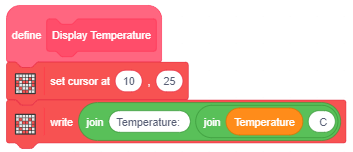
- Define the Display Temperature block:
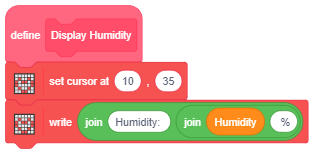
- Define the Display Humidity block:
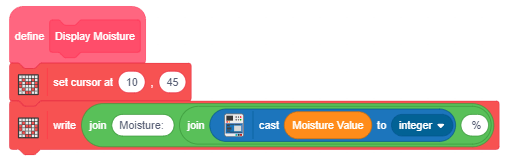
- Define the Display Moisture block:
- Define the Display Light block:
- Define the Control Pump block:
- Upload the code to evive.