
Introduction
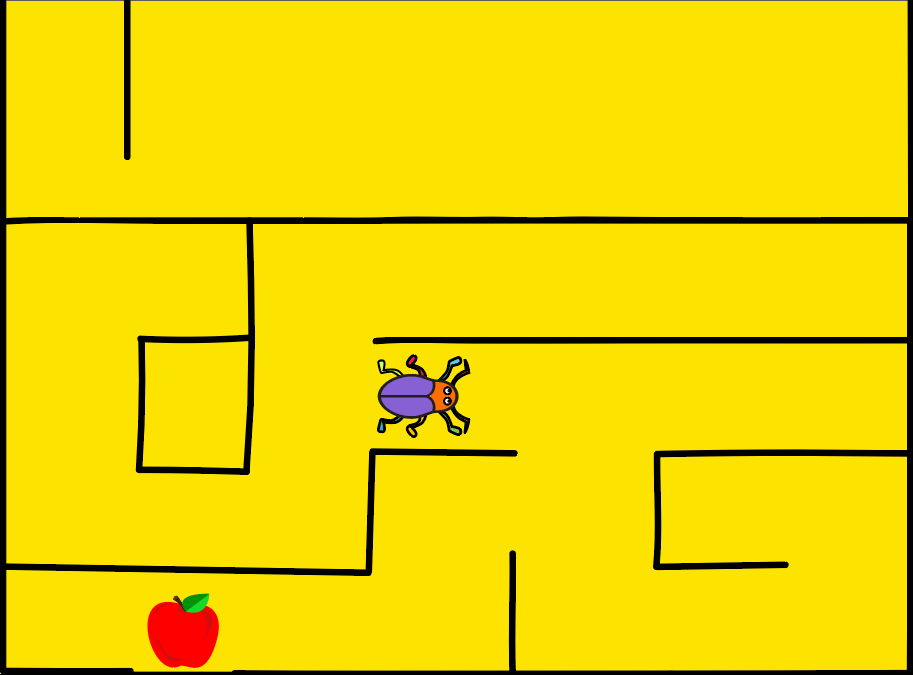
The time has come to do something super exciting! We are going to create an interesting game in PictoBlox! The aim of the game to help the beetle reach the apple at the end of the maze without touching the boundaries.
We are going to use evive’s navigation key to control the beetle.
Let’s begin!
Bringing in the Beetle
PictoBlox has an inbuilt library from where you can choose any sprite you want. Follow the steps below to bring in the beetle:
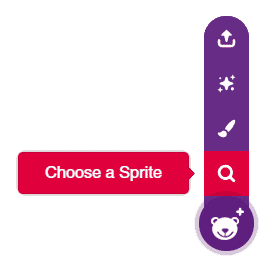
- Right below the stage, you will see a purple button with a bear on it. Take the cursor over it and select Choose a Sprite; the sprite library will open.
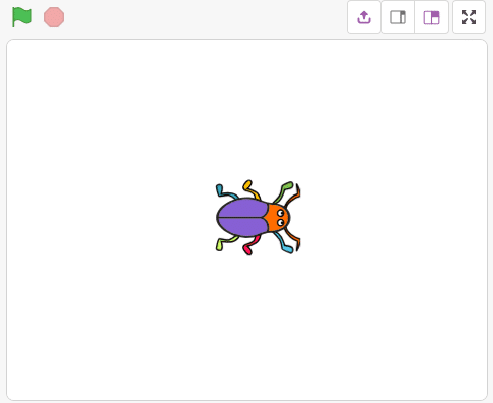
- Select the beetle sprite from the library.
Now, there are two sprites: beetle and Tobi. Right click on the icon for Tobi (below the stage) and click on the delete option.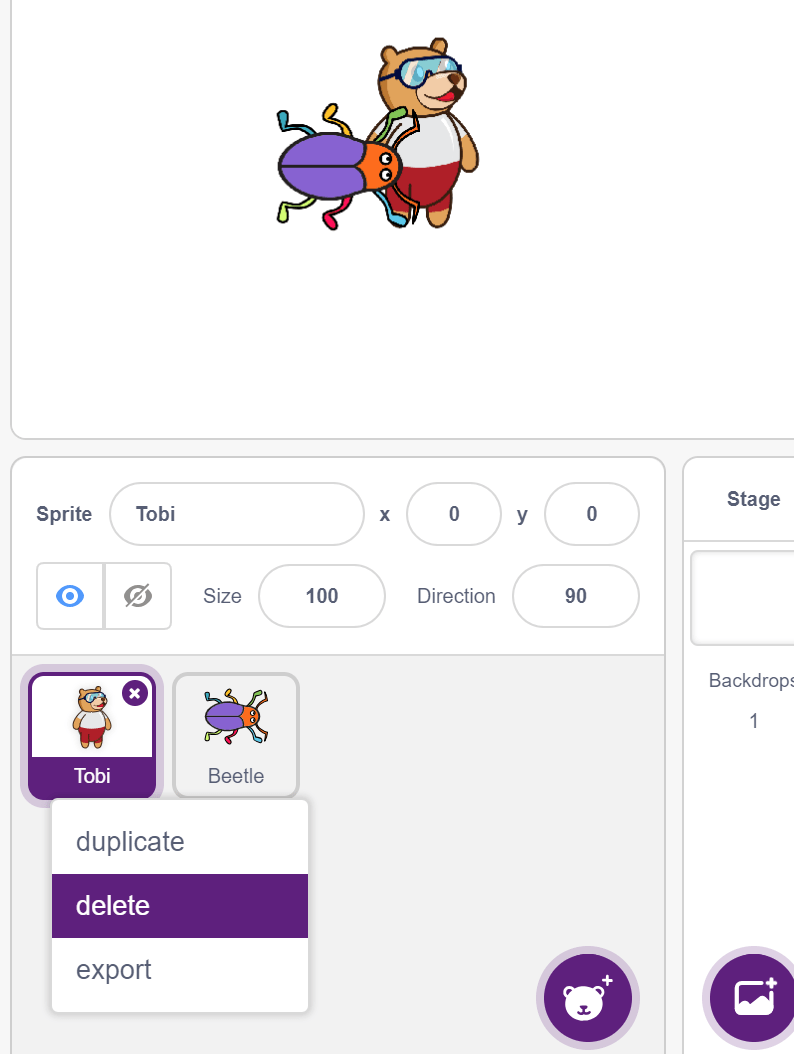
Giving the Beetle Its Moves
Let’s write the script for the beetle. Since we’re controlling it using evive’s navigation key, the beetle must move in the direction we push the key. Let’s begin!
- Connect evive to your computer and open PictoBlox. Then, select evive as your board from the Board menu in the menu bar and select the appropriate port from the Connect menu. In doing so, some palettes specific to evive will appear in the block palette.
- To make the beetle point in a direction, we will use the point in direction () block from the Motion palette. Drag and drop it in the scripting area and write 0 in the space. 0 corresponds to the forward direction (w.r.t. the end of the maze).
- To move the beetle, drag and drop move () steps below the point in direction(0) block. Now, click on these blocks; the beetle will move 10 steps forward.
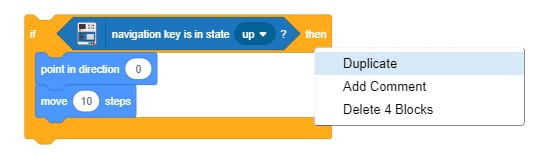
- From the evive palette, drag and drop the navigation key is in state () ? block and select up from the drop-down.
- To make the beetle move forward only when we press the navigation key, we will use the if block from the Control palette.
- Place the navigation key is in state () ? block inside the space in the if block. Place the point in direction () and move () steps blocks inside the C shape.
- The steps for writing the script for the down, right, and left directions are similar to those for right. So, instead of dragging and dropping each block, just duplicate the script as shown by right-clicking on it and make changes in the state in the navigation key is in state () ? and point in direction () blocks as given below:
- For ‘down’, set the direction as 180.
- For ‘right’, set the direction as 90.
- For ‘left’, set the direction as -90.
- Now stack all the if blocks together.
- To make our device continuously check and execute these instructions, drag and drop the forever block from the Control palette on the script we’ve written so far.
- Finally, go to the Events palette and select the when flag clicked block; place it above the forever block. The script is ready!

- To test the script, upload the firmware to evive using the Upload Firmware button and click on the green flag. The beetle should move as you press the navigation key.

Setting Up the Stage
PictoBlox has an inbuilt library from where you choose any backdrop you want. Follow the steps below to add the maze backdrop:
- Click on the purple colored icon which says Choose a Backdrop.
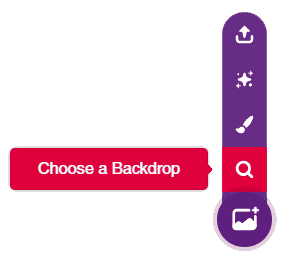
- Select the maze backdrop from the library.

Sensing the environment
Now, it’s time to write the script for safely taking the beetle to the end of the maze. Follow the steps below to write the script:
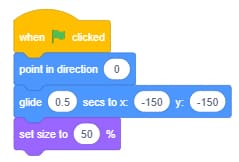
- Go to the Events palette and drag and drop when flag clicked block in the scripting area.
- From Motion palette, drag and drop the point in direction () block below the when flag clicked block.
- Then, drag and drop the glide () secs to x: () y: () block and set secs as 0.5, x as -150 and y as -150. The x and y values are the coordinates of the beetle’s initial position.
- Drag and drop the set size to () % block from the Looks palette to adjust the beetle’s size.
- Whatever we write next must execute continuously because we want to keep track of whether the beetle touches the boundaries or not. So, drag and drop a forever block.
- Drag and drop an if block inside the forever block and the touching color () ? block from the Sensing palette inside the space of the if block. This block will help us check if the beetle touches the boundaries. Select the color of the boundaries from the drop-down.
- Whenever the beetle touches any boundary it should return to its initial position and if it safely reaches the end, i.e. touches the color red, the game should stop. For that, we will use the stop () block.
Below is the complete script.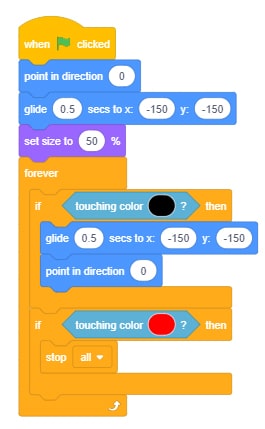
Enjoy the game!
Conclusion
In this chapter, you made your very first game in PictoBlox! In the coming chapter, we’re going to make another interesting game which will be a little challenging than this one and double the fun!


