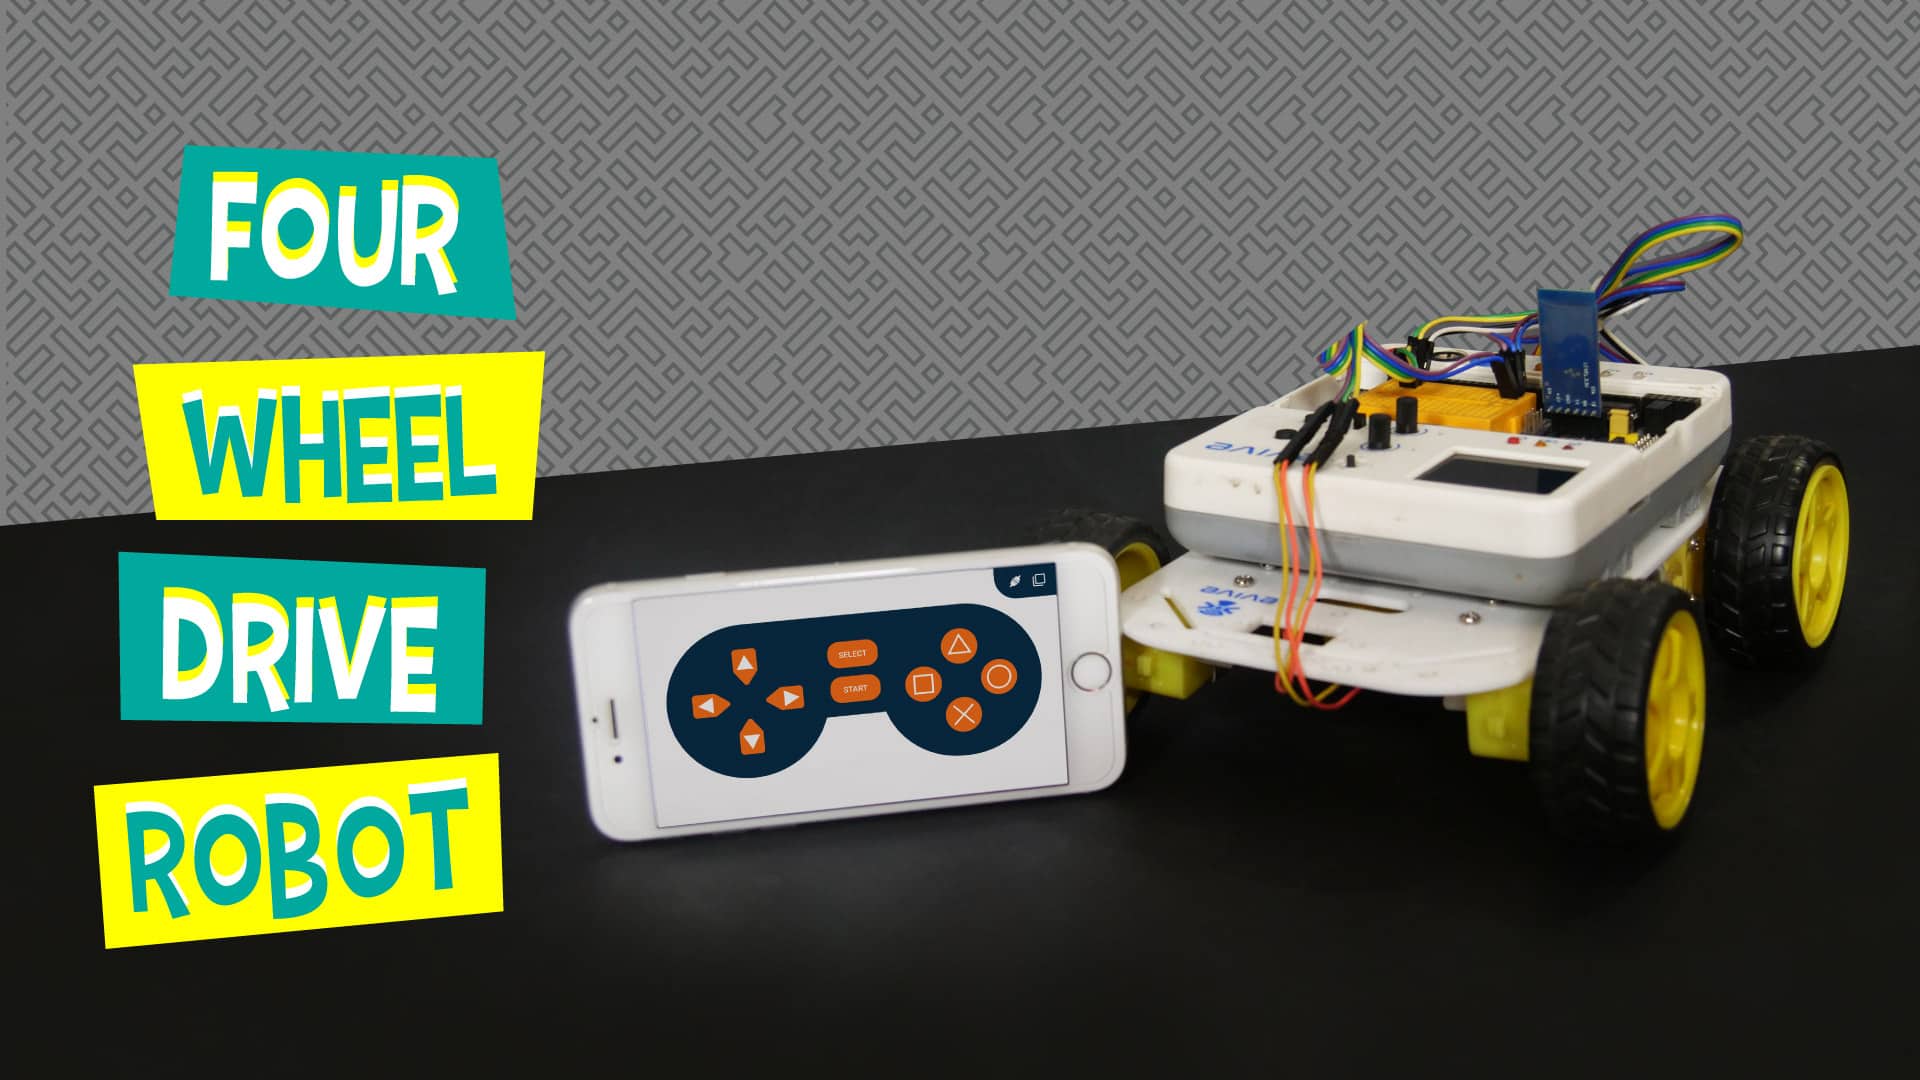

Introduction
‘Tis time for some robo fun! In this project, we’ll show you how to make your very own DIY 4-wheel drive mobile robot in easy steps! All the components required to make this mobile robot are available in the evive Starter Kit. And mind you, this 4-wheel drive mobile robot ain’t no ordinary robot; it can be controlled wirelessly with a Smartphone via a super special project interaction and Bluetooth controller app, Dabble! You can download it from HERE.
Ready, set, zoom!
Making the 4-Wheel Drive Robot Base
We will start by making the legs of our Mobile Controlled 4-wheel drive robot:
Making the Legs
- We are going to use B.O dual shaft DC motor to give legs and an acrylic base plate to give torso to our robot.
- Take a motor clamp and dual-shaft motor attach the clamps to the motor by using M3 bolts of 25mm length and M3 nuts.
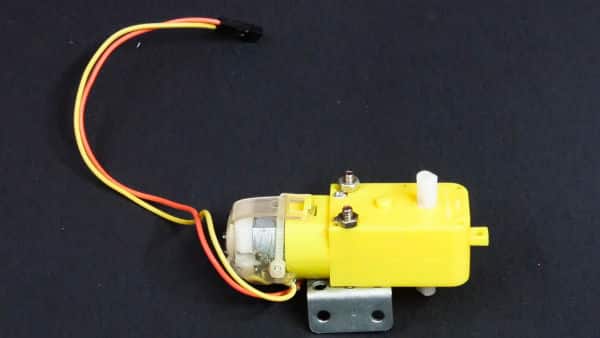
 Make sure to screw the motors to the middle hole given on the motor clamp.
 - Complete the other three legs too.
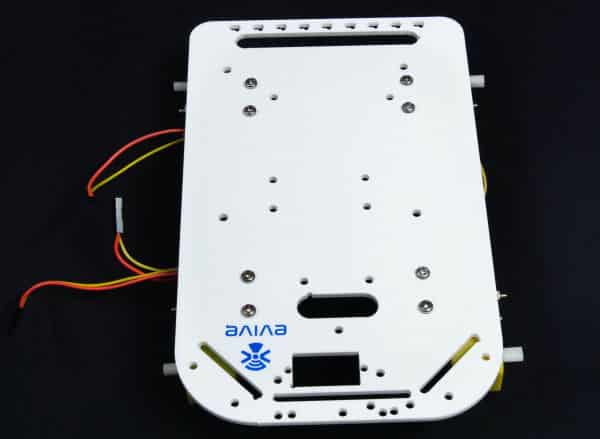
- Now, we need to attach the legs to the torso. Take the acrylic base plate or chassis and mount the motors onto the chassis with the help of a clamp attached to the motor using M3 bolts of 8mm length. Use 1 and 3rd hole on the clamp to fix the clamp on to chassis.
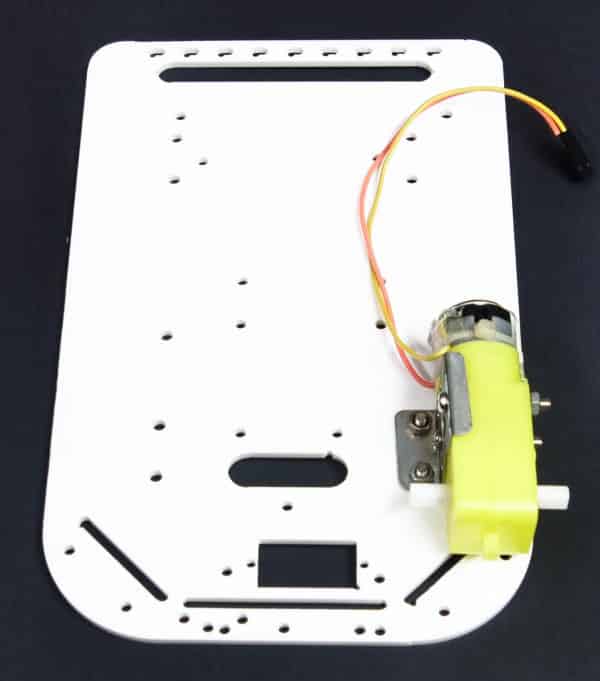 Make sure to fasten the clamps to the side of the chassis which does not have evive’s logo. Also, the wires of the DC motors are facing inside.
 - Repeat the above step for the other three legs too.
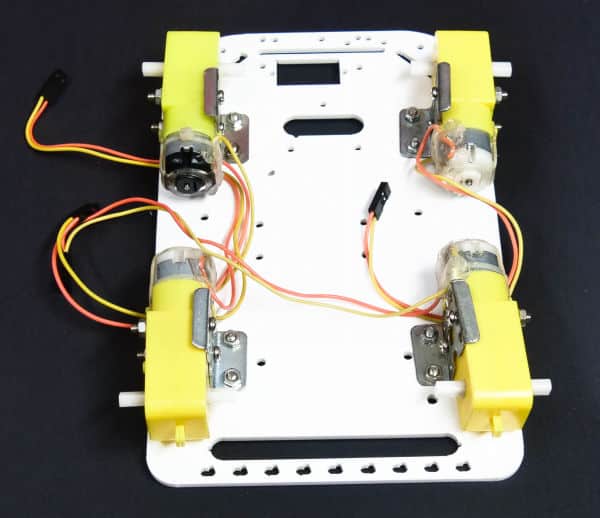
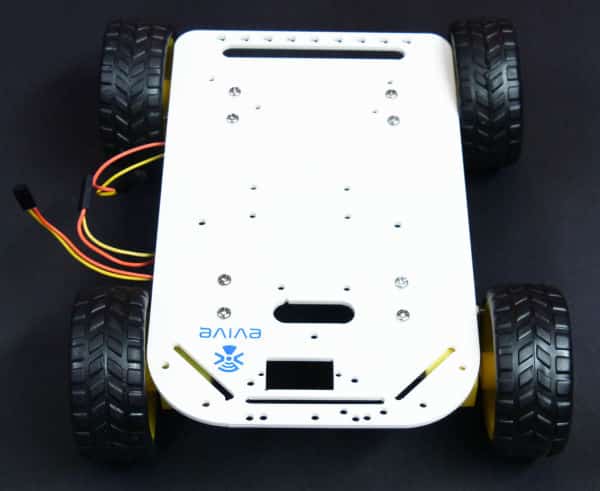
- Now, to complete the leg assembly, let’s attach the feet to the legs, i.e the wheels to the DC motors. Since the motor shaft has a specific shape, match it with the wheel’s hole to fit it easily.

Completing the Torso Assembly
We will be using an external battery to power up our robot, thus we will also be needing housing for the same.
Take a 3D-printed battery holder and attach it between the motors below the chassis using M3 bolts of 8mm length and M3 nuts.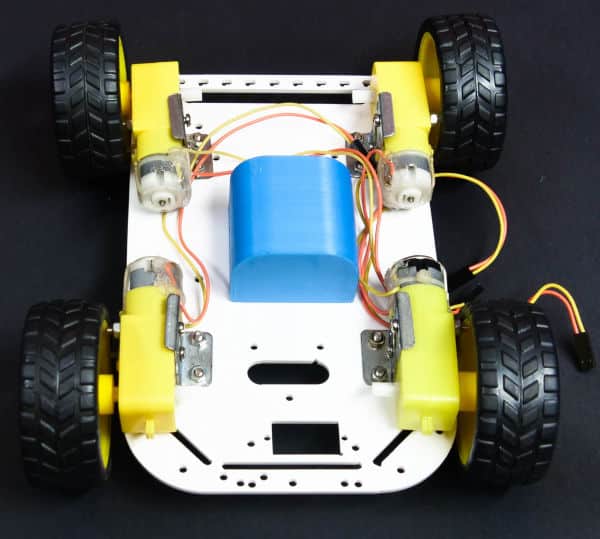
Bringing in the brain: evive
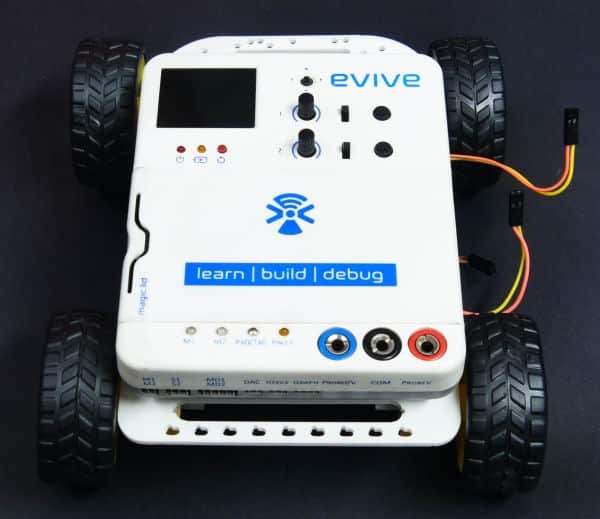
Now that the lower body of the four-wheel drive robot is ready! It’s time to mount the brain onto the robot. The evive- Arduino embedded platform is the brain in our case. if you are just getting started with evive, visit here.
- Place evive on to the chassis on the side where evive’s logo is printed and match the mounting holes of evive to the mounting holes on chassis. And make sure the evive’s screen faces the front of the robot.
- Fasten evive using 12 mm M3 bolt and nuts on the chassis.
- With this, our robot is almost ready. We need to power up our robot.
- Thus, fit the battery inside the battery holder. To make the connections for the robot have a look at the next step.
Making the Connection of the 4-Wheel Drive Robot
Let’s first connect the motors of the four-wheel drive with evive
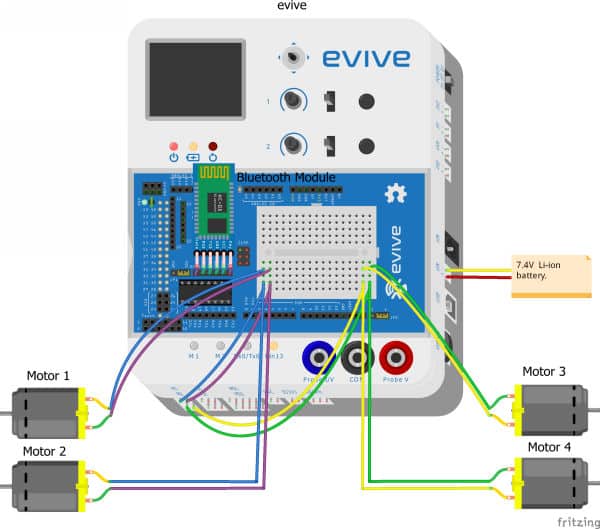
- Take two sets of 2 male-to-female jumper cables and connect them to evive’s Motor Channel M1 and M2.
- Next, connect them to the breadboard.
- Take four sets of 2 male-to-male jumper cables and extend the motor wires.
- Next, connect the motors on the left side in parallel with the motor channel M1 on the breadboard by inserting their males ends in the same columns like that of the M1 channel.
- Similarly, connect the motors on the right side in parallel with the motor channel M2.
Now, let’s connect the battery
- Connect the battery to the VIN terminal on evive.
- And switch the jumper from VVR to VVS. This will change the operating voltage from the internal battery to the external battery of evive.
Finally, connect the Bluetooth Module
- Connect HC-05 Bluetooth Module to the headers provided on evive.

Debugging the Mobile Robot
Now to make sure all the motors are connected perfectly and rotate in the same direction, we will use one of the evive’s plug and play features. Follow the steps given below for the same.
- Switch ON evive.
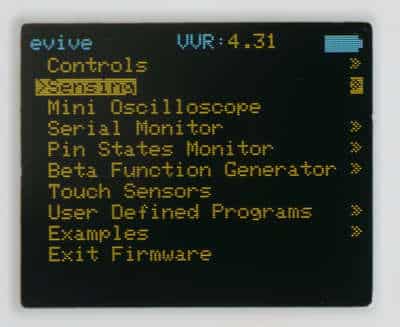
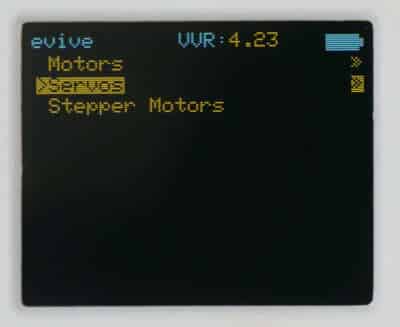
- From the menu select Controls.
- Then select Motors.
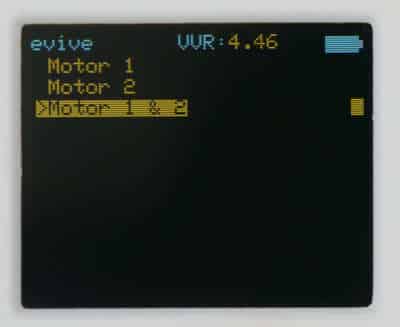
- As we are working on both the channels i.e. M1 and M2, select Motors 1 and 2.
- Slide the slide switch 1 and slide switch 2 in the upward direction to switch ON on the motor.
- Rotate both Potentiometer 1 and Potentiometer 2 to set the PWM.
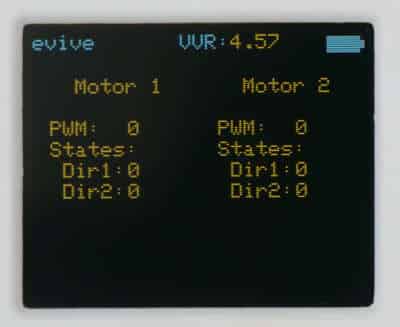
All the motors should rotate in one direction. If it is not so then simply interchange the terminals of that motor.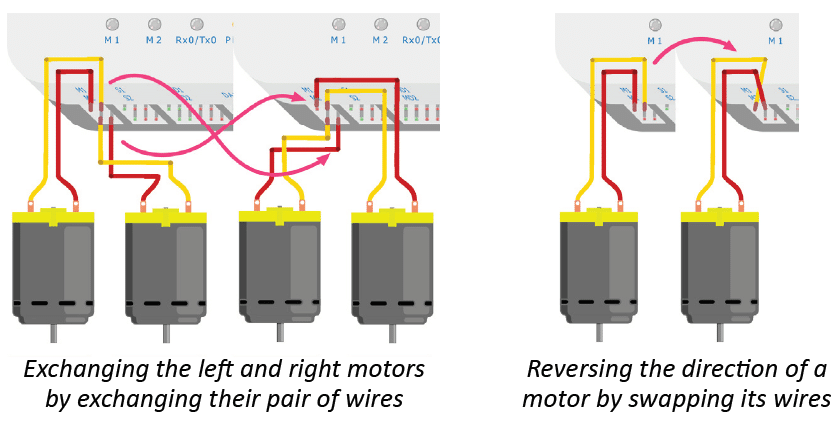
Completing the 4-Wheel Drive
Let’s get our 4-wheel started.
- Switch on the robot by sliding the power switch up to EXT as we are using an external battery.
- Now for controlling the robot via bluetooth we would be using a pre-loaded example inside evive. You can even write the code in PictoBlox if you want.
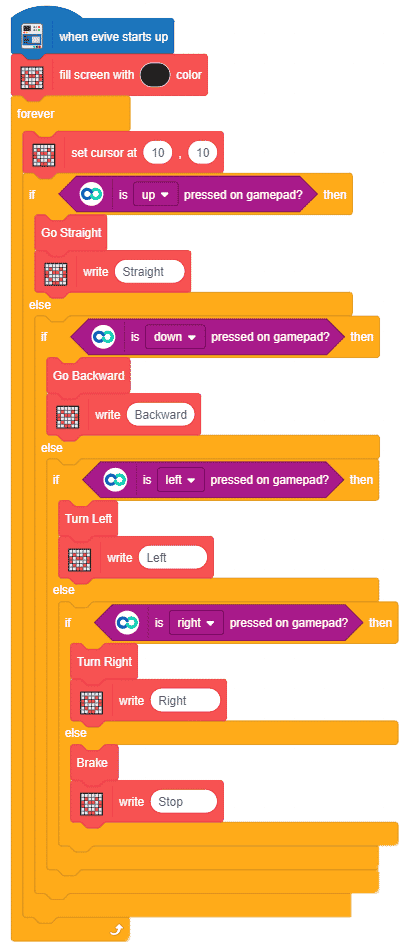
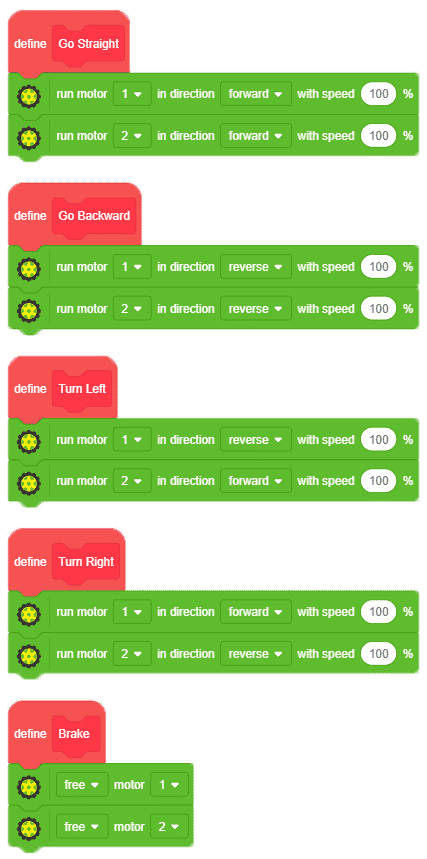
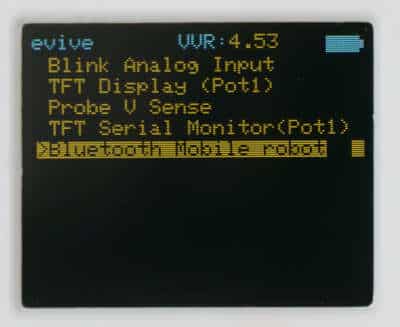
- Open evive’s menu and select Examples from the menu.

- Then select Bluetooth Mobile Robot.
- Now open the Dabble app on your smartphone available for iOS and Android,
- From that select the gamepad module.

- Control your robot using the arrow keys of the Gamepad.
Conclusion
With this, your 4-wheel drive mobile robot is ready. Enjoy!


 0-1 screenshot")


