
Introduction
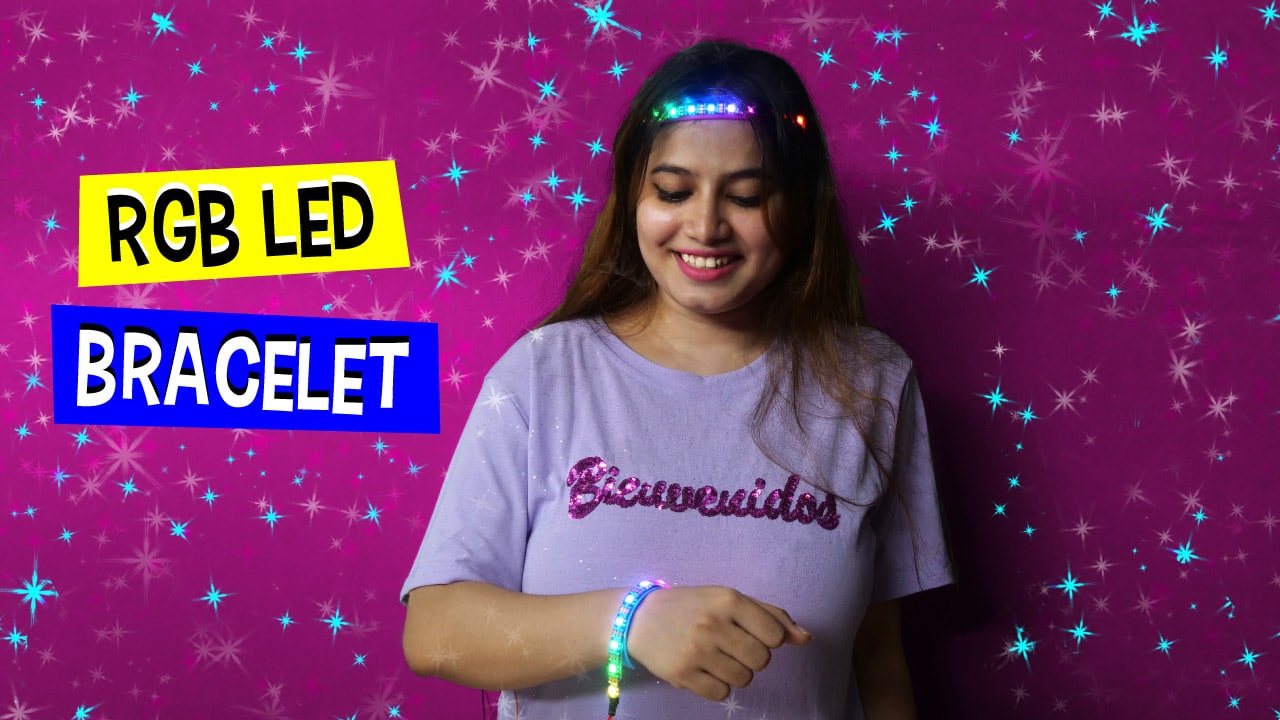
Can electronics and fashion mix? With this DIY bracelet made using RGB LED strip they sure can! Learn how to make your own cool DIY RGB LED bracelet and steal the show wherever you go. The best part? It’s super easy to make. All the components for making this DIY bracelet, such as an RGB LED strip, cables, etc are available in the evive Starter Kit. Programming it to make it funky also becomes a piece of cake with PictoBlox – our graphical programming software based on Scratch blocks. You can download it from HERE.
Lighting up the show in 3, 2, 1… NOW!
Making of the DIY Bracelet
As, we are going to make a cool RGB LED easy DIY Bracelet, with different RGB effects, we first need a bracelet that will hold our LED RGB strip. Thus, we’ll be using a material that can easily be folded into a band like a chart paper or cardstock paper to make the bracelet.
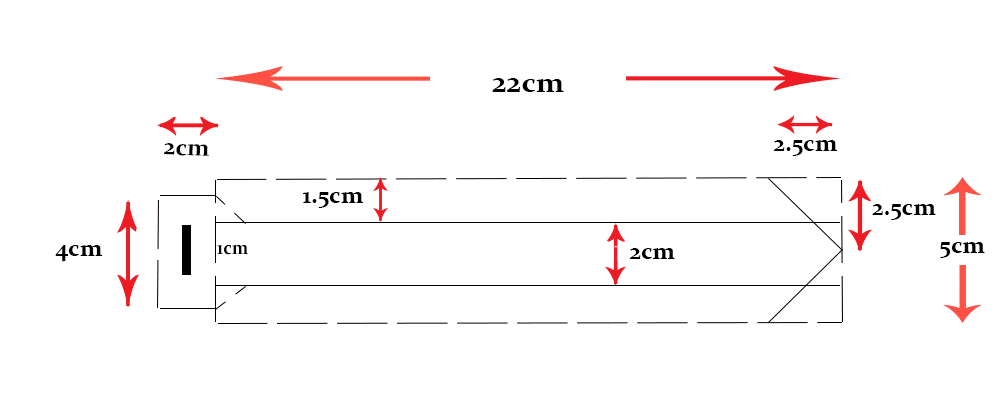
- Take a chart paper of the size approx 30cm * 10cm or of the size of your wrist.
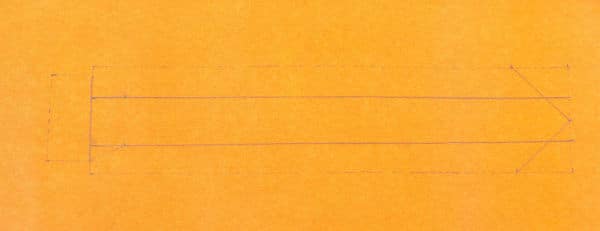
- To make the bracelet template, we are first going to mark it on the chart paper with the help of pencil and ruler as shown in the figure below:
 You can simply fold the paper and make it into a bracelet too. But following the below steps to create your own bracelet will make your LED bracelet sturdy.
 - You may observe that we are going to make two types of markings on the chart paper:
- Dashed line.
- Solid line.
- We are going to cut the chart paper along the dashed lines.
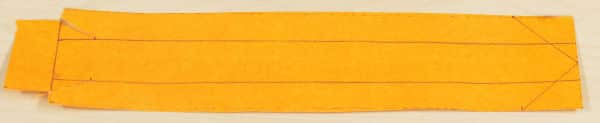
- And use the solid lines to fold along to make the bracelet template.
- Once folded, glue the flaps together using a glue stick.


With this, our RGB LED bracelet or LED wristband is almost ready. All we need to do is to add a locking mechanism to our bracelet, to prevent it from falling off.
DIY-ing the Locking Mechanism of our DIY Bracelet
Now we need to close two ends of the bracelet and give it some interlocking fit so that the wearing and removing of our LED Homemade bracelet is easy.
- Create a slit on one side of approx 3cm wide near the wide end of the bracelet.
- Pass the pointy end of the bracelet through the slit. You will notice a pocket for locking the bracelet and the flap on the slit side is created. Move the pointy end of the wristband into this pocket.
- Give it a nice check that whether it’s locking properly or not.
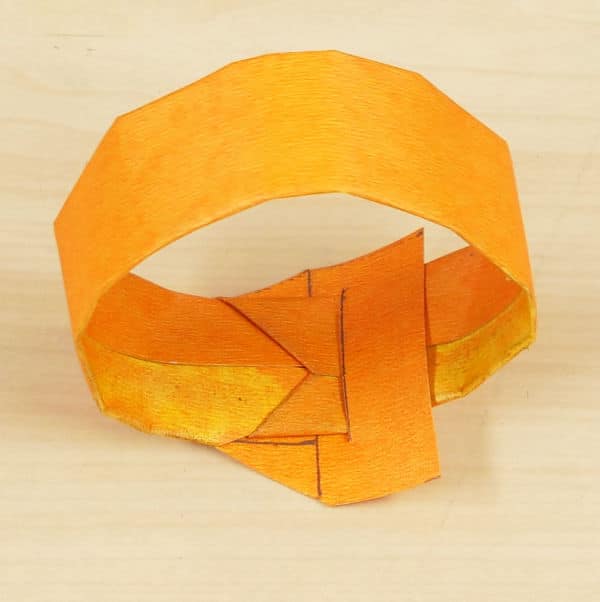
With this our DIY wristband is complete. Time to make it RGB LED wristband.
Making the Bracelet: RGB LED Bracelet
Now comes the fun part! Making our Bracelet glow using the RGB LED strip. The RGB LED strip is an array of any number of RGB LEDs which can be programmed and controlled using a microcontroller like evive, Arduino, ESP32, etc. As we need to add the RGB strip to our bracelet, we are going to use the RGB strip with 10 RGB LEDs.
To add the RGB LED strip onto the bracelet, peel the paper off the back of the RGB LED strip then paste it carefully in the middle of our bracelet.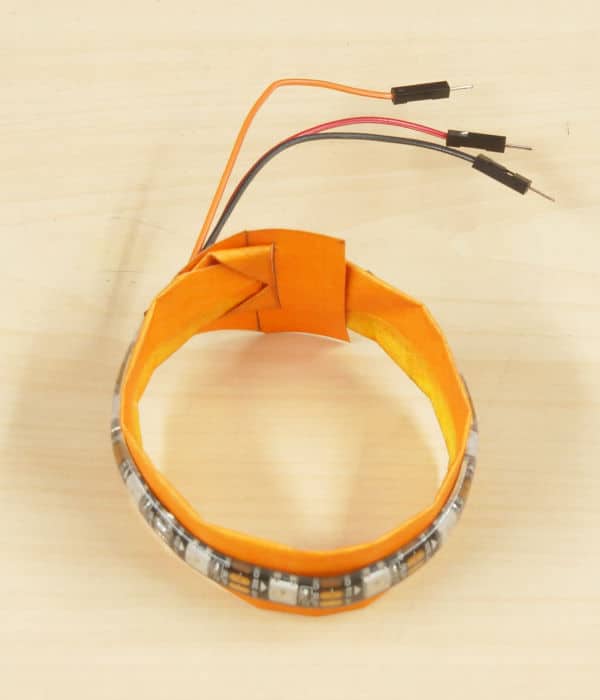
With this, the making of our RGB LED bracelet is complete. The next few steps include connecting it to evive and programming it using PictoBlox.
Connecting the RGB LED Bracelet to evive
Before connecting you may notice that the header wires from the RGB LED strip are a bit short. While being in a party, you may want to put your hands up and do some cool moves. Thus we need to extend the Wires of the RGB LED Strip so that your hands are free to move though being connected.
- Take 6 Male-Female jumper cables and make the three long jumper cables. Connect their female ends to the header wires of the RGB LED strip.
 Make sure you use the same color as the color of the header wires to prevent further confusion.
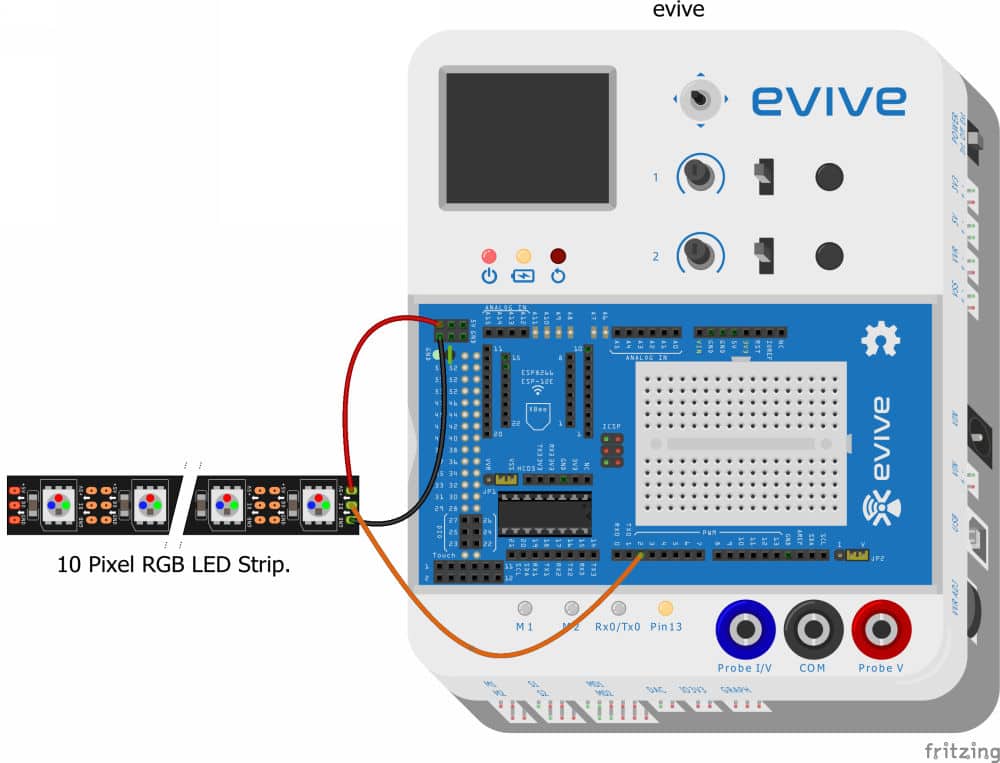
 - Connect the RGB LED strip to evive as given below:
- VCC to +5v of evive
- GND to GND of evive
- Signal pin to Digital Pin 2 of evive

Writing the PictoBlox Code
To make the project simpler, we will program our RGB LED strip using PictoBlox.
- The code will start executing as soon as evive starts up and will run a forever cycle to make the LED glow continuously.
- Before running the actual code, we need to first initialize the RGB strip first. Write 10 in the white space given as we are working with the RGB strip of 10 RGB LEDs.
- Finally, the below block is used to add effects to your RGB Strip, where the first drop-down is to choose the effect, the second is to choose the number of the RGB strip and the third drop-down is to set the delay.

Upload the following to code to evive.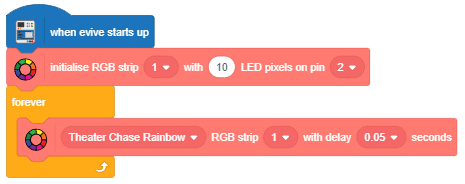
Changing the Color Patterns of the RGB LED Bracelet
You can write a code where you can change the pattern of your RGB strip onto the bracelet by pushing the tactile switch of evive upwards.
Only a few changes need to be done in the code.
After adding the hat block and initializing the RGB strip we will be checking whether the tactile switch is up or not using the if-else block. If the slide switch is pushed up we will print one pattern on the RGB LED strip and on pushing the switch back to its original position will change the pattern on the RGB LED strip.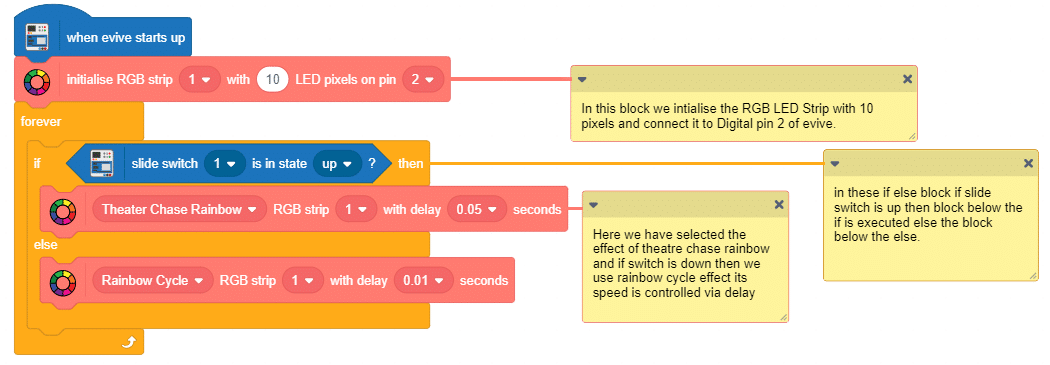

The 3D printed Wristband and Headband
To make the bracelet look even prettier try attaching the RGB LED strip to any of your readymades bracelets. If you don’t have a bracelet, you can even 3D print one for yourself.
Also, you can add the RGB LED strip to your Headband and make it glow!
Conclusion
With this, your DIY bracelet using an RGB LED strip is ready! Go out there and steal the show!