
Introduction
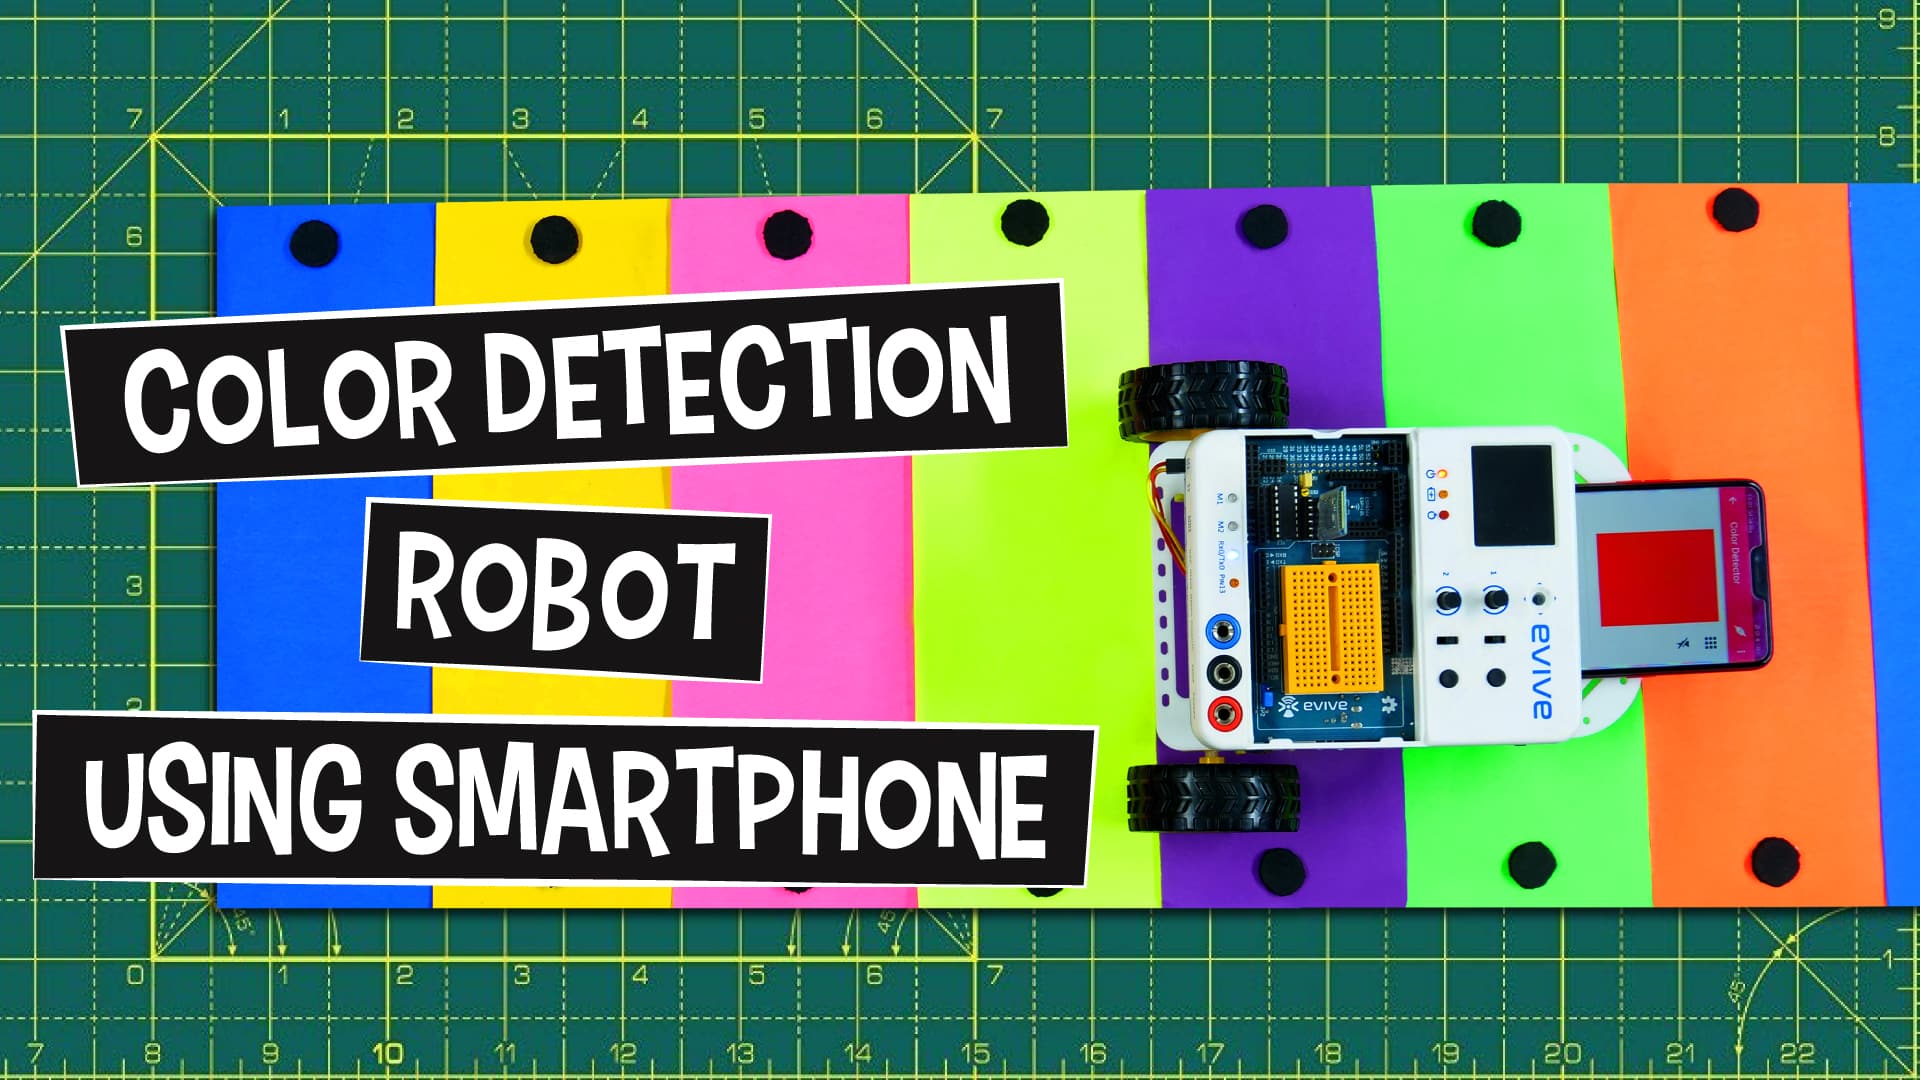
There are robots that can detect colors and there are those that can play music. But robots that detect colors AND play different sounds depending on different colors? Now that’s something really cool and fun! And that is exactly what we’re going to make today. You’ll need evive and some components from the evive Starter Kit to make the robot, PictoBlox, our Scratch 3.0-based programming interface to program it, and Dabble, our ‘Smarter-than-the-phone’ app, to control it, and lots of DIYing to have lots of fun!
Download PictoBlox from HERE.
Get Dabble on Google Play.
Beginning musical color detection in 3, 2, 1… now!
Making
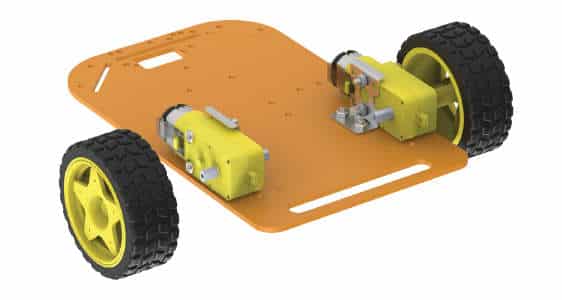
Let’s start by making the basic 2-Wheel Drive Robot:
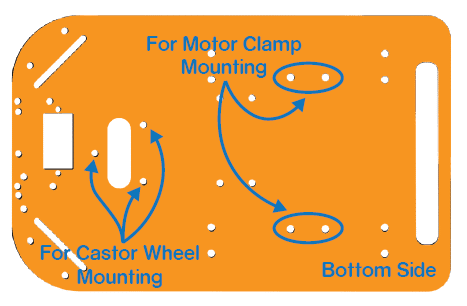
- Take a robot chassis or a base plate.
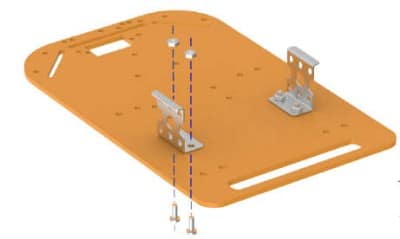
- Mount 2 motor brackets on it using M3 bolts and nuts.
- Fasten the DC motors to the motor bracket using M3 bolts and nuts.
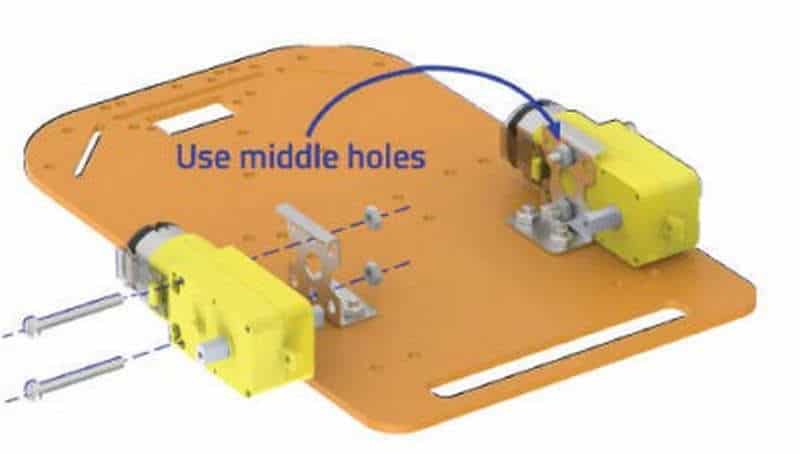
- Attach wheels on the motor shaft of each motor.
- For a robot to be stable, it needs to have three contact points with the surface. For that, we will use a caster wheel.
- Fasten the caster wheel to the robot chassis using M3 nuts and bolts.
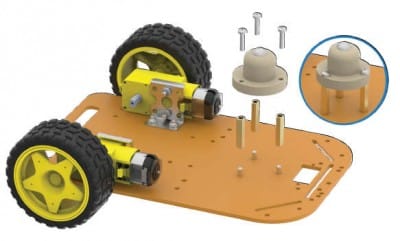
- Now, fasten 2 male-to-female standoffs on the top of the chassis using M3 bolts.
- The space between the evive and the robot chassis is to place your Smartphone.
- Once you are done with the assembly, make the connections as shown in the next step.
Now let’s make the color track/xylophone.
Take papers of different colors. Take one of them and glue to another. Once done, to make it look like a xylophone, glue small circles of black chart paper at ends of each color paper.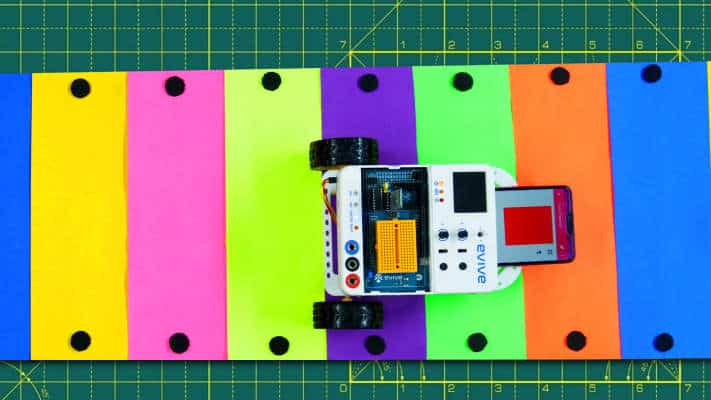
Connection
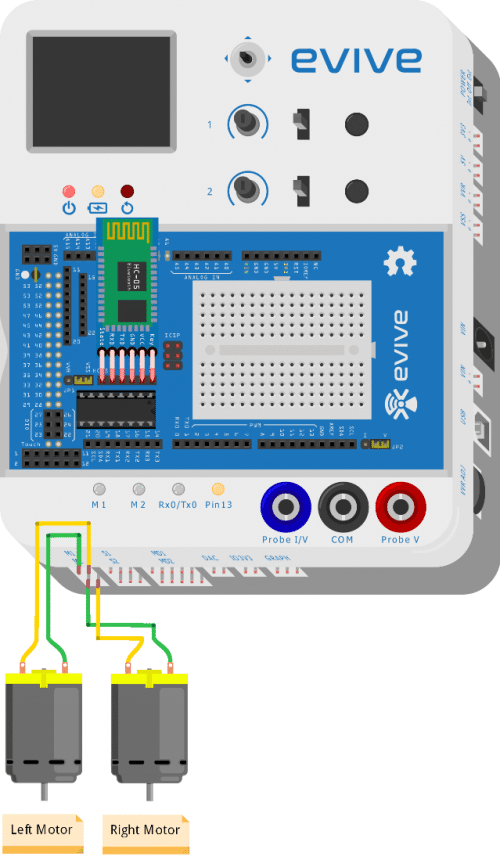
Make the connection as given:
- Connect the motor on the left to motor channel M1.
- Connect the motor on right to motor channel M2.
- Lastly, connect the HC-05 Bluetooth module to the evive.

Logic
- Open Dabble.
- Open the Camera module.
- Then, choose the Color Detector.
Now, turn on the robot and slide the slideswitch1 UP. This will make the robot move forward.
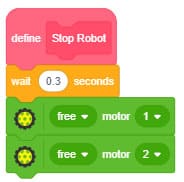
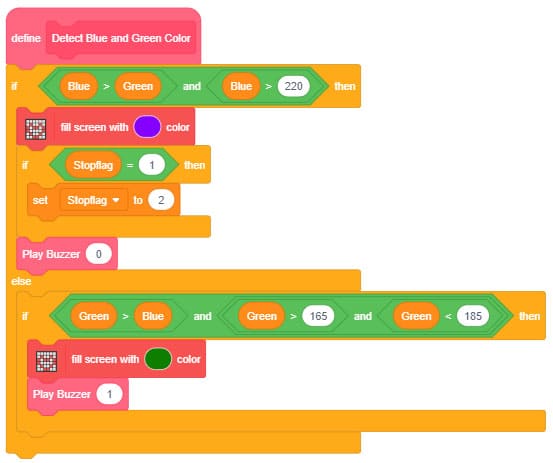
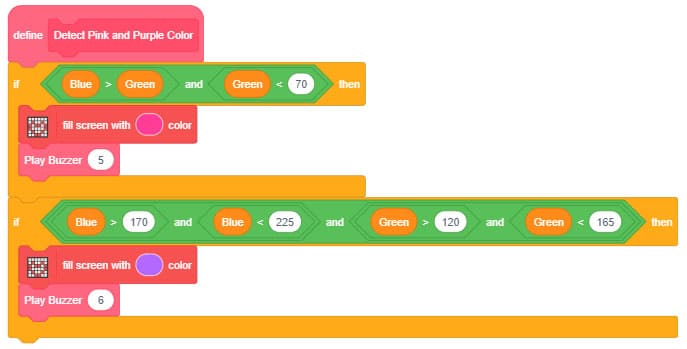
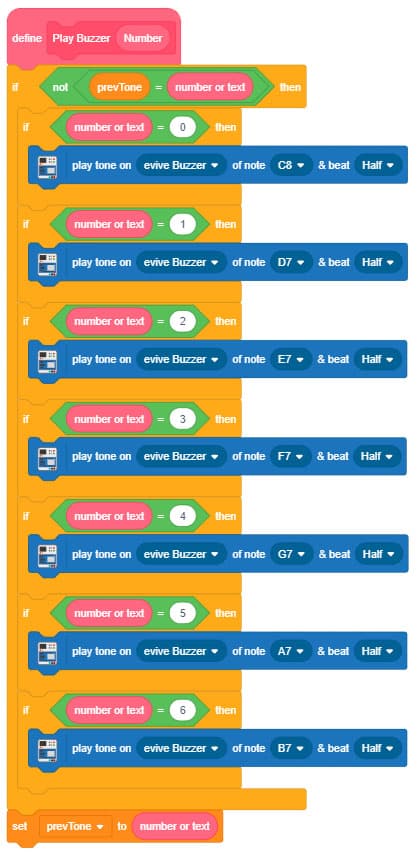
As robot moves, it will detect different color strips below it and will produce different notes depending upon the color it detects. The robot will stop moving forward when it detects the same color twice.
Code
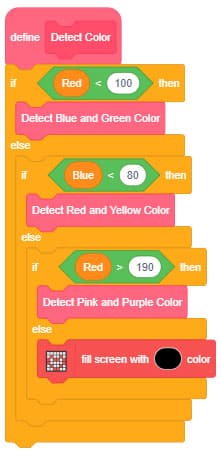
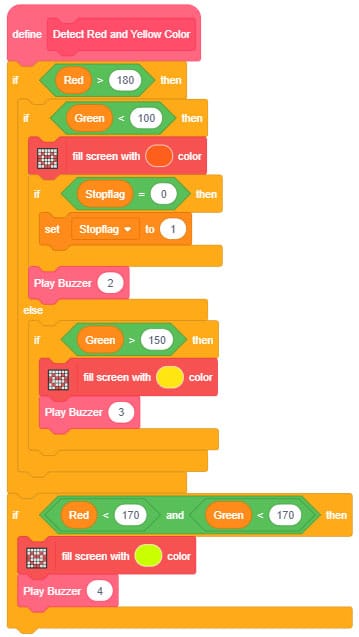
You need to make your robot move forward and stop when the color is detected. Write the following script for the same.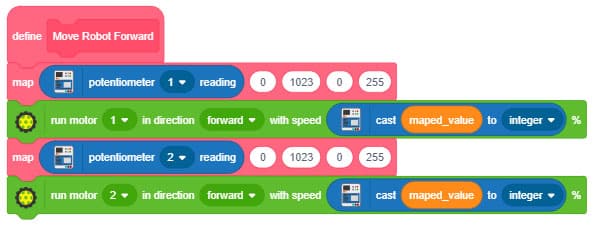
We need our Smartphone should detect the color and play the tune accordingly.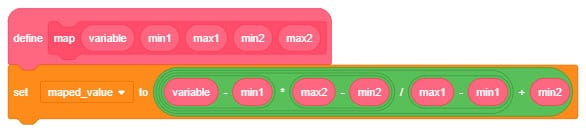
Finally, upload the main block to evive:

Conclusion
With this, your color detection robot is now ready to play colorful music for you!
P.S LAST FOUR DAYS REMAINING! Go check our awesome campaign on Indiegogo and take advantage of the never-like-before opportunity of completely transforming DIYing for you and your loved ones!


🏅⭐ 1-47 screenshot")


