

Introduction
This project is about making things easier – as far as sorting objects based on color is concerned! We’re going to make a DIY color sorter that can tell black from white using an IR sensor. All you need to make this project is evive, an IR sensor, some wheels, DC motors, servomotor, jumper cables, some colored papers, and lots of DIYing!
We’re going to program our color sorter in PictoBlox – a graphical programming software based on Scratch with advanced hardware interaction abilities. You can download PictoBlox from HERE.
Why are you still here? Get sortin’!
Making of the Conveyor Belt Support
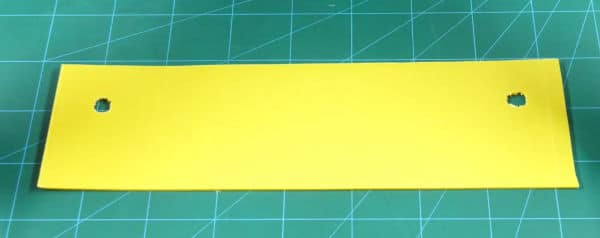
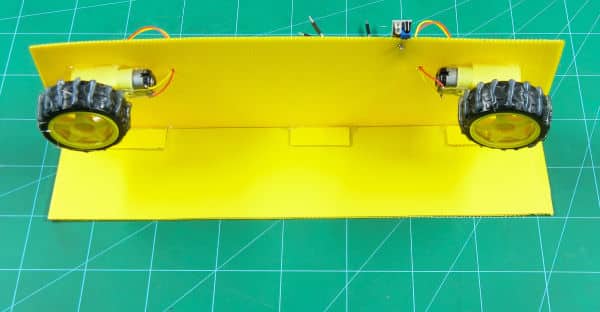
- The conveyor belt support will the pulley that will be our motors and wheels and some other components which we will discuss in the latter part of the project. Take a piece of cardboard whose length is almost the length of the conveyor belt, this will be the support plate of our color sorting machine.
- Now, we need to attach the pulley that will make the conveyor of the color sorter move. The ultimate duo of dual shaft DC motor and the wheel will be acting-pulley in our case.
- Pierce two holes at both the horizontal ends of the support plate. The hole should be of the size of the shaft of the DC Motor.
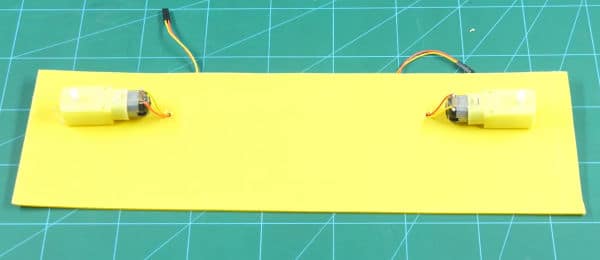
- Insert the DC motor into these holes and fix it using the hot glue.
 Make sure that the entire DC motor assembly is on front.
 - Fix the other DC Motor too.
- Make smaller holes next to the DC motor to pass the wires coming out of the DC motors through them.
- This was just the one partner of our duo. We need to add the other one too, but before that let’s first fix the support to the actual base.
Fixing the Support Plate
Now, take another piece of cardboard whose width is the same as that of our conveyer support system. This will help our Arduino based Color Sorting Machine stand on its feet.
Fix the Support plate onto the base plate using hot glue.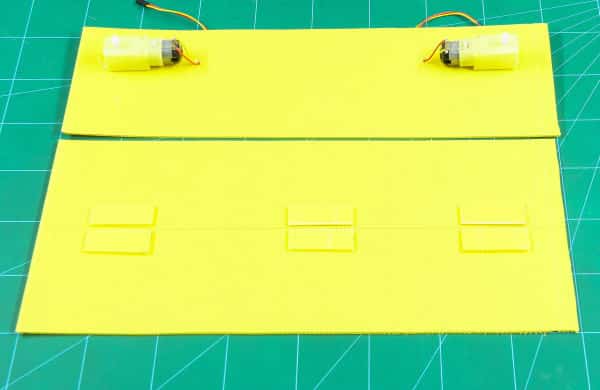
Bringing in the Other Partner
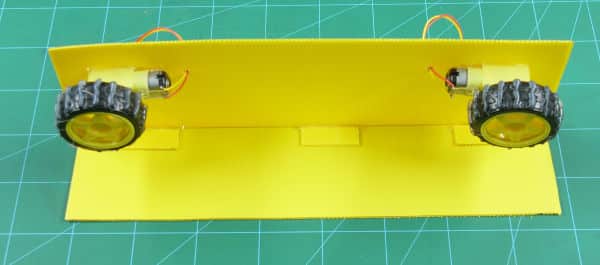
Before we add the other partner, we need to make it a bit rough so that it can have a grip of the conveyer belt.
- Make grips on both the wheels using a hot glue gun.
- Once he is trained well, attach them to their partners i.e the DC Motor shafts.
Adding the Complaint Box
In this project, we are going to sort only the two basic colors of life: black and white. Thus, we will simply use the IR sensor as it can do the needfuls.

Before we add the IR Sensor to the project, let’s first test it.
- Bring out evive, our brain, the Arduino embedded platform, or the all-in-one electronics prototyping lab.
- Attach the IR Sensor sensor to it by connecting: the VCC of the sensor to +5V of evive, GND of the sensor to the GND of evive and the Signal Pin to the Digital Pin 2 of evive.
- Once done, switch ON the evive. As we need to debug the IR Sensor, select Pin State Monitor from the firmware menu.
- Pin State Monitor helps to check the status of both analog and digital pin. If your sensor is working perfectly fine, the number corresponding to Pin 2 will change to 0 when you bring white sheet next to the sensor and 1 if it far away or it is a black paper.
If the sensor is not working properly, turn the potentiometer knob on the IR Sensor using a screwdriver until it is working.
- Put evive in aside, and take out the connections. Now, attach the IR Sensor to the support plate using a pair of M3 bolt and nut.
- Thus, it will check whether a white object is passed in front of the IR Sensor or the black object and notify(complain) the brain.
With this, the color detector(complaint box) is done.
Adding the Bouncer
The work of the color detector is done, the brain needs to take the actions i.e, collect the white objects in one box and the black in other. We want the black objects to complete the path of the conveyer belt and get collected at the end. And the white to come out of the line beforehand.
- As we need to keep the white ones out of the line, we need the bouncer to do so. Thus, take a micro servo and attach servo head to it using a self-threading screw.
- Now, on the top of the servo horn attach an ice cream stick as you need to have long hands to keep the naughty ones out of the line.
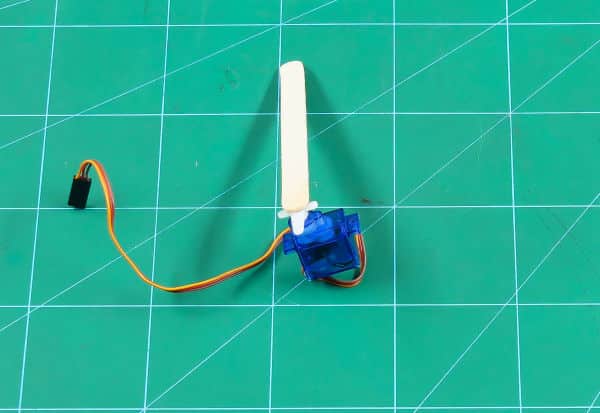
- Now, ice cream won’t go with our fancy color sorter machine, thus, decorate it the way you want.
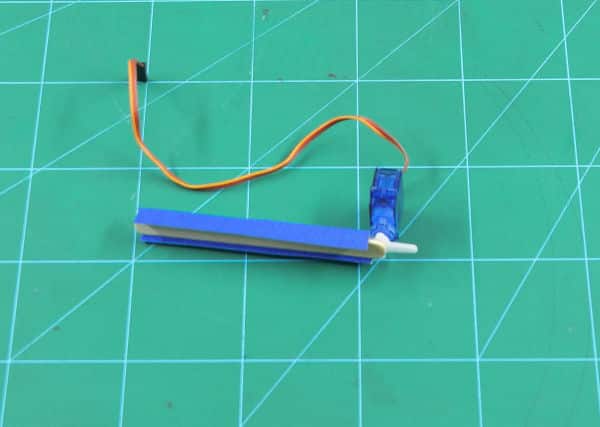
- Once done, attach it to a small distance from the IR Sensor.
The Conveyor Belt
Now, all the components are added, it’s time to bring in the conveyer belt. Cut the colored chart paper whose length needs to be little more than the double the width of the support plate.
Bring the two ends of the conveyor belts closer and glue them together using double-sided tape and wrap it around the pulley as shown.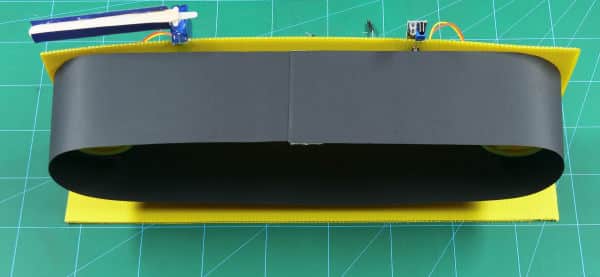
With this the assembly of the Arduino based conveyor belt is complete. All you need to do is make the connections and write the code for the same.
Making the Connections
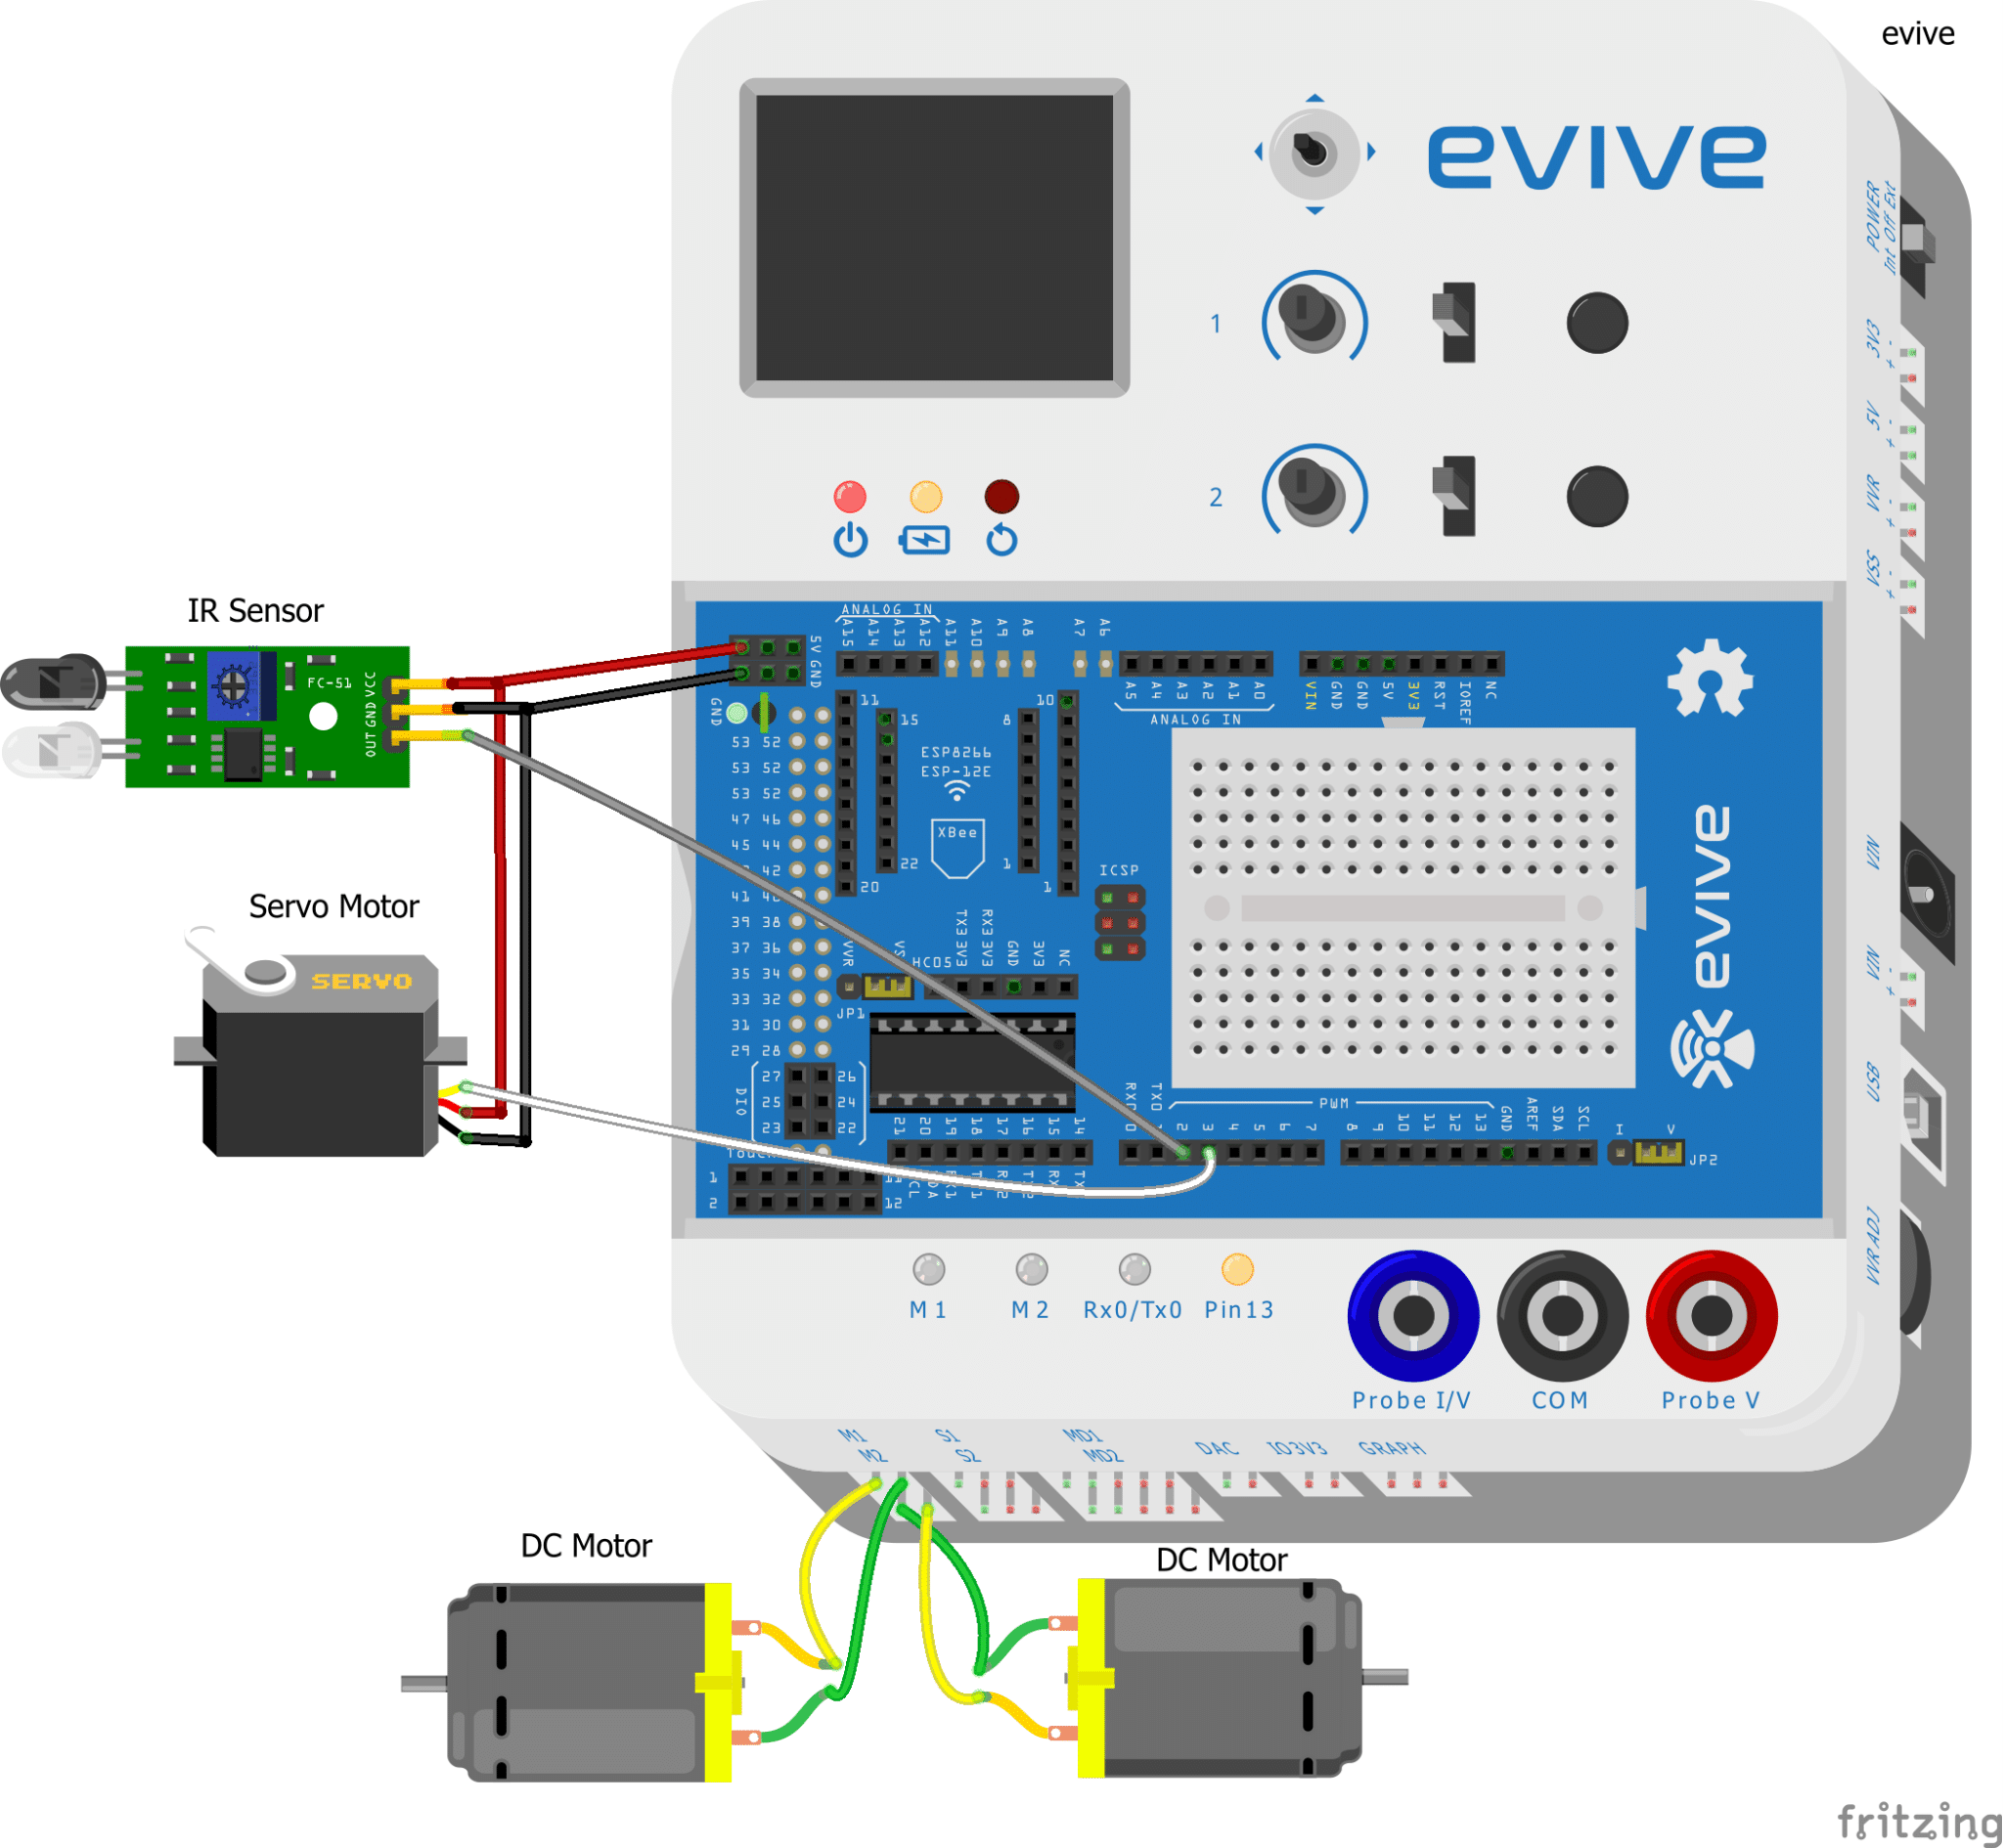
Make the connection of all the electronic component as given below
- IR Sensor:
- VCC: +5V of evive
- GND: GND of evive
- OUT: Digital Pin 2 of evive
- Servo Motor:
- VCC: +5V of evive
- GND: GND of evive
- Signal: Digital Pin 3 of evive.
- DC Motors:
- Motor1: Motor Channel 1 of evive
- Motor2: Motor Channel 2 of evive

PictoBlox Code
As we have made the Arduino based Color Sorting Machine from Scratch, we will code it in Scratch Based programming platform: i.e our very own PictoBlox.
Once you open PictoBlox, drag and drop the blocks given below and complete writing the entire code for the color sorter.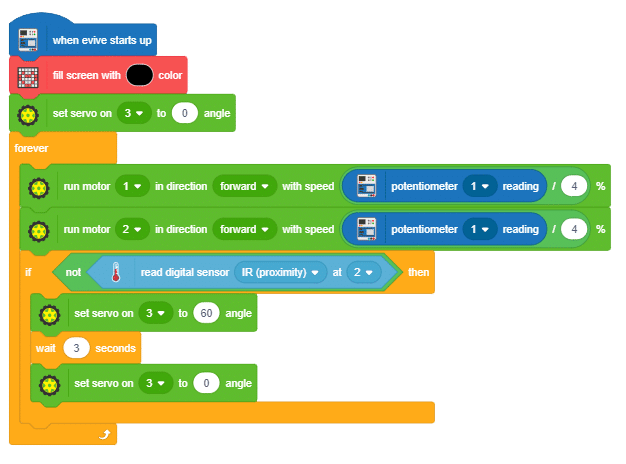
Conclusion
With this, your color sorter is now ready to differentiate the black from the white for you!


 _ Naga Pranav Patcha 3-39 screenshot")


