
Introduction
Have you ever felt too tired or lazy to get up and go aaaall the way across the corridor when someone’s at the door? Or has your sibling or child ever look you outside a room accidentally or not so accidentally? Don’t lie! You’ve been there just like us, haven’t you? Well, most of you have. And we all know how annoying the first situation and how scary the second situation can be. Guess what! Here’s a solution that is going to help you avoid them altogether! Presenting you the Dabble Controlled Door Lock – a smart lock that can be controlled using Dabble, our ingeniously developed project-making application which you can get here. All you need is a servo motor, some wires, some DIYing skills, and your friendly-neighbourhood mate evive et voila! You’re the master of the door now. Pretty cool, huh?
So, why are you still here?! Get going!
Making
Let’s start by making the locking mechanism. We have 3D printed all the parts of the lock.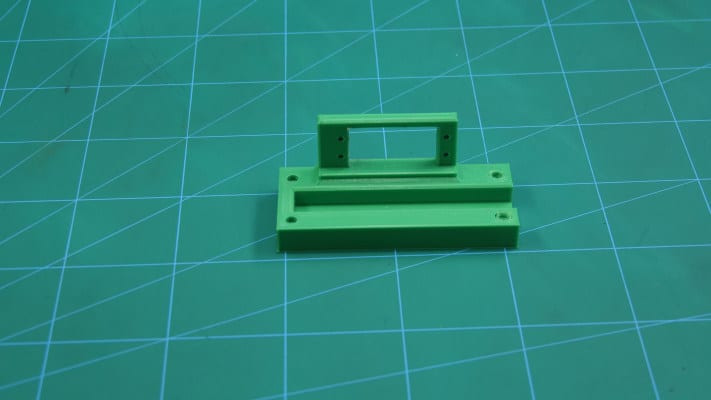
First, we will assemble the lock as shown in the below figures.
Take the latch and place it inside the latch holder.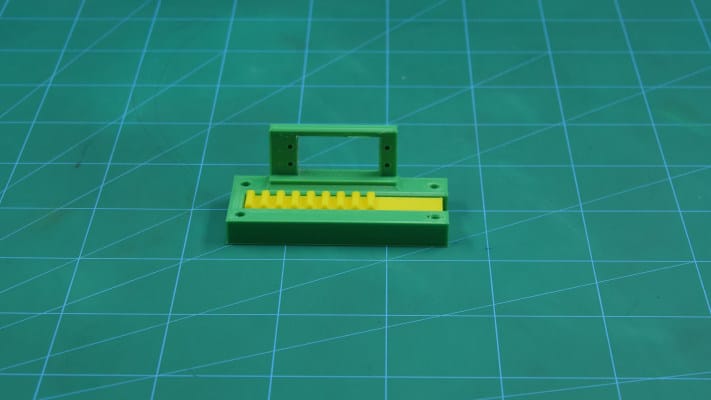
Now, take a metal servo and glue it in the empty space given. You can use hot glue for this purpose.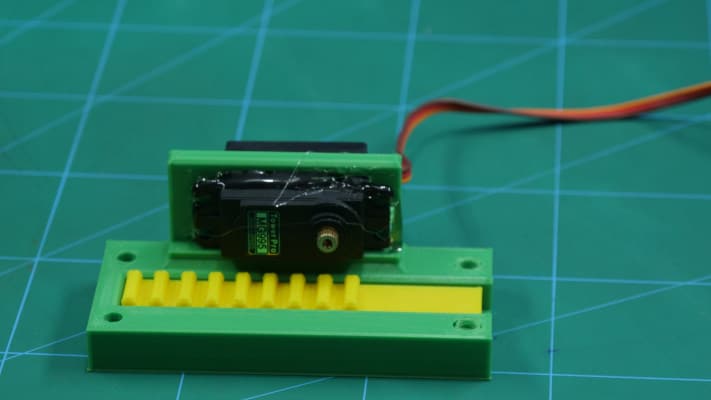
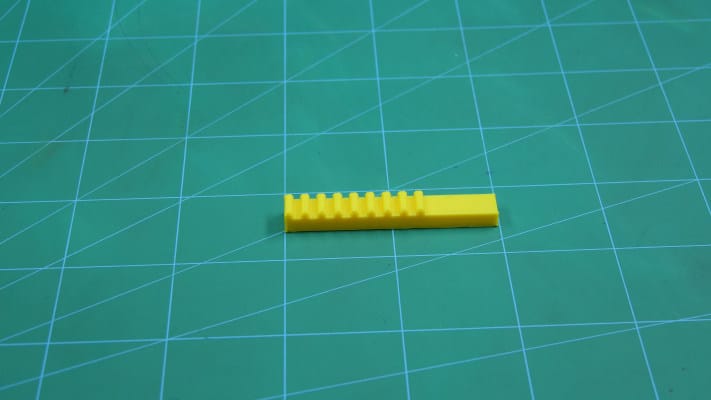
Next, take the 3D Printed gear and fix on the servo head.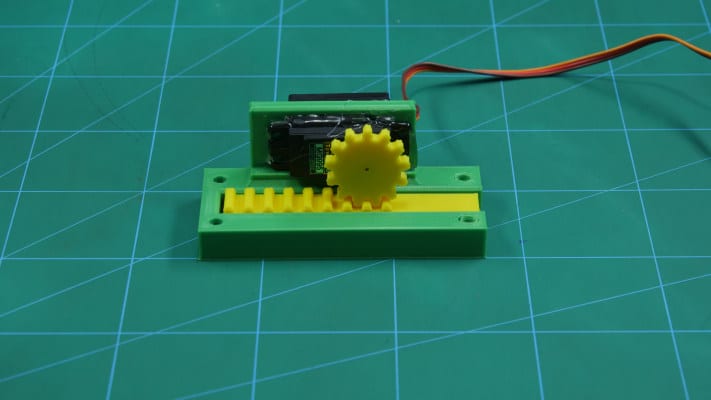
Make sure that you fix the gear in such a way that the teeth of the gear match with the spaces on the latch.
Once done, make the connections and write the code given in the steps below.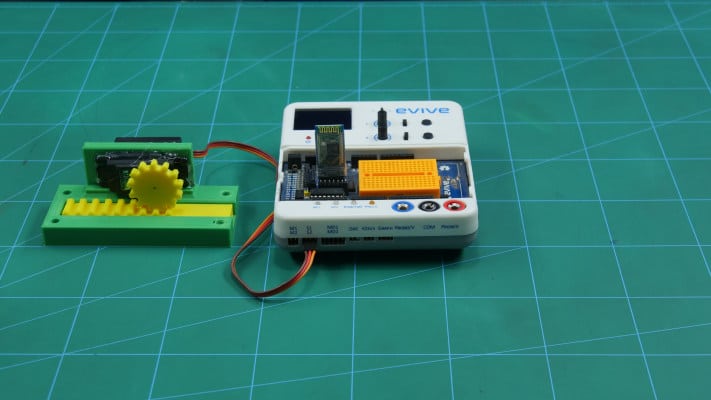
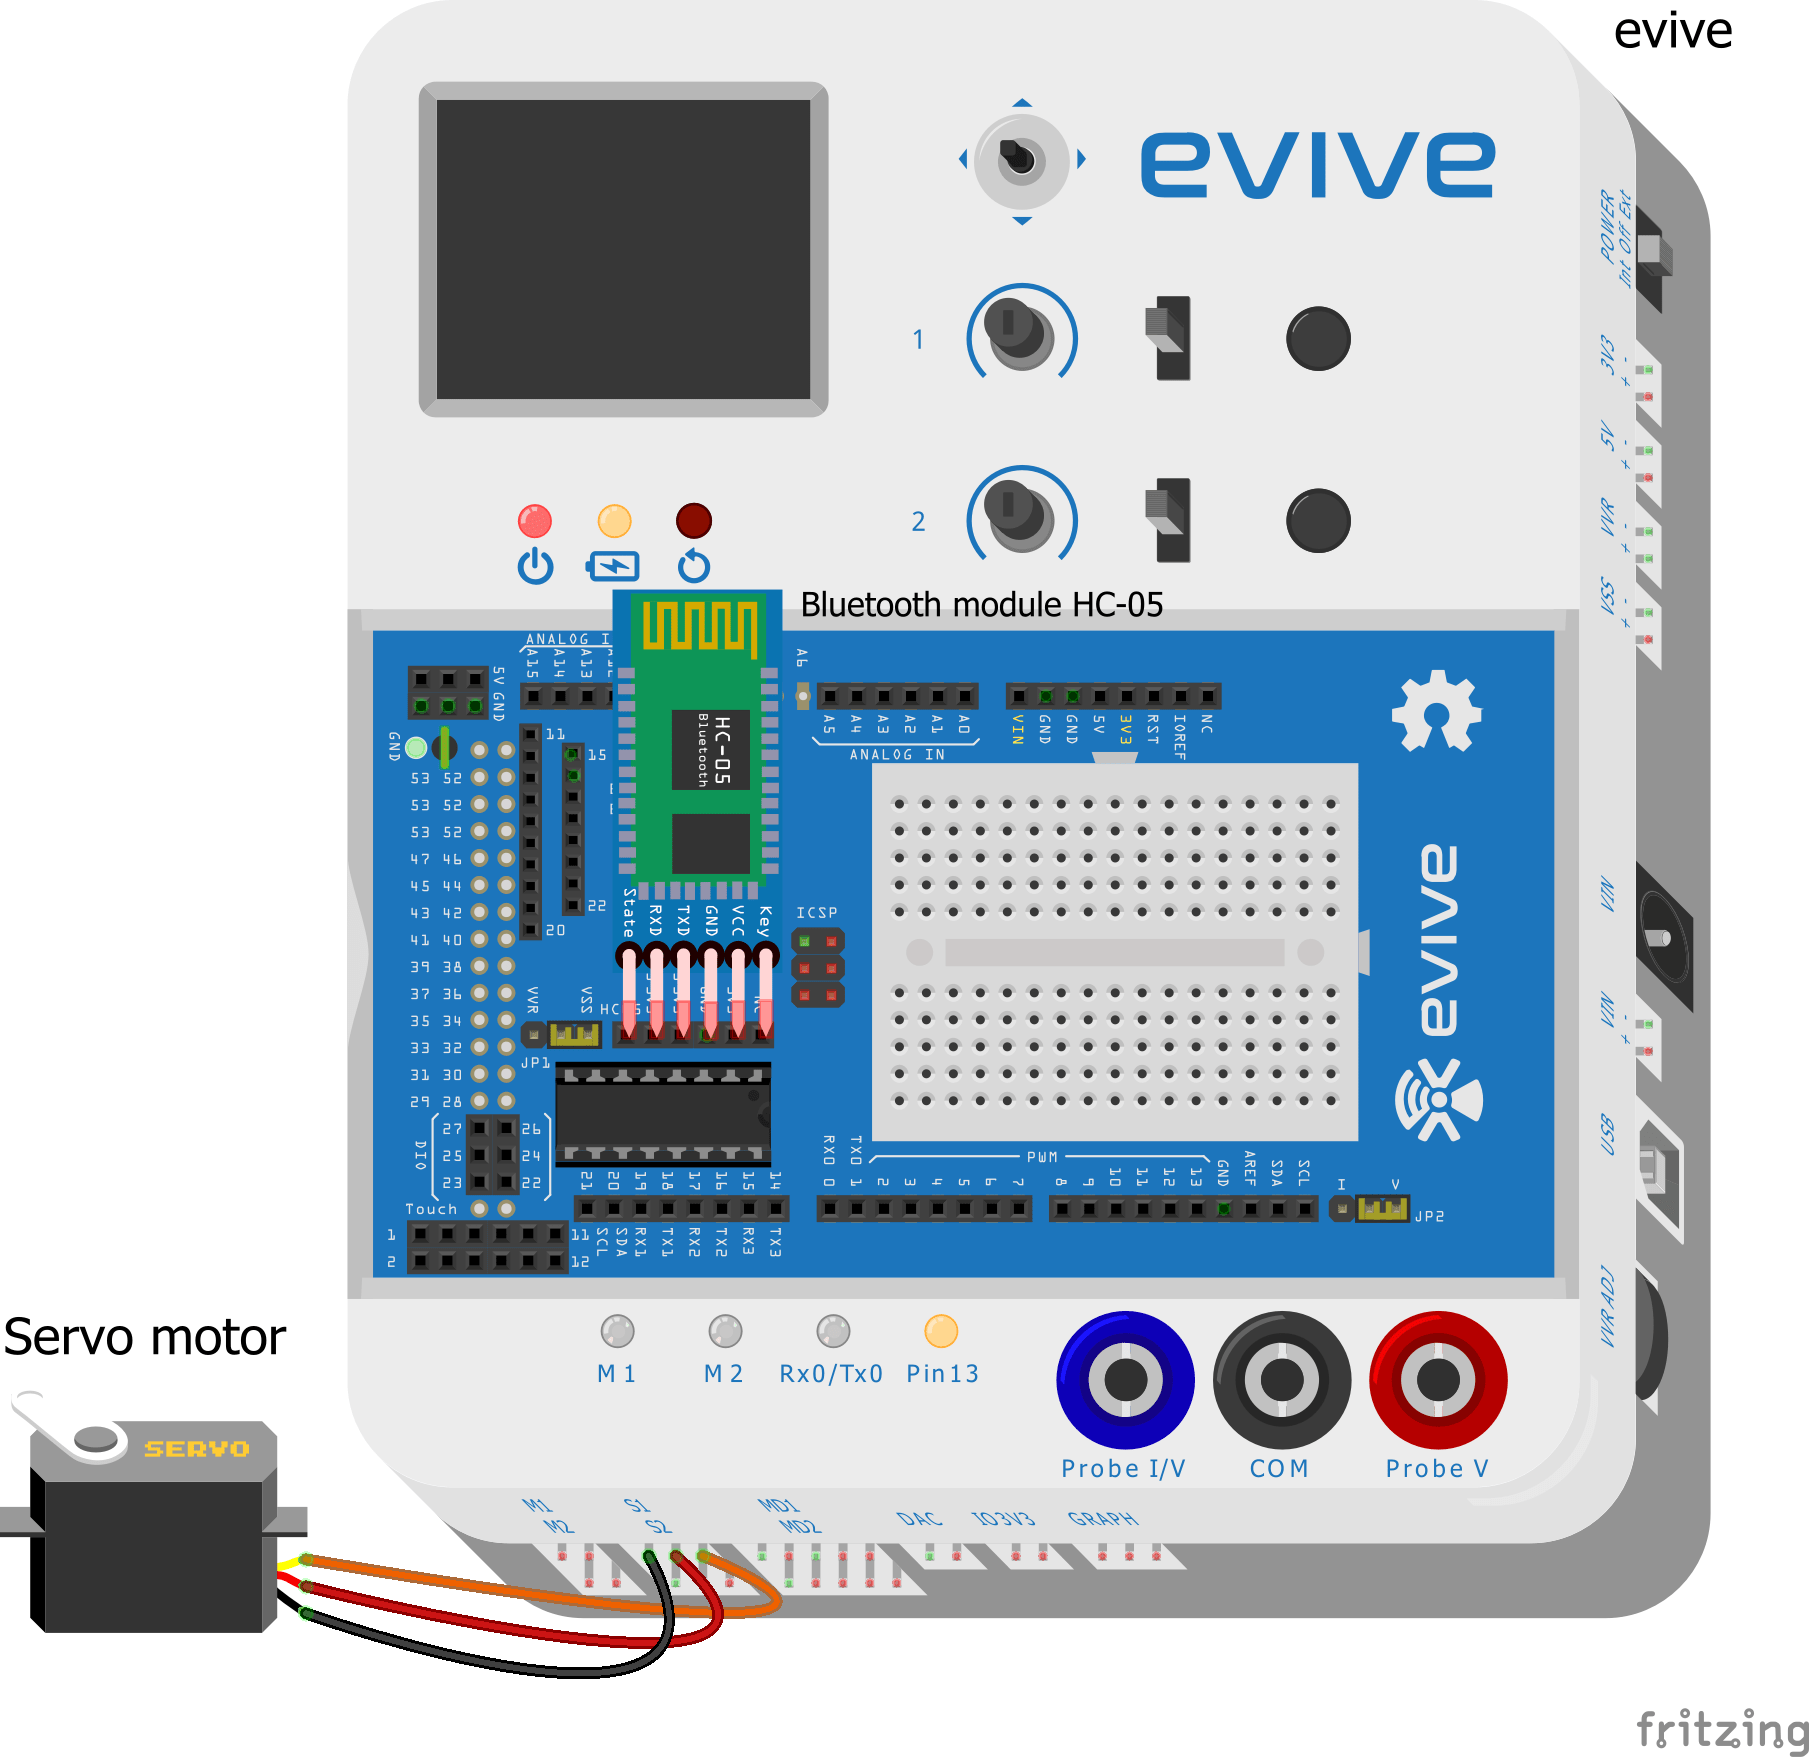
Connections
Insert the Bluetooth Module as shown in the given figure.
And connect the metal servo to Servo Channel 1 or S1.

Code
Upload the following code to evive.
Logic
To see how the lock works, fix it on the back of the door.
The lock will remain closed by default.
To open the door, you will need to pair our phone with the Bluetooth module connected to evive using dabble.
Once you have established the connection, from the modules inside the app, choose Terminal.
You can give both textual and voice commands.
Type or say ‘open the door’.
In response, the assembly will welcome you and ask you for the password.
Type in the password that you set while writing the code.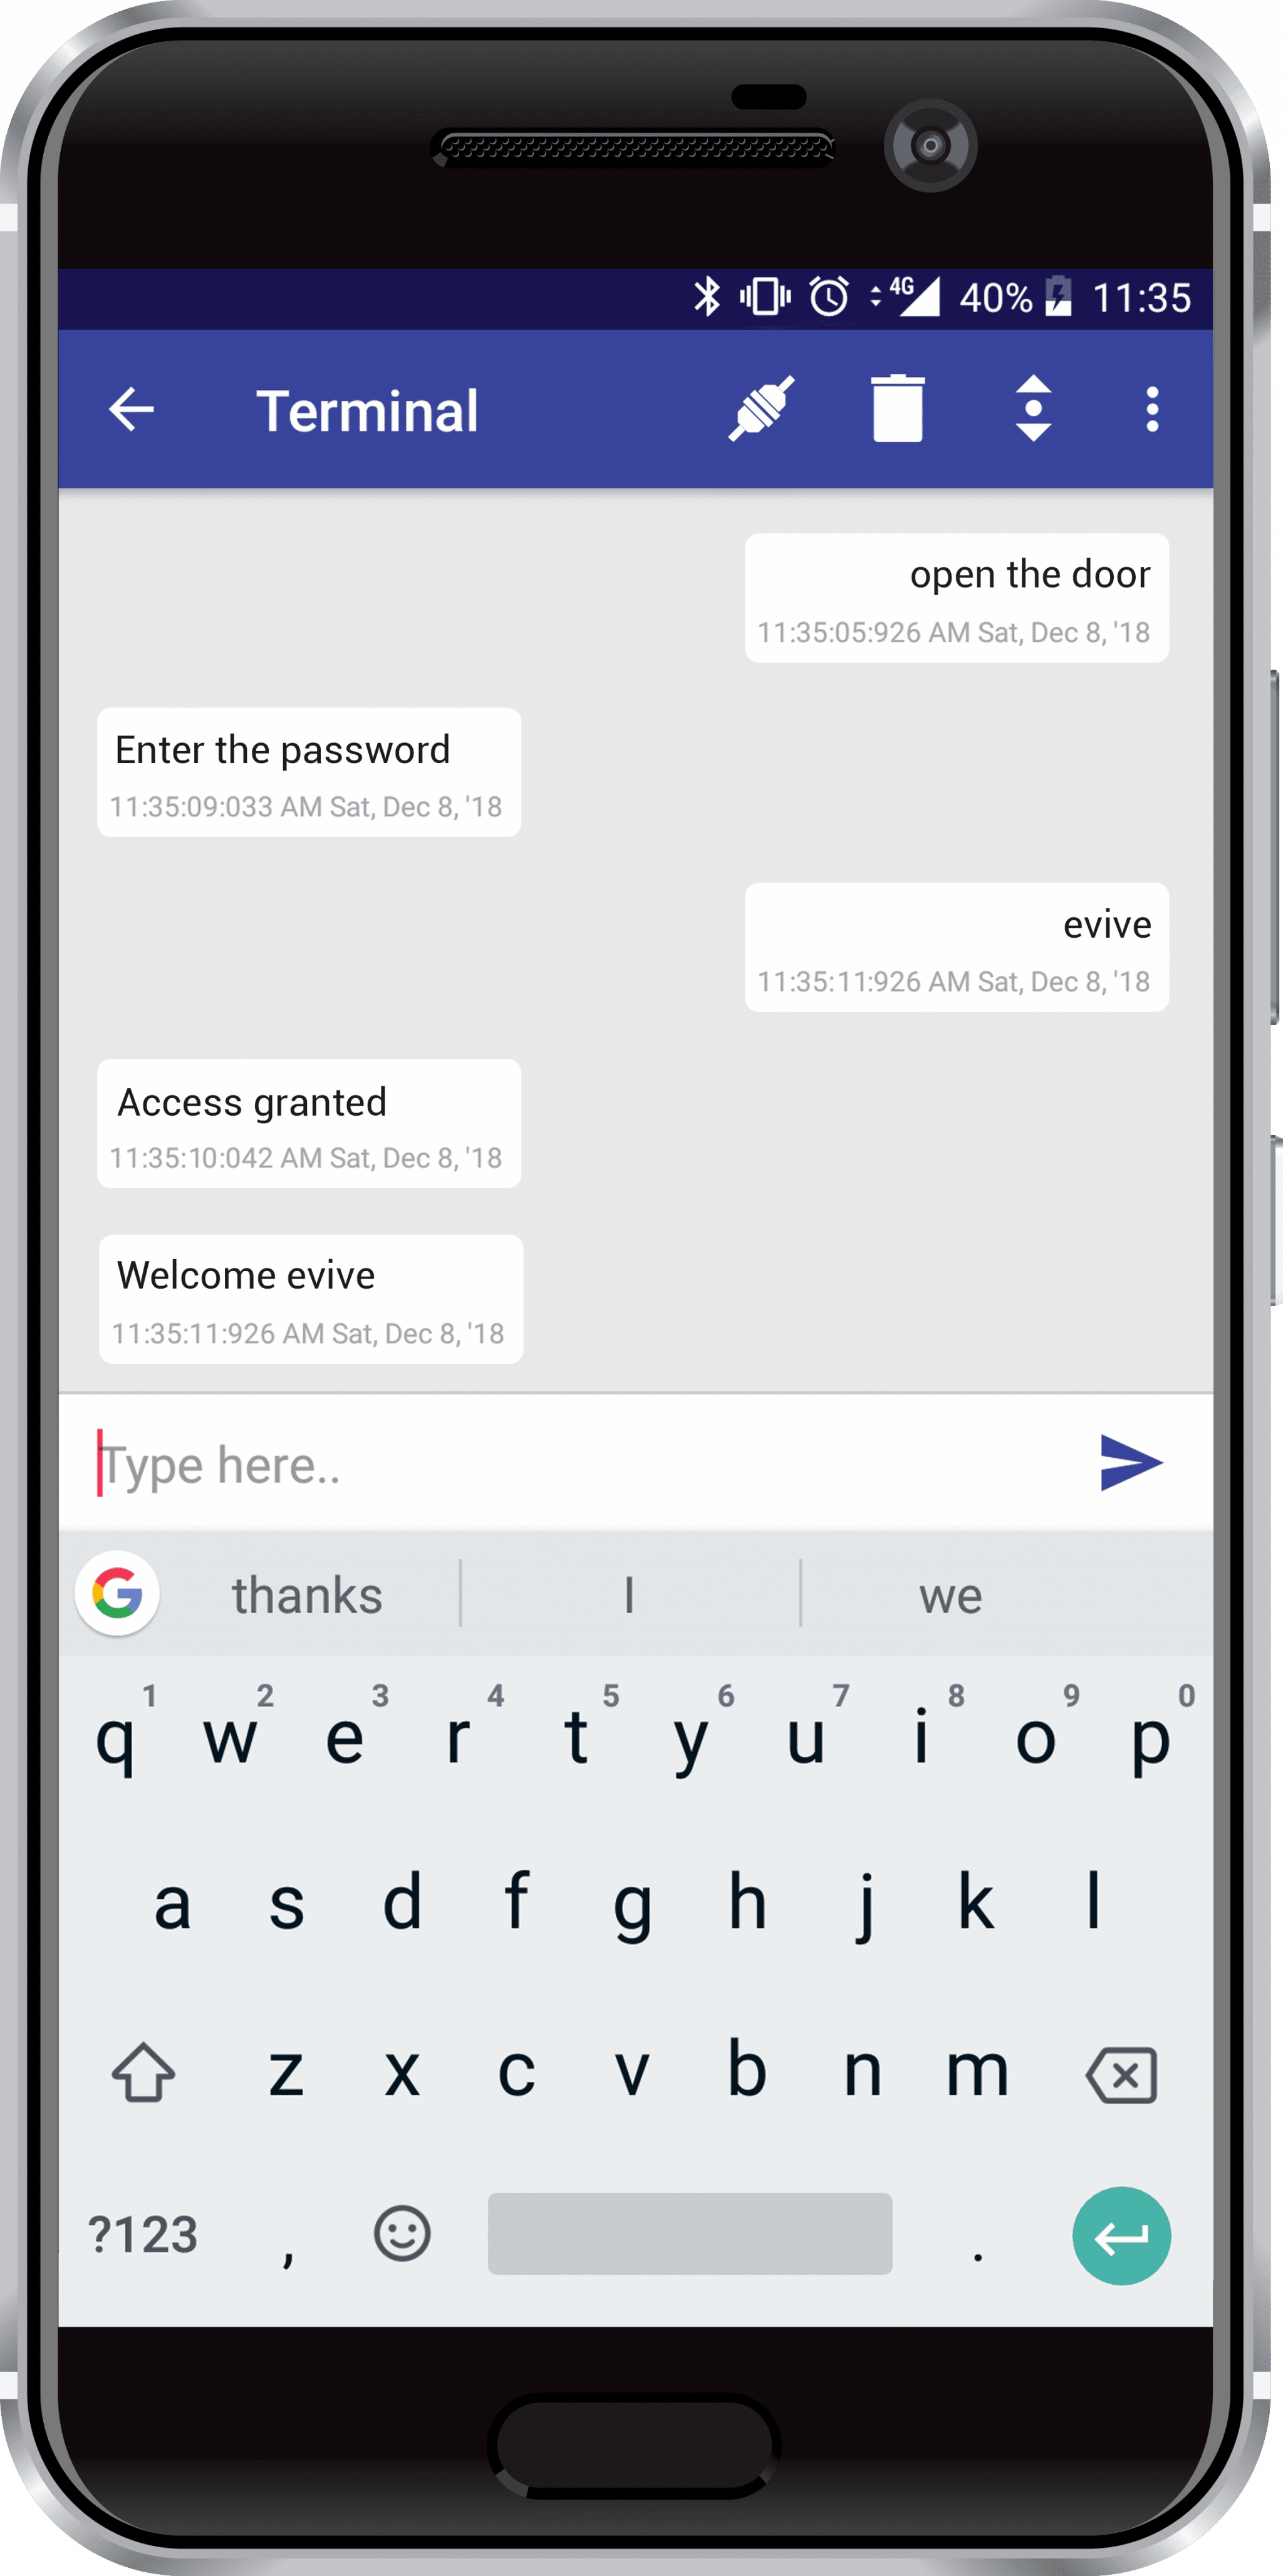
And bingo! The door opens, letting you in.
You can also vary the duration for which you want to keep the door open.
Once the time is over, the lock will automatically close the door thus coming back to its original state.
But remember if you enter the wrong code, you won’t be able to pass through.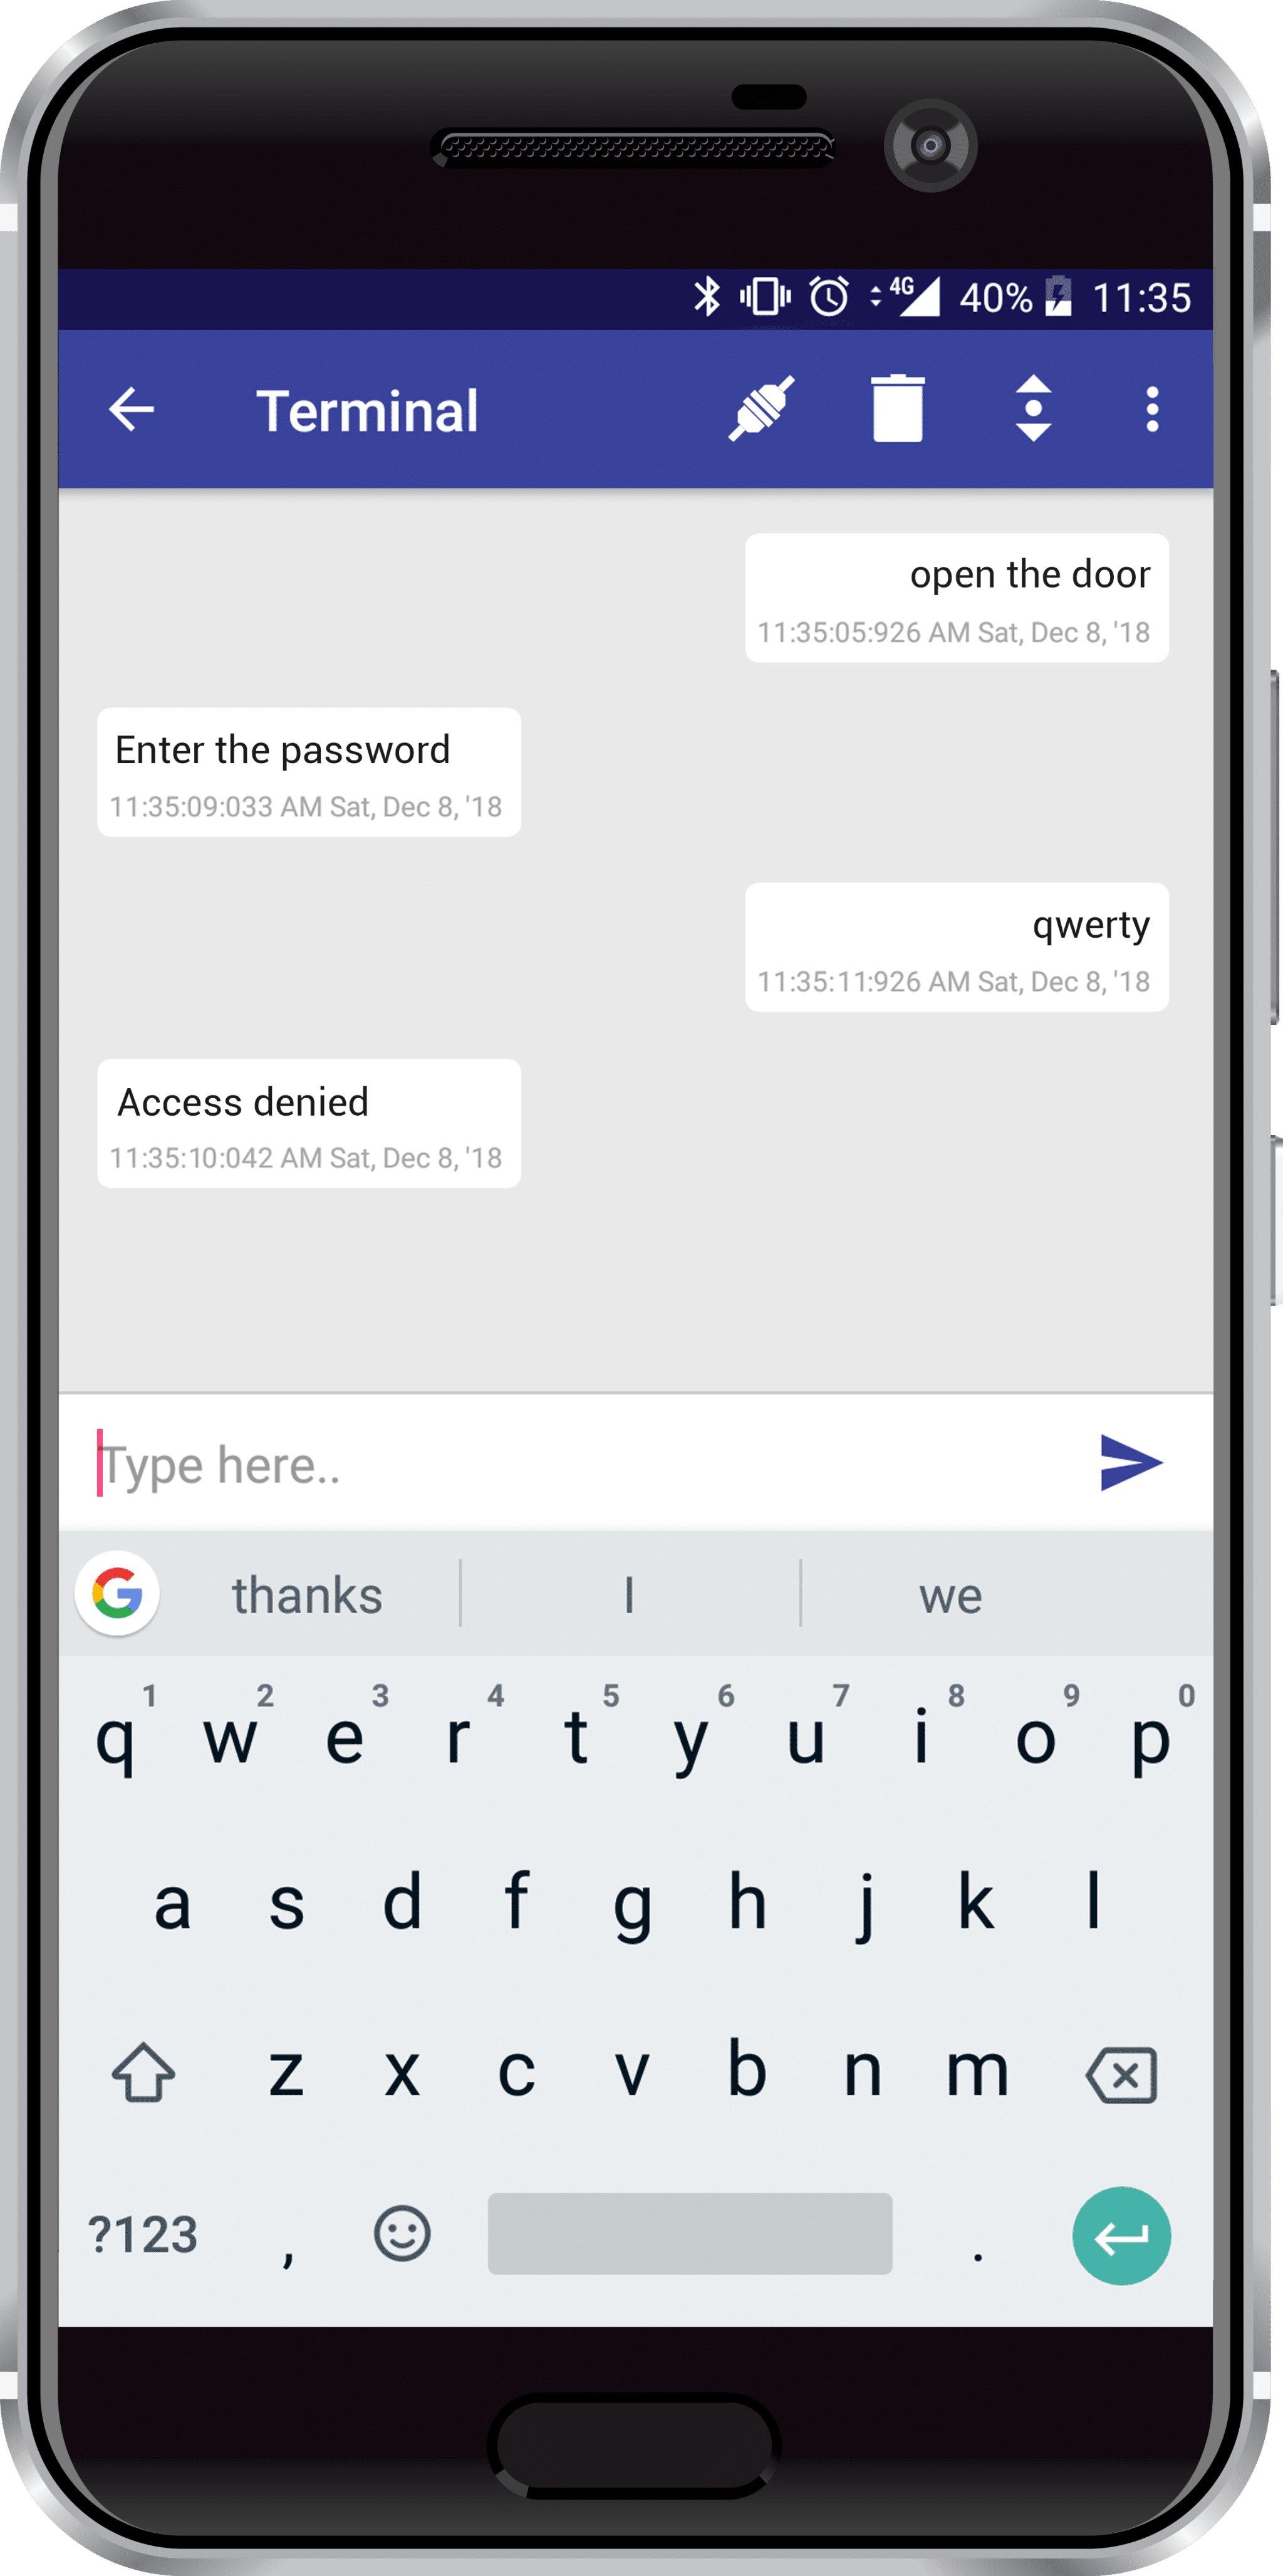
Conclusion
With this, your door isn’t going to be ordinary anymore! Before you leave, here’s some exciting news for you! We’re launching an exciting STEM product this month that will make learning electronics, programming, and robotics super fun! Find out more about it here and if you like it, even reserve one for yourself to get an exclusive early-bird perk!


 For Construction Sites by Abhay Maheshwari 2-6 screenshot")


 I Aradhya Gupta I 7th I DL DAV Model School SB I CODEVOUR 2022 2-16 screenshot")


