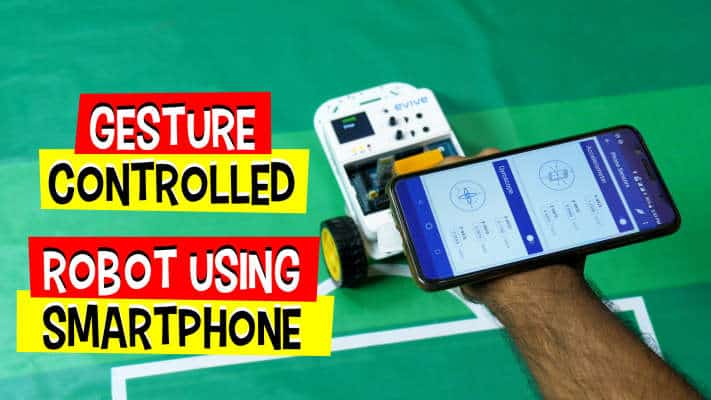

Introduction
We’ve controlled robots with handheld controllers and with virtual controllers in Smartphones; however, both of these required the use of two hands. But this time? This time we’re going to take it to another level because this time we’re going to control our robots using a Smartphone with the help of hand gestures. Turn your hand forward and the robot moves forward; turn it back and the robot moves back! And this has been made possible with the help of none other than our friendly neighborhood graphical programming software, PictoBlox, and our genius mobile application, Dabble.
You can download PictoBlox from HERE and get Dabble from Google Play!
Ready to take control of your robot in your hand, quite literally? Let’s get started!
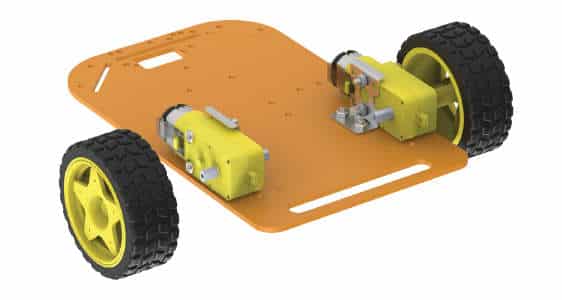
Assembly of the Robot
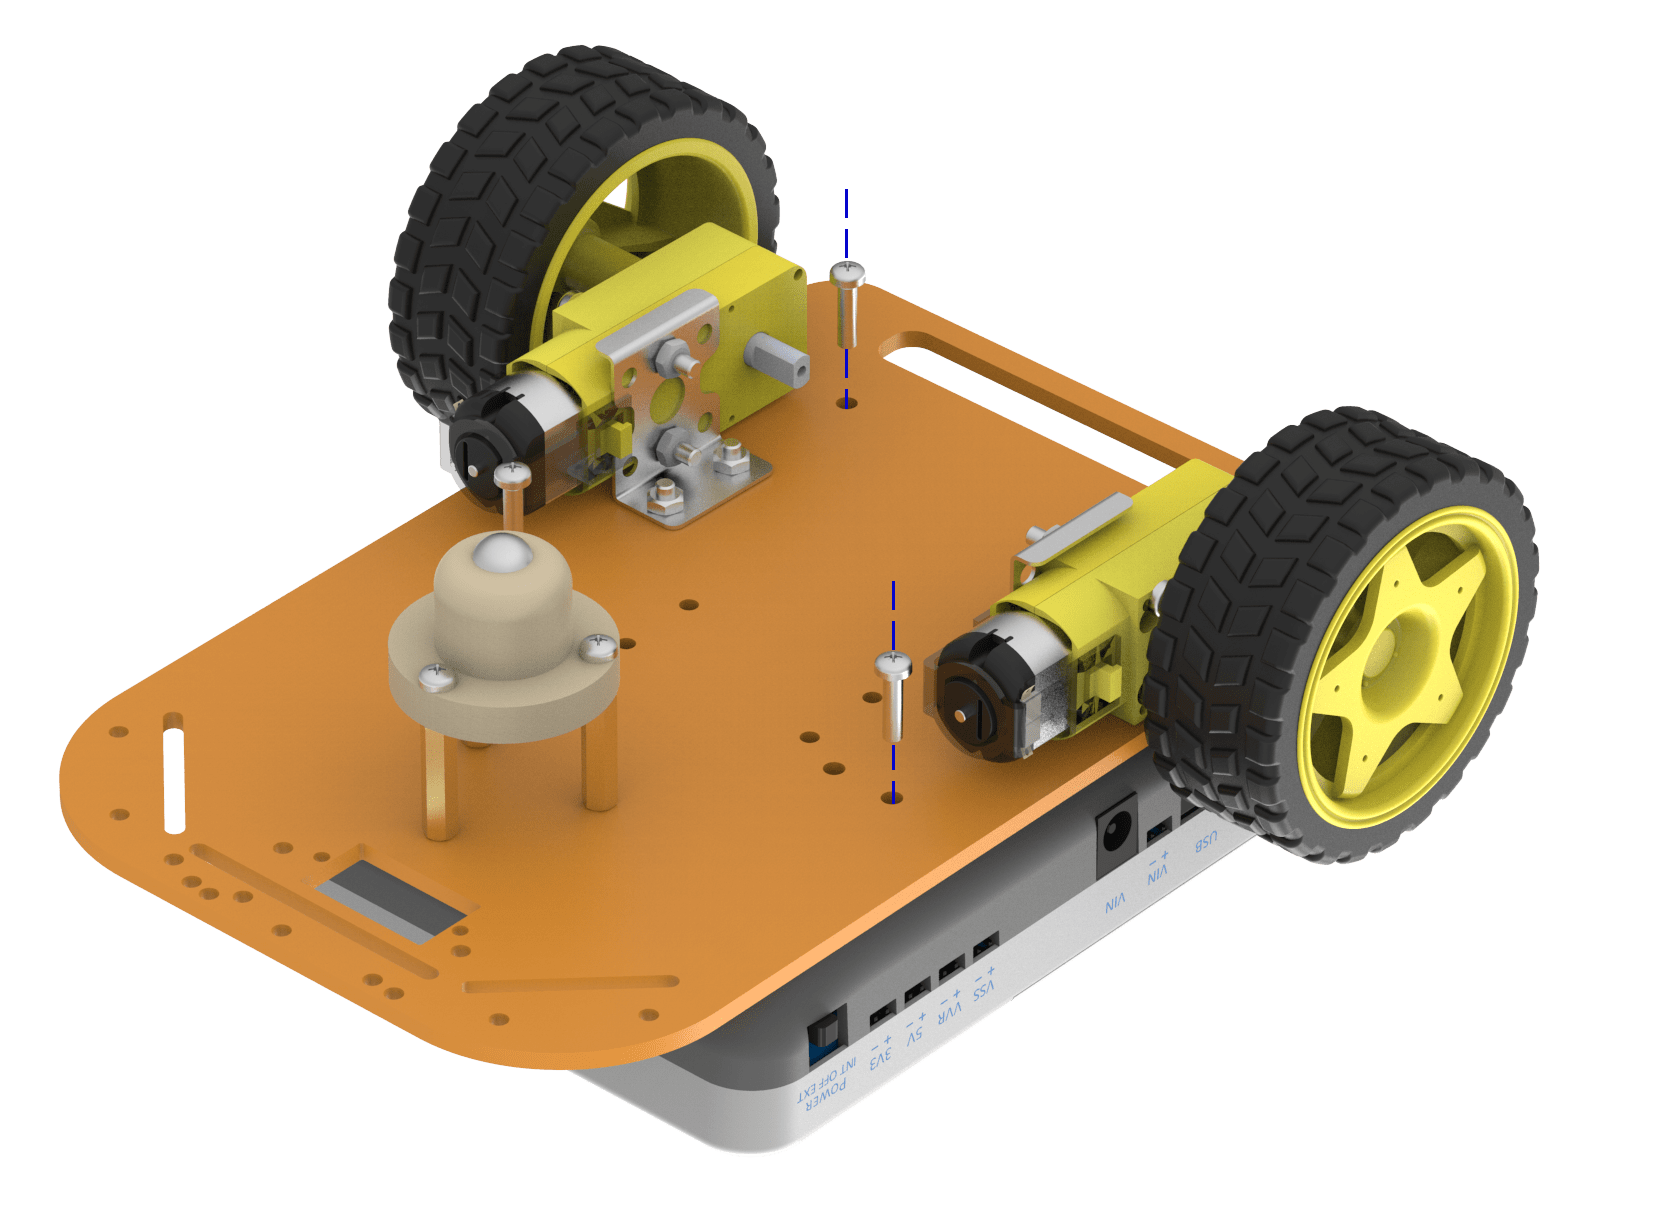
The annotated base is shown on right. This is the bottom side. There is an evive logo on the top side for your reference. So be careful while using the base.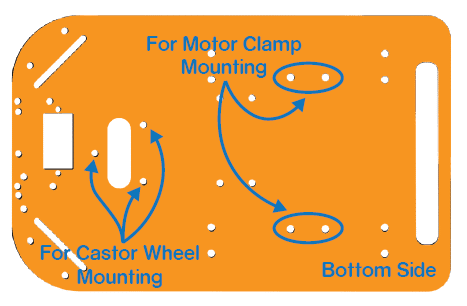
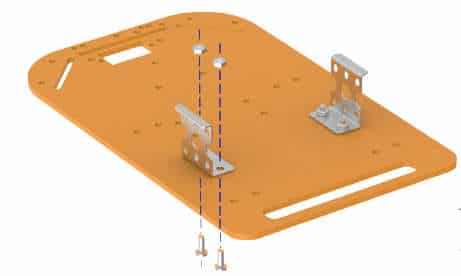
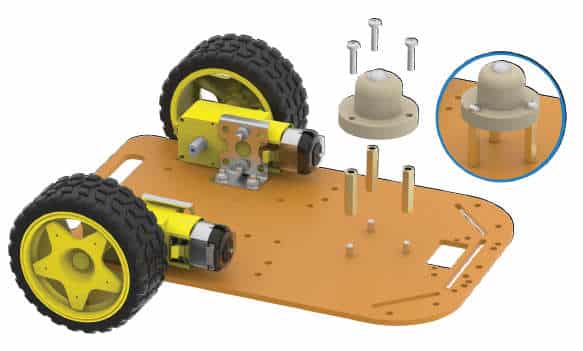
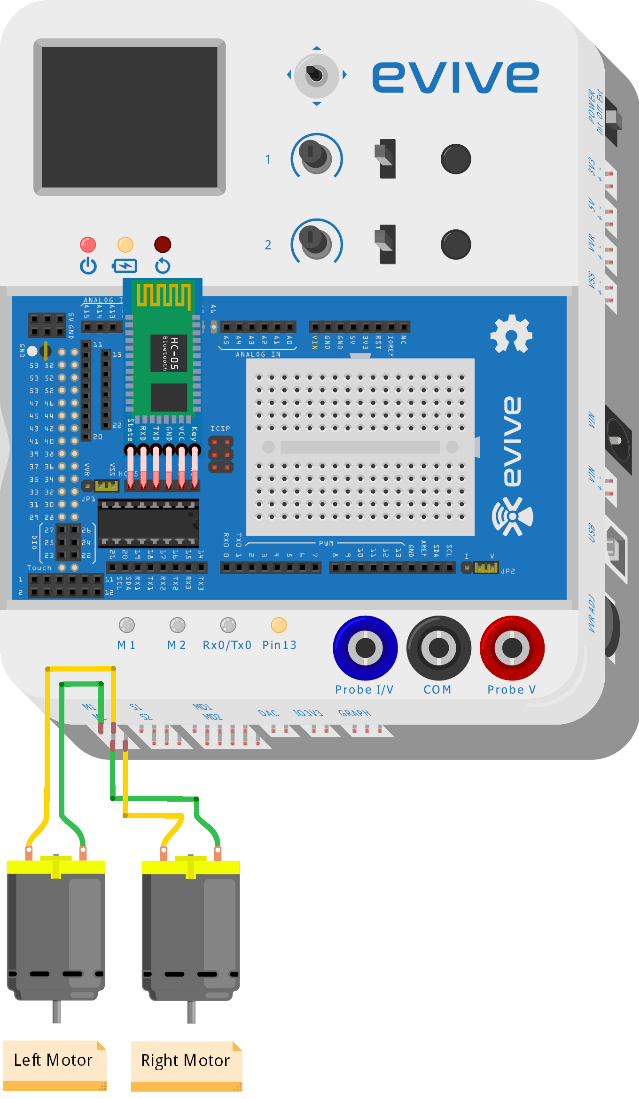
- Fix the motor mounting brackets to the chassis using M3 bolts of 8mm length and M3 nuts.

- Attach the two motors, one to each bracket, side by side and fasten using M3 bolts of 25mm length and M3 nuts.
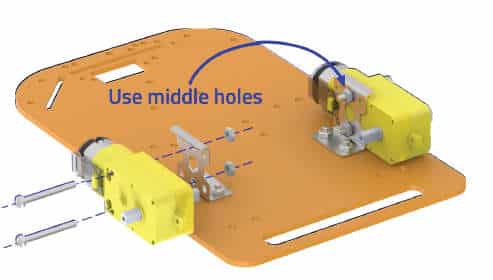
- Now, fit the wheels into the protruding motor shafts.
- We’ll attach the Castor wheel now. First, we will mount the M3 standoffs (20 mm) on which the Castor will be attached. Fasten the standoffs to the chassis using M3 bolts of 8mm length.
- Place the Castor on top of the standoffs in the configuration shown and fasten using M3 bolts of 12 mm length.

- Flip the assembly and place evive on the top of the chassis.
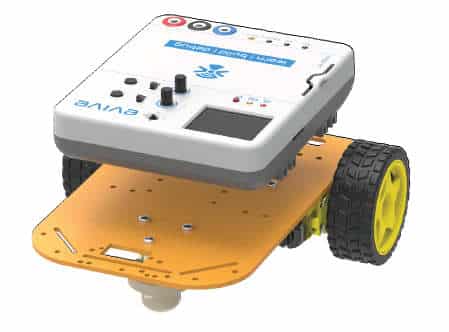
- Using the holes on the back of evive fasten it to the chassis using M3 bolts of 12mm length.
Circuit
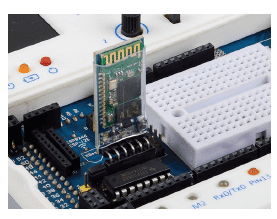
For this robot, we have to connect the HC-05 Bluetooth module. In the figure below, you can observe where the Bluetooth module’s 6 pin connectors are plugged on evive.
And the Motors to Motor Channel 1 and 2.
Logic
Firstly, open Dabble in your Smartphone. Then, connect Bluetooth. Select the Phone Sensor module.
You will find a number of sensors in this module like the accelerometer, gyroscope, magnetometer, proximity meter, light meter, sound meter, location, temperature, and barometer.
You will also notice that these sensors are showing values of the quantities they measure.
In this project, we are going to use the accelerometer. Toggle the switch corresponding to it.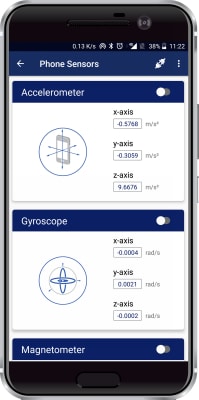
In doing so, the data that is being measured is sent to evive which is connected to your car.
When we tilt the phone either forward or backward, acceleration along the X-axis changes.
If the acceleration along X-axis goes above 3 m/s2, then the robot will move in the forward direction.
If it goes below -3 m/s2, then the robot moves in the backward direction.
If we tilt the phone either left or right, acceleration along the Y-axis changes.
If the acceleration along Y-axis goes above 3 m/s2, then the robot moves in the left direction.
If goes below -3 m/s2, then the robot will move in the right direction.
If the acceleration along both the axes i.e X-axis and the Y-axis is between -3 m/s2 and 3 m/s2, then robot does not move.
Code
PictoBlox is a graphical programming software based on Scratch 3.0 that makes learning how to code easy and fun. It allows you to interface and control evive with your computer and even uploads code to it.
You can download PictoBlox from here.
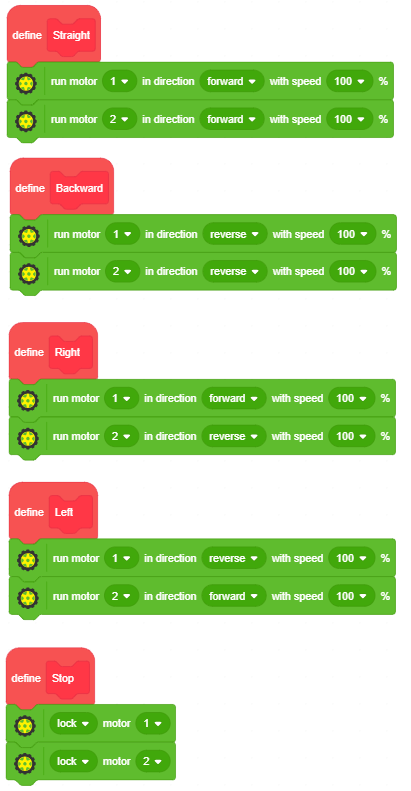
Upload the following code to evive: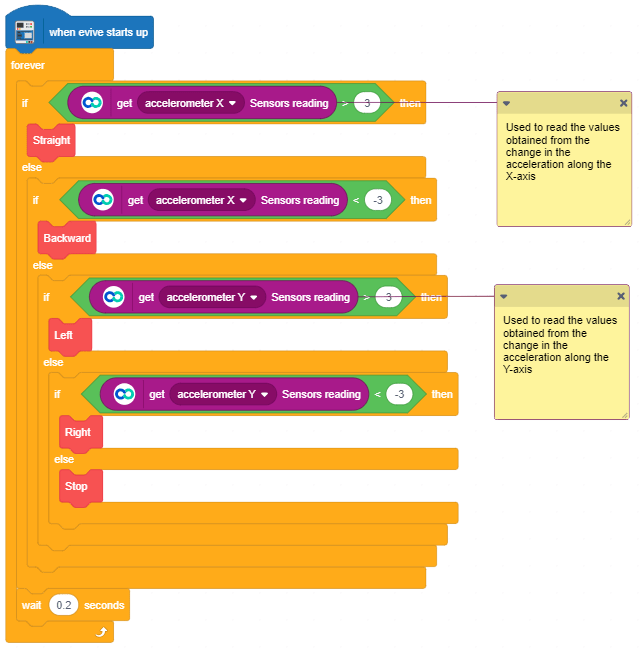
Conclusion
With this, your robot is going to be at your beck and call even at the slightest of a gesture!
PS. Our Indiegogo campaign, which had been going so well that we decided to extend it, is going to end within a fortnight now! DIYers and educators have loved us and lauded us and think that everybody should have a look. So, what are you waiting for? Check out our campaign right NOW!


