
Introduction
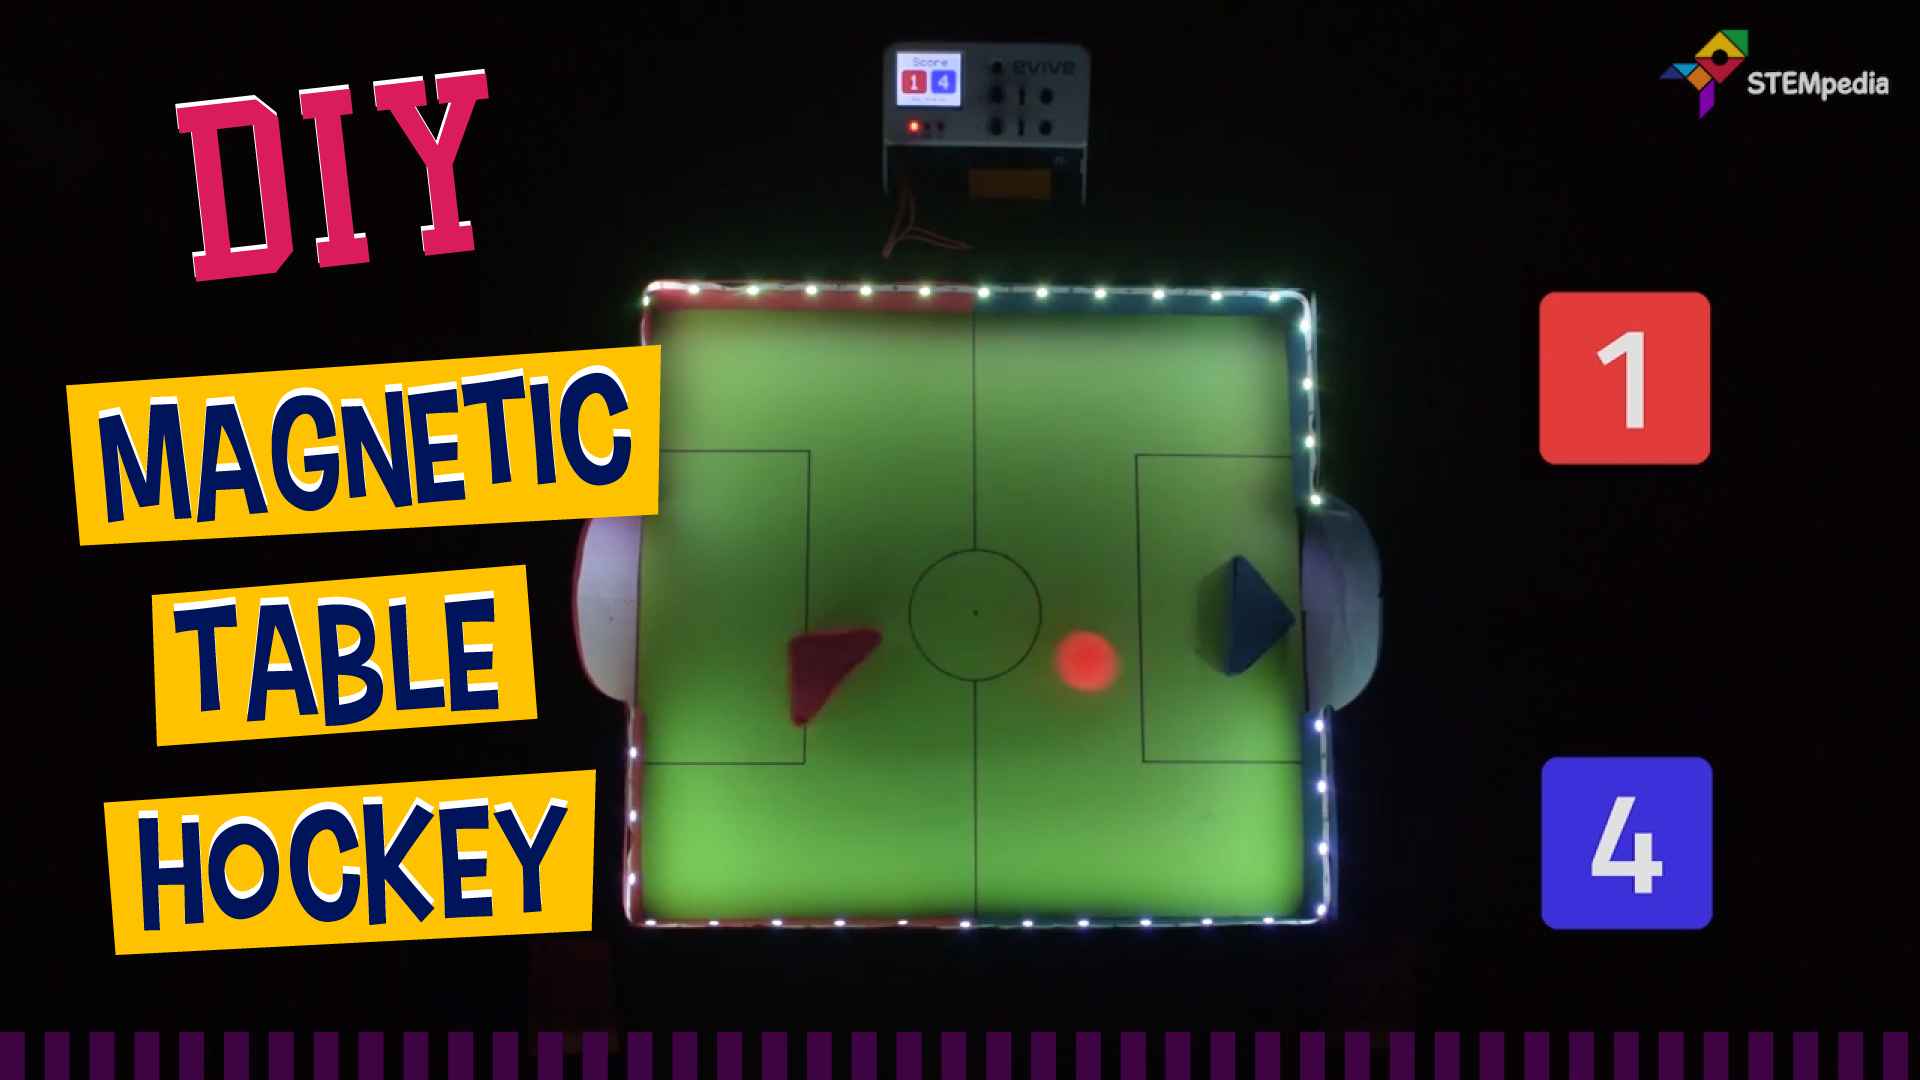
You must have played Air Hockey! Pay few $$dollars$$ to the gaming zone and just start scoring goals to beat your friends. Isn’t it very addictive? You must have thought of keeping one table at home, but hey! ever thought of making it yourself?
We will be making our own automated DIY magnetic table hockey. We will add a micro-controller, obstacle detection sensors to count goals and keep track of time. No need to keep track of goals, the sensors and evive will do it while we enjoy playing and concentrating on the ball. RGB LEDs add vibrant colors to this cool DIY creation.
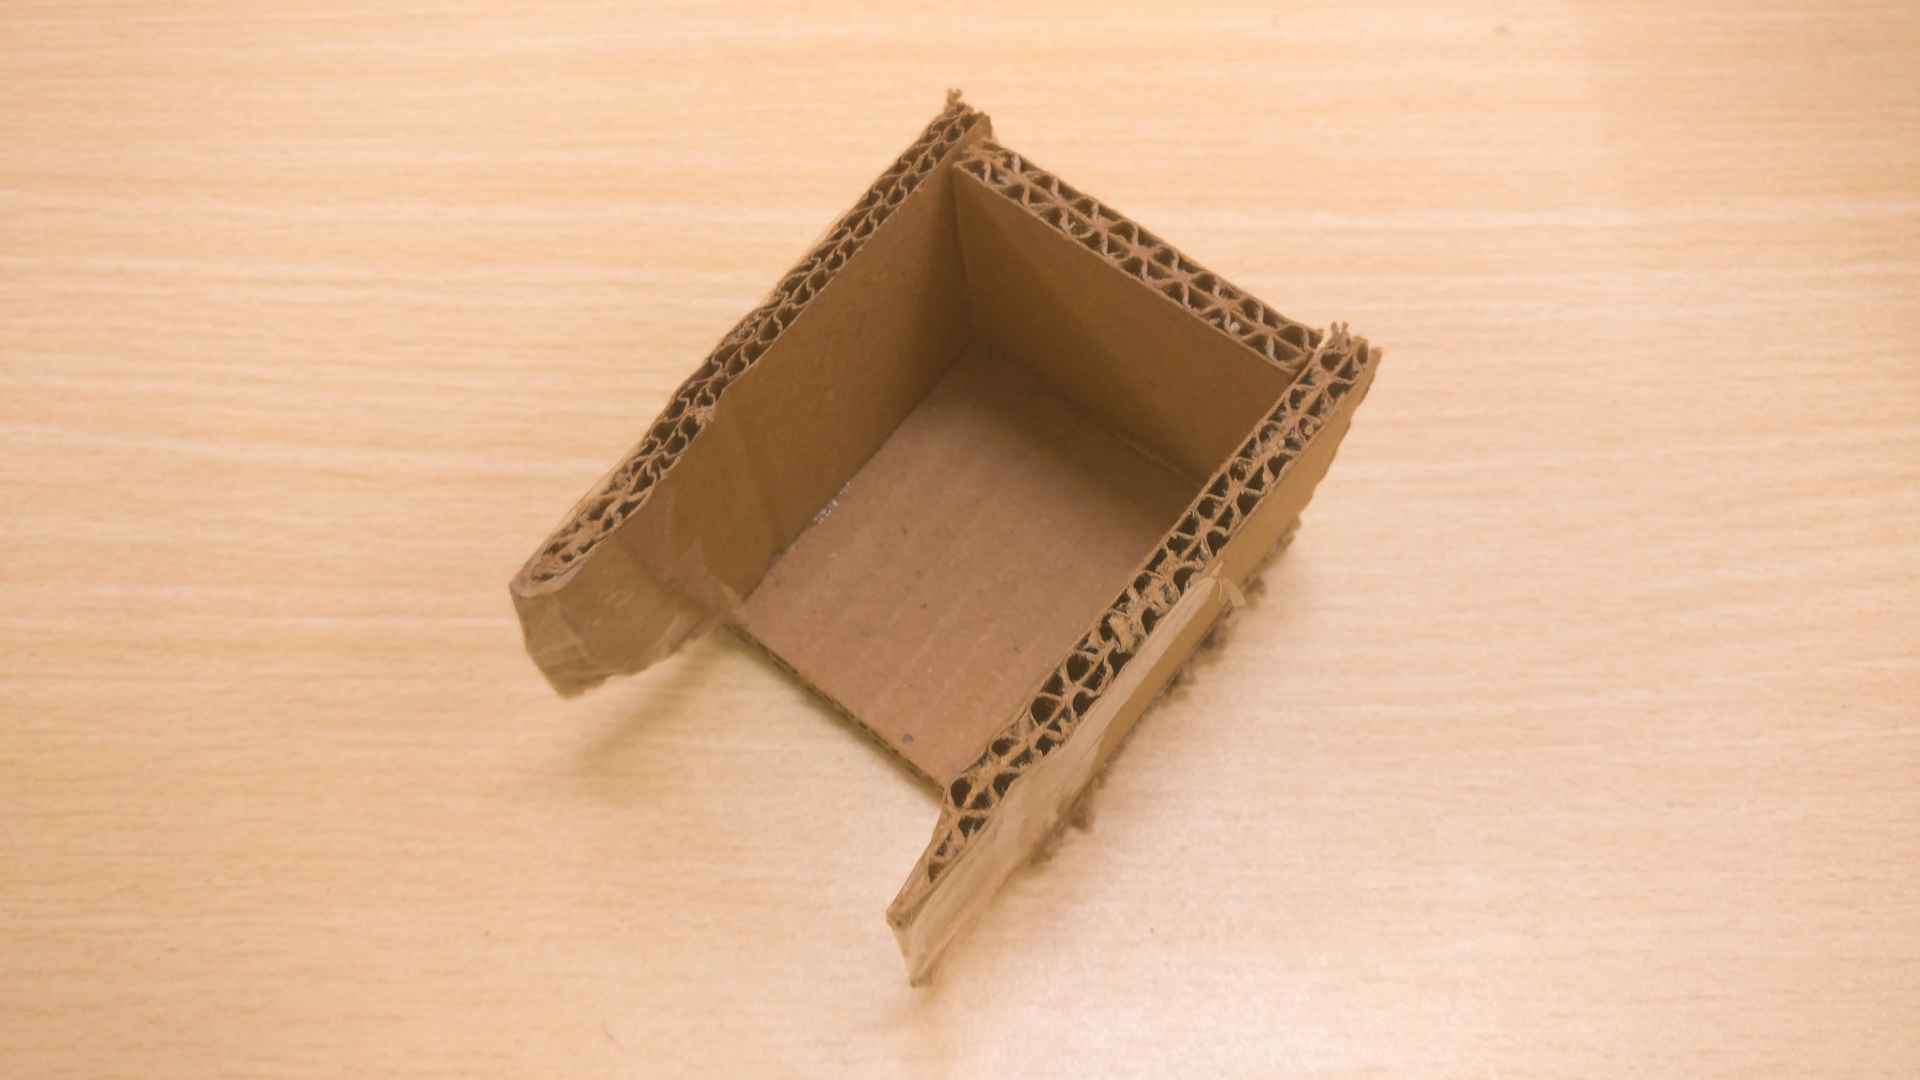
Crafting the Table Hockey Frame: Part A
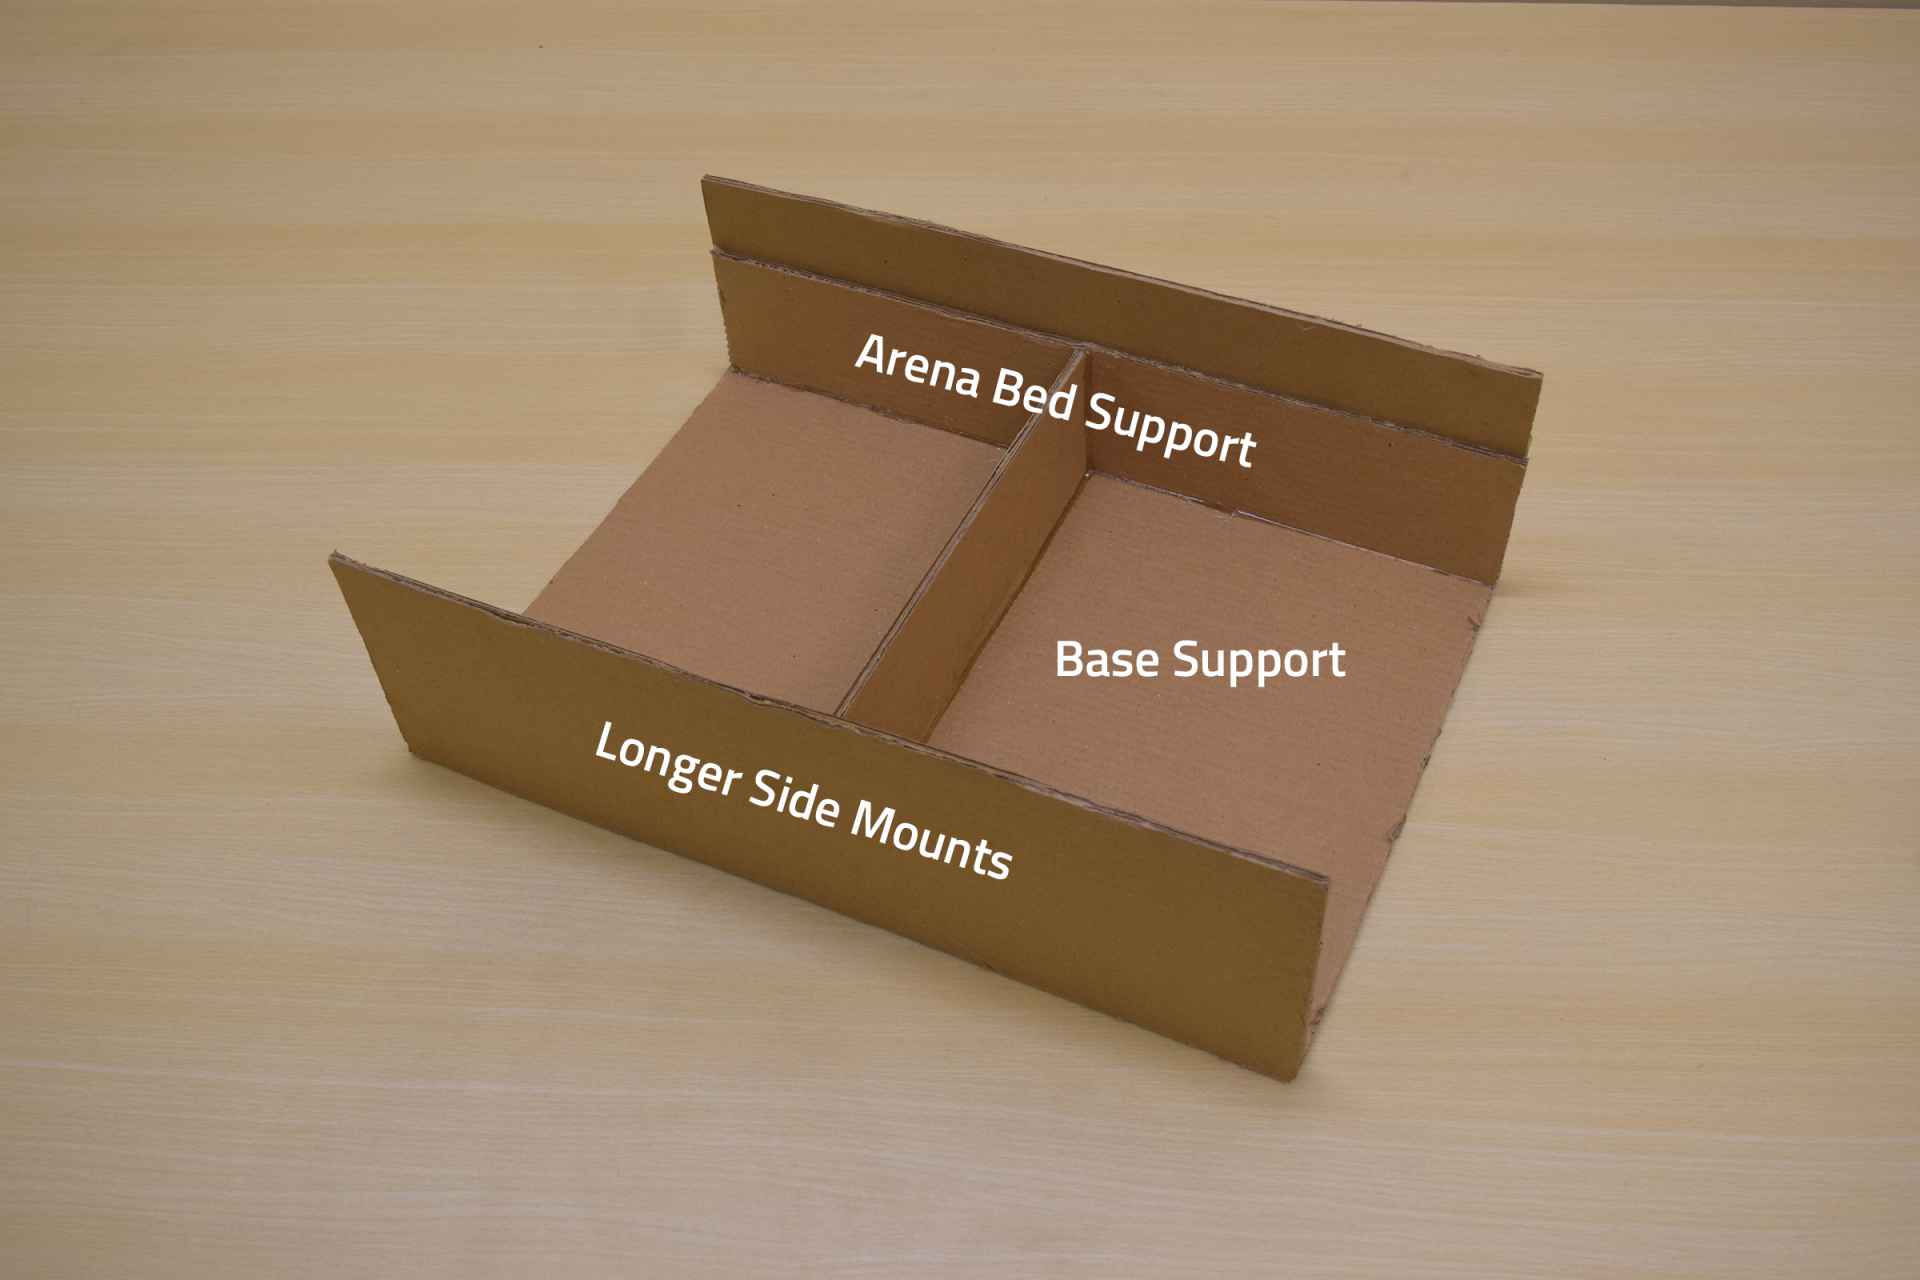
We need to cut out following pieces from thick cardboard
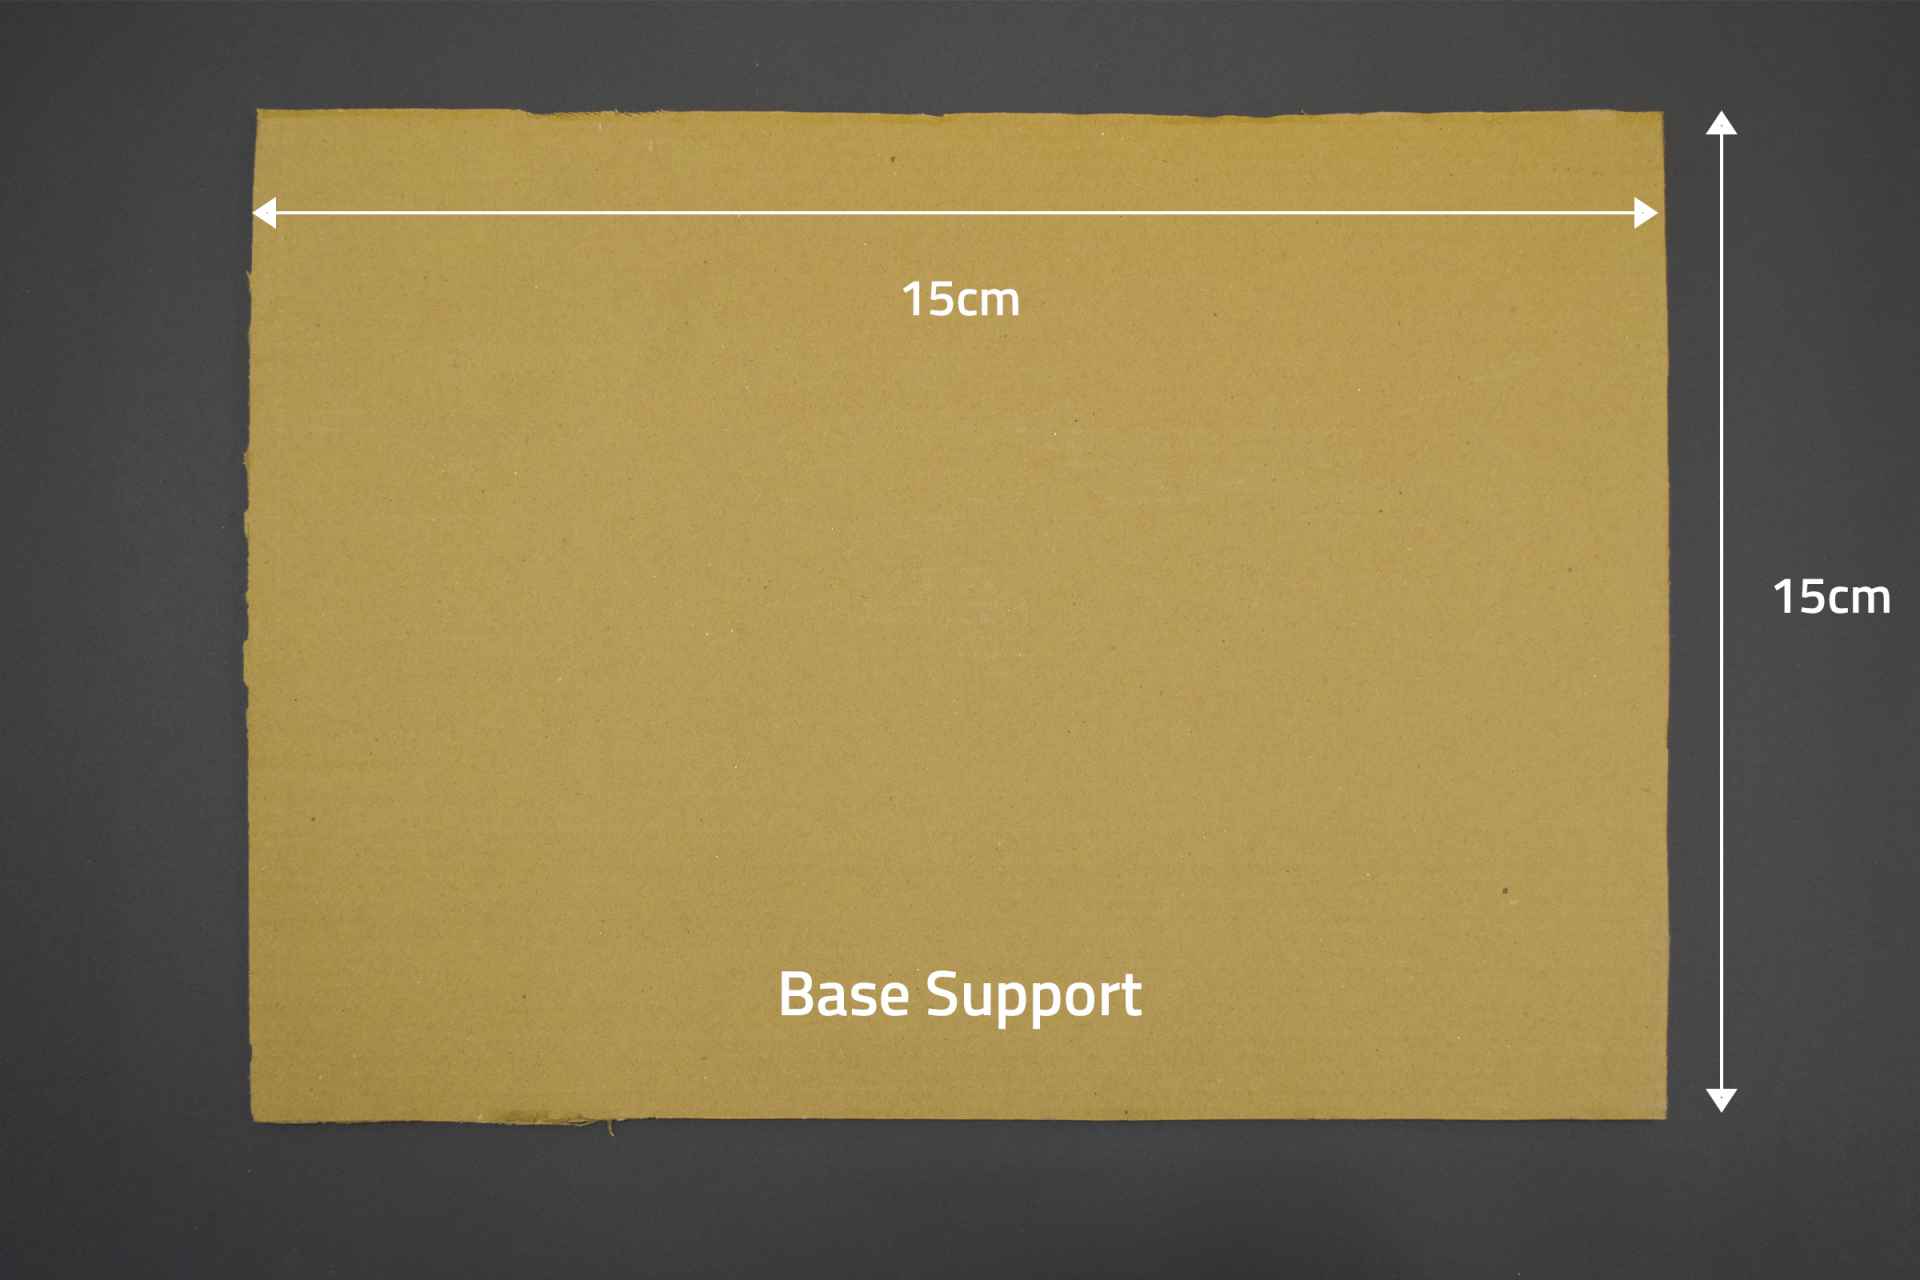
- Base Support Its a rectangular sheet of size 50cm X 35cm
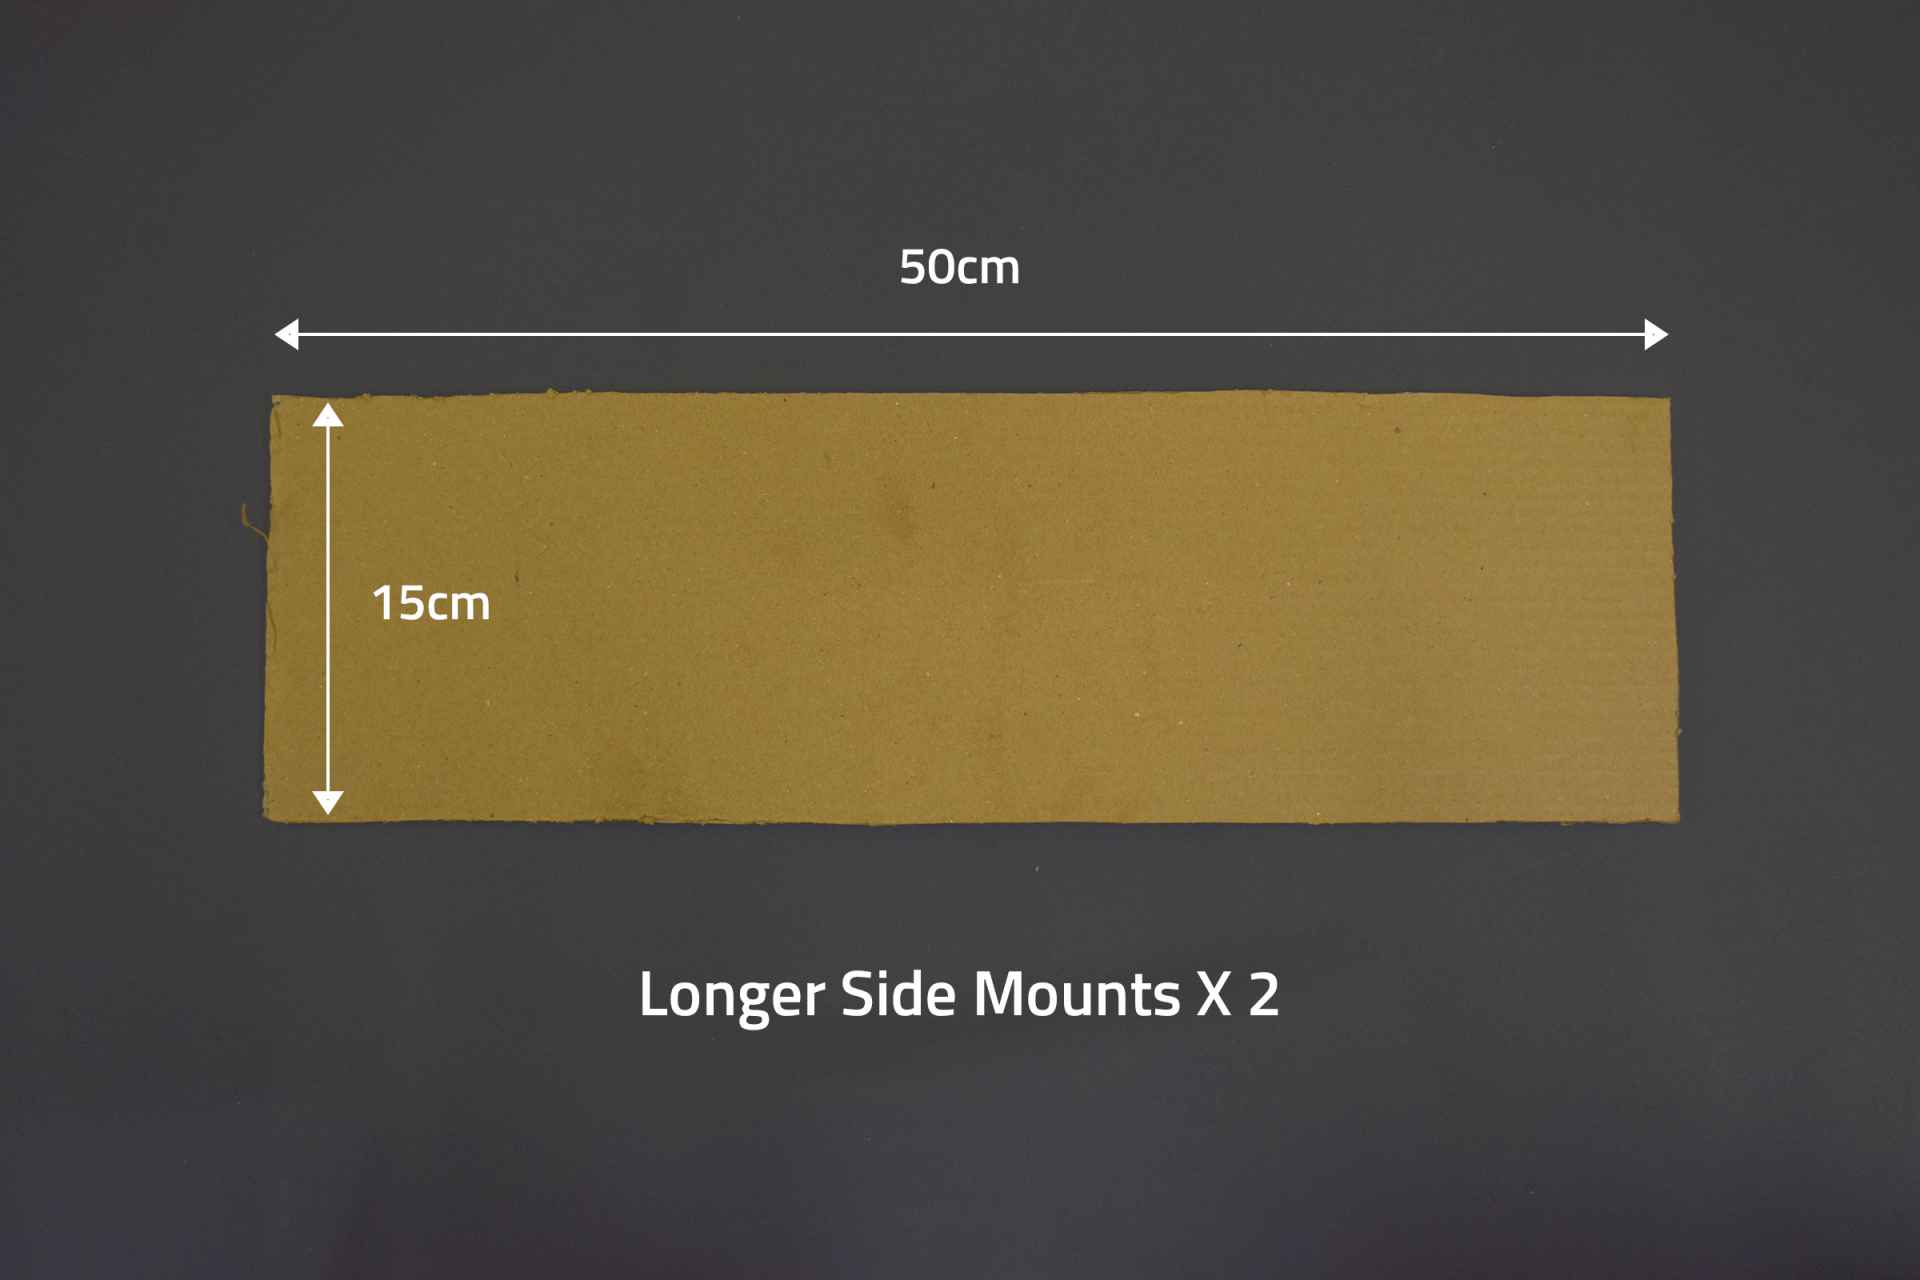
- Two Longer Side Mounts Rectangular sheet of size 50cm X 15cm
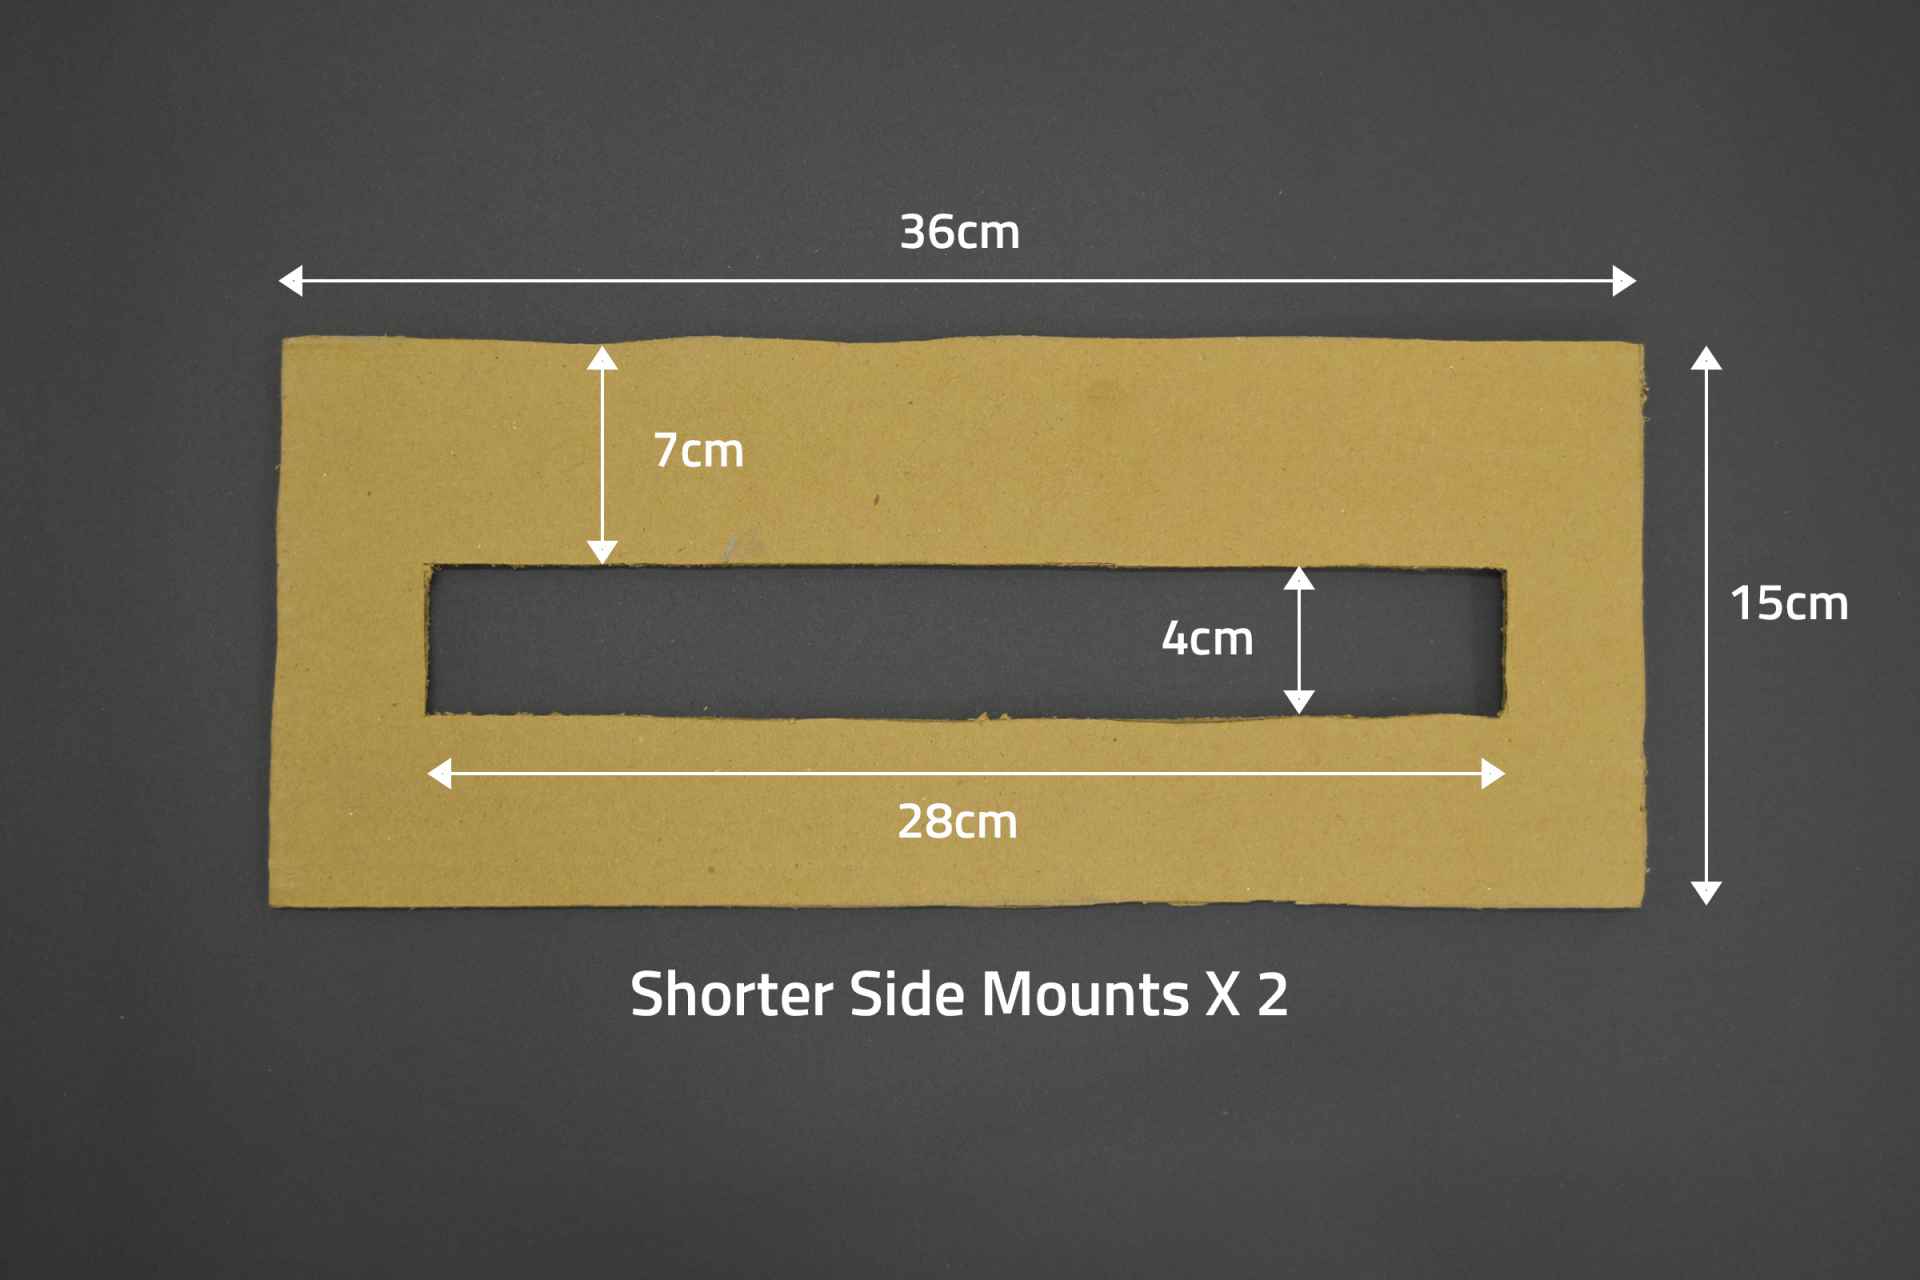
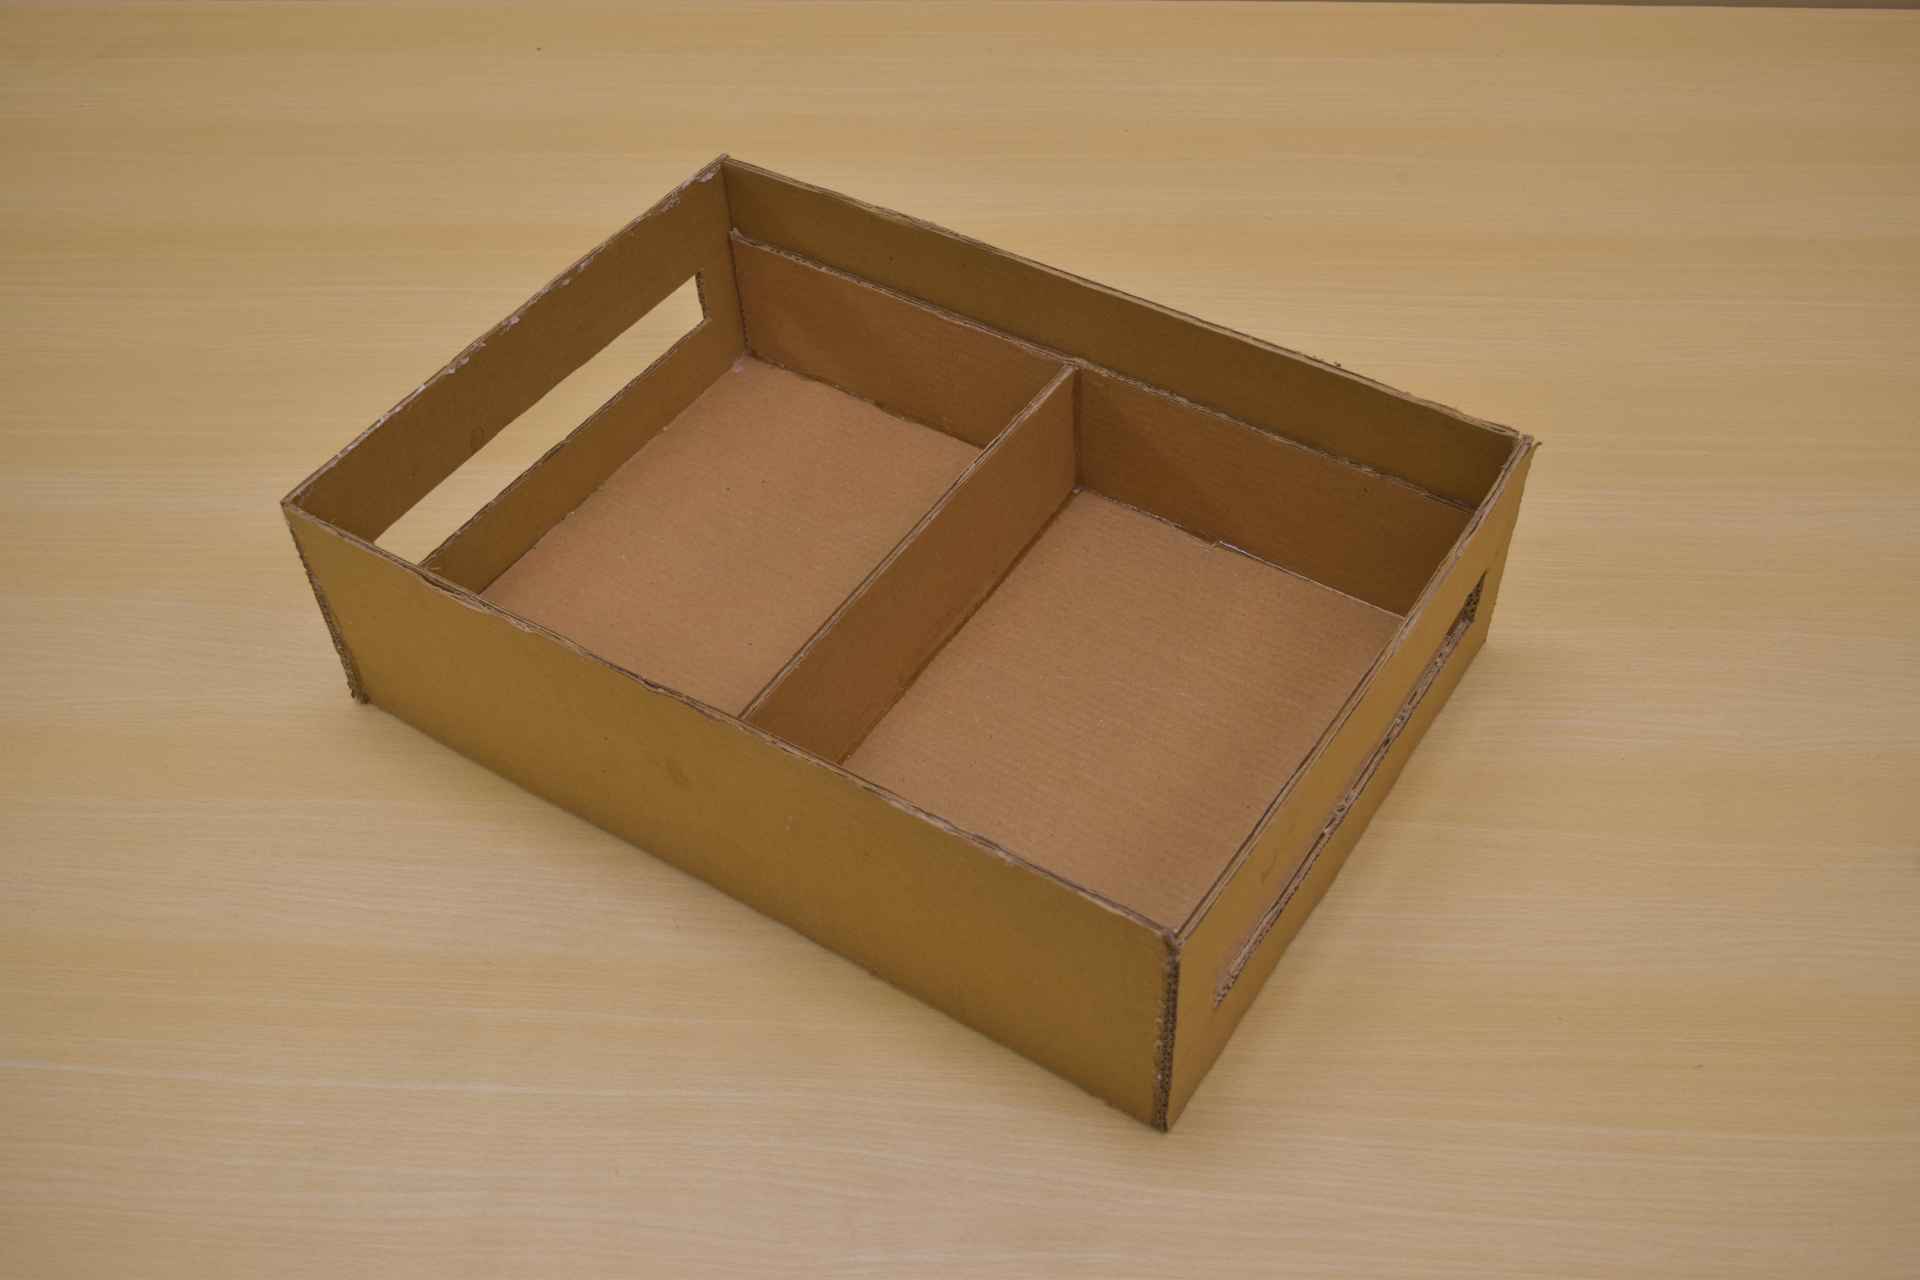
- Two Shorter Side Mounts Rectangular sheet of size 36cm X 15cm Rectangular cutout of size 28cm X 4cm at an offset of 7cm from the longer edge in middle
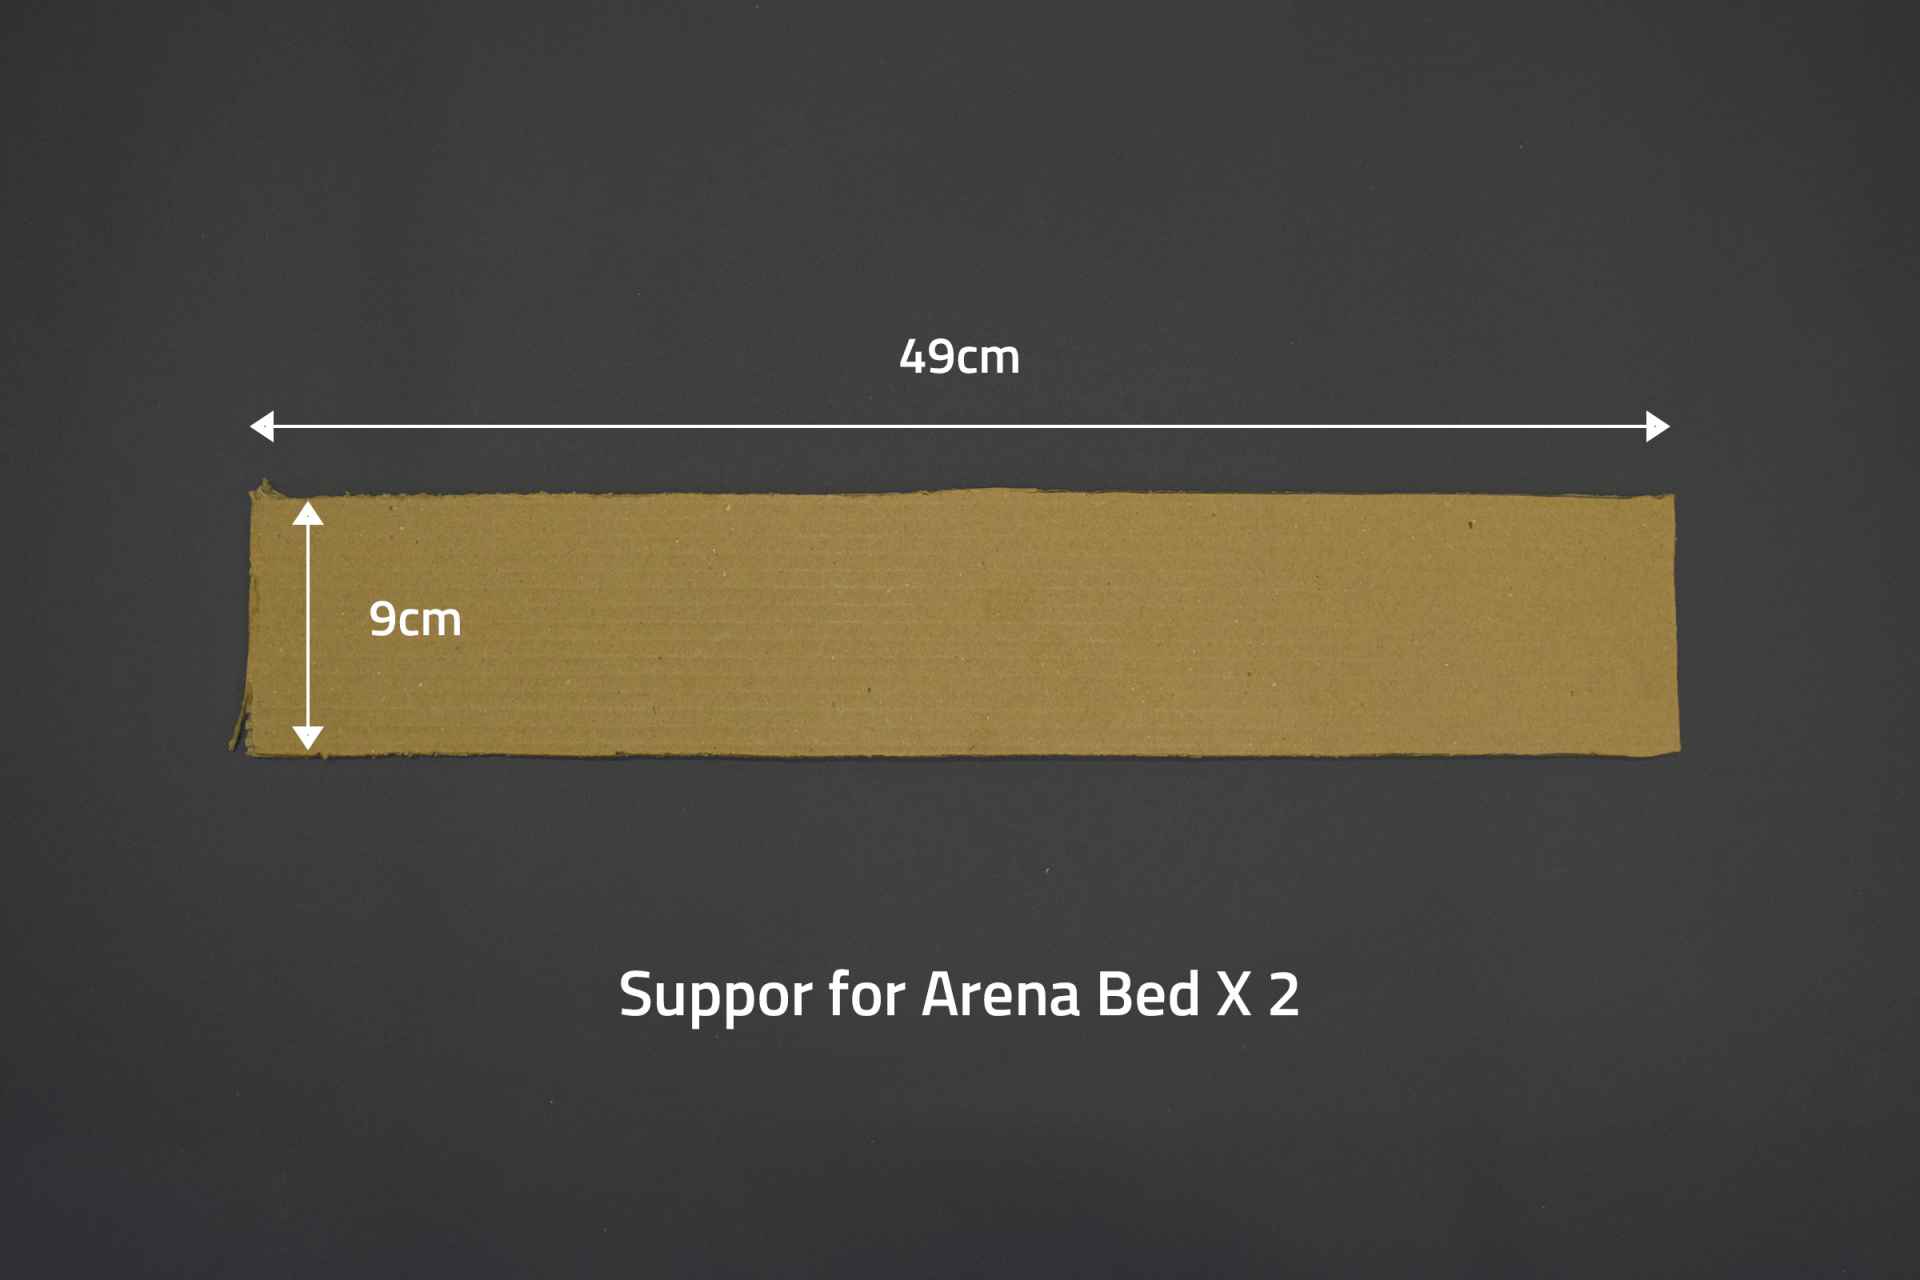
- Two supports for Top Arena bed Rectangular cutouts of size 49cm X 9cm will be stick to the Longer Side mount on the Base Support.
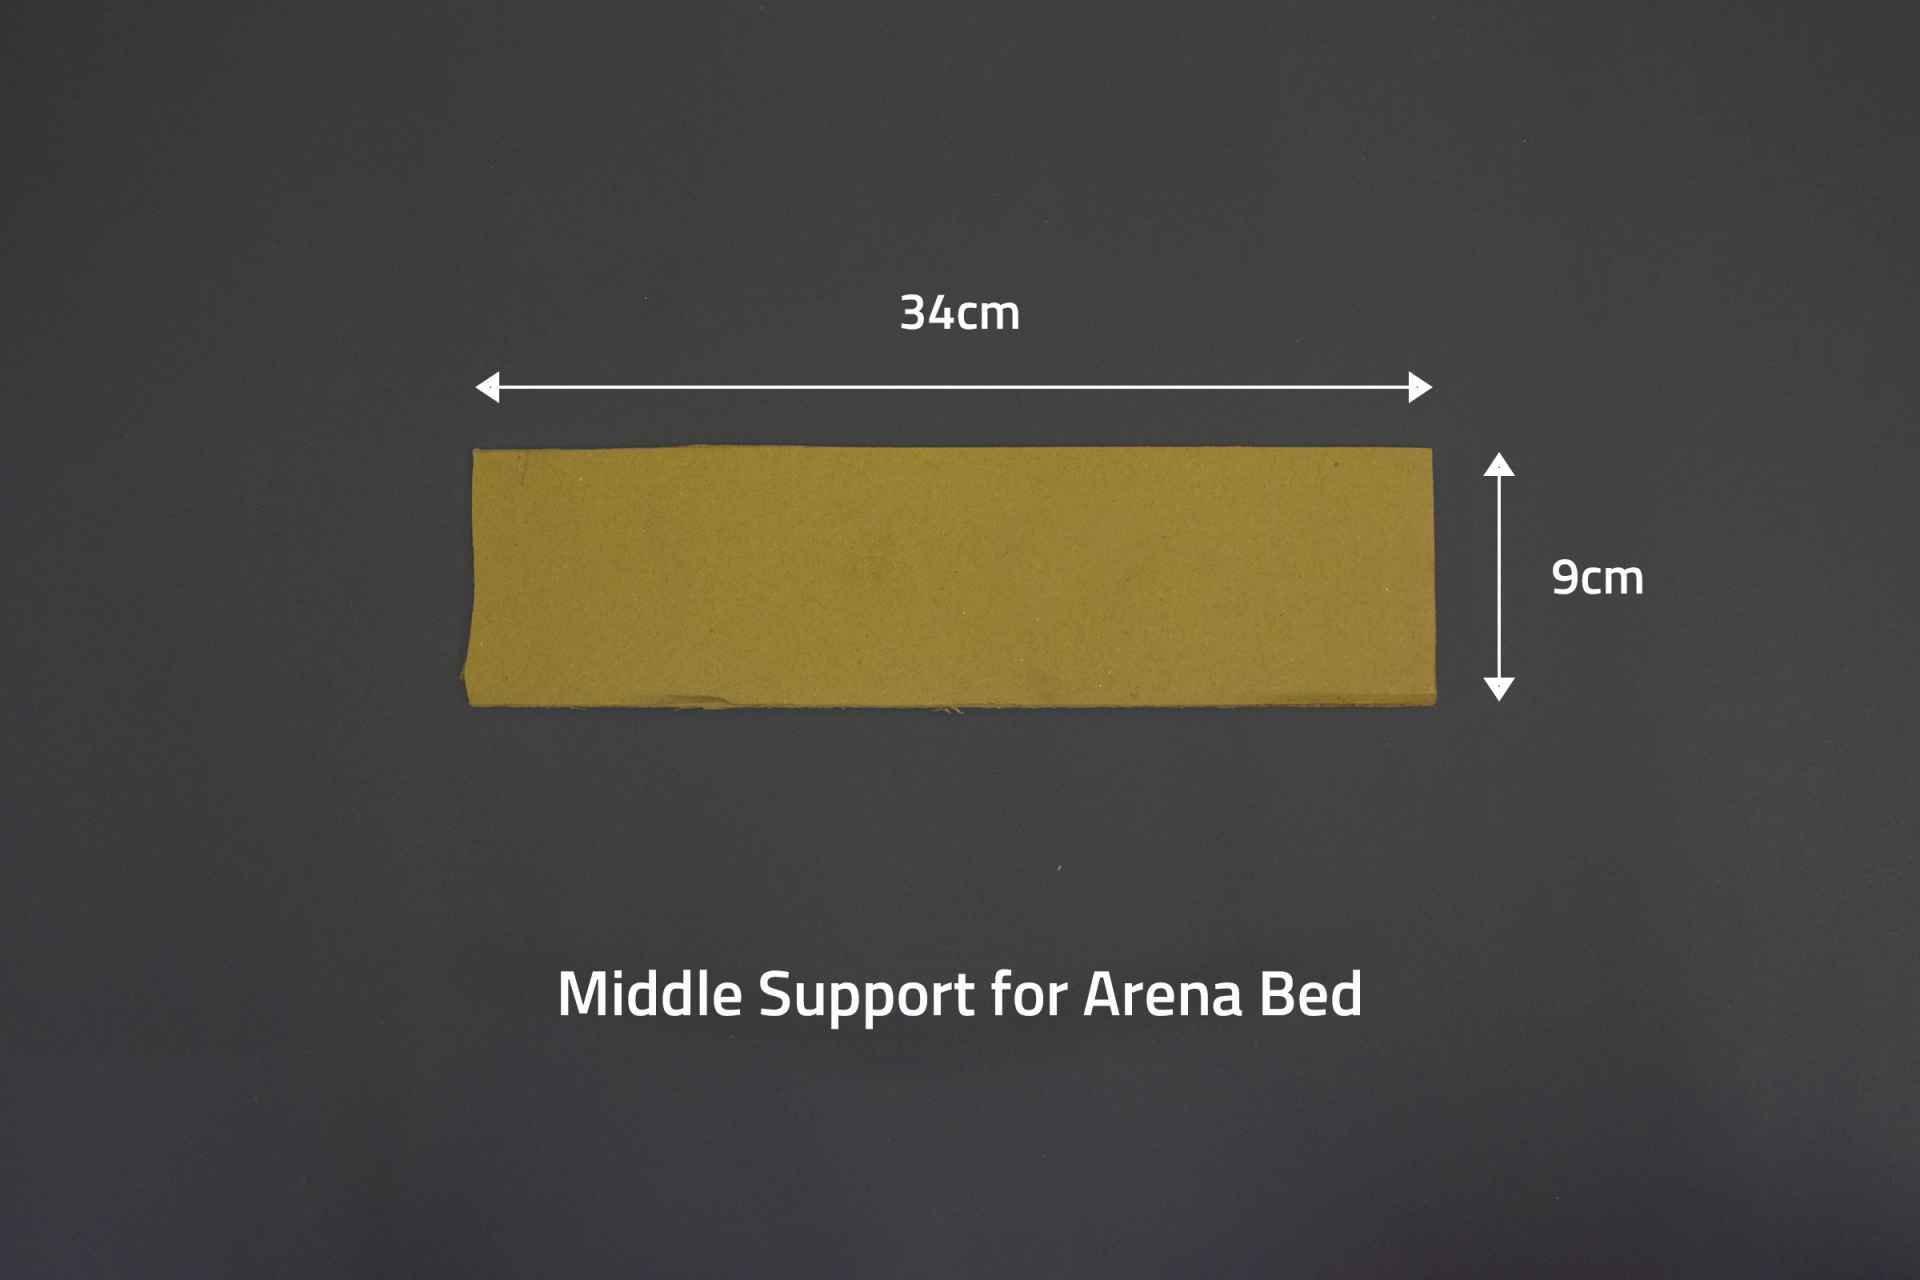
- Middle support for Top Arena bed Rectangular cutout of size 34cm X 9cm glued in in parallel to the Shorter Side Mounts on the Base Support, which will make the partition into two halves. This will restricts the players to enter into opponents side (explained later) and also provide support in middle for the Arena Bed
Now we will make slots in the Two Shorter Side Mounts from which we can insert the playing handles with a magnet strongly glued on one end (we will make this handle later)
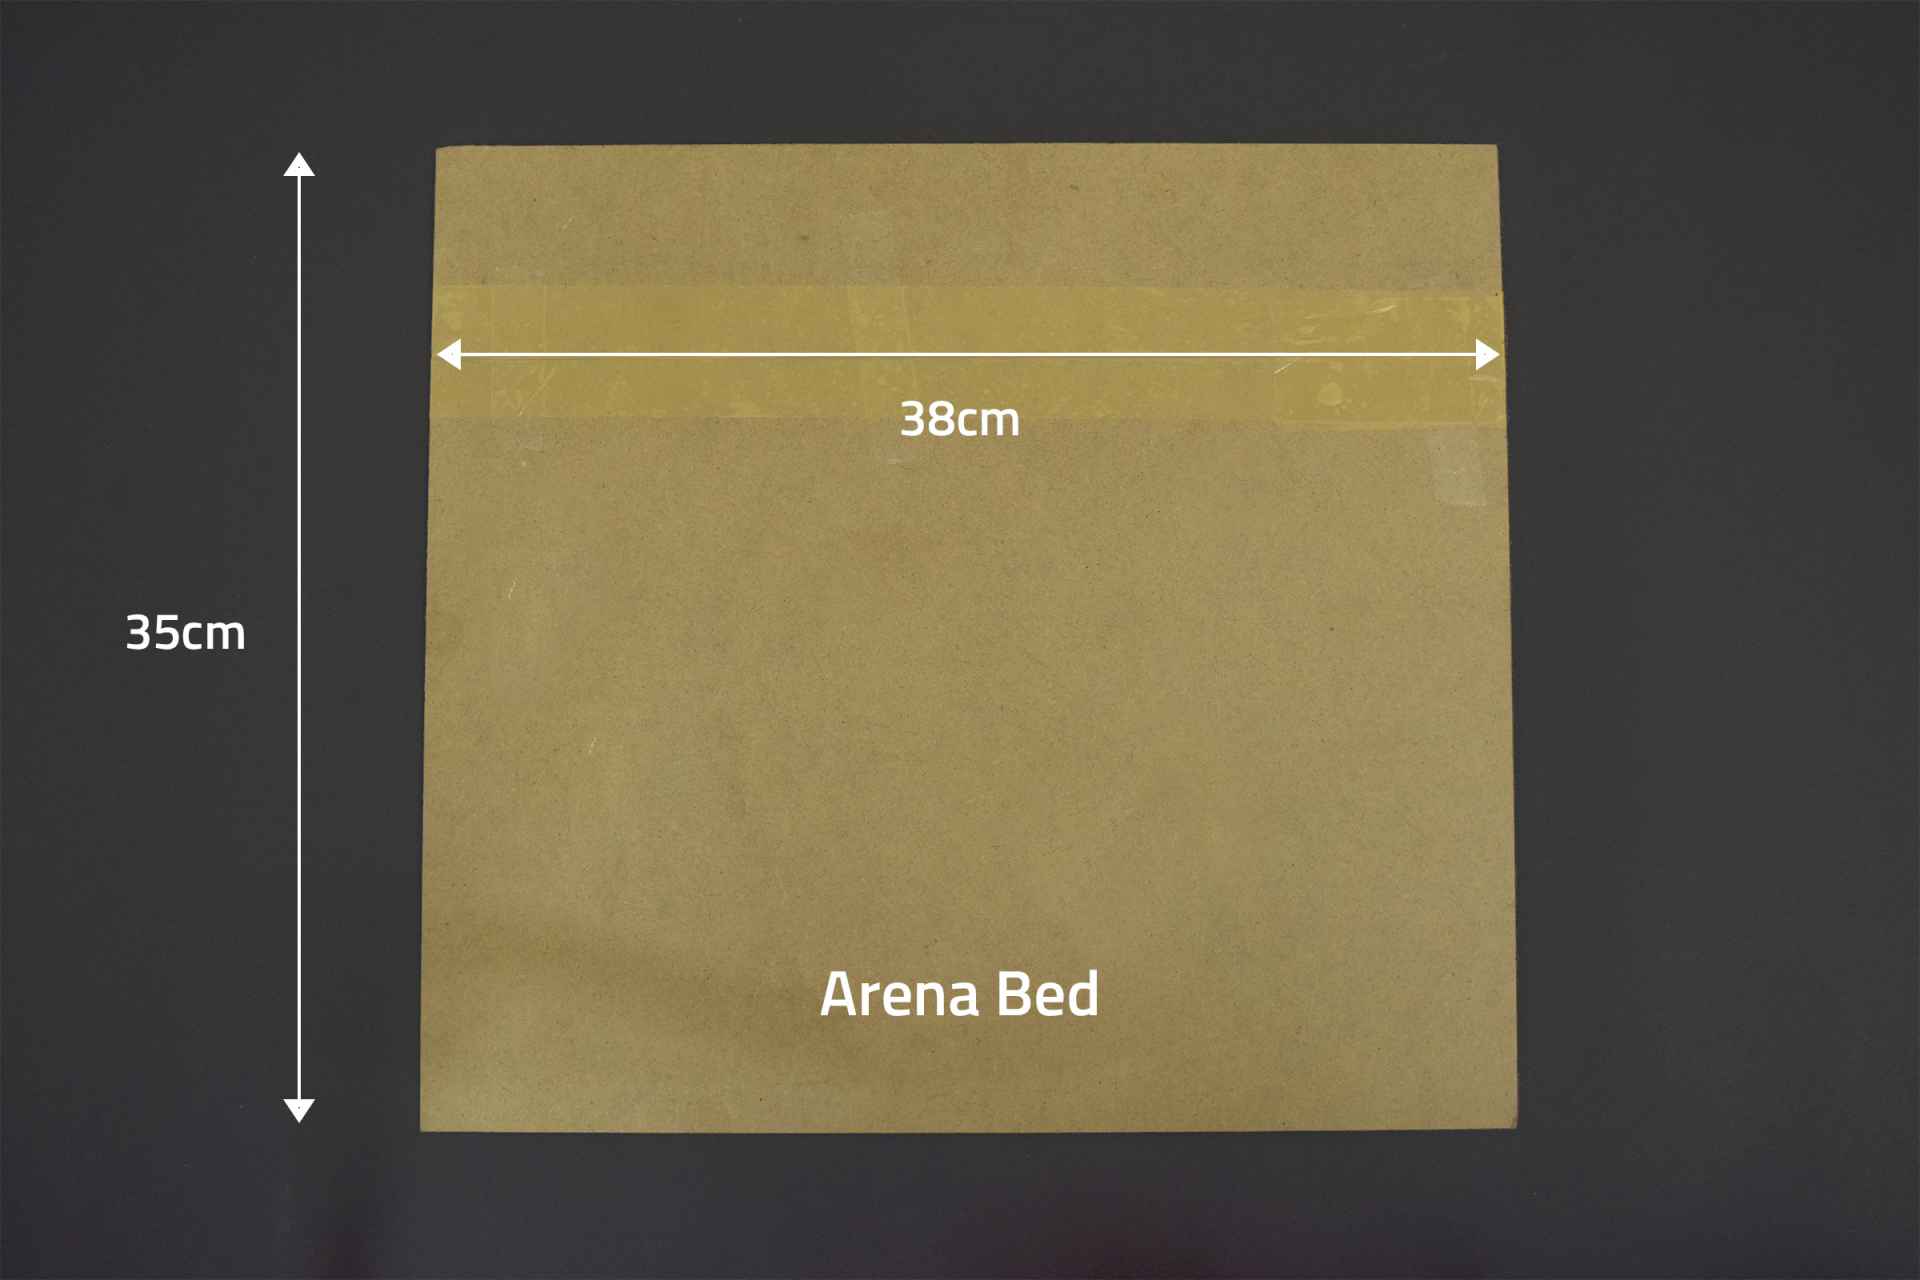
We will use a hard cardboard sheet of size 35cm X 38cm, which should be very flat and should not deform or compress very easily. But first make the frame using the above thick cardboard and then re-check for suitable dimensions, where you can place the Arena Bed on top of Two supports and Middle support as sometimes you end up with different arrangement/placement after gluing with Glue Gun.
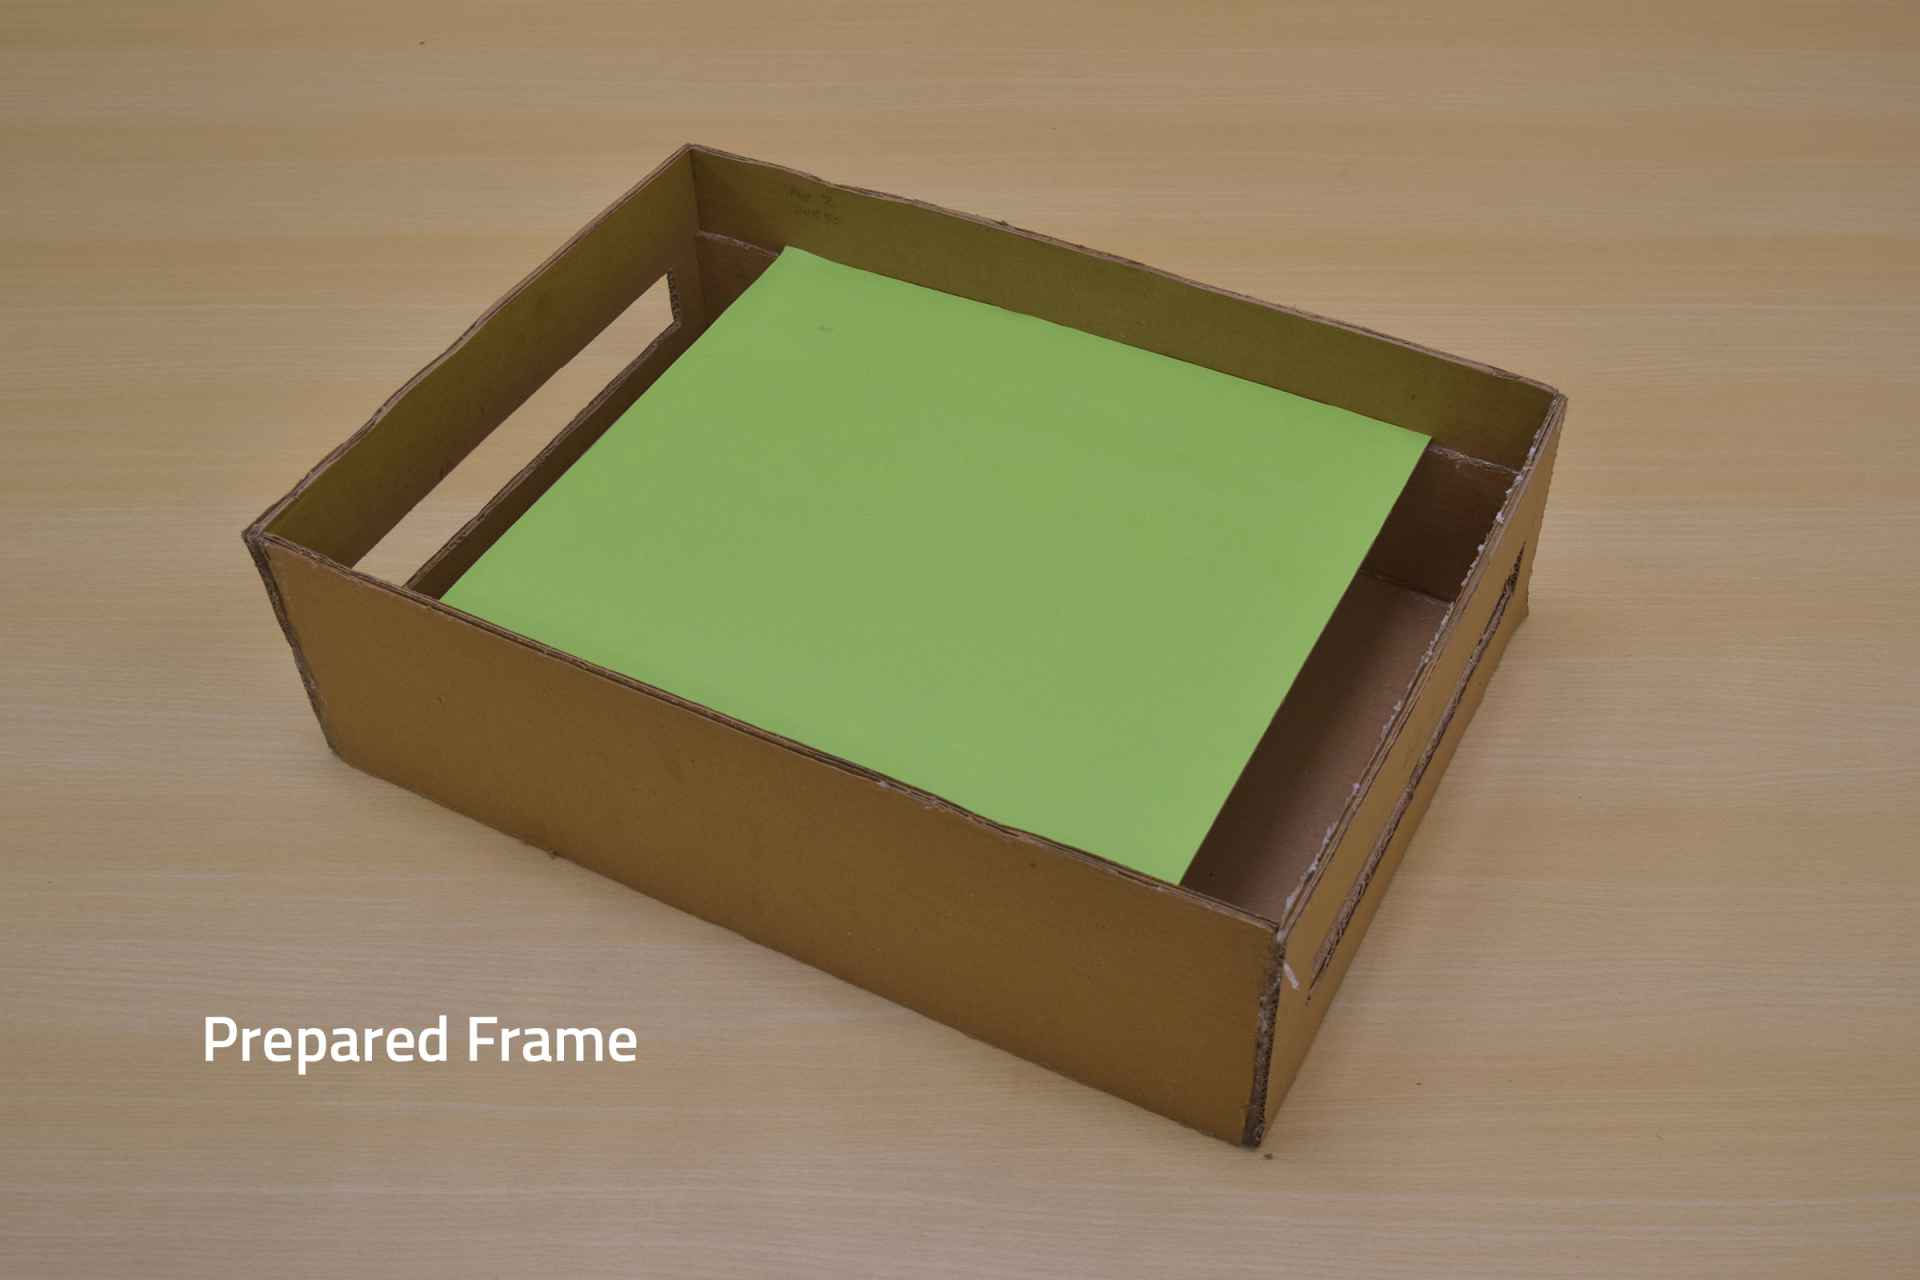
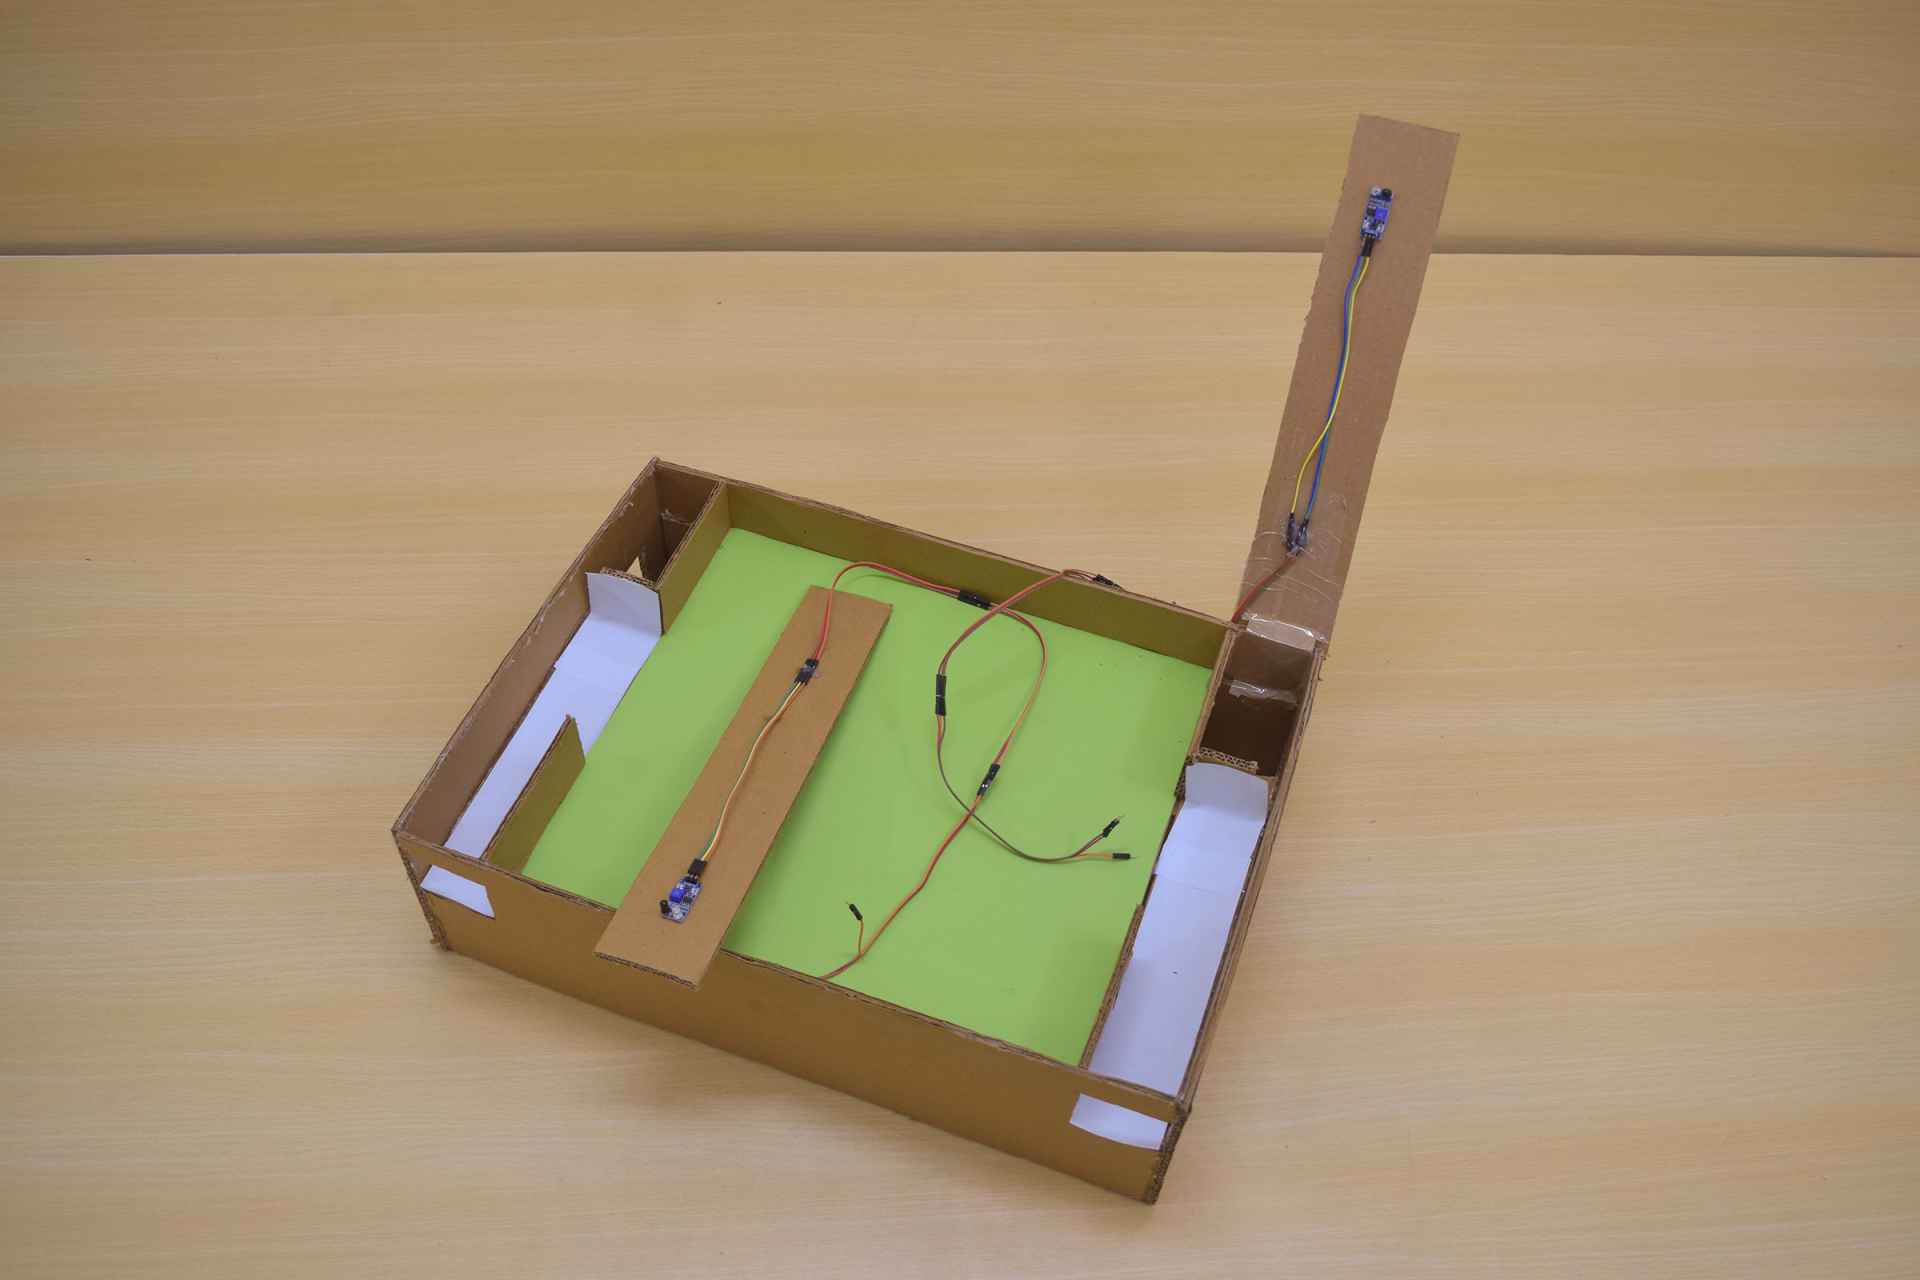
Crafting the Table Hockey Frame: Part B
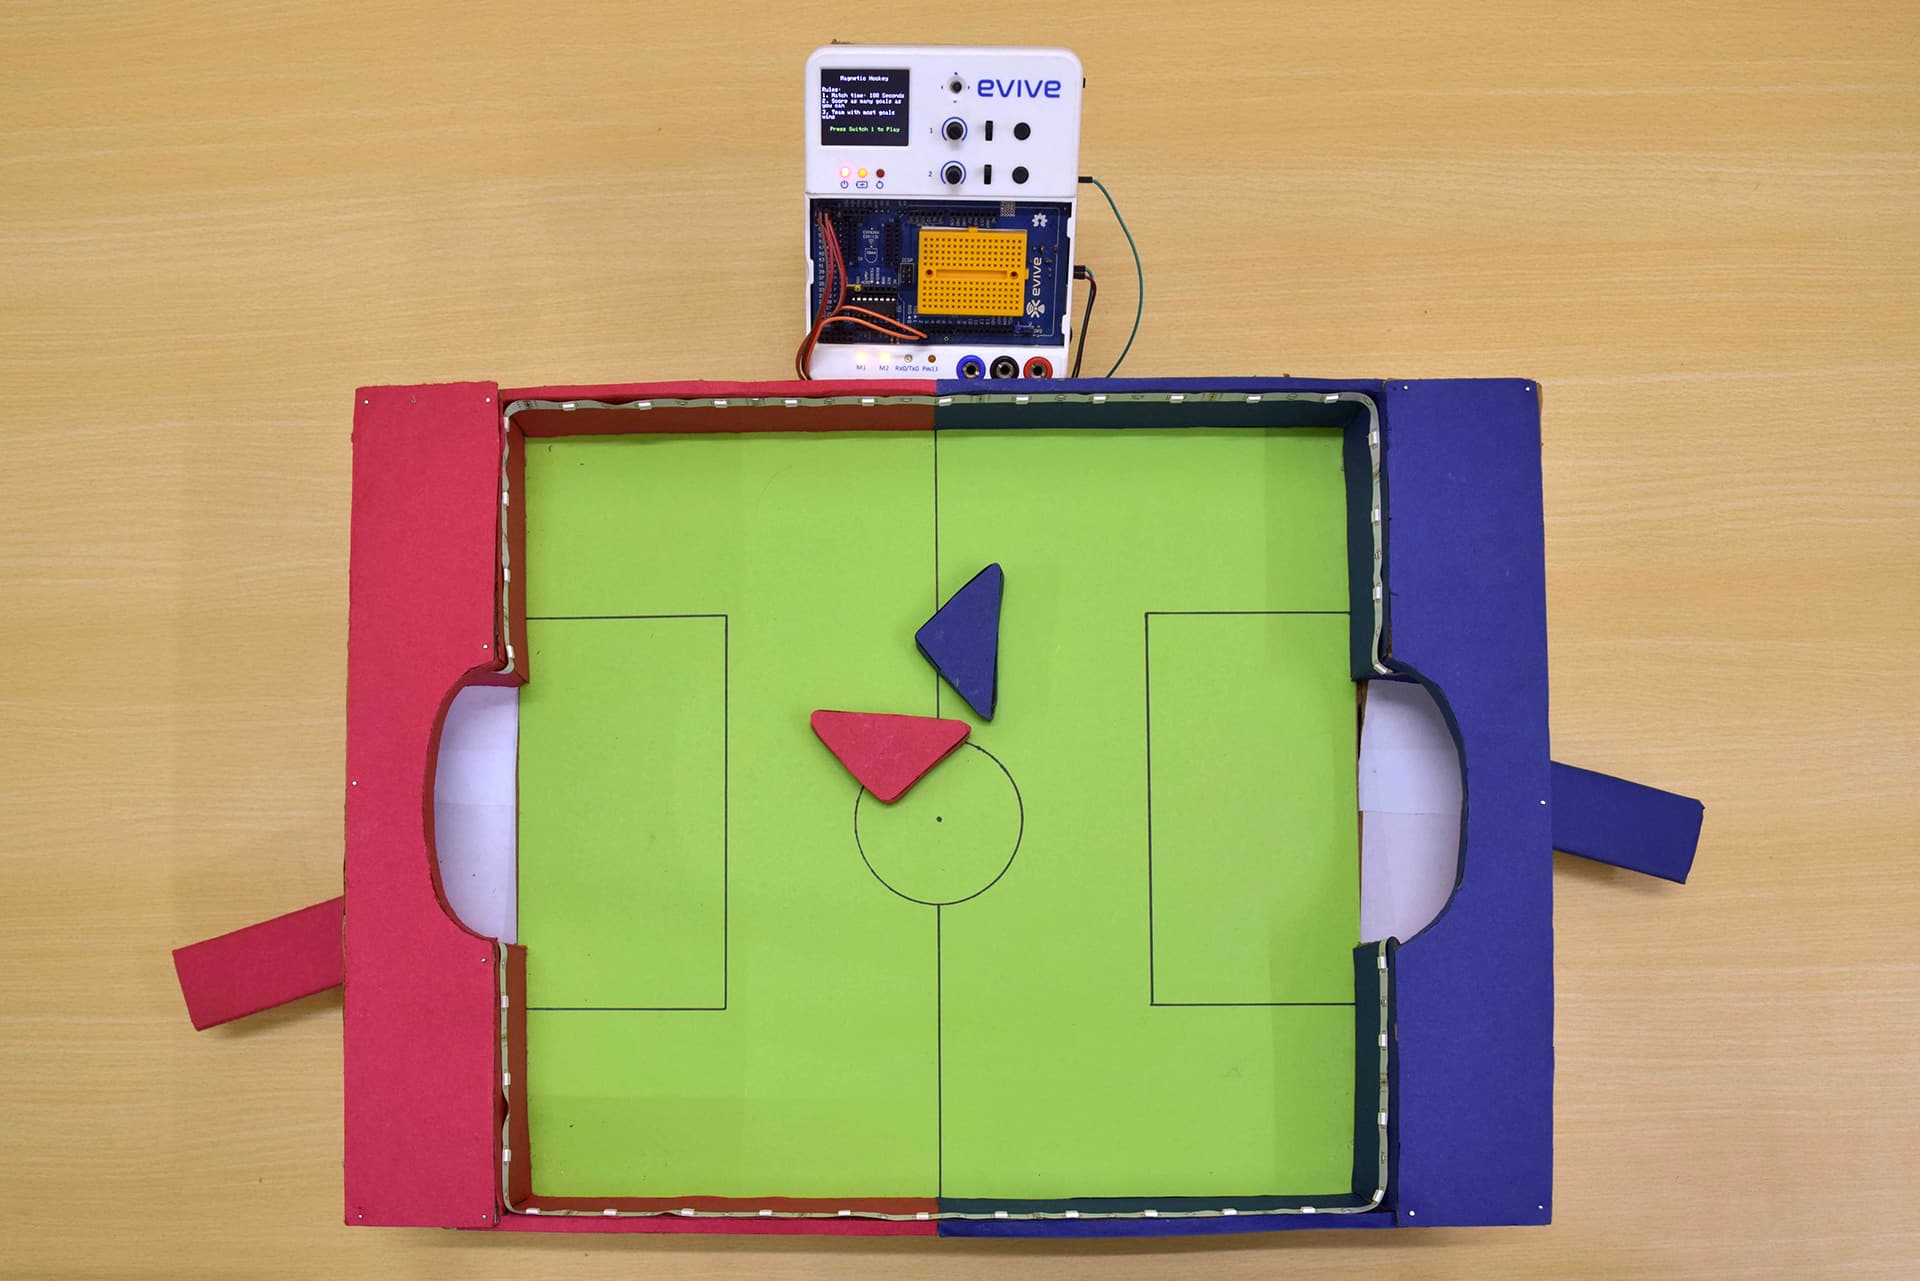
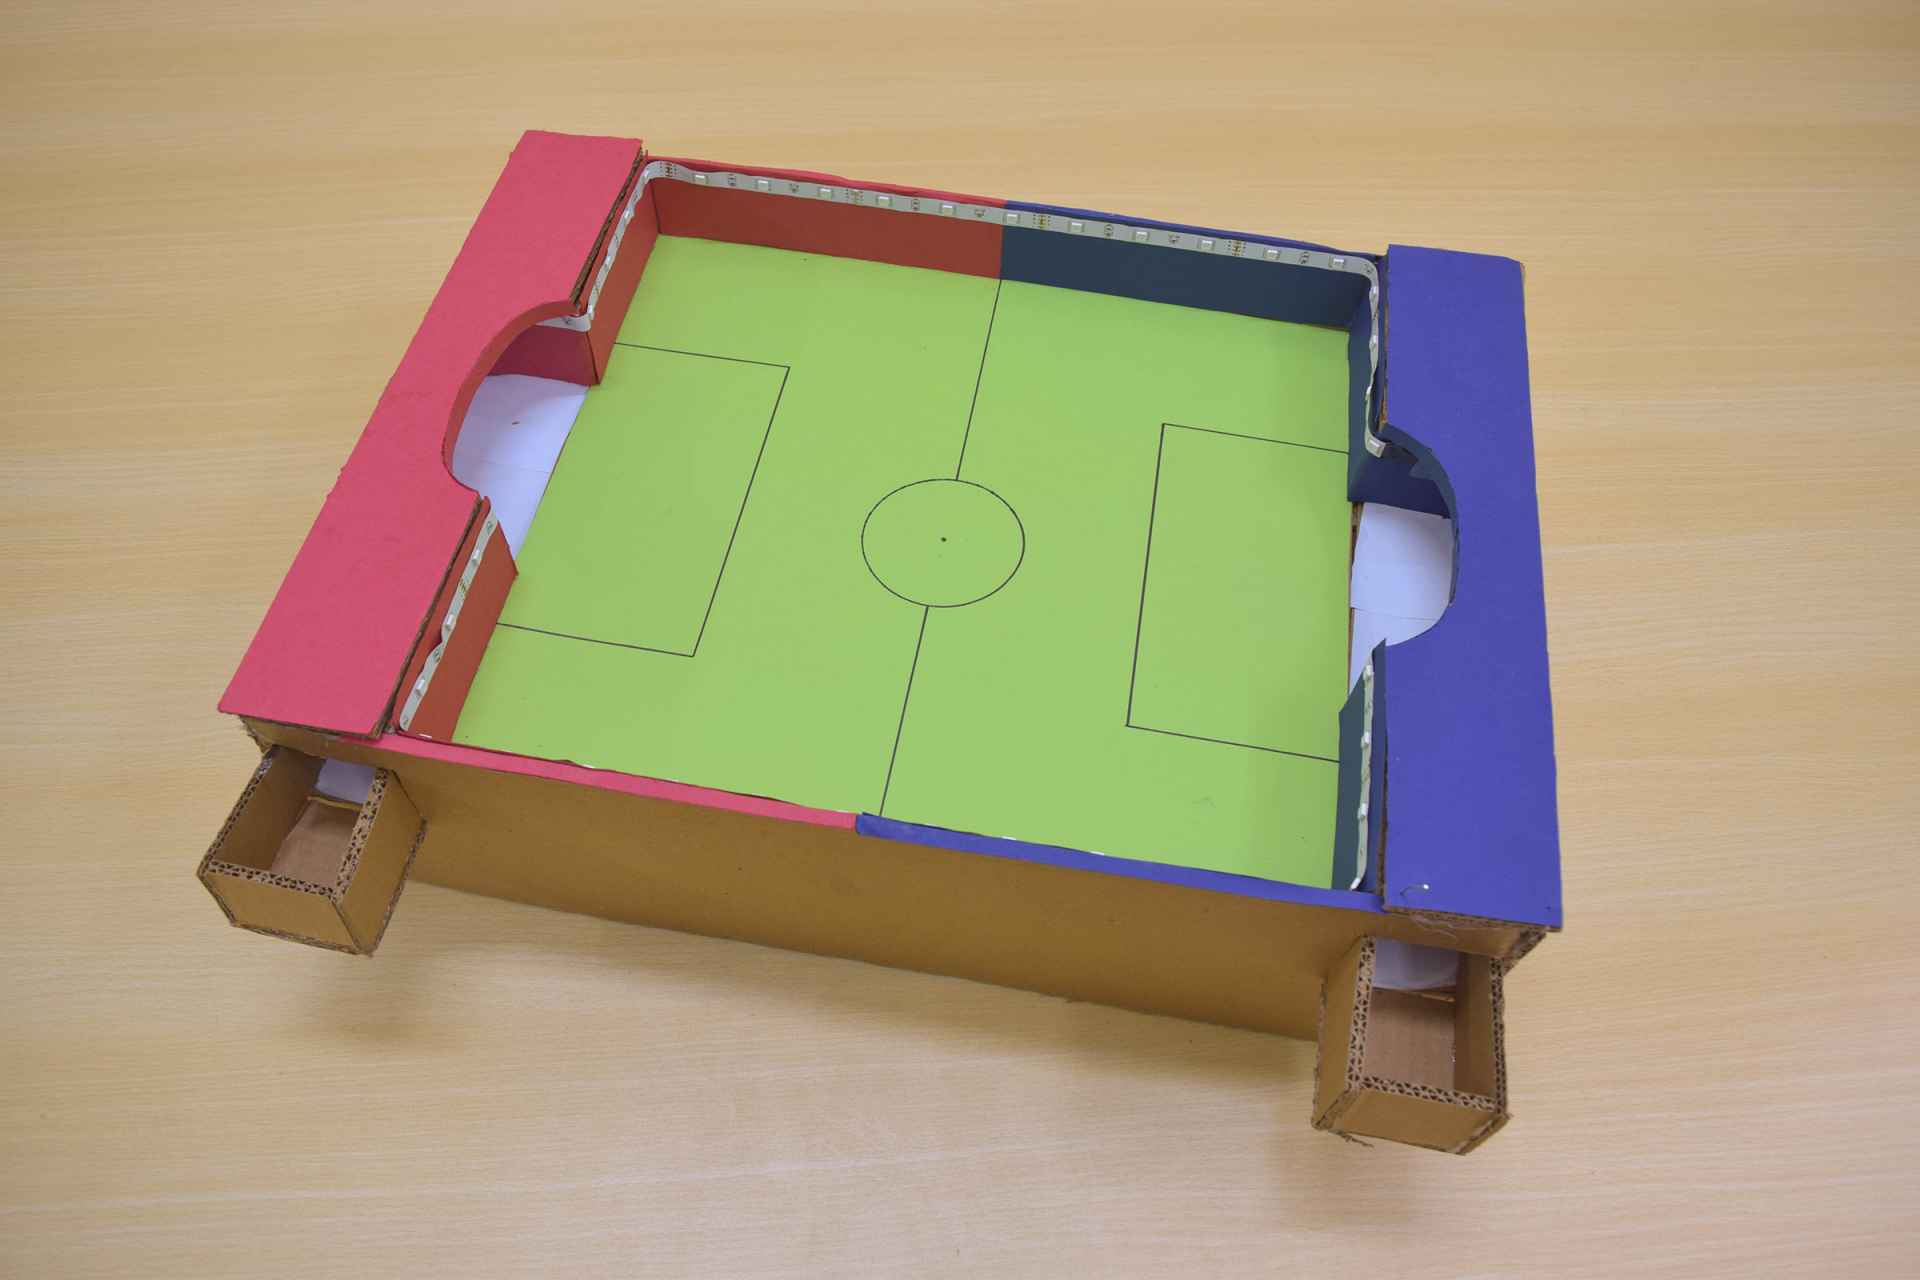
So now our frame and arena are ready. We covered the Arena Bed with thick green colored paper.
Now we need to make slots for goal posts and a slider to get out the ball after the goal is scored. Be careful to take measurements from the frame which we have just made as little bit variation will always be there. We will cut following cardboard pieces:
- Goal slots: 4 Thick Cardboard rectangular cutouts of size 5cm X ~11.5cm (This will leave ~12cm goal post) We will stick them vertically on the top of Arena Bed aligned with the Side Support Mounts. The space left in middle will act as goal post.
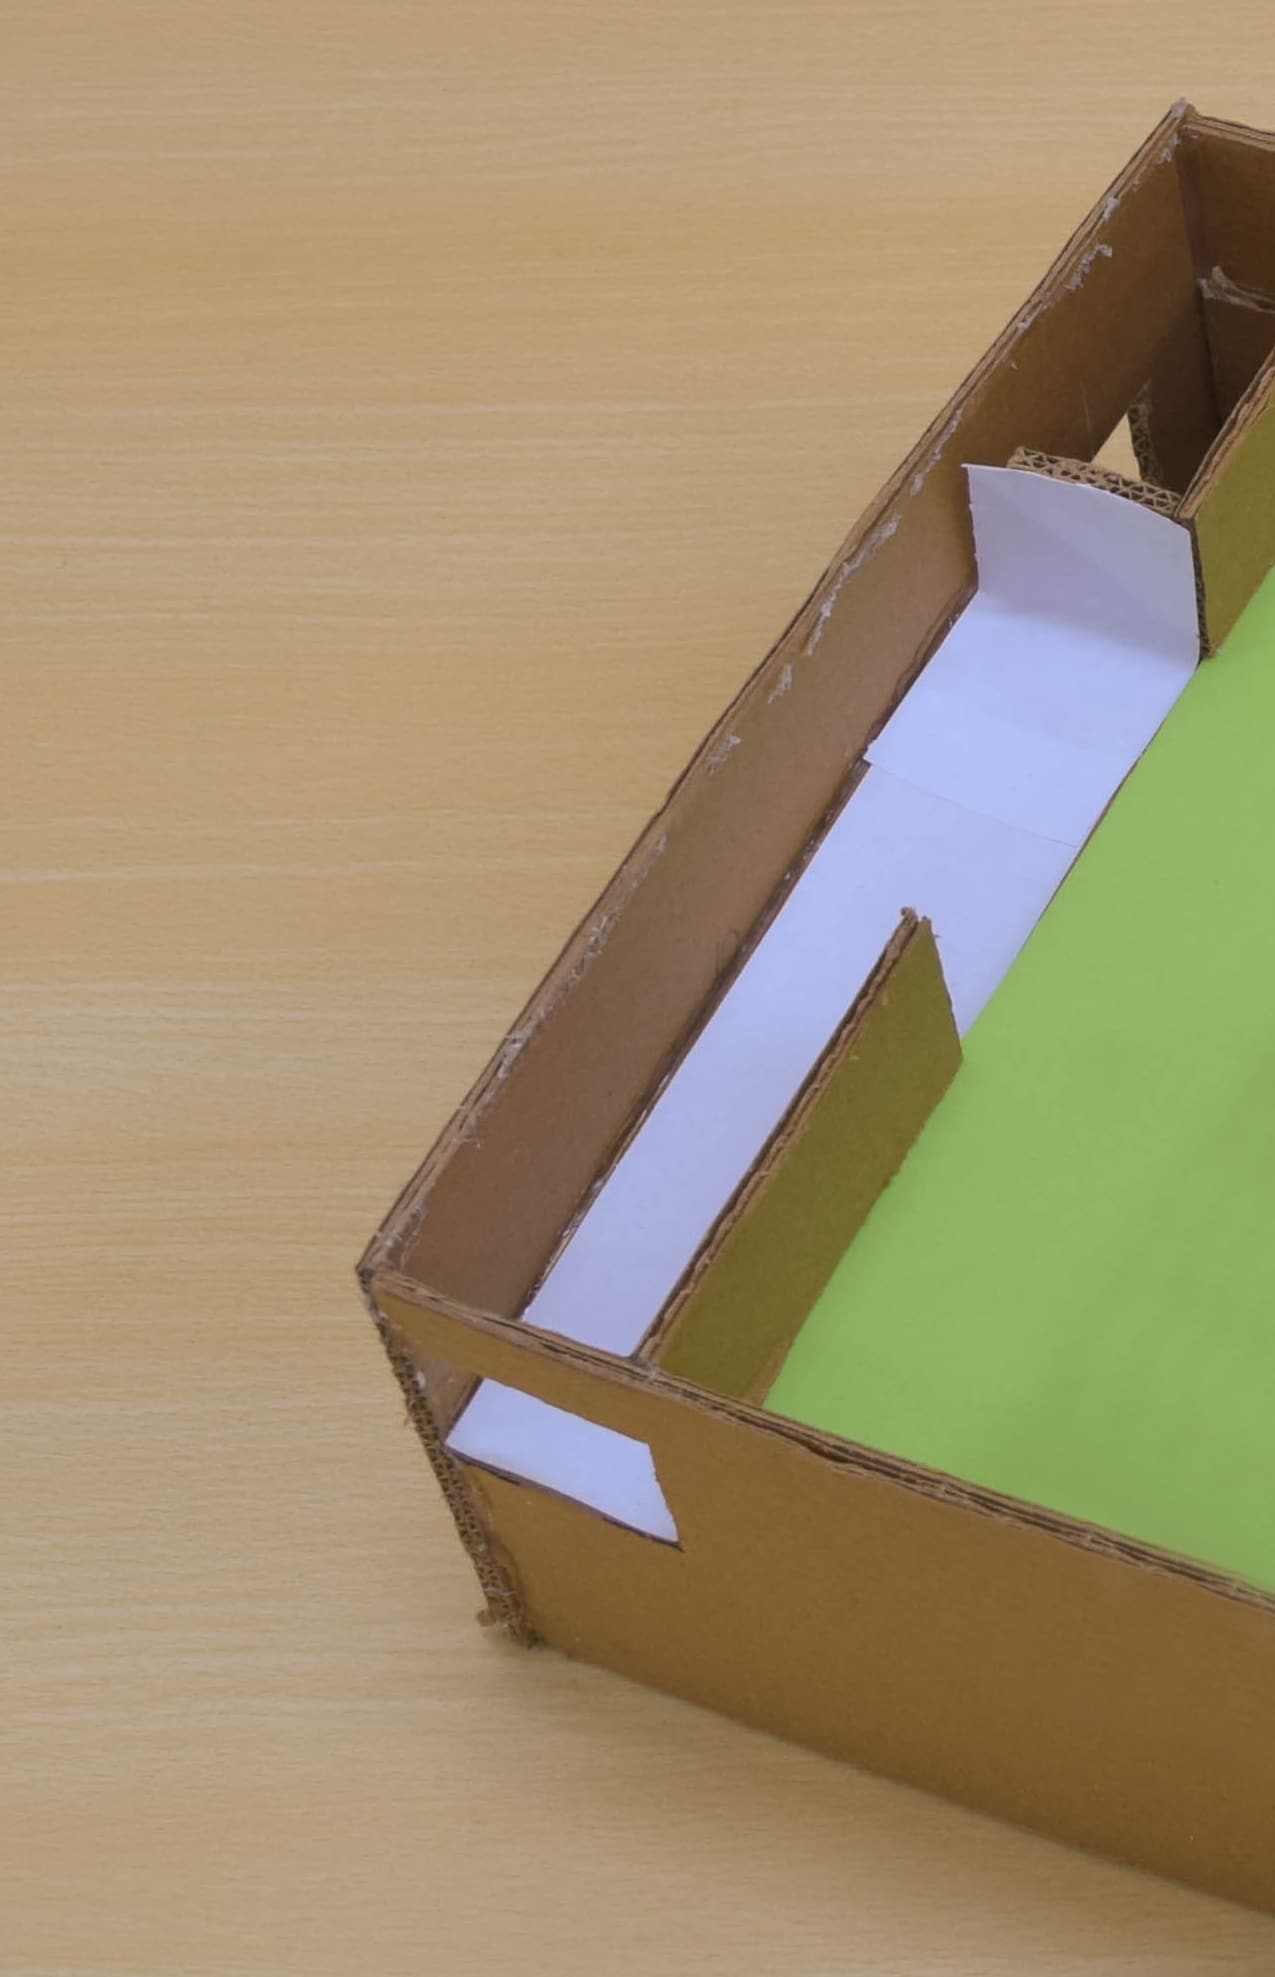
- Sliders will be made of any cardboard sheet of approximately ~36cm X 5.5cm (or 6) We need to carefully glue this little below (~1cm) the Arena Bed in slightly inclined position such that ball can roll over to the side as shown in figure (We kept difference in height of 1cm to make it inclined and ball was easily rolling). We kept it little below so as the even a fast moving ball should not come back into the field. Please measure before cutting this and adjust the dimensions accordingly. Stick a white/dark paper on slider sheet as opposite to dark/light colored ball, which is required for the sensor to detect passing of ball. (explained in next step)
- Ball catcher Once the ball slider is working fine, we will make rectangular slot in the Side Support Mounts to get the ball out of slider. We made two small ball catcher, which we will glue in front of the rectangular slots on each sides of sliders.
- Goal Post Top Covers (~6.5cm X 36cm) We will put a top cover on top of the goal post and sliders. It will be placed on top with support of Shorter Side Mount and two rectangular cutouts which makes the goal post. Measure the required dimensions from the frame, we just made. Gently Craft a circular arc from the from side. Don’t glue this now. (Shown in next step)
Integrating Sensors to Detect the Ball After Goal is Scored
Who wants to note down goal score? We will make it automated using basic IR sensors and a micro-controller. We have to mount two IR sensors on the inner side of Goal Post Top Covers near the edge (leave some space from the edge). We will have to bend the BLACK and TRANSPARENT LEDs on the sensor to point it vertically (as shown in image). Please check that ball should easily roll out without touching the sensor.
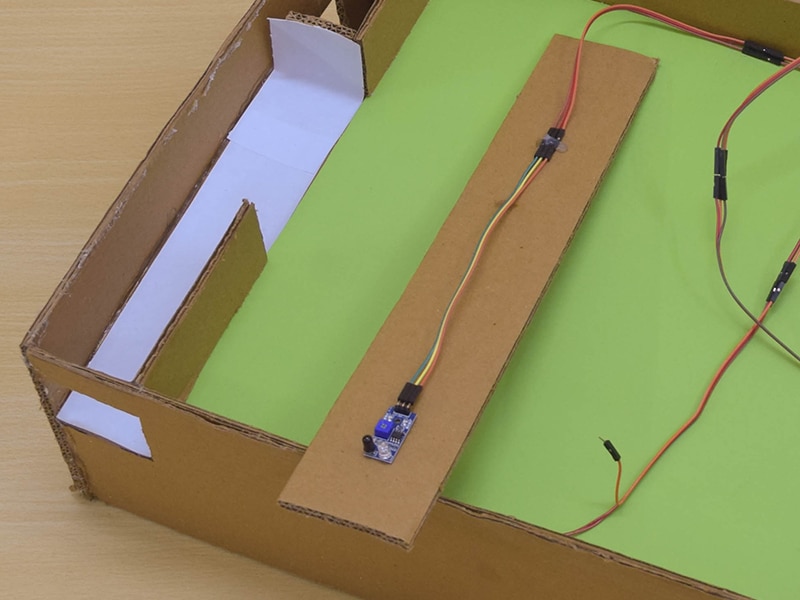
Now we will use evive menu which can be downloaded from here. Navigate to Pin State Monitor menu option and we will be using this to calibrate our sensors. The ball will pass from the Slider Sheet after a goal is scored. There is a small potentiometer on the sensor which needs to be calibrated to detect the ball. Our ball is dark reddish colored, so we have stick white paper on Slider Sheet to differentiate. Turn the potentiometer at one end and then slowly turn it while testing detection of ball passing.
You can skip this step and programming one, if you don’t want to add timers and sensors to count the goals.
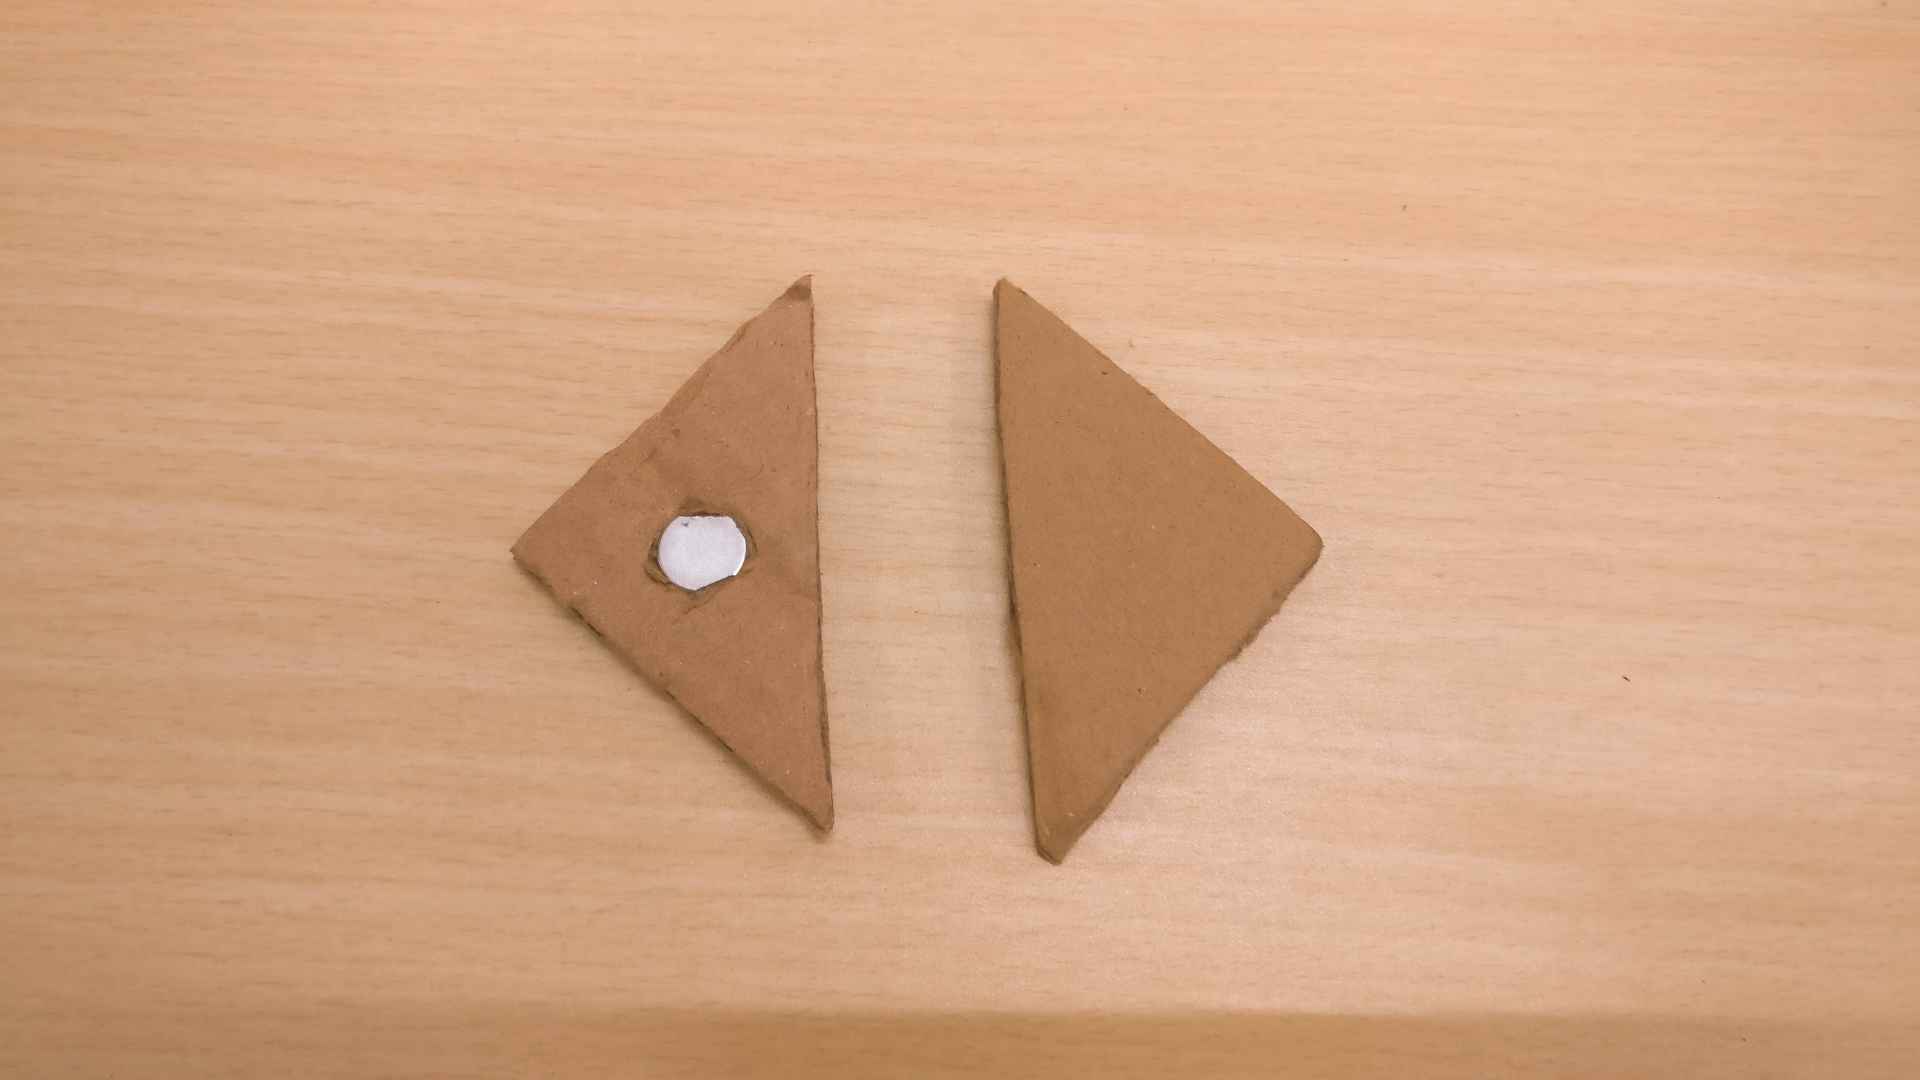
Crafting the Magnetic Striker and Stick
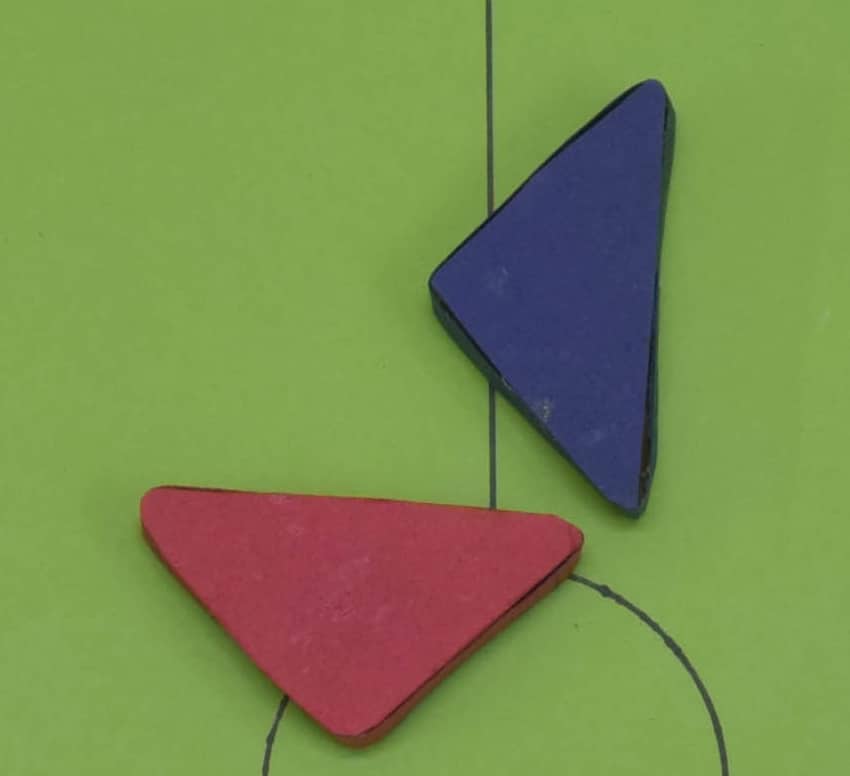
Now we will make four isosceles right angular triangles of cardboard with sides 7cm X 7cm for strikers. You can try what size you want to make. Two triangular cutouts will be glued on top of each other after placing a neodymium magnet in the middle. [We added a third piece on top of two as the ball was going over the top it]
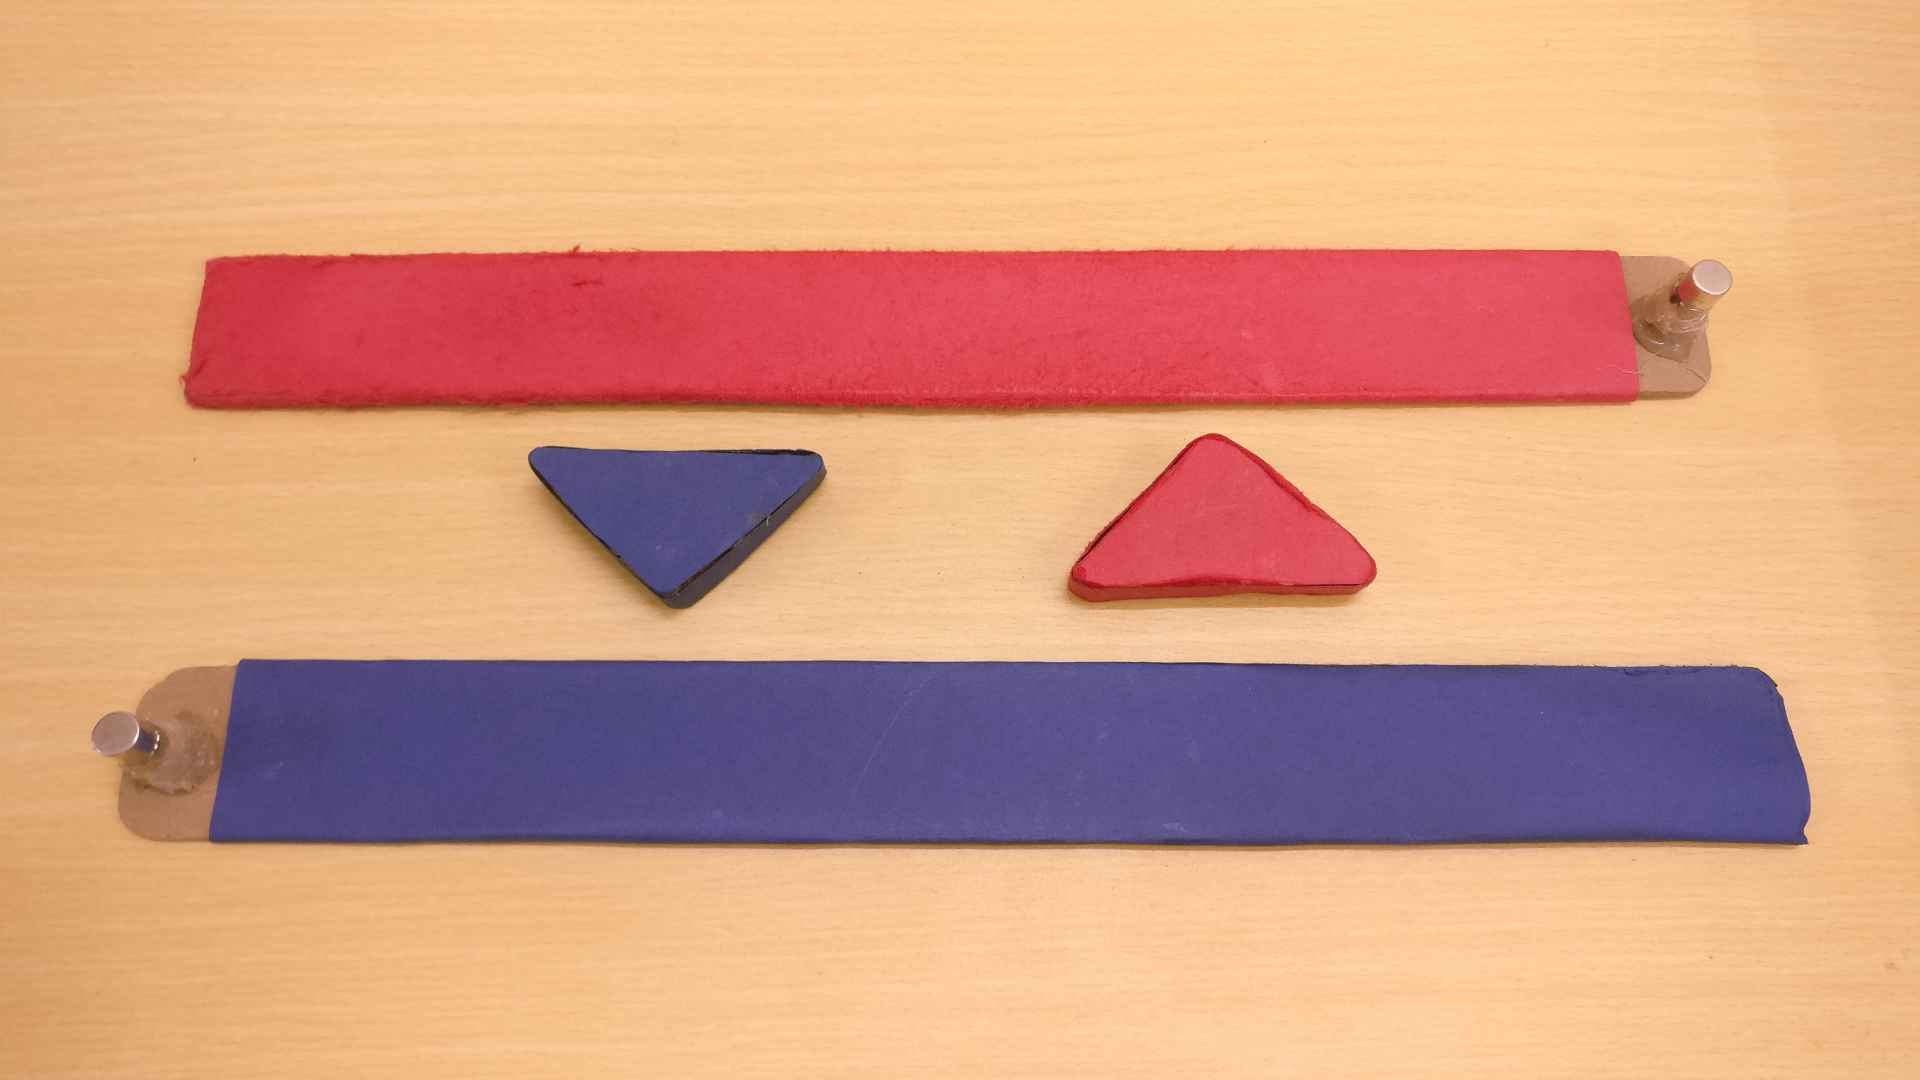
Also, we will make two sticks with magnetic tip to control the striker from below the Arena Bed. A very strong Neodymium magnet has been glued on the tip of stick. Later we covered the stick with thick red and blue colored paper.
This stick will drag the striker kept on top of Arena via magnetic force.
Decorating the Hockey Table
We stick red and blue colors on the two sides and drawn half line and marked a rectangular field near goal posts on both the sides. Ball will be placed inside this at the start of every game.
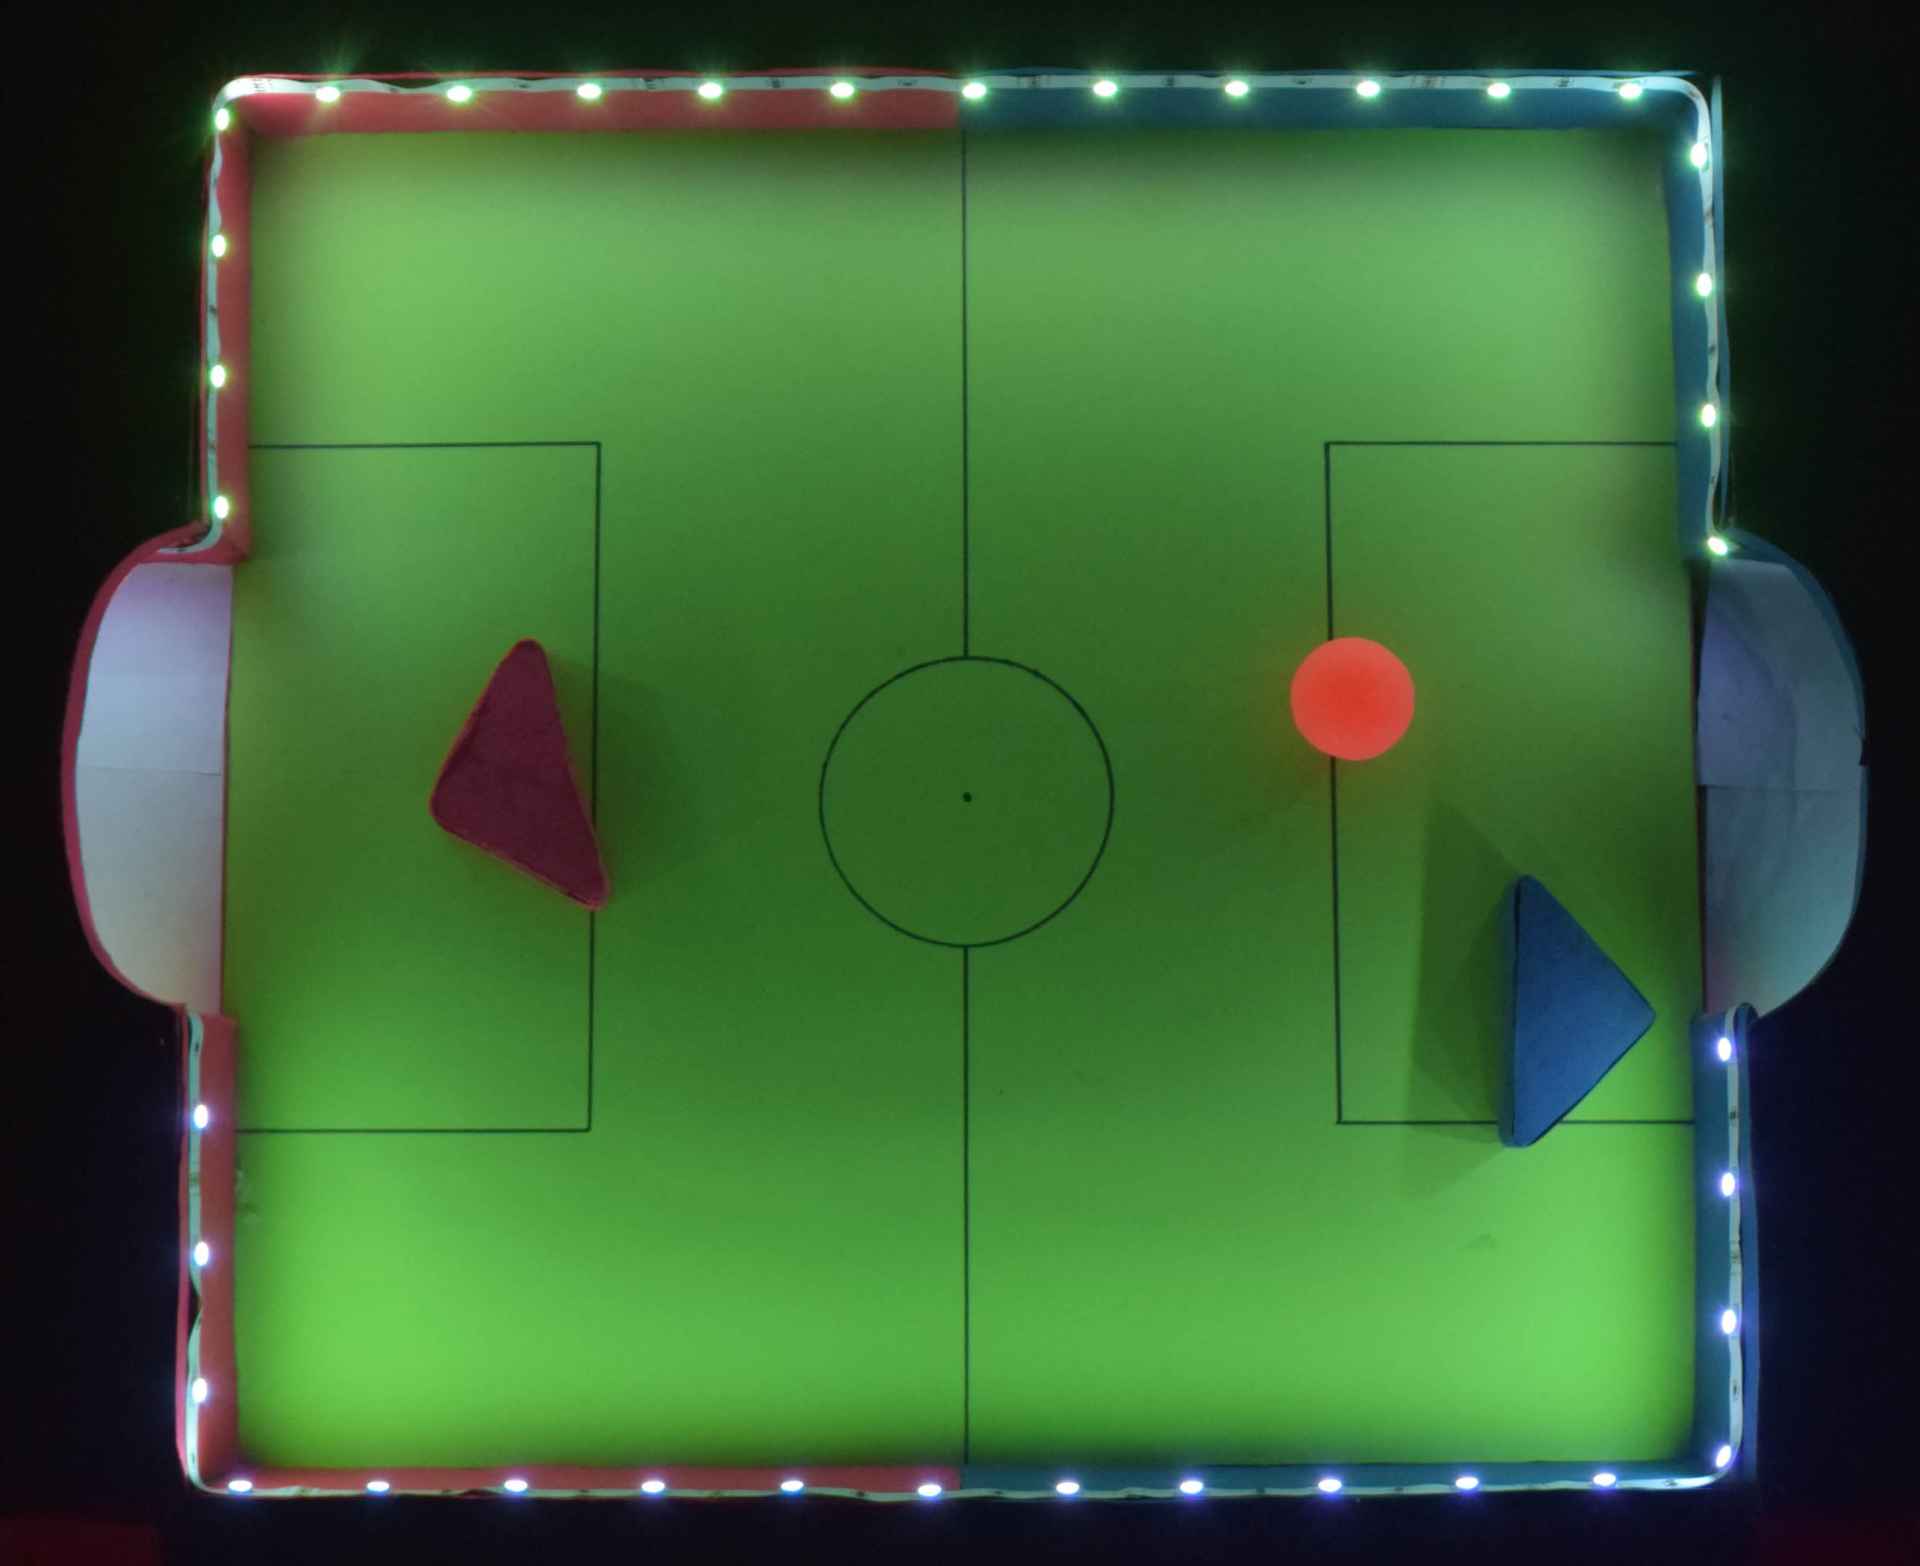
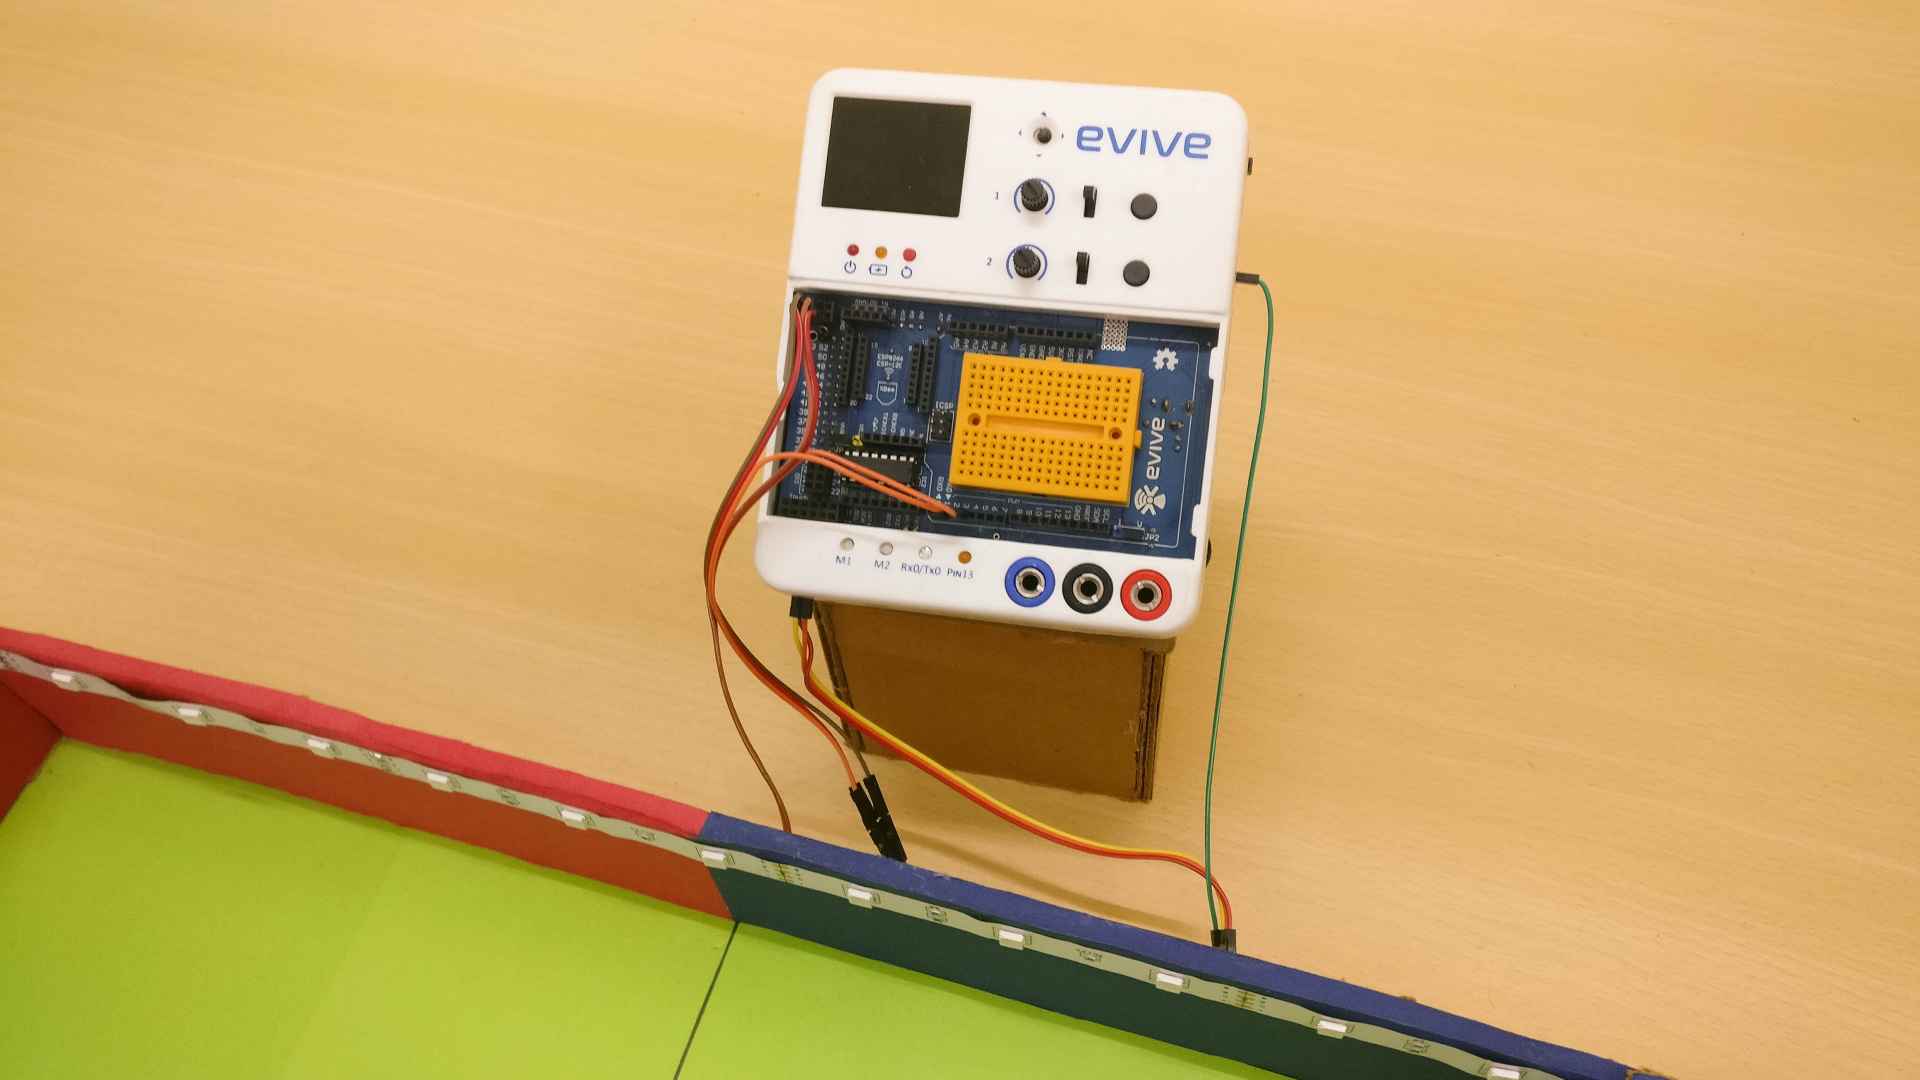
Enjoyed playing games with your friends during late night hangouts? Its really fun. There comes RGB LEDs. We put 12V RGB lights give amazing feeling with switched off room lighting. On all the sides, we had pasted the LED strip which were controlled by evive’s inbuilt motor driver using 3 channels. Organize the wires or LED strip and sensors and bring it carefully outside the frame near the Top Goal Post Cover.
Wiring the Sensors and Lights with evive
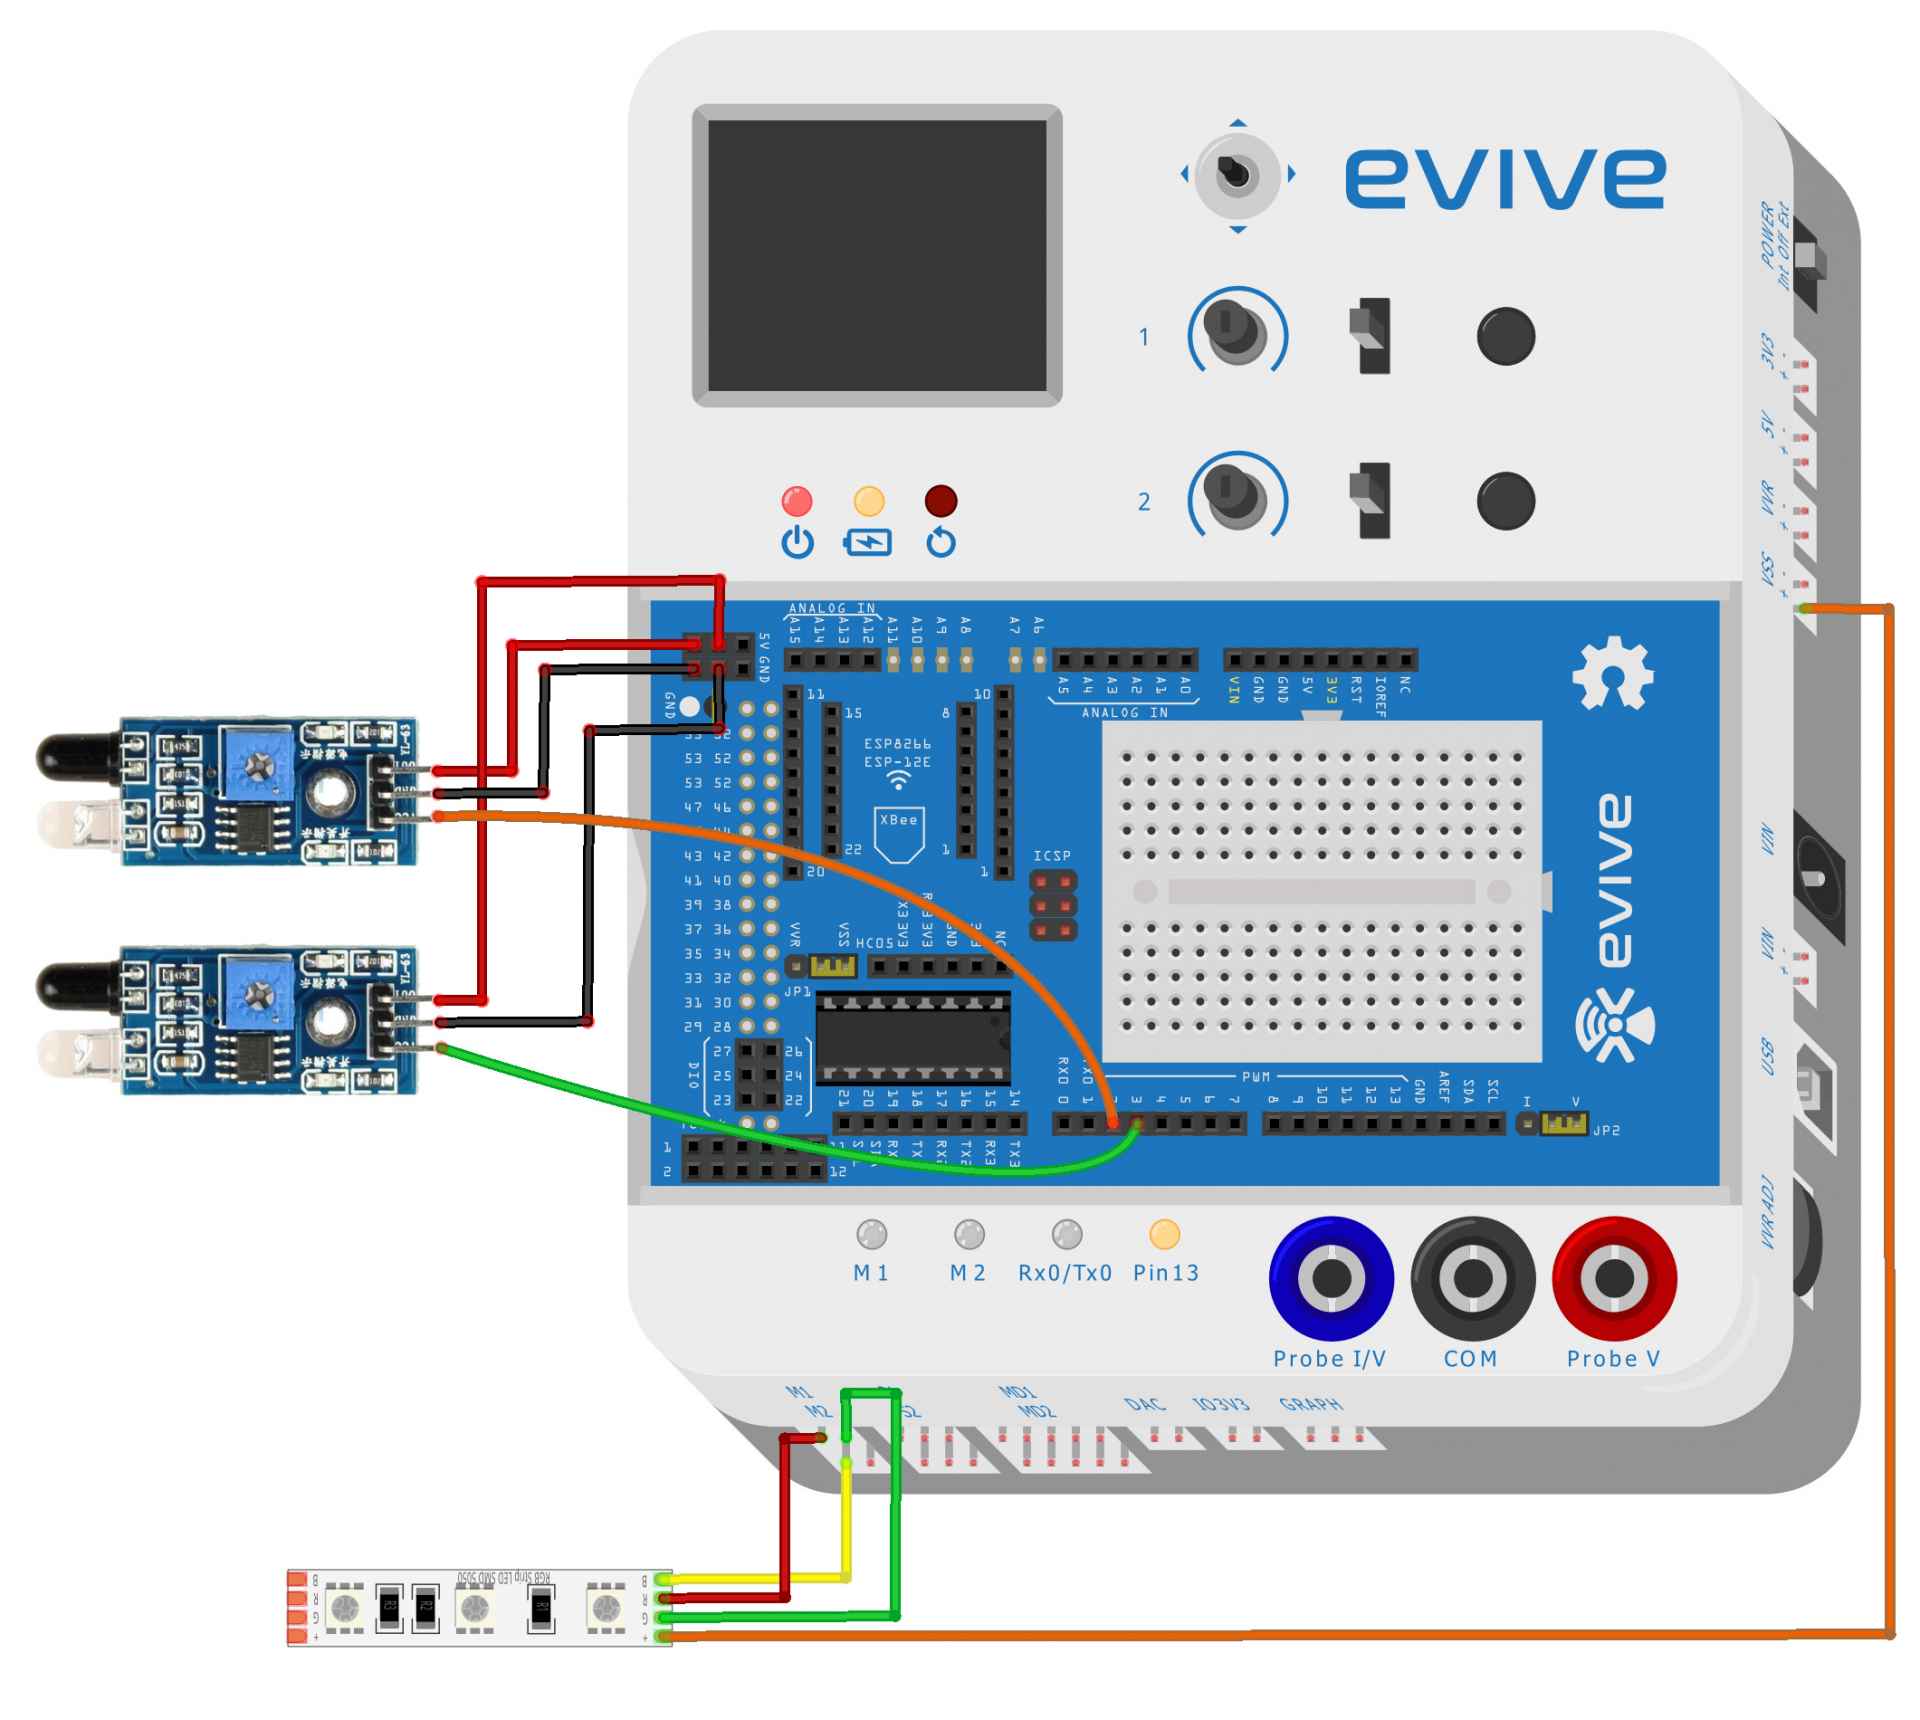
We need to connect the following things to evive:
- Two IR Sensors As we have mounted the sensors on the bottom side of Goal Post Top Covers and organized wire to get them on the opposite side of Ball Catcher, now we will connect the three wires to evive, namely GND to Ground, VCC to 5V and Signal to 2 and 3.
- RGB LED strip The strip has four wires. As we see in the circuit diagram, ‘+’ is connected to VSS or VVR on evive. ‘R’, ‘G’ and ‘B’ are connected to the motor terminals in plug and play interface.
- Since we have used 12V RGB LED strip, we will connect a 12V DC Adapter or 3 Li-ion battery or 6 AA Cells.
Code
Now, its time to program. There are six things:
- Timer: As per the gameplay, each game will be given three minutes (or as per your choice) and evive will keep track of it. Timer will start after Tactile Switch 1 is pressed on evive.
- Detect Tactile Push Button: The game starts once any player presses the inbuilt Tactile button 1 on evive.
- Sensors to detect the goal: We need to detect the passing of ball in the slider via IR sensors after any goal is scored on either sides. And the program will keep track of total goals.
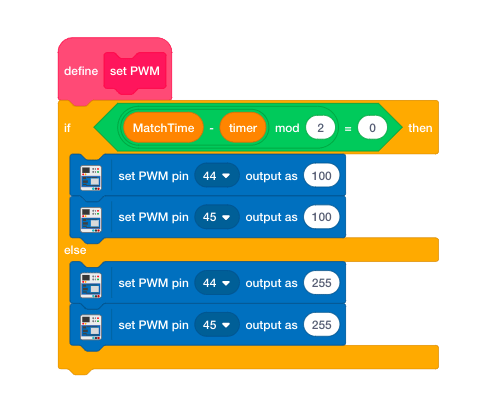
- RGB LEDs: LEDs will be white as the game starts. After any goal, LEDs will glow Red/Blue color depending on who scored the goal. LEDs will start blinking when 5 seconds are remaining.
- evive’s Buzzer: A beep sound will be produced at start, on scoring any goal and end of game.
- evive’s TFT: We will display instructions, goal scored, time and winner.

Shown above is the final algorithm for the game.
Programming in Scratch and Arduino
The program can be made in PictoBlox kids love graphical programming) or Arduino.
PictoBlox is a free programming language where you can create your own innovative and interactive projects, stories, games, and animations.
Click here if you want to learn more about PictoBlox.
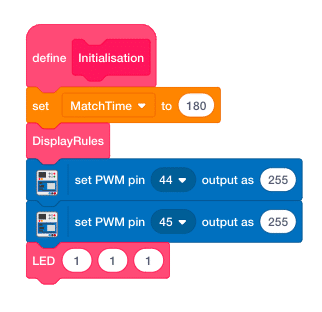
Upload the following code to evive:
- Initialization: Initialize the initial game setup and variables.
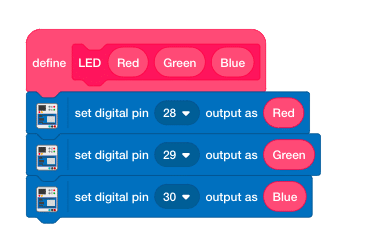
- LED with three inputs (Red, Green and Blue): Turn ON the LED according to inputs.
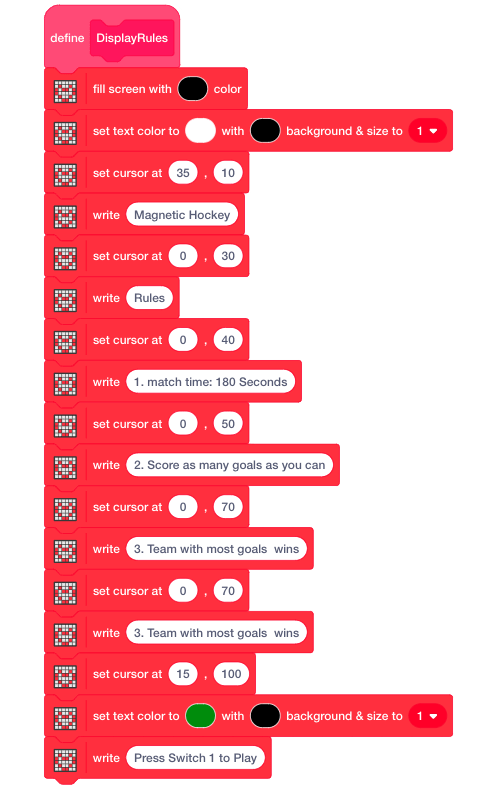
- Display Rules: For displaying the rules on TFT Screen at the start of the game.
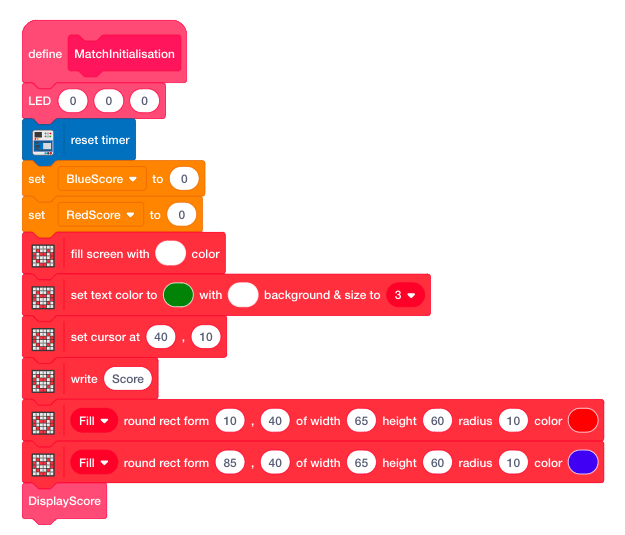
- Match Initialization: Initializing match and match variables.
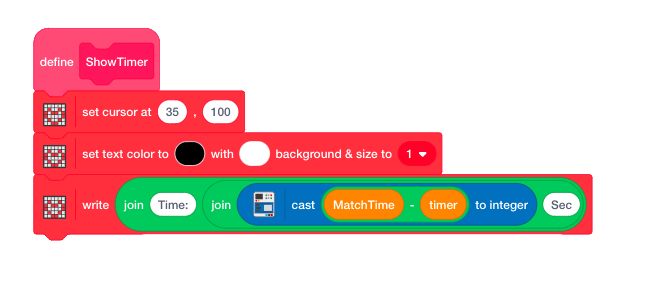
- Show Timer: Display time on TFT while the match is in progress.
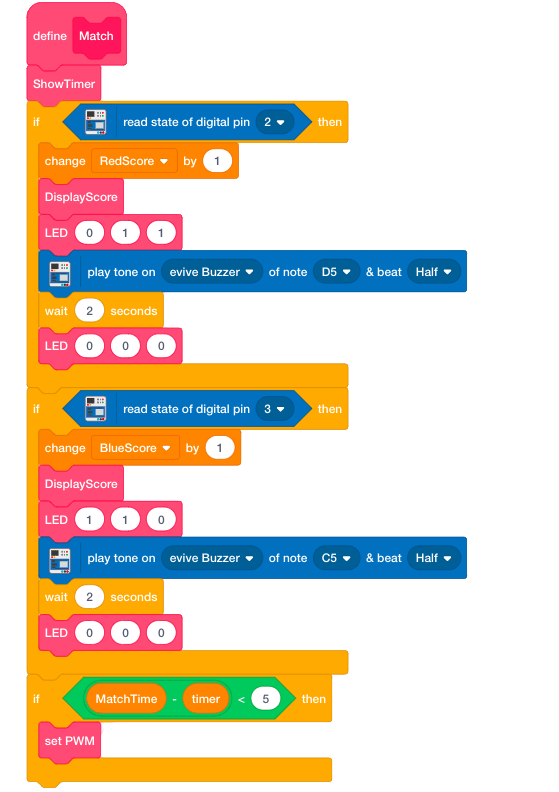
- Match: All the things happening during the match is here like detecting goals.
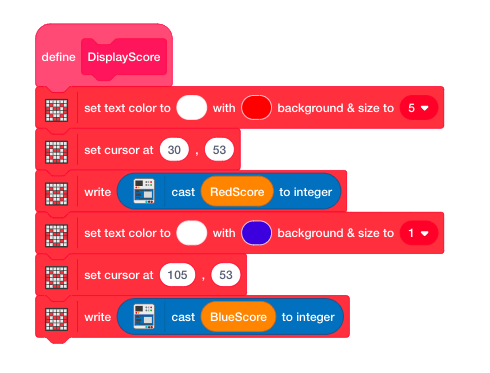
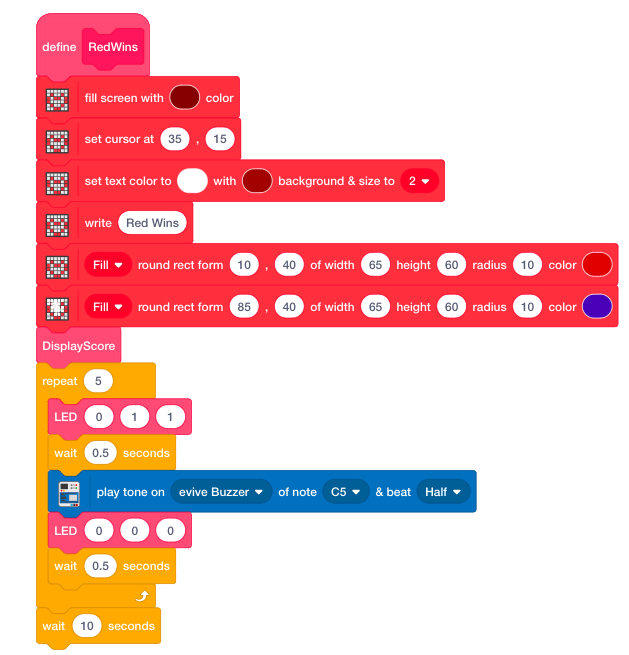
- Display Score: To display score during and after the match.
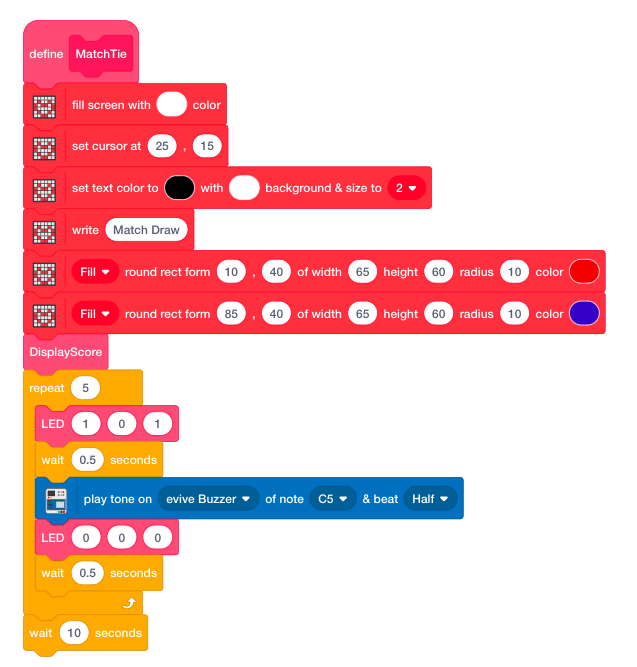
- Match Tie: This block turns LED to green after match, indicating a tie.
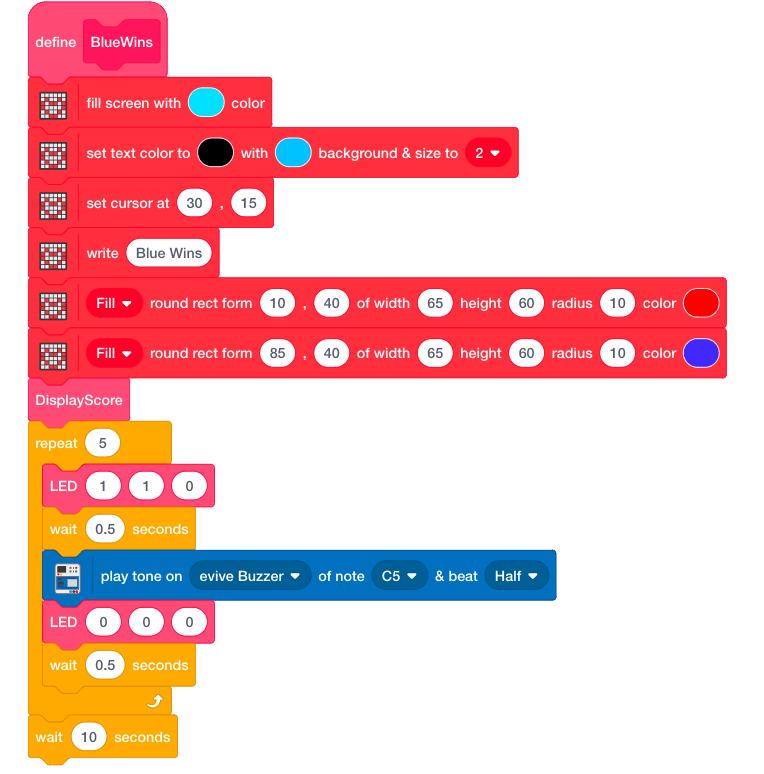
- Blue Wins: This block turns LED to blue after the match, indicating that Blue has won the game.
- Red Wins: This block turns LED to red after a match, indicating that Red has won the game.
All the blocks are integrated into the main code that follows the flow chart shown in the previous step.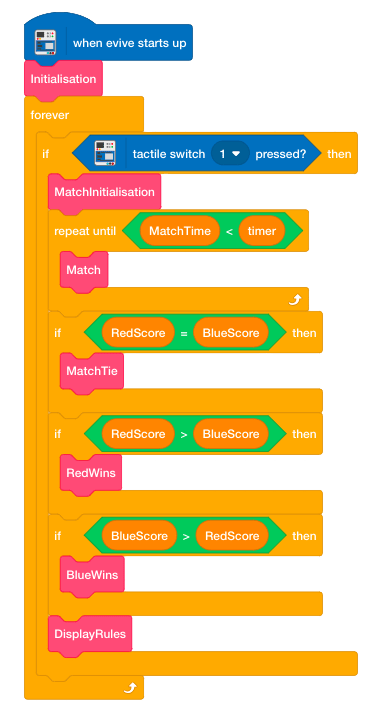
The Gameplay
- Each game will be of 3 minutes and a toss will decide who is going to start.
- Each player will be given a magnetic striker and a stick with magnetic tip. The stick will be inserted from the slot made in the Shorter Side Mount. It will be below the Arena Bed and controlling the striker placed on top of Arena.
- The ball will be placed inside the rectangular region at the start of game or after each goal, on the side opposite to the one who scored the goal.
- Winner will be the team who score more goals or else the game will be drawn.

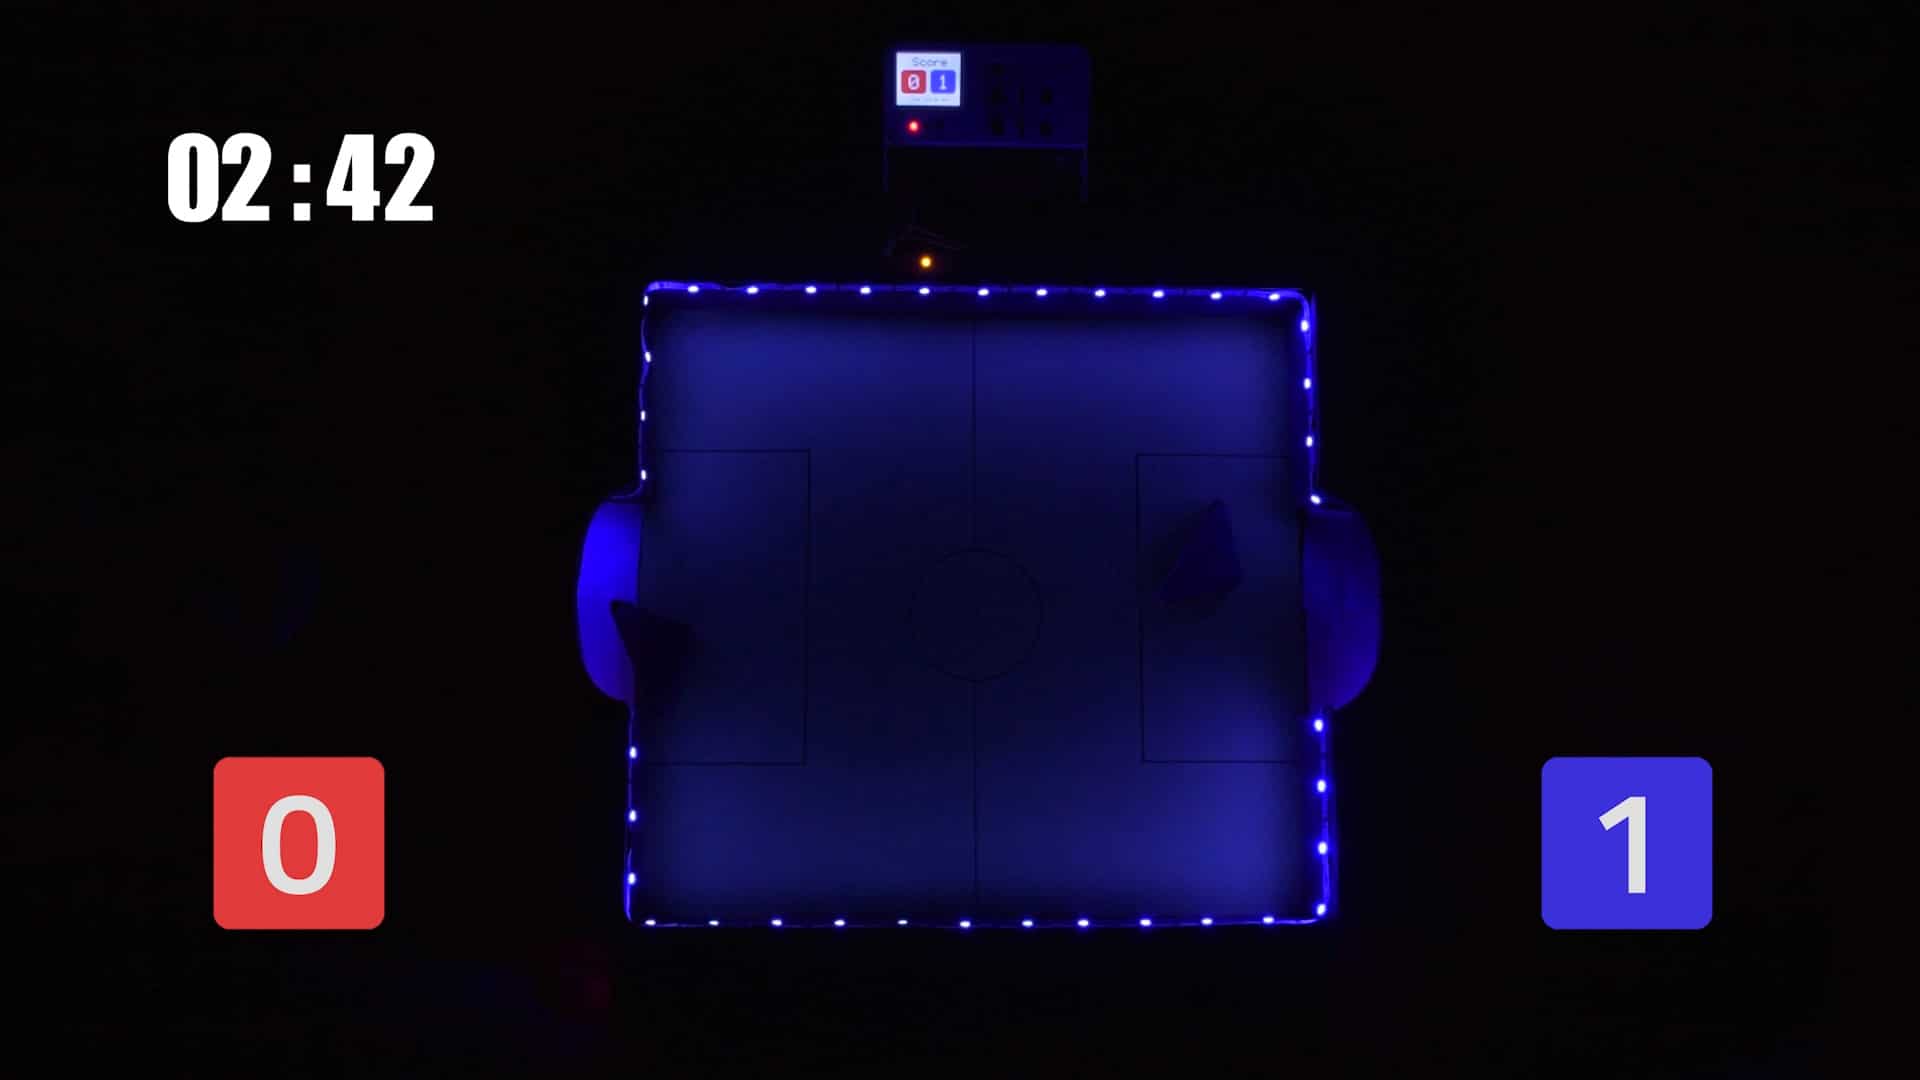
Let’s Play!
With this, your DIY Magnetic Table Hockey is ready! Enjoy!
As the day of launch is drawing near, the excitement is rising exponentially! We cannot wait to share the cool stuff that we’ve put together especially for you! To know more about it stay updated on the same, visit HERE!


