
Introduction
Dale Carnegie gave us ‘How to stop worrying and start living’. We’re here to add yet another way to help you stop worrying; worrying about the safety of your abode, your workplace, and any other place you have. Behold the *drum rolls* DIY Password-Based Door Lock!
A simple yet effective way to prevent anybody from accessing your room without entering the correct password. Lie back and chill (and Netflix if you want) as your home and office stay protected from break-ins and thefts.
Want to make one for yourself?
Then let’s get started in 3, 2, 1, go!
Connections
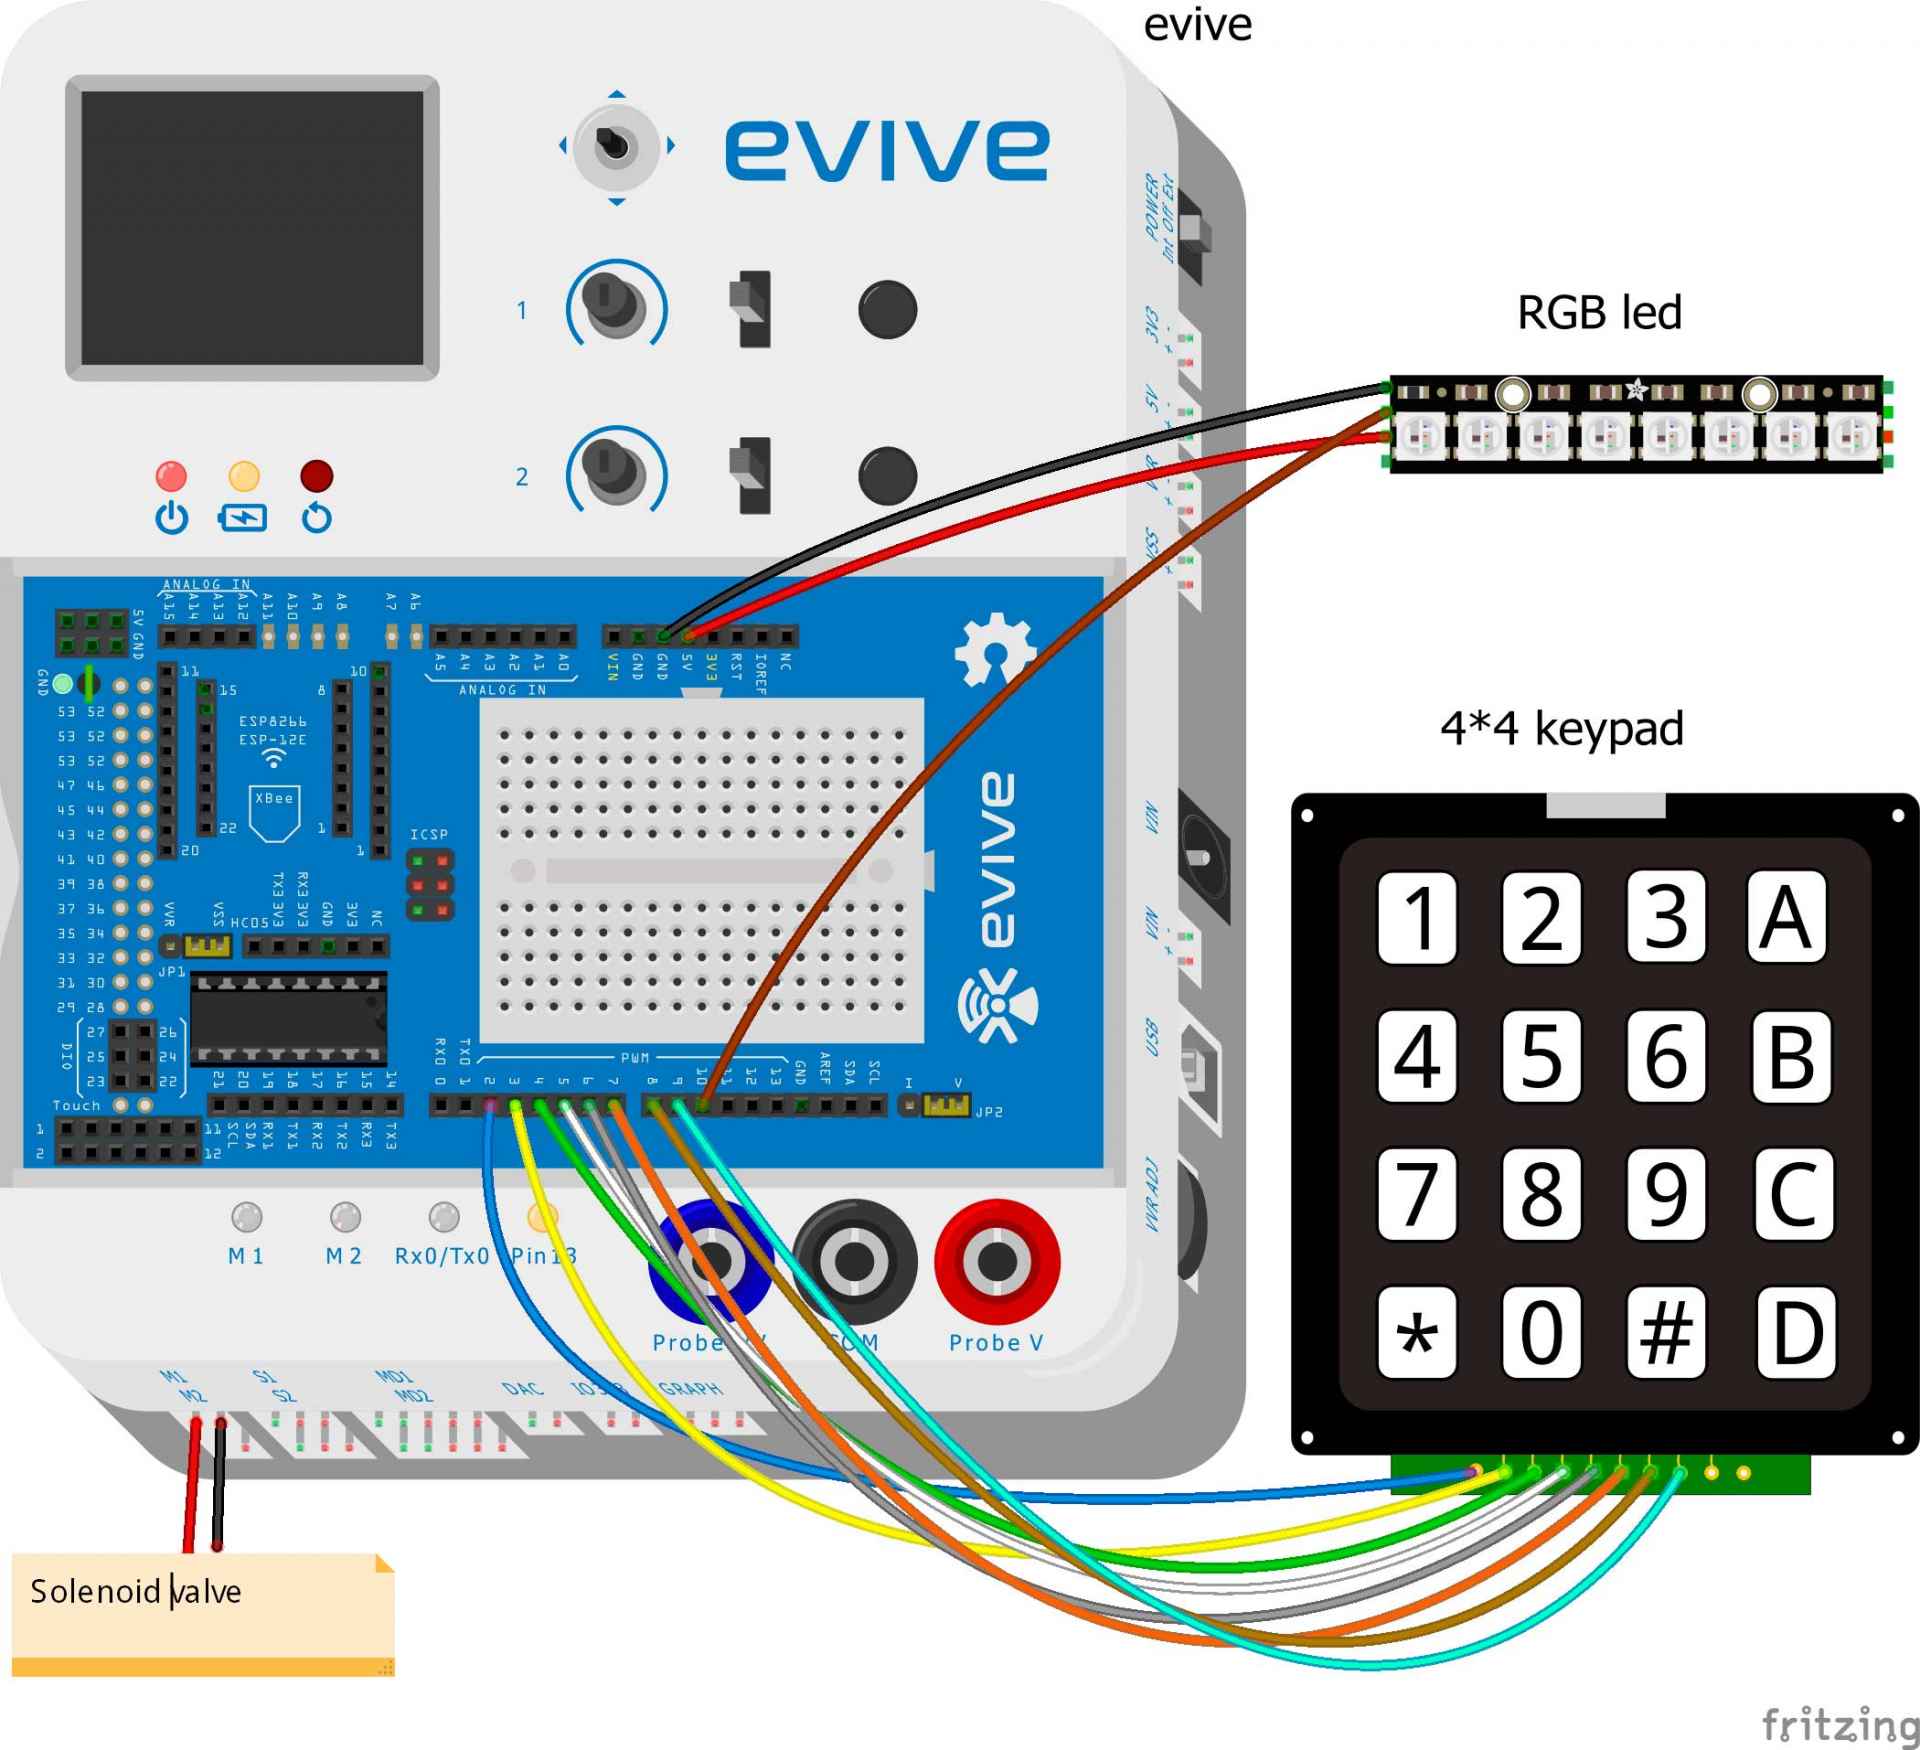
We will be connecting the Keypad and the lock to evive.
We are using Solenoid Lock with evive.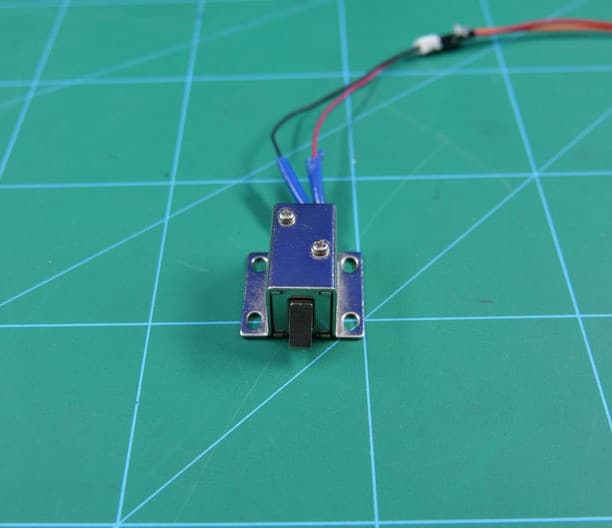
It is connected to the channel M1.
Connect both lock and Keypad as shown below:
Logic
Once you are done with the circuit, it’s time to understand the logic behind it.
We have installed RGB Strip. This Strip is to indicate the status of the entire system.
We have set the passcode of 4 digits (you can set as much as you want).
The screen on evive shows “Enter Password”.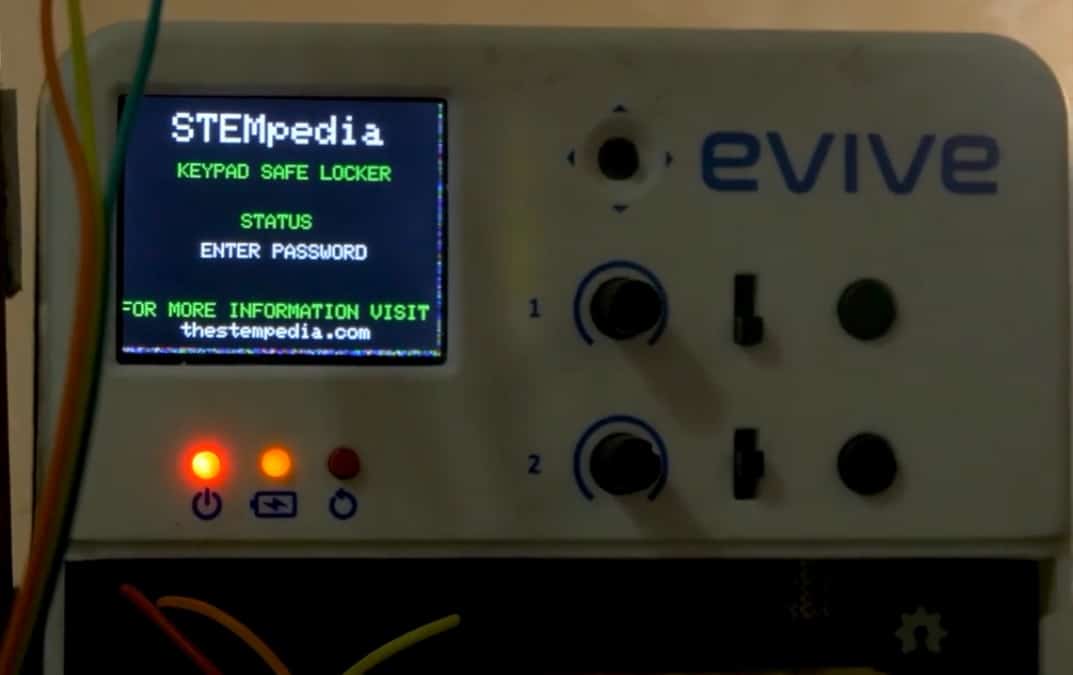
As soon as we press a digit the LED of the corresponding number turns to BLUE.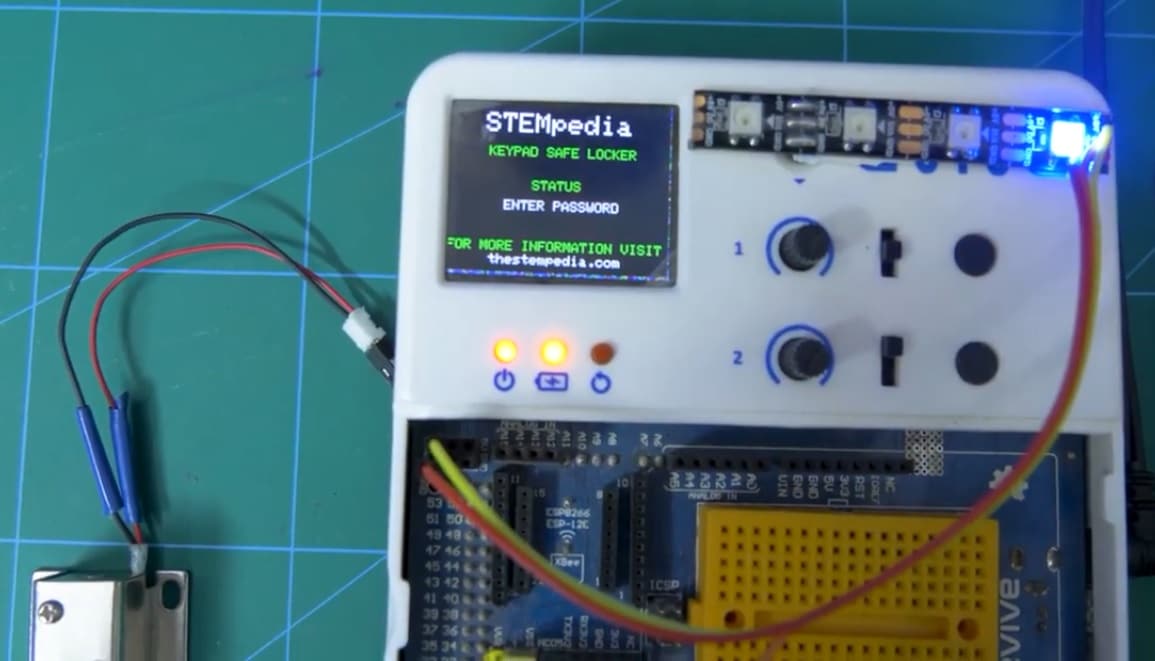
This shows the total number of digits entered by you.
Once you enter all 4 digits, and if the password is wrong: the screen displays “ACCESS DENIED” and the RGB turns RED. 
You won’t be able to open the door now.
If the password is correct: the screen of evive displays “ACCESS GRANTED” and the RGB turns GREEN.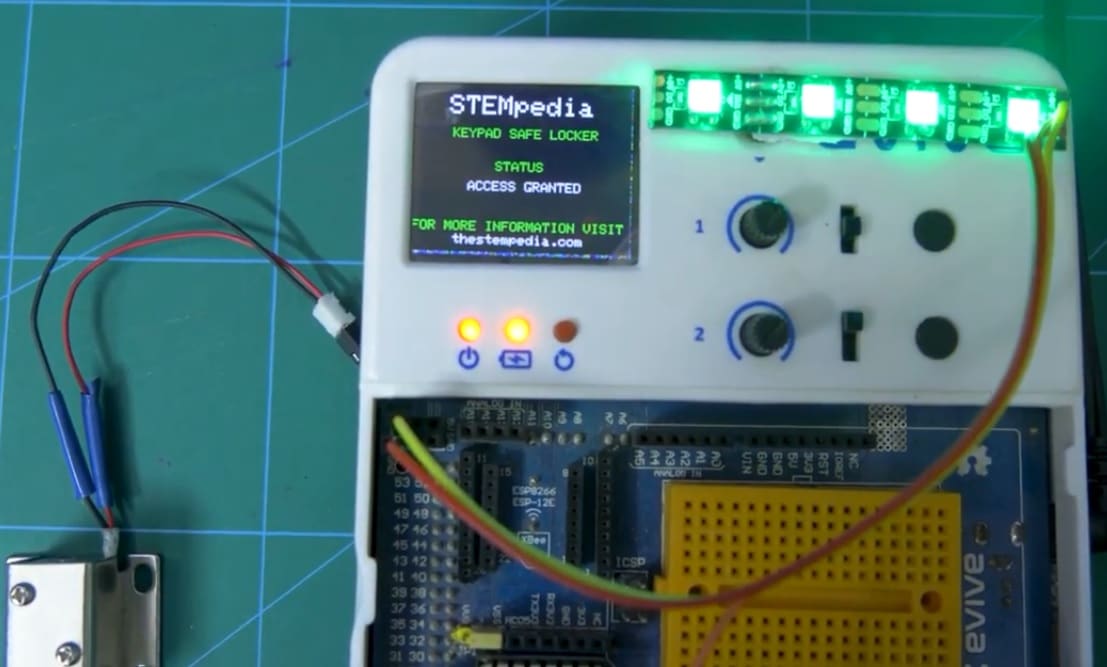
And the solenoid gets the signal, thus the magnet attracts the slot, opening the door.
Code
Apply the following code for the working of same. Also, you need to set the password in the code itself. You can change the number of digits you want in the passcode.
Application
There are a number of applications for this project. The one we are showing here is as the door lock.
We have attached the keypad to one of our doors and a solenoid to it.
NOTE: You can use any lock as per your choice.
You can enter the room only if you have the correct password.
This was one out of many applications.
The other application is in the Safebox. The safebox we made earlier uses the Fingerprint Sensor. You can add the same passcode lock here.
Click here to make one:
Conclusion
With this your DIY Password-Based Door Lock is ready. Time to stop worrying and start living, the STEMpedia way!


 0-1 screenshot")


