
Introduction
With holidays and festive season around the corner, everybody wants their house to be as shiny as a mirror’s back. But that can be quite a task! Not anymore, fellas, not anymore! With this easy to build Smart Cleaning Robot, you can now easily clean the floor and the walls of your entire house with a few clicks of the button on your Smartphone! Sit down, grab a cuppa, a plate of your favourite, and clean away!
Want to make one for yourself? Then why are you still here?
Ready. Set. Clean!
Making
The making is basically divided into three parts:
- Assembling Smartphone Controlled
- Assembly of Floor Cleaner
- Completing the Robot
Assembling the Smartphone Controlled Robot
You can find the assembly of the same here.
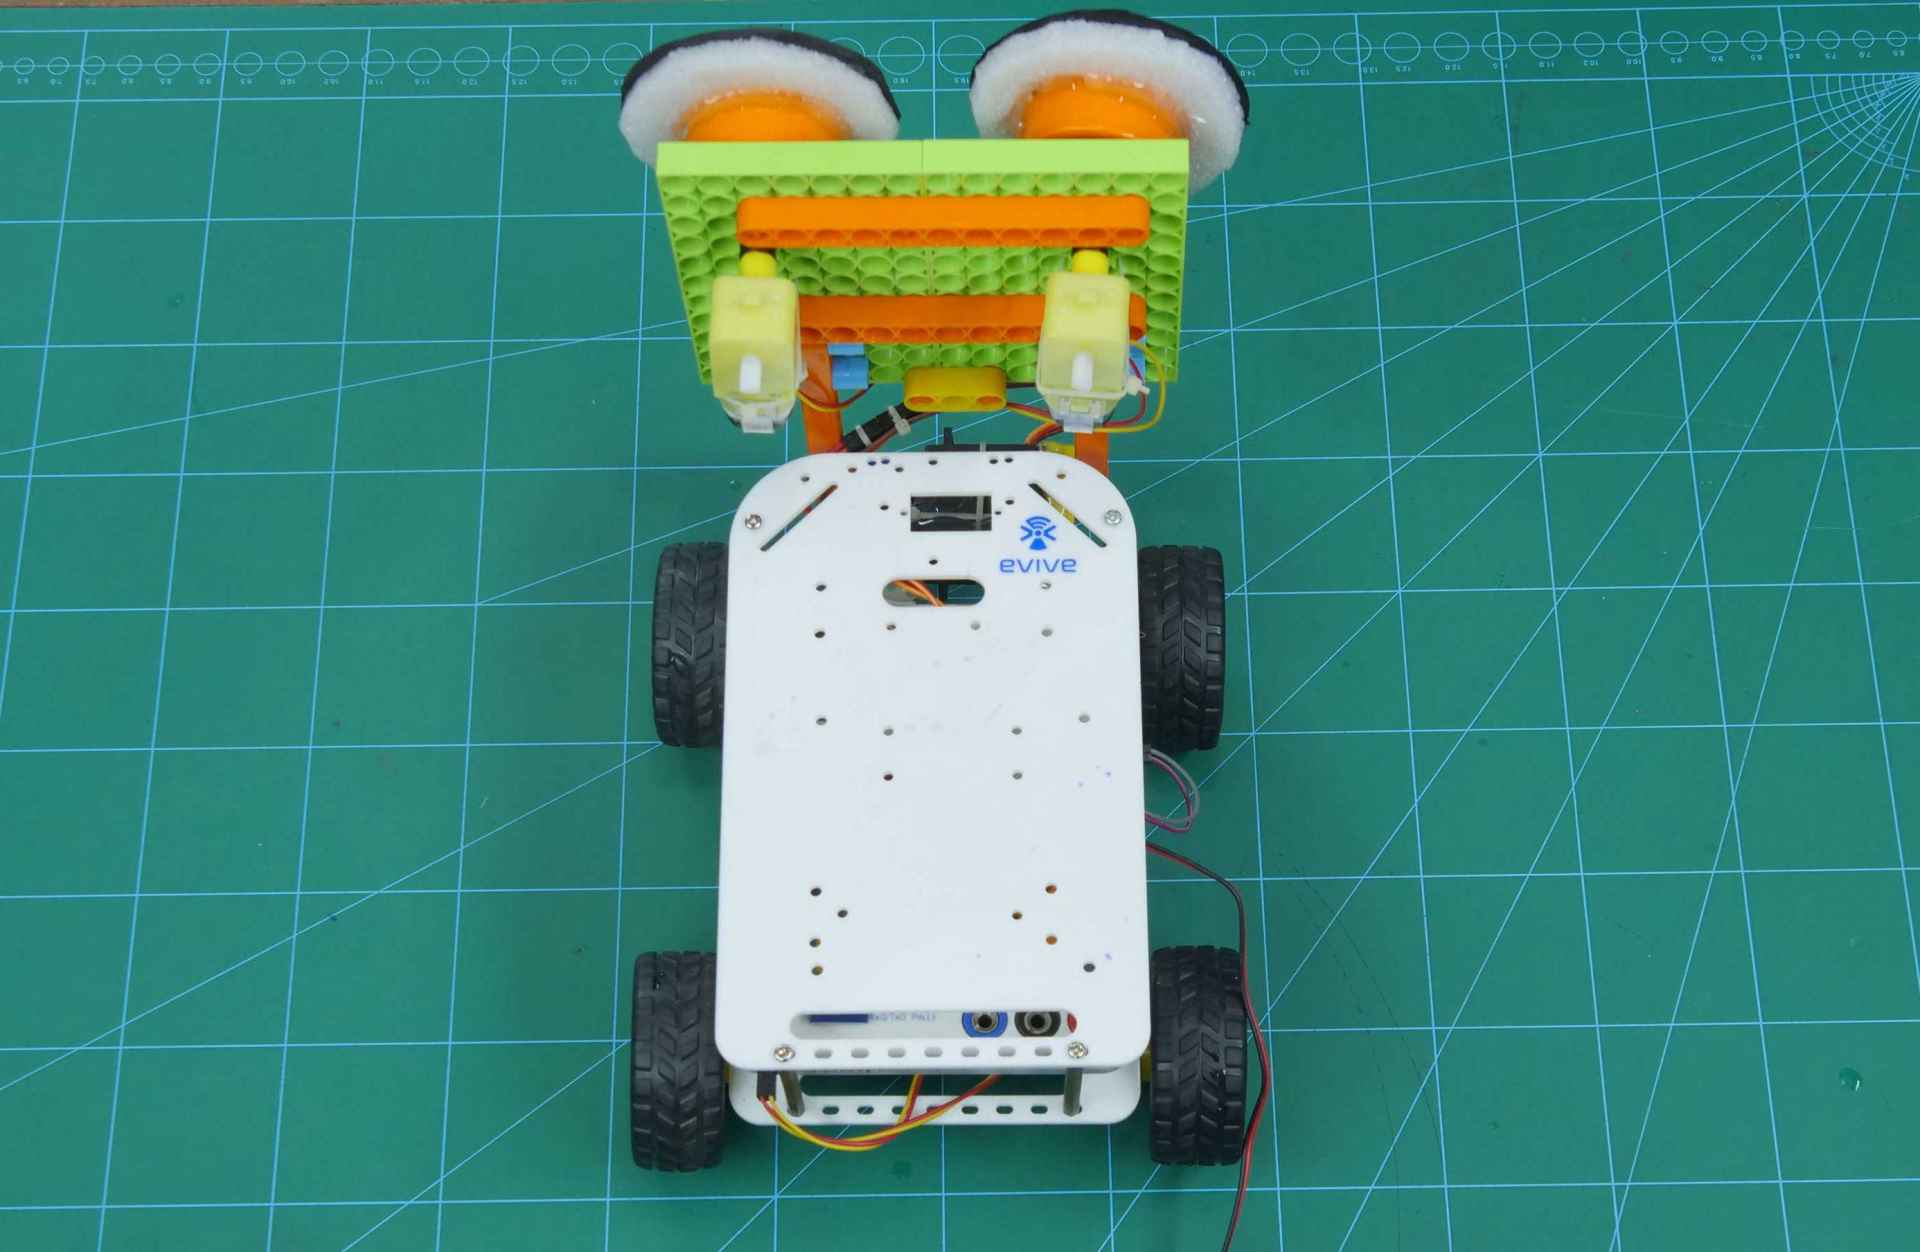
Now, that we have to mount the cleaning assembly, we need a plain base.
We will attach another chassis on the top of evive, using 60(30+30)mm standoffs.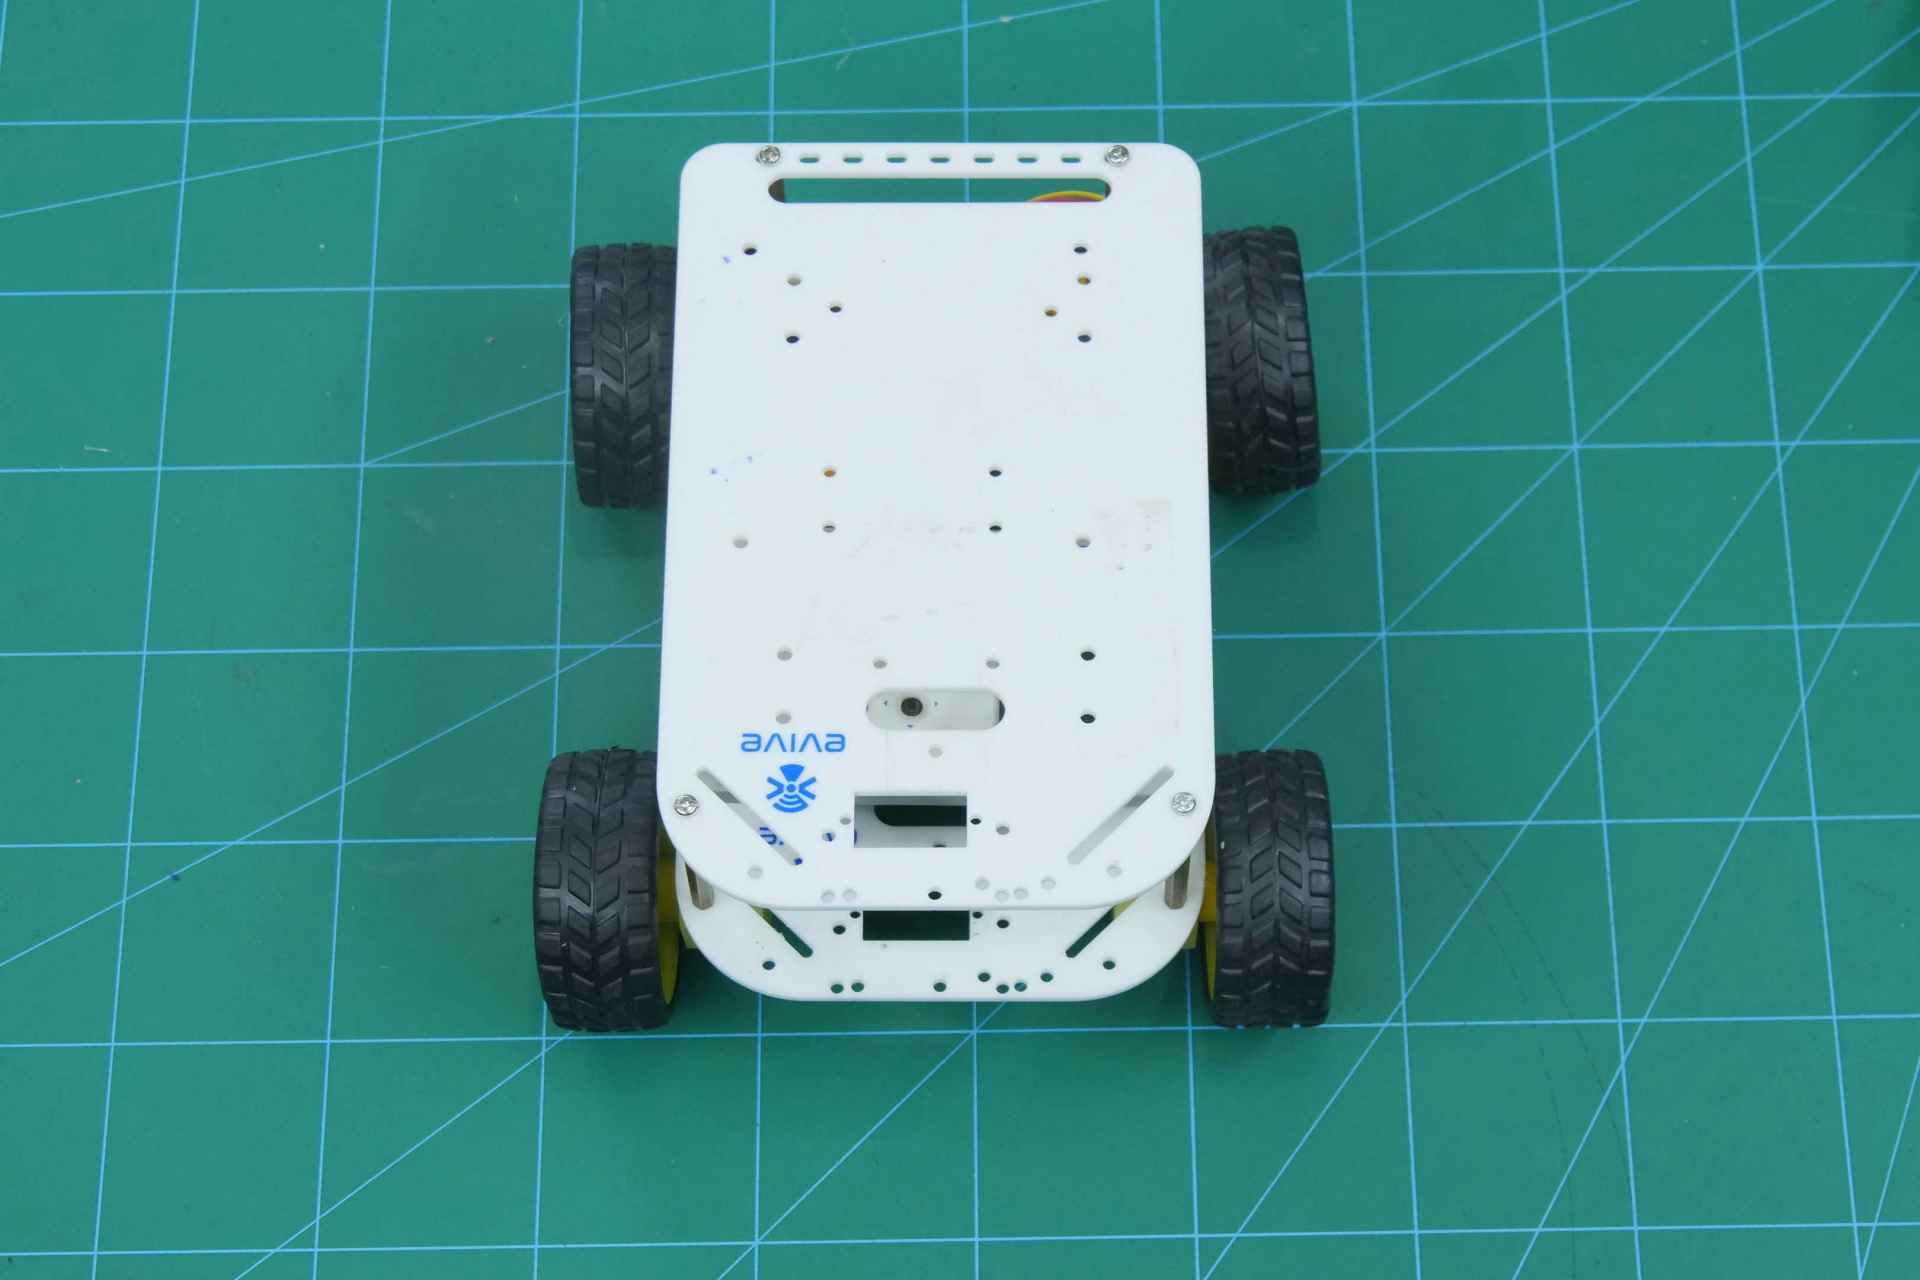
Thus, we got the base is ready.
Assembly of Floor Cleaner
We will be making this assembly using BLIX. You can even use LEGO or Cardboard.
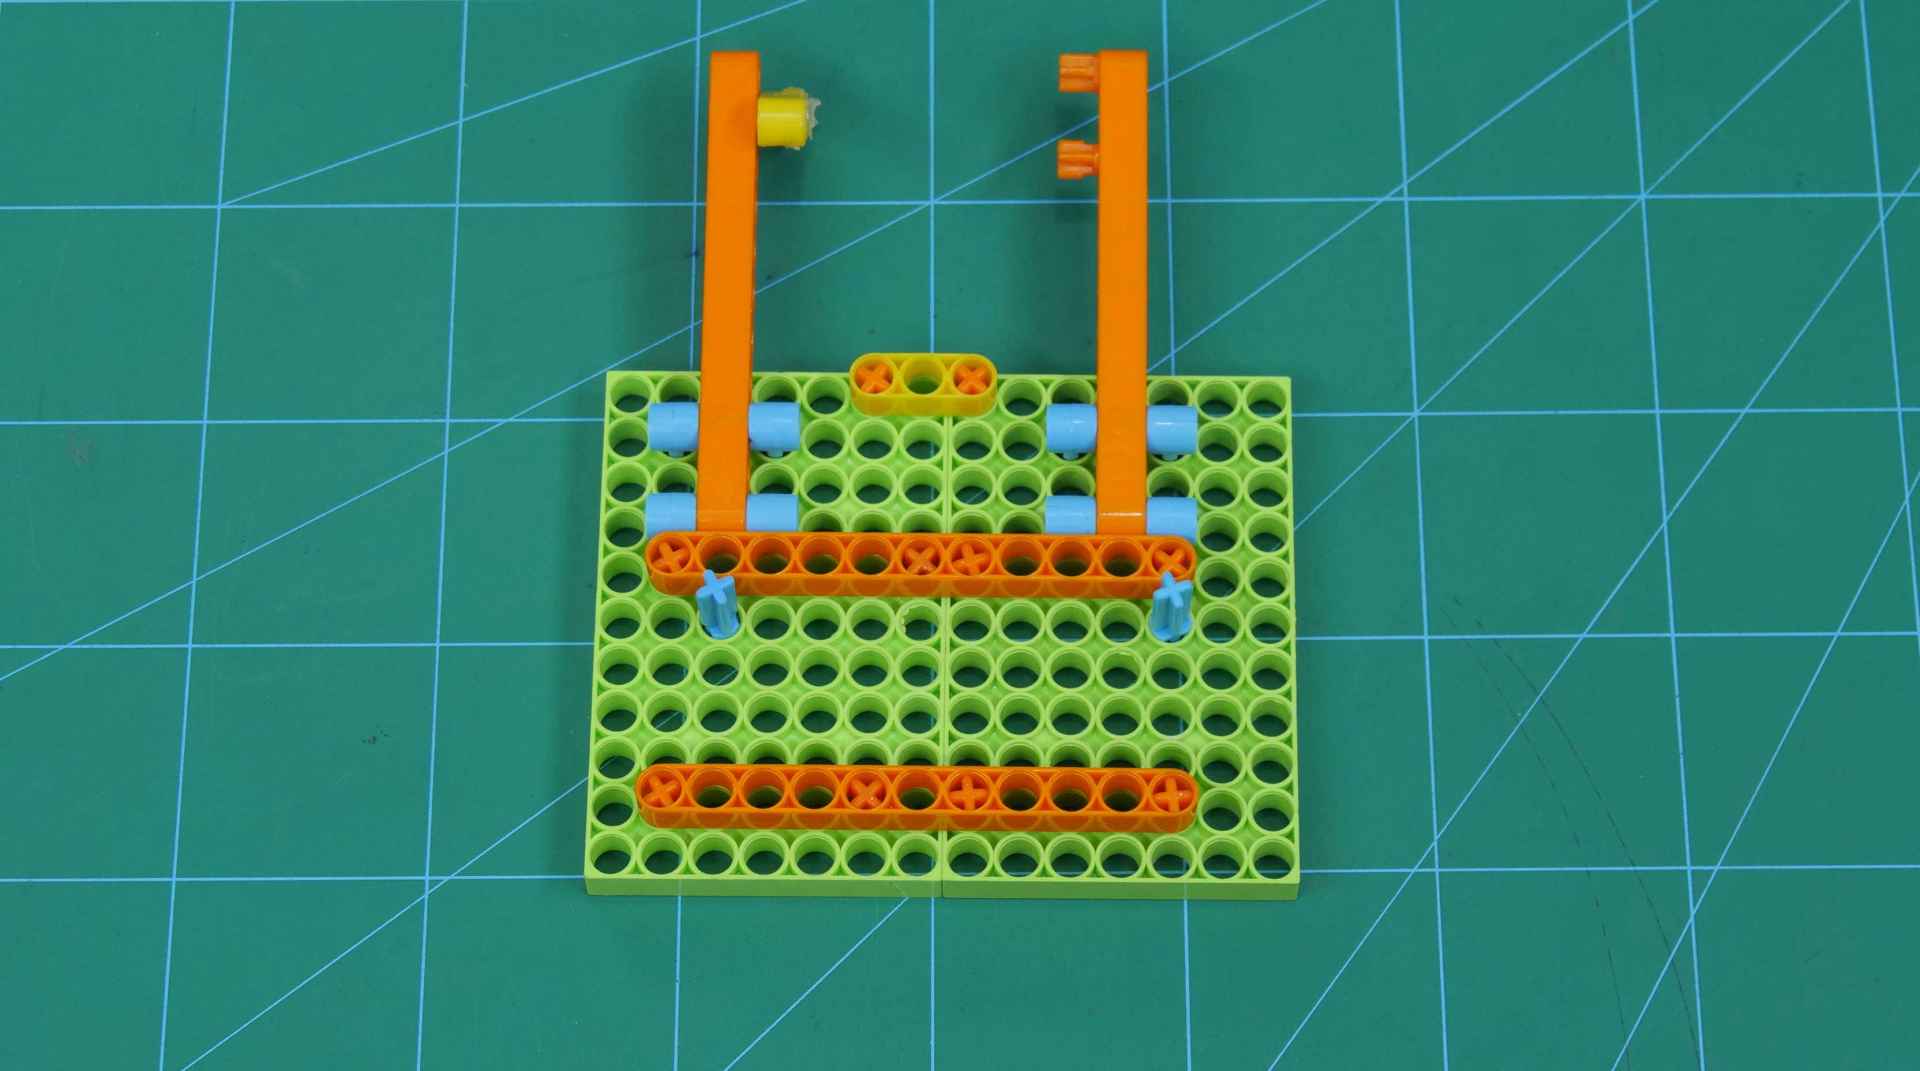
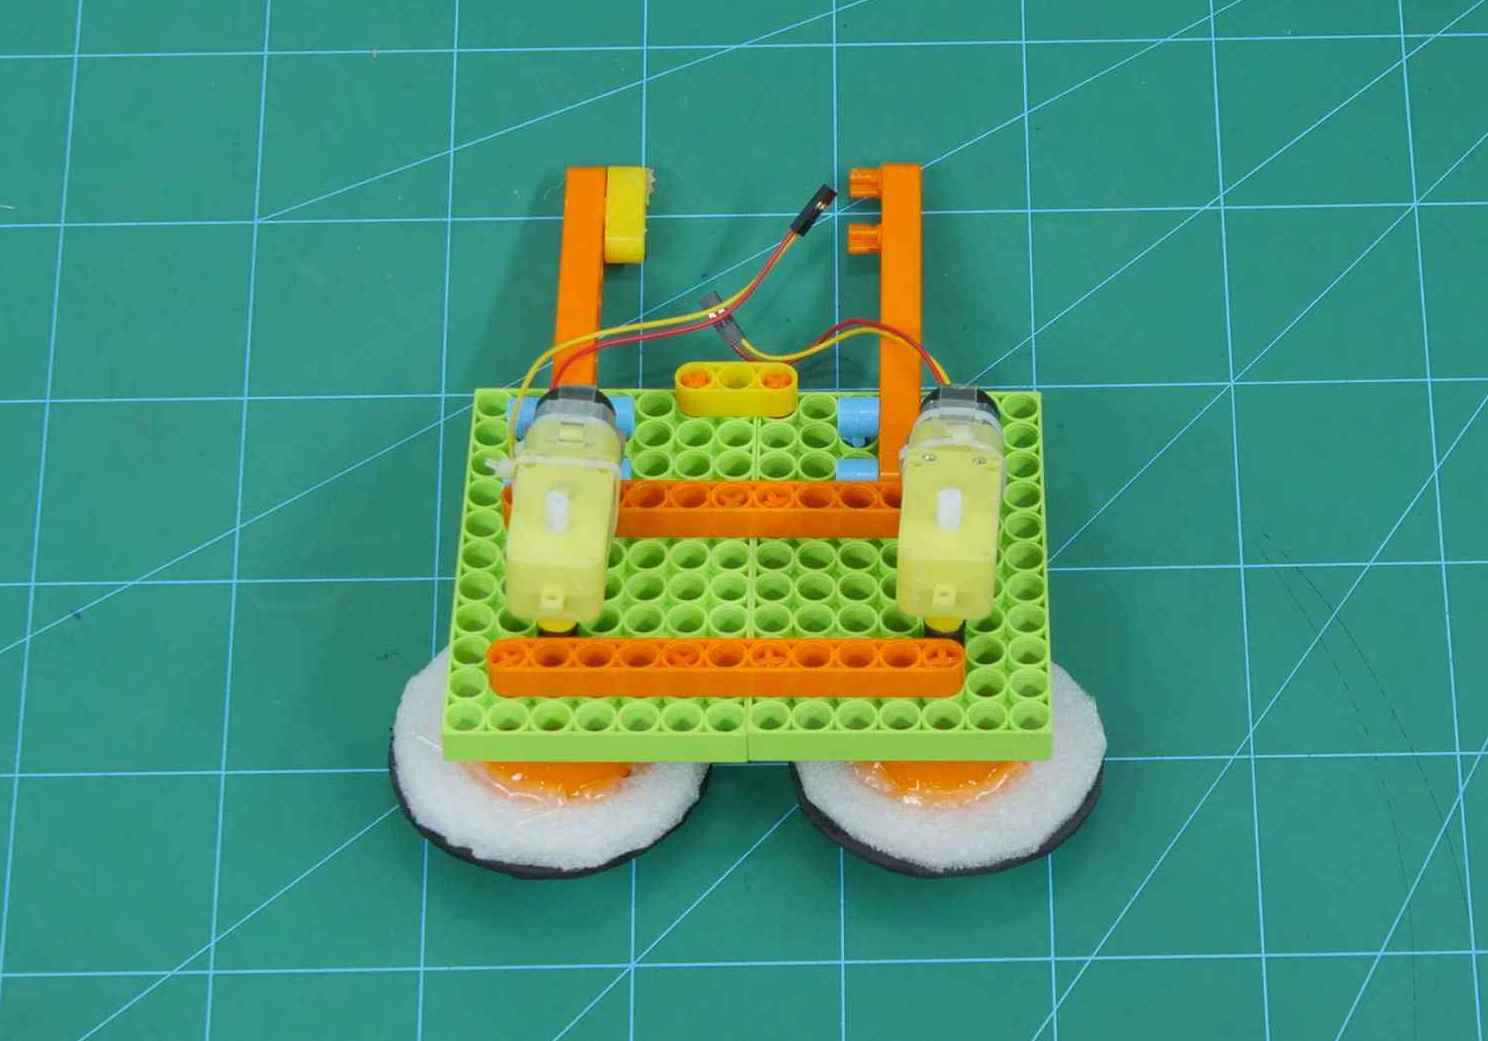
We have combined two large pieces of blix using connectors.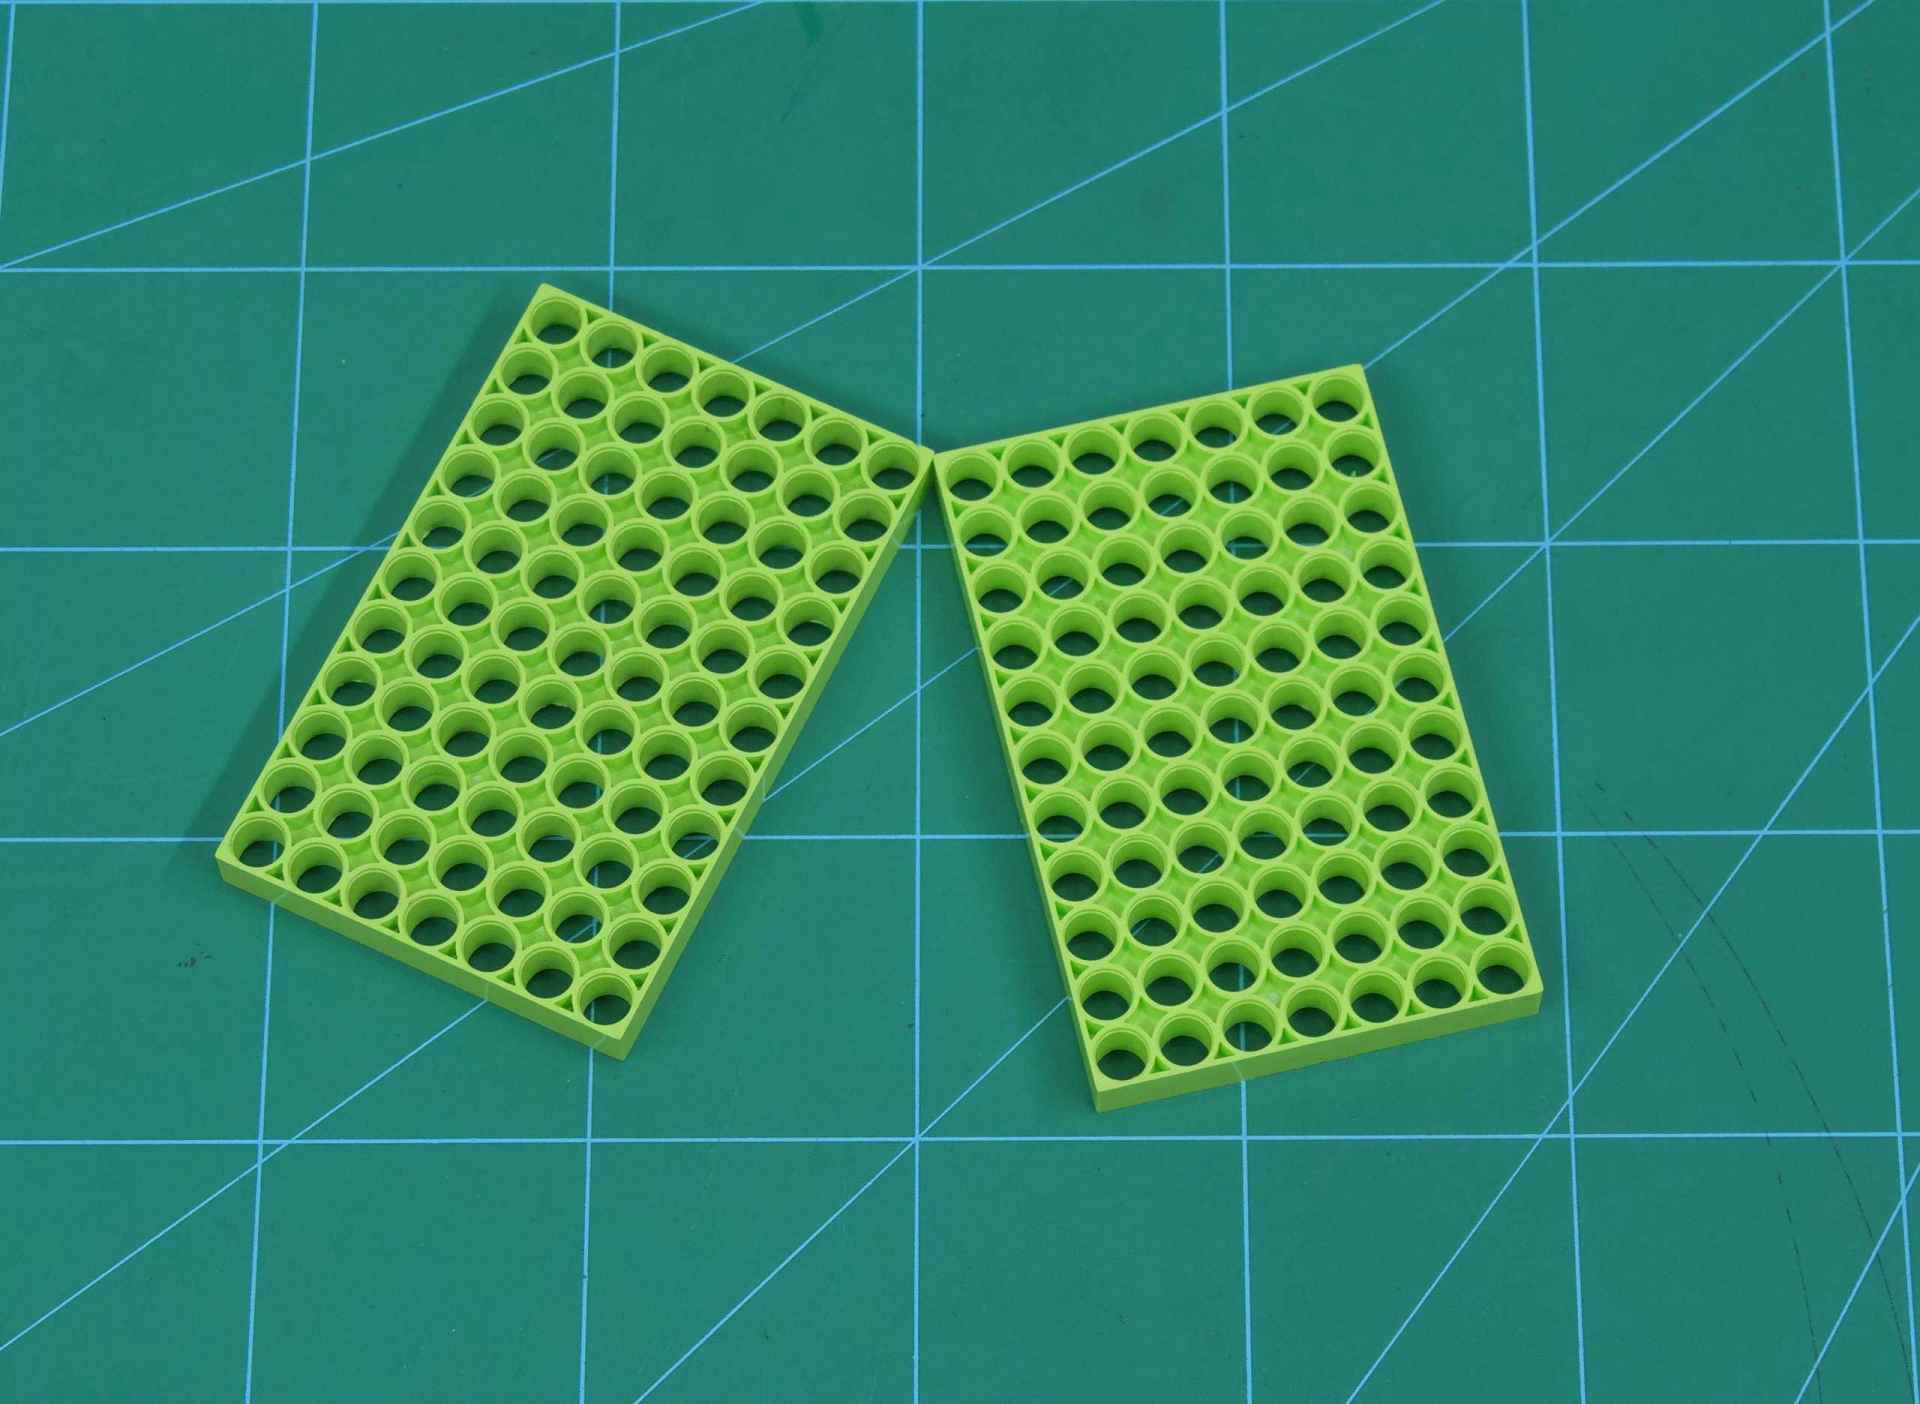
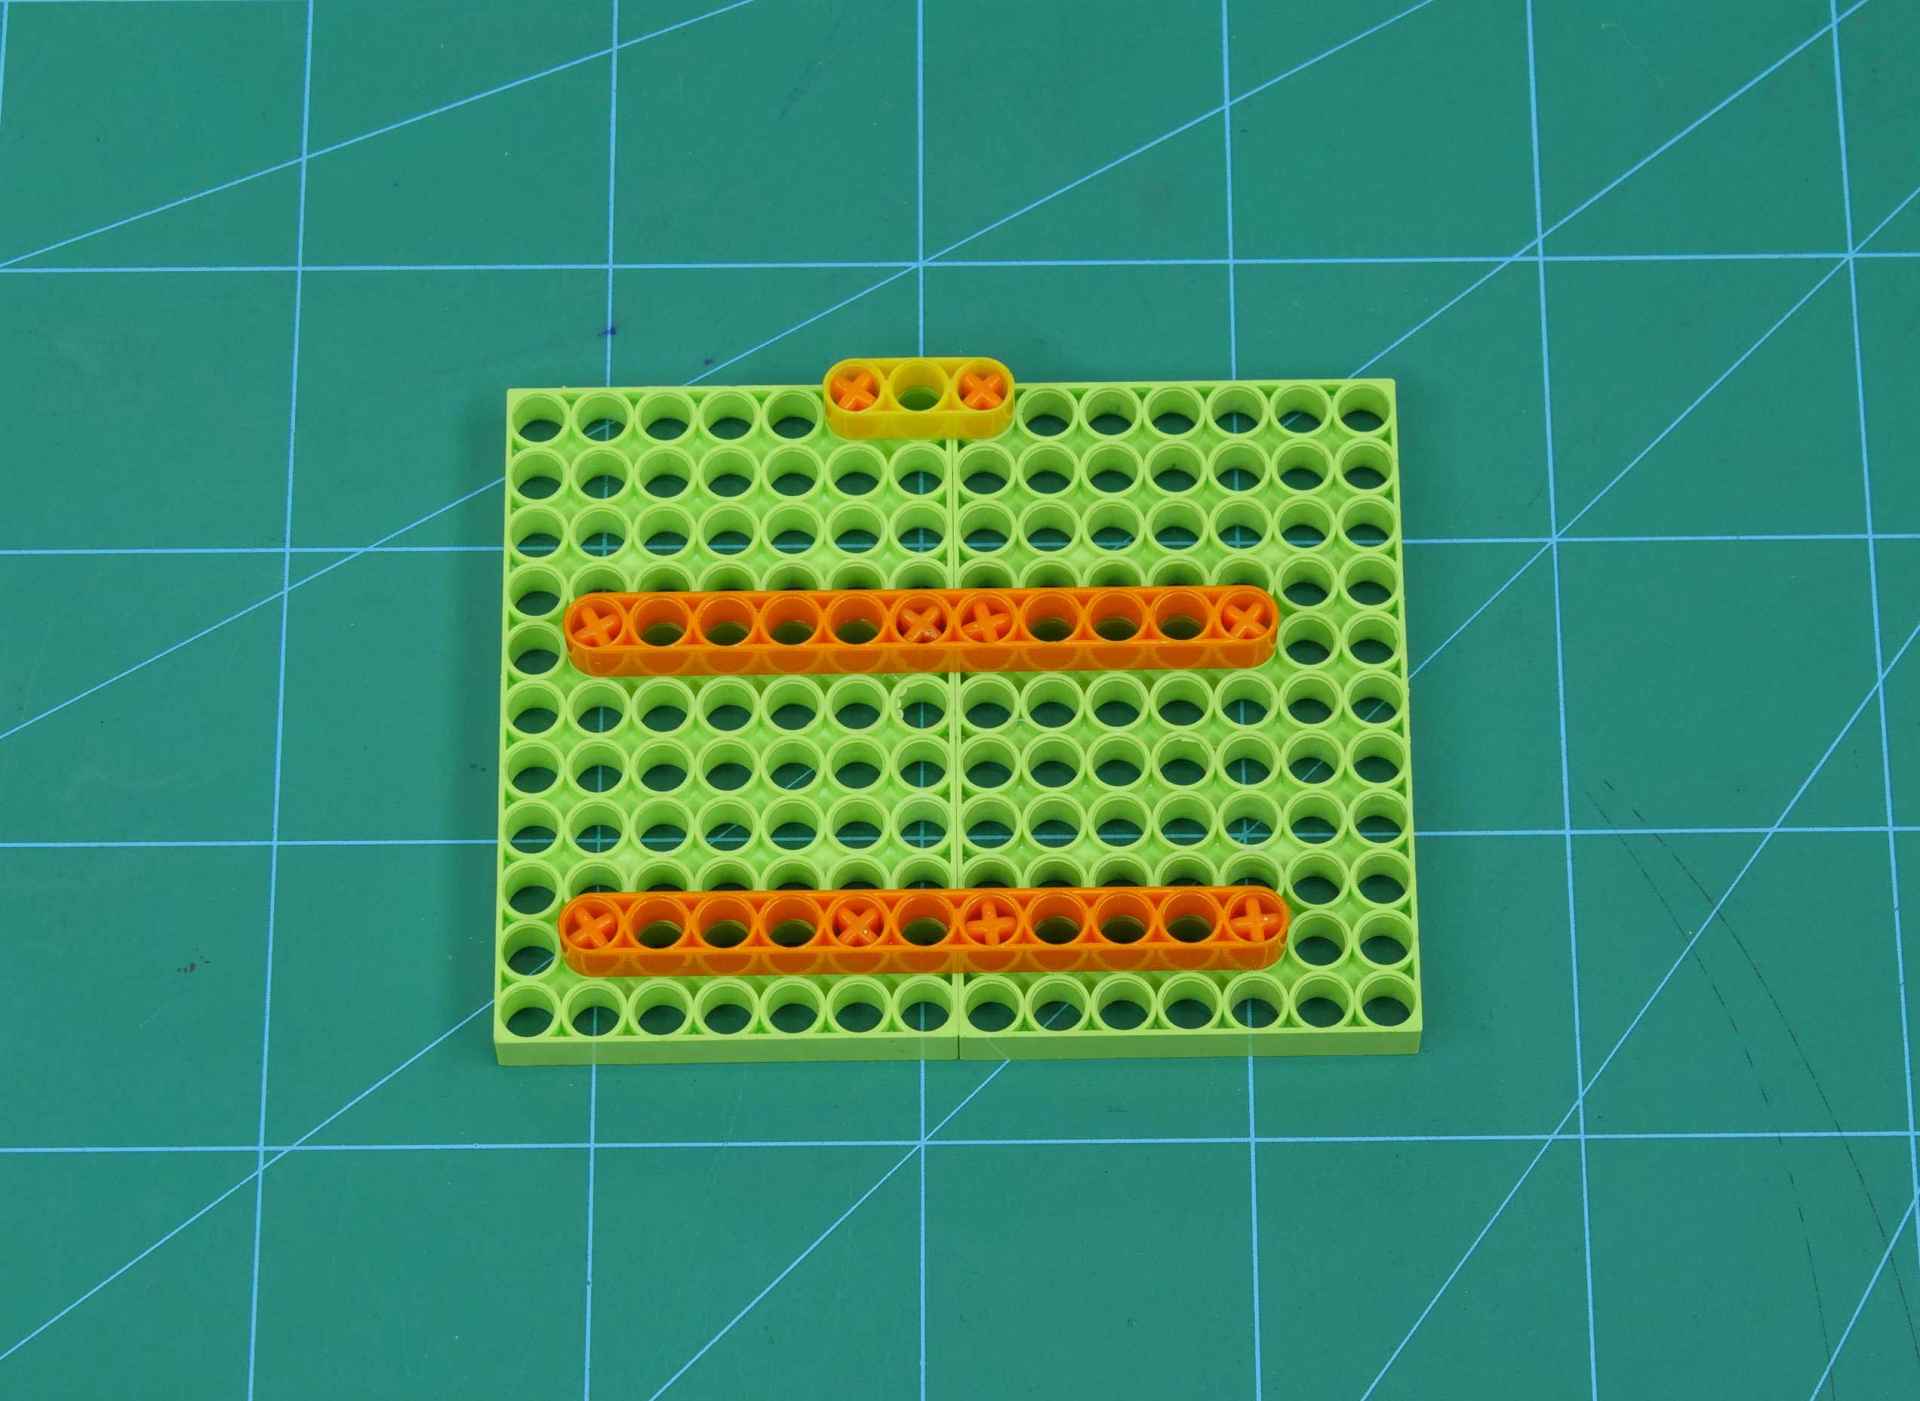
We have made an assembly that will connect the blix pieces to chassis, as shown below.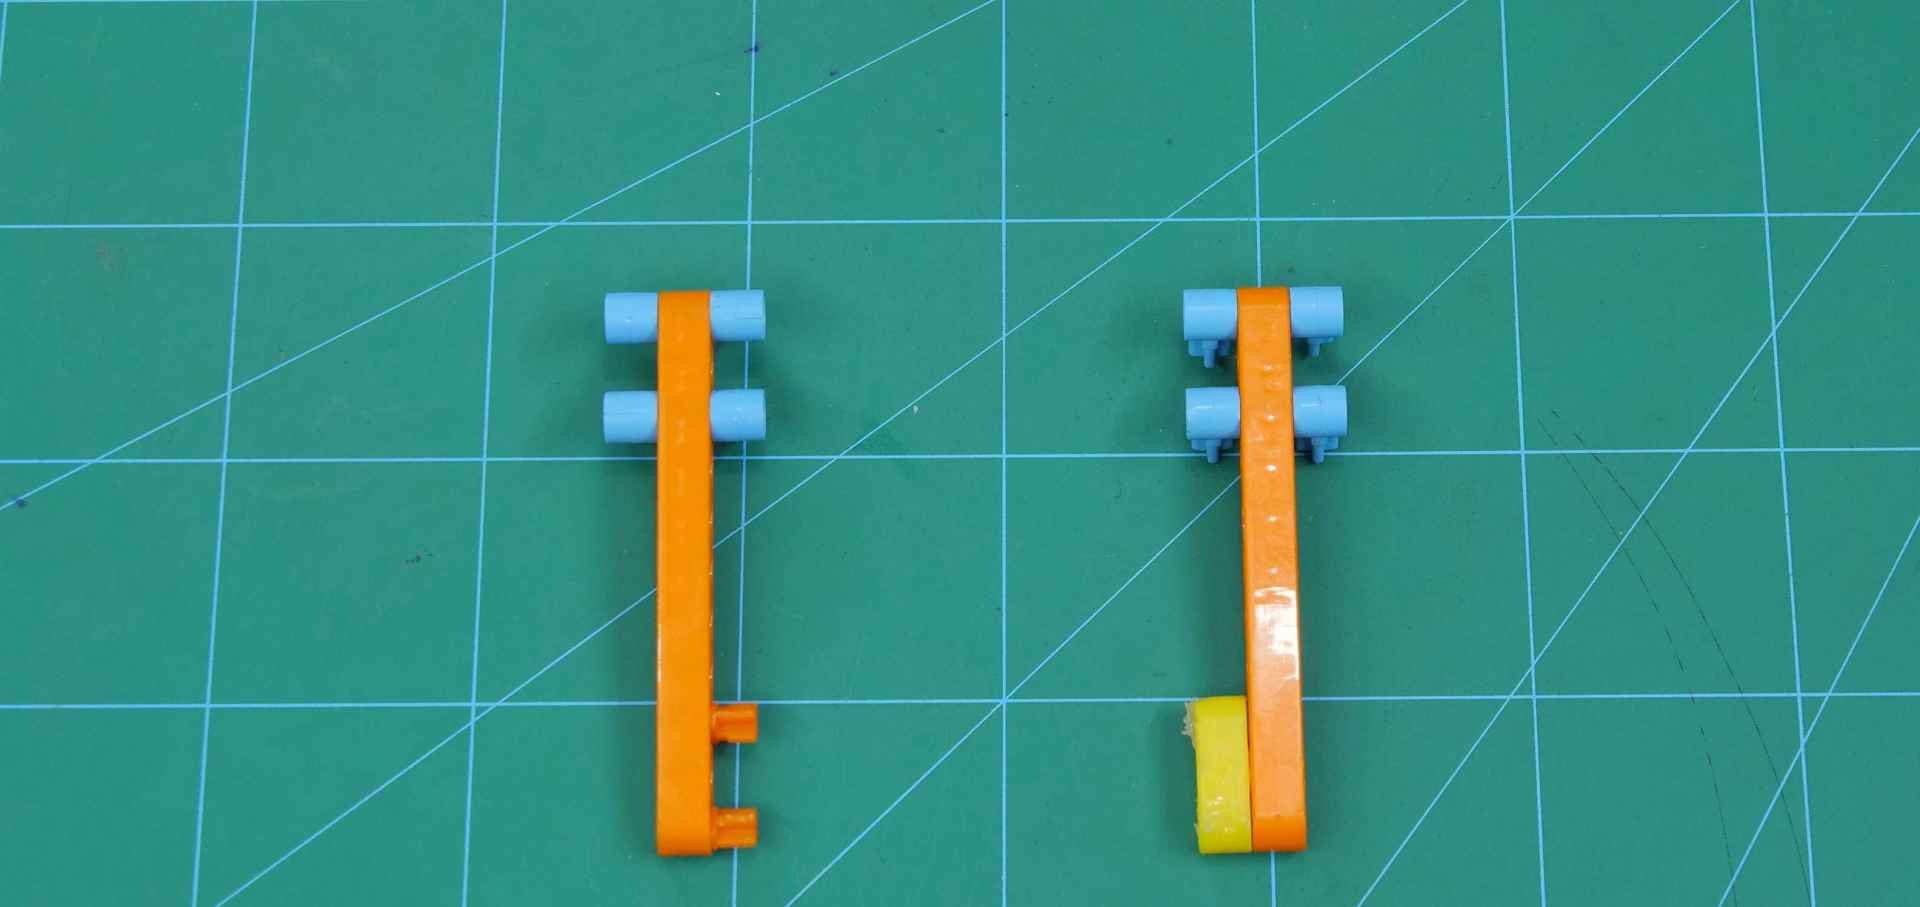
Now that we know, the cleaning robot will be having a piece of cleaning cloth attached to the front of it. We will also rotate it so that it can clean in a much better way.
For that, we are going to add two DC Motors.
To fix it properly to the Blix assembly we have added a longer 3D printed shaft at one of its shafts.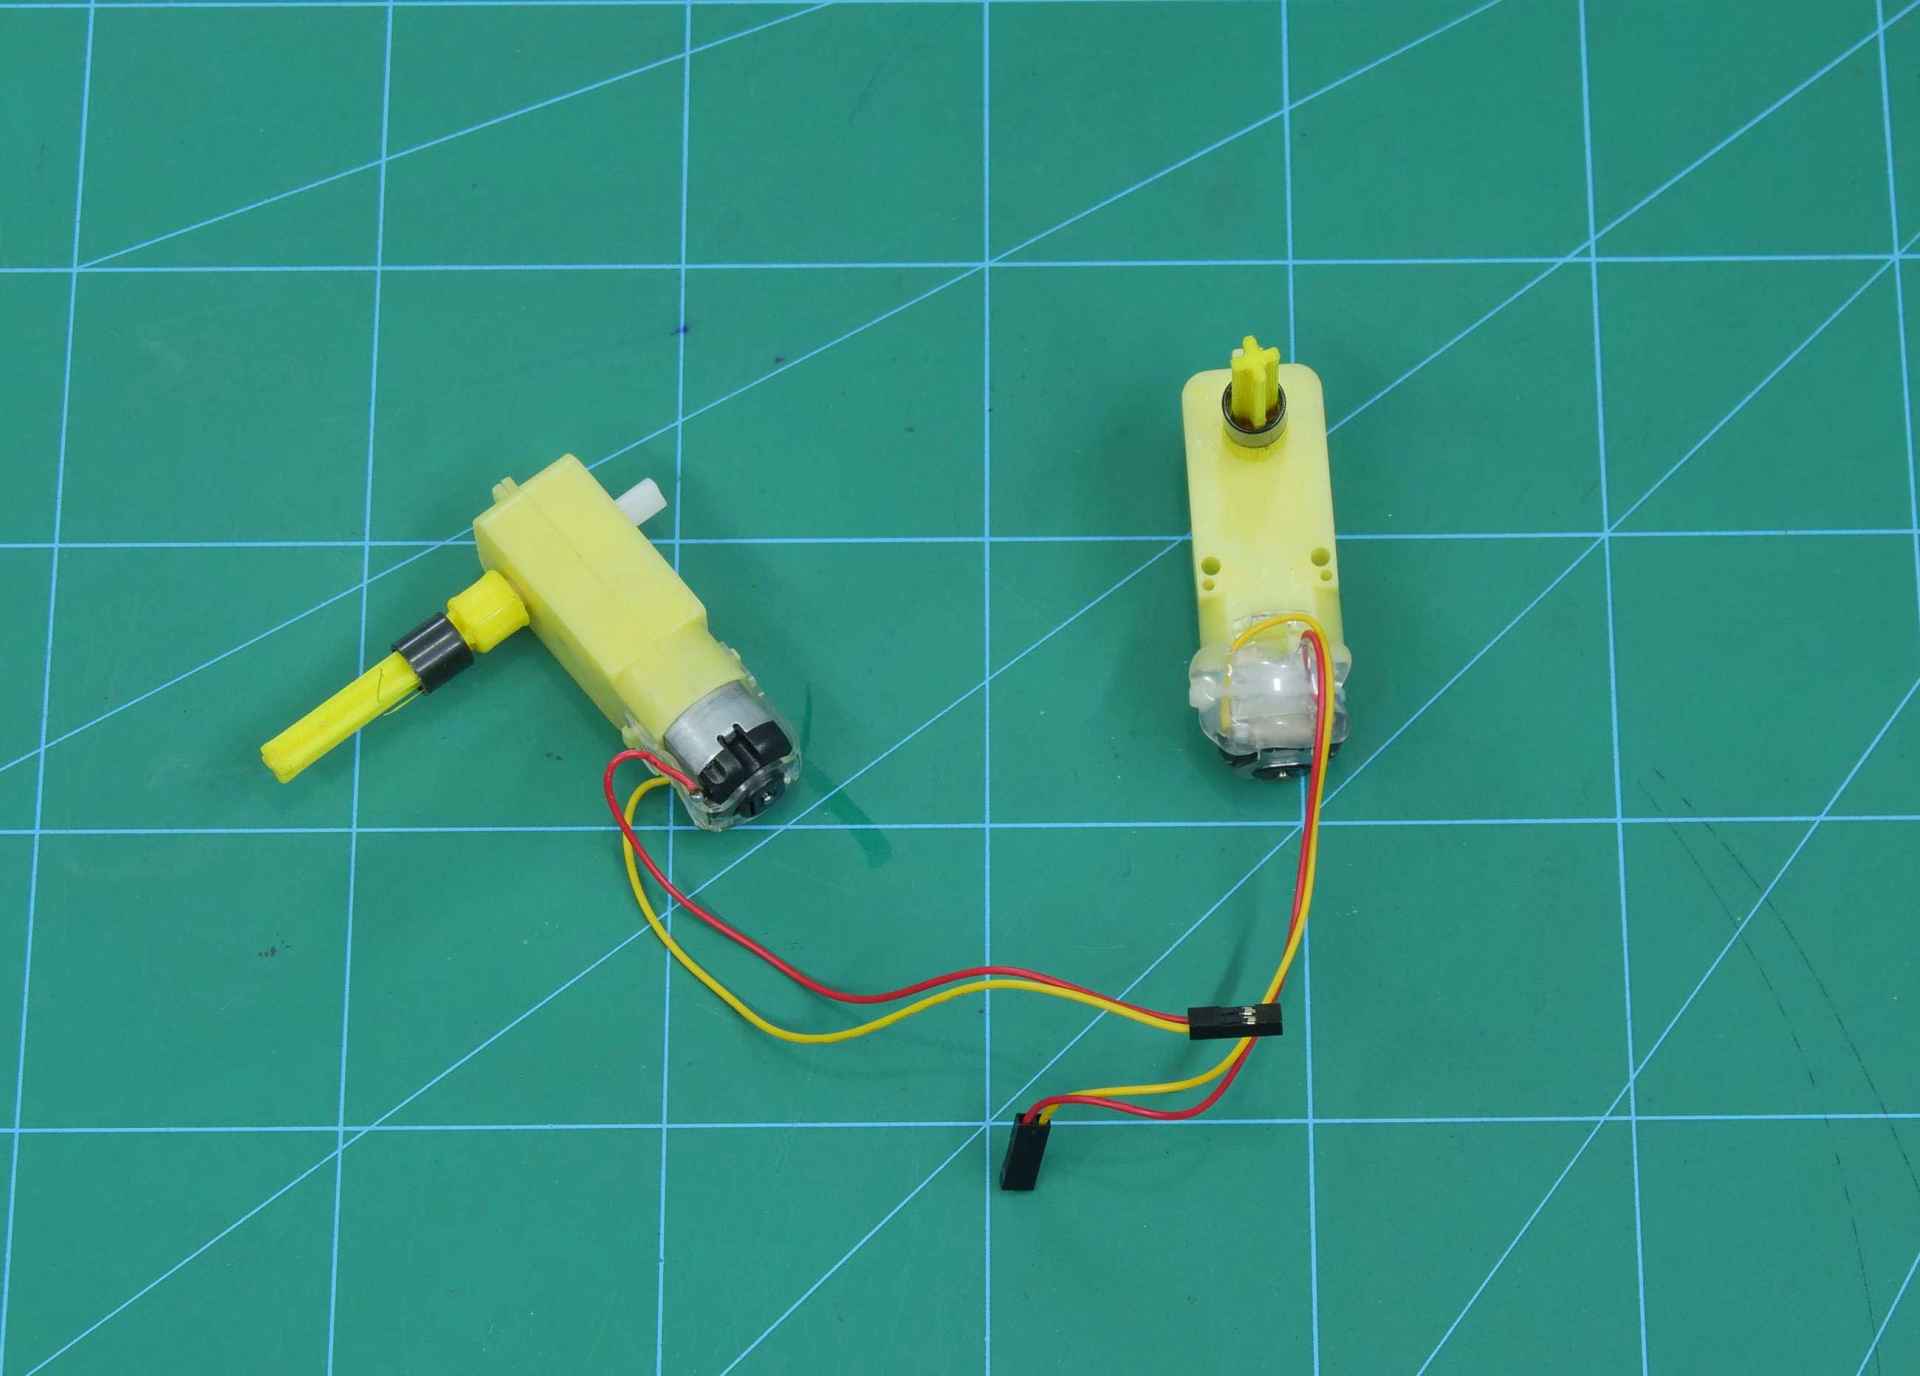
This piece will pass through one of the spaces of the blix platform, upon which the cleaning cloth will be mounted.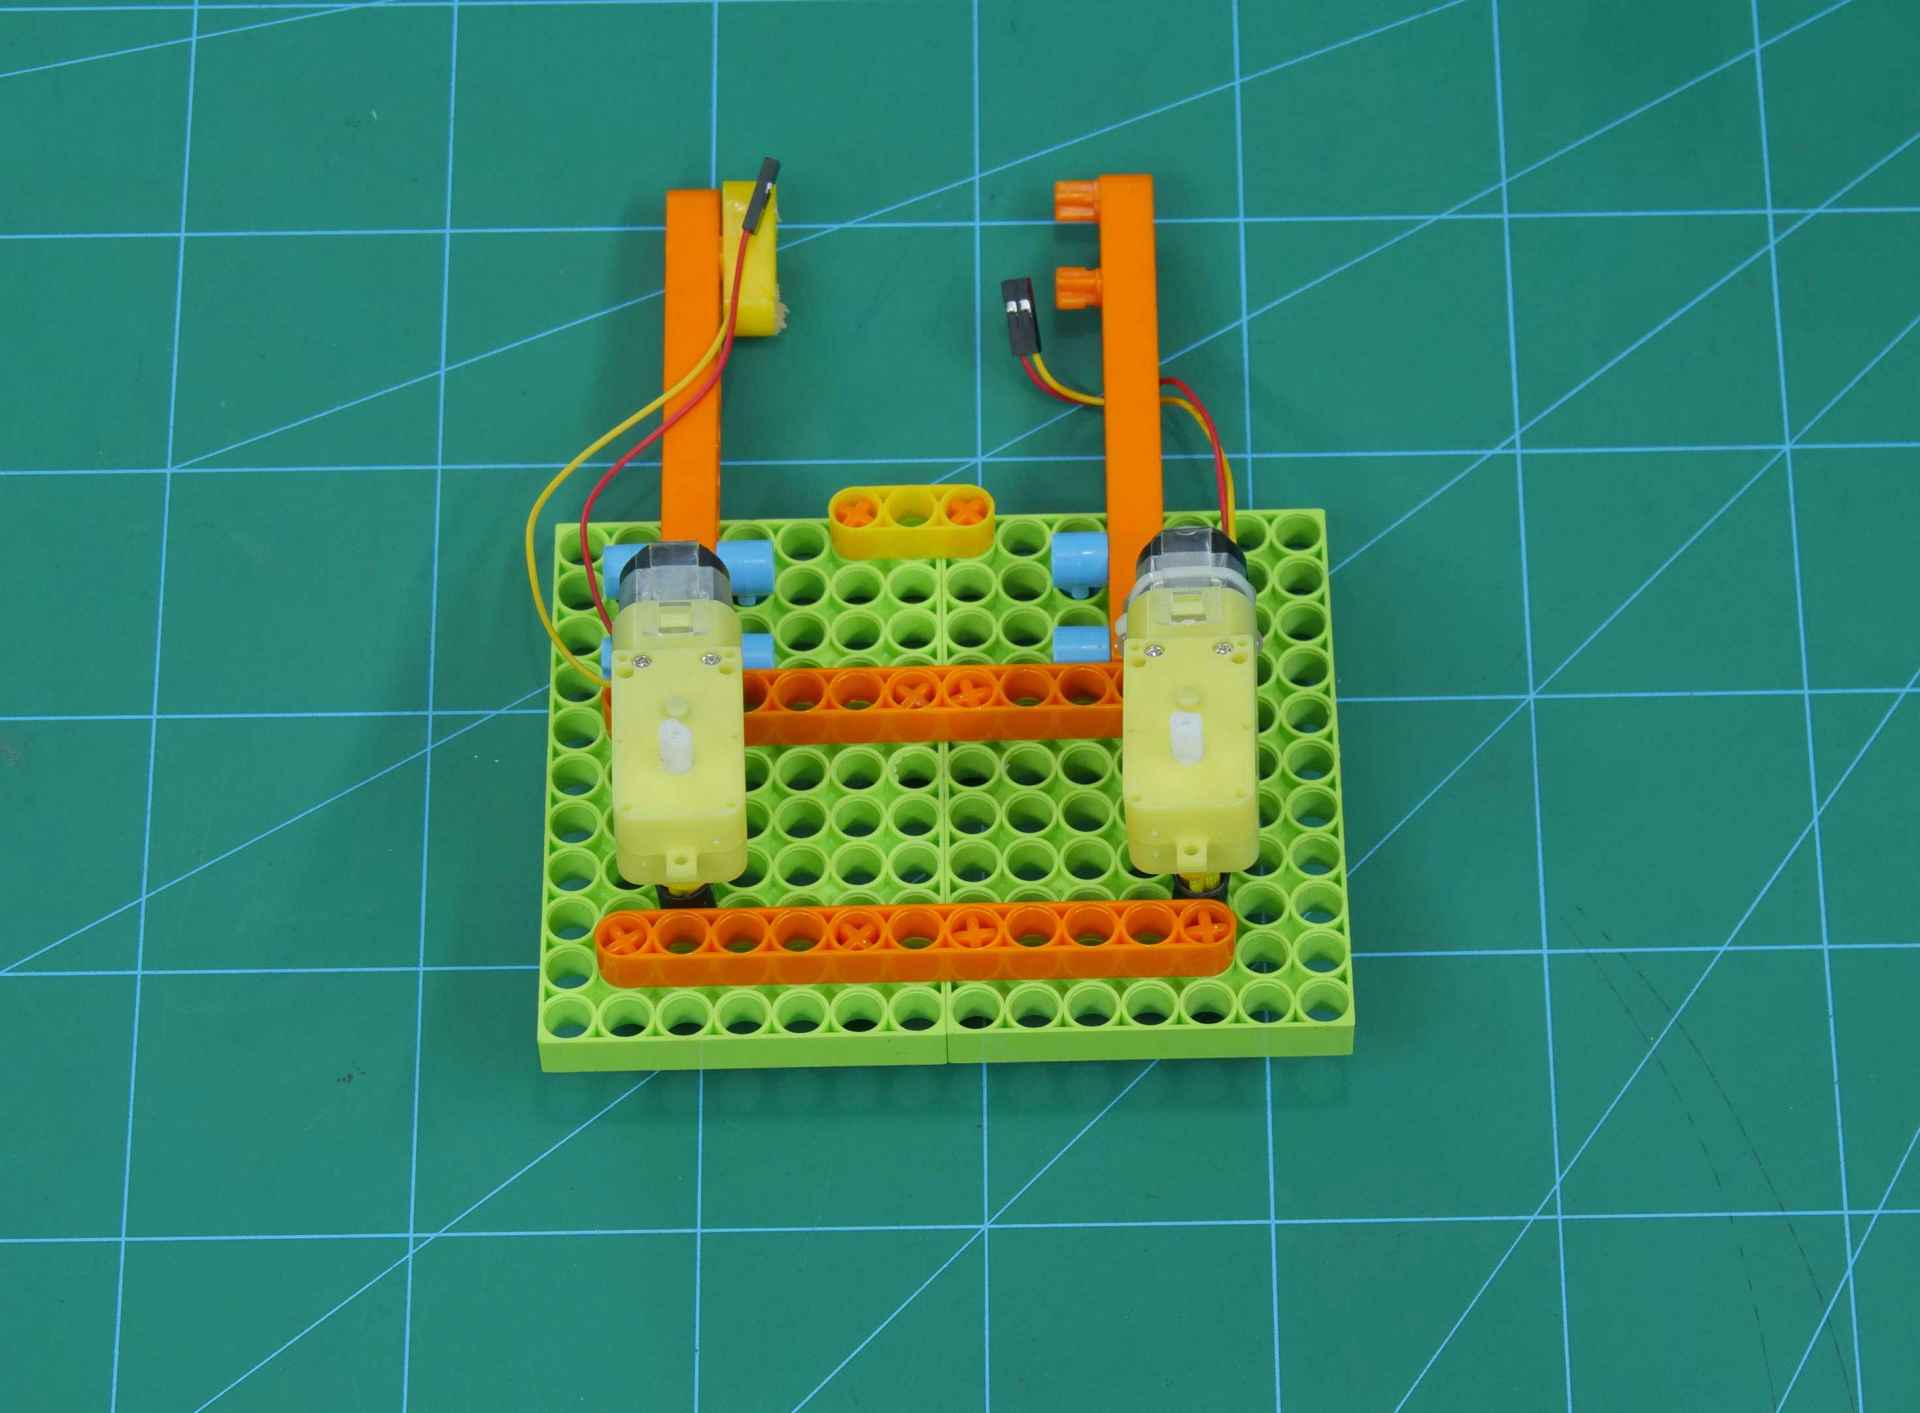
To fix the DC Motor, tighten it using cable ties.
Now on the shaft, we are going to fix the wheel, upon which we have glued the sponge piece with a cloth.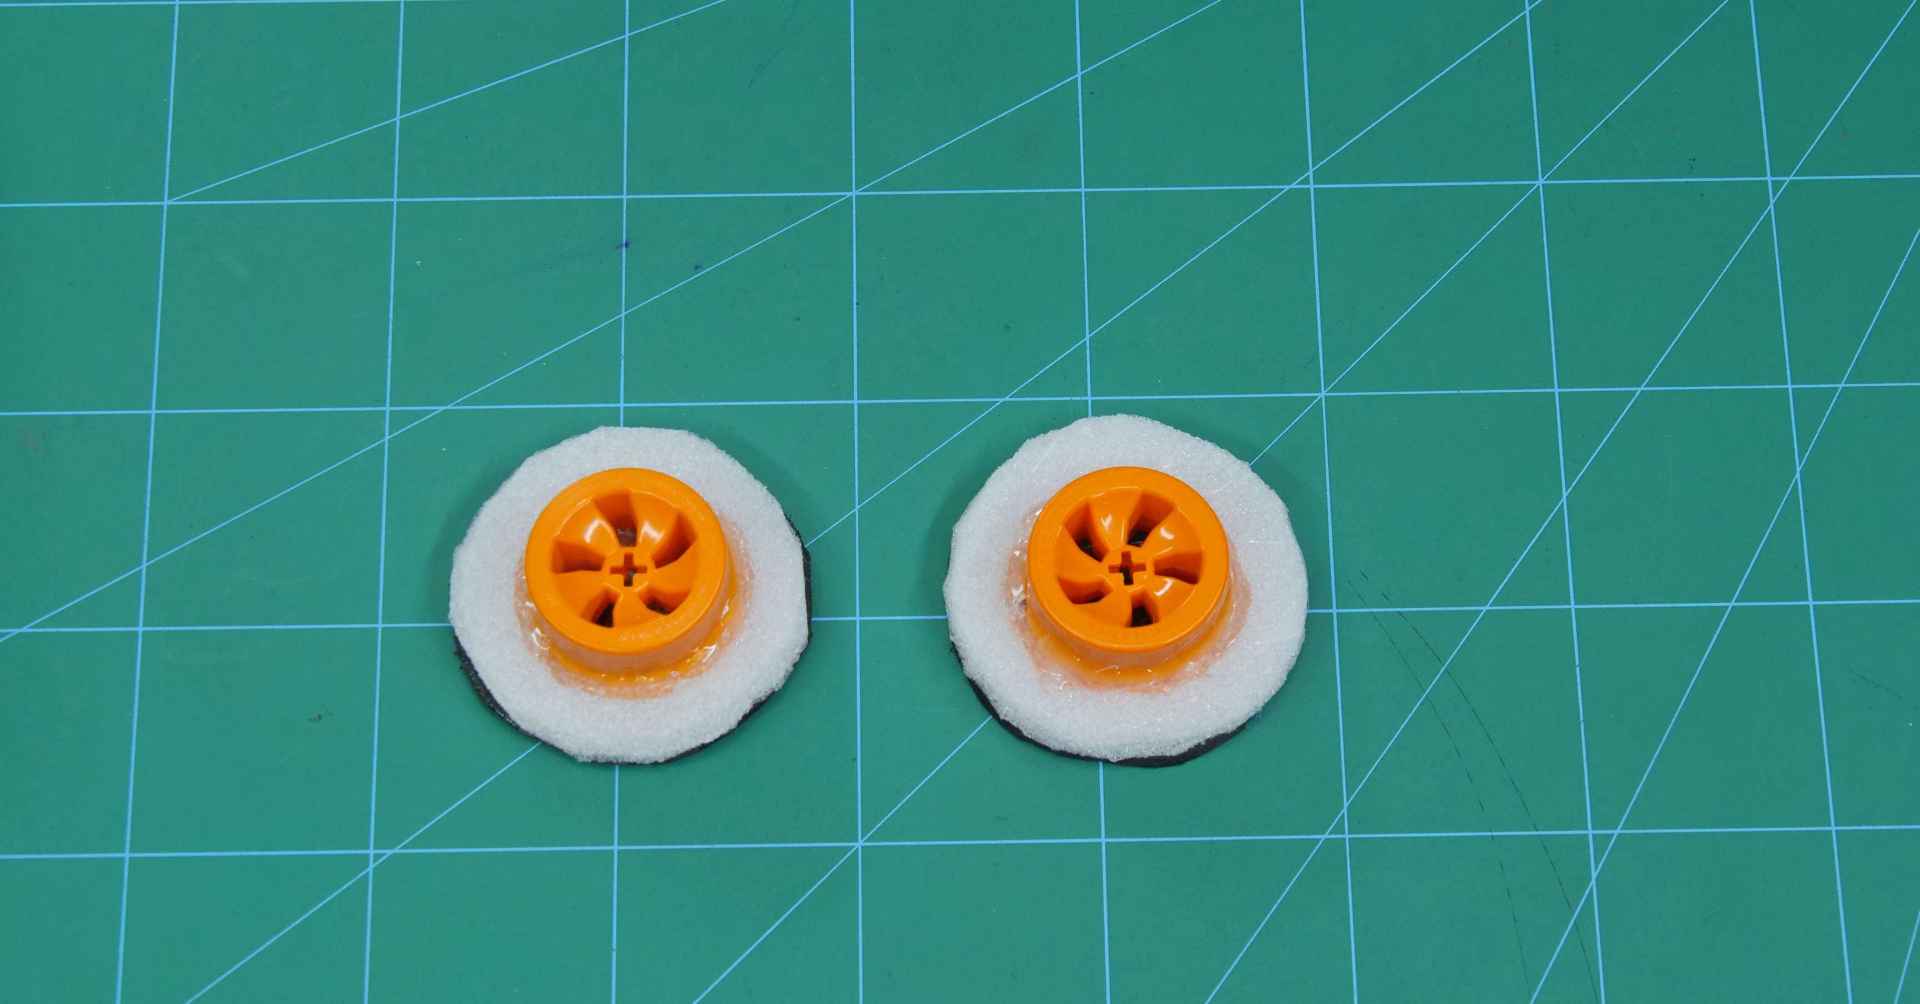
 Let’s assemble the robot and the assembly together.
Completing the Robot
We are going to add the metal servo on to the bottom chassis. Flix the servo using Hot glue & cable ties.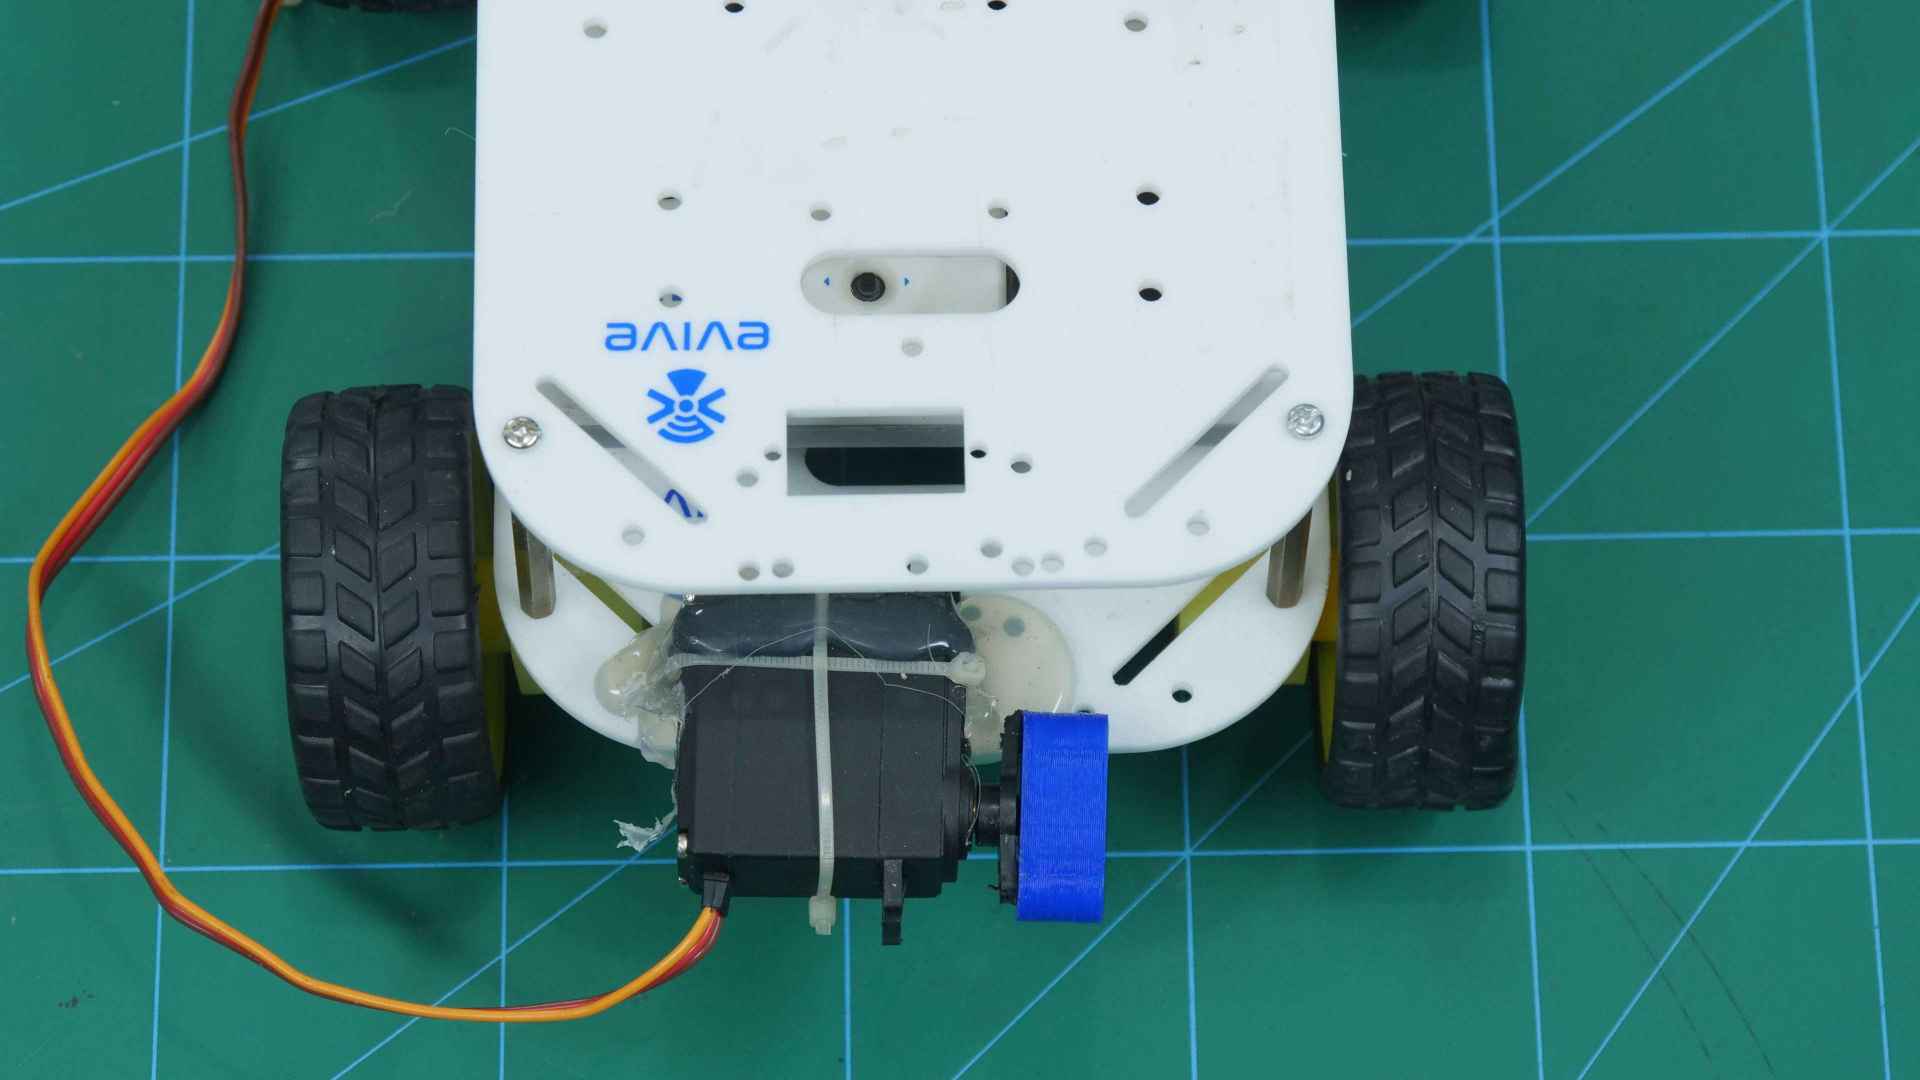
Now to fix it to the blix assembly, we have added a 3D printed part, which can be attached to the elongated part of the blix assembly.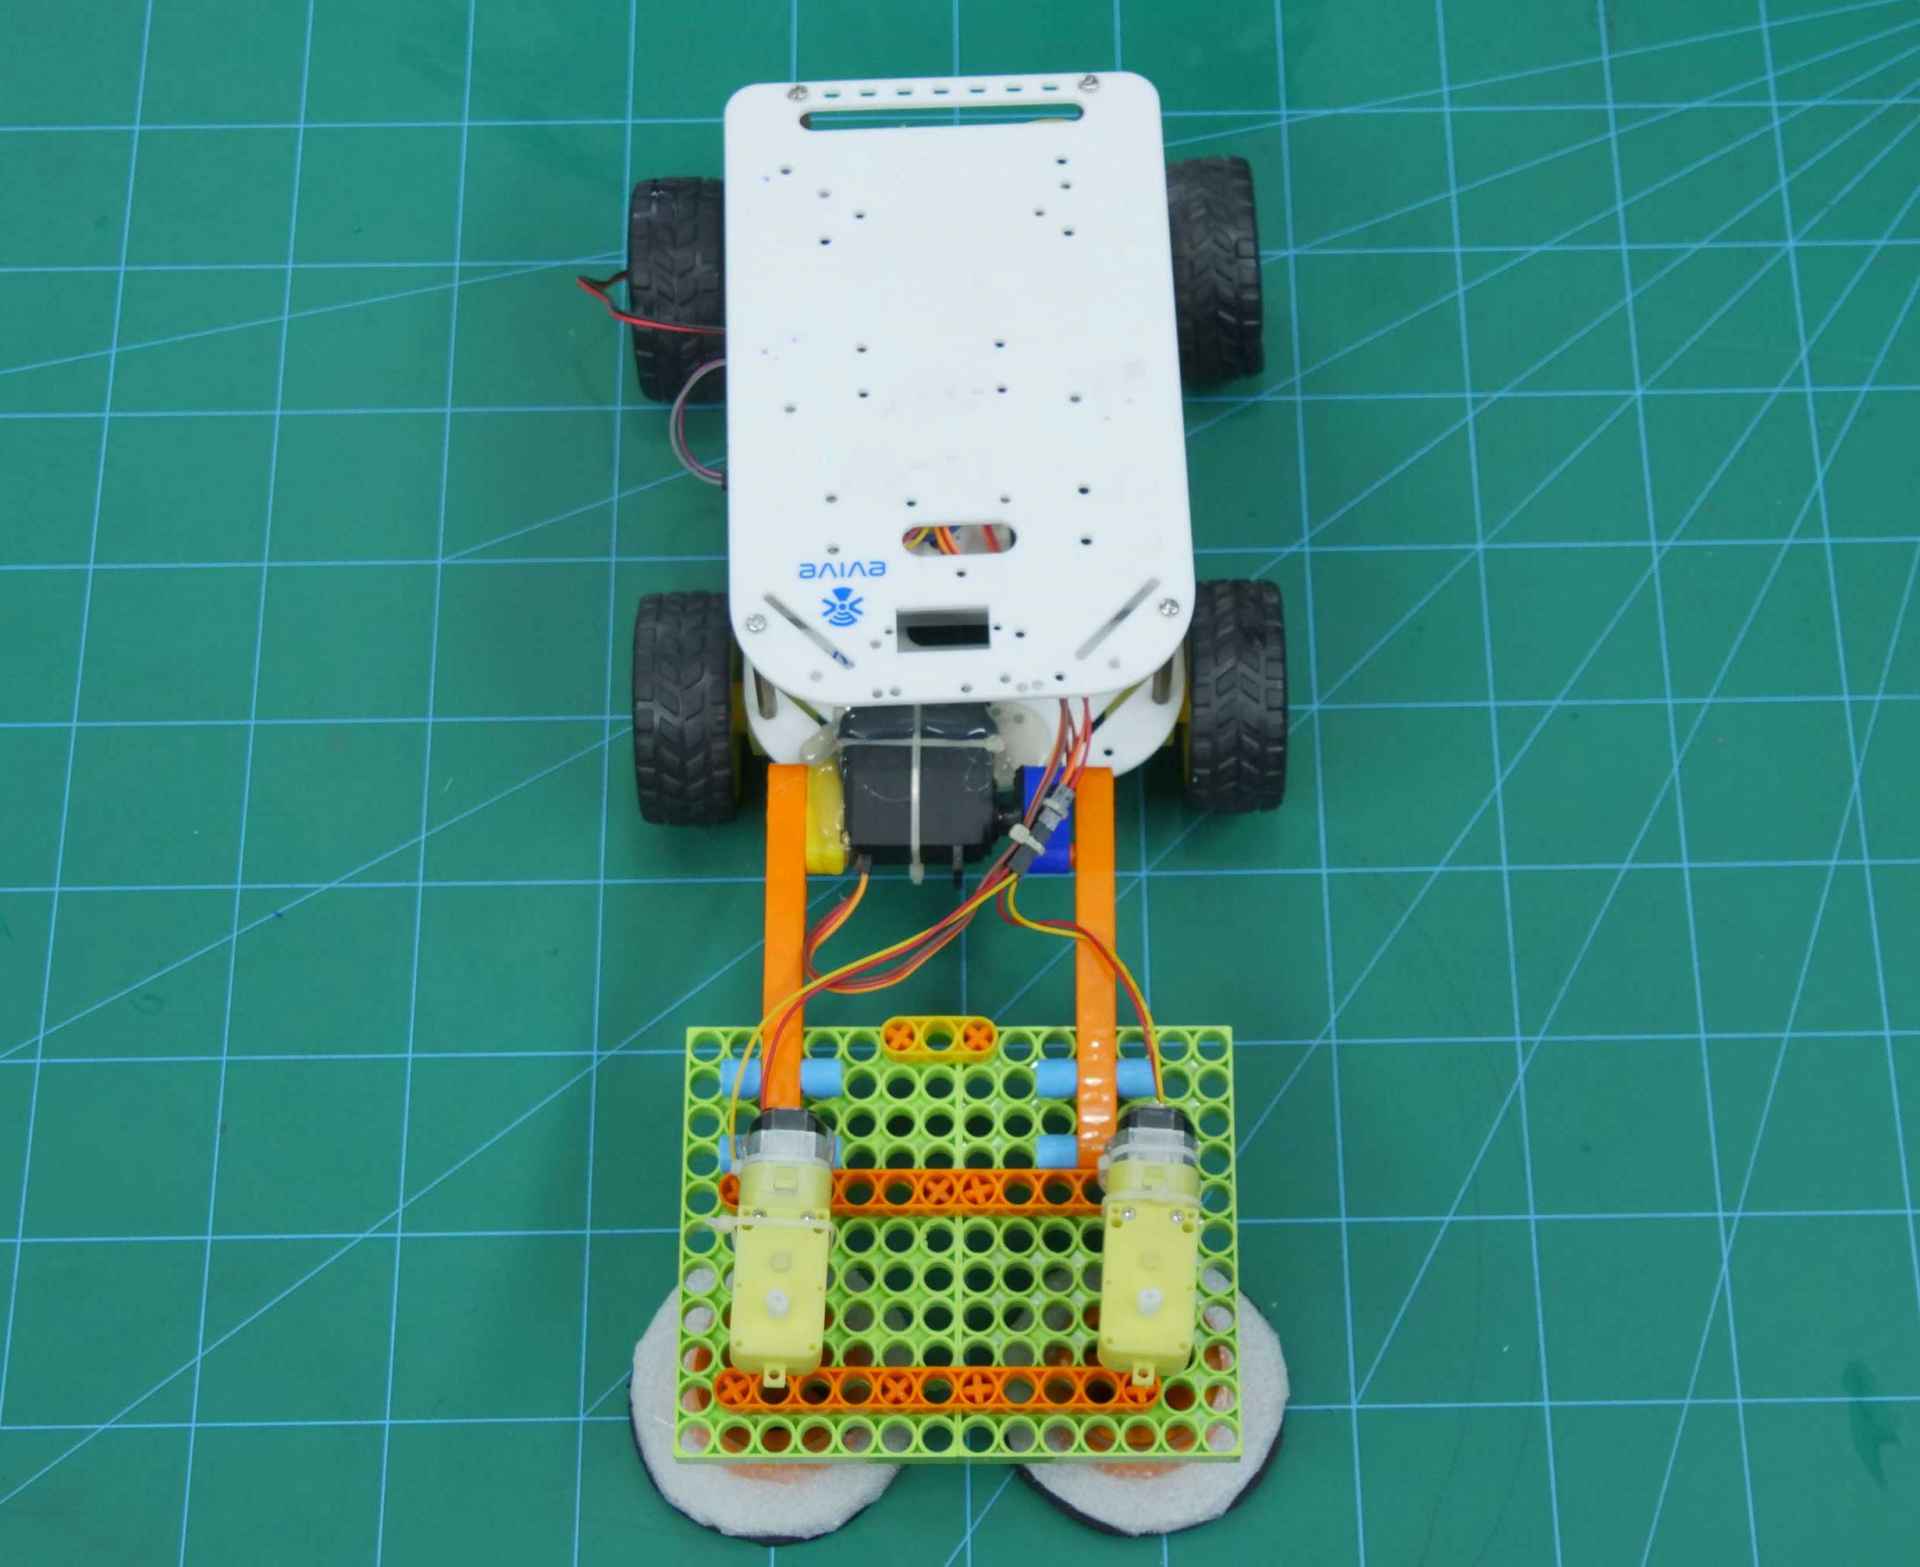
We will be adding one more functionality to our robot, that is along with cleaning, the robot will also shower the water and then clean it.
We will need a source where we will be fetching our water from.
Take a water bottle and make a cut on top of it and glue the bottle on top of chassis using hot glue.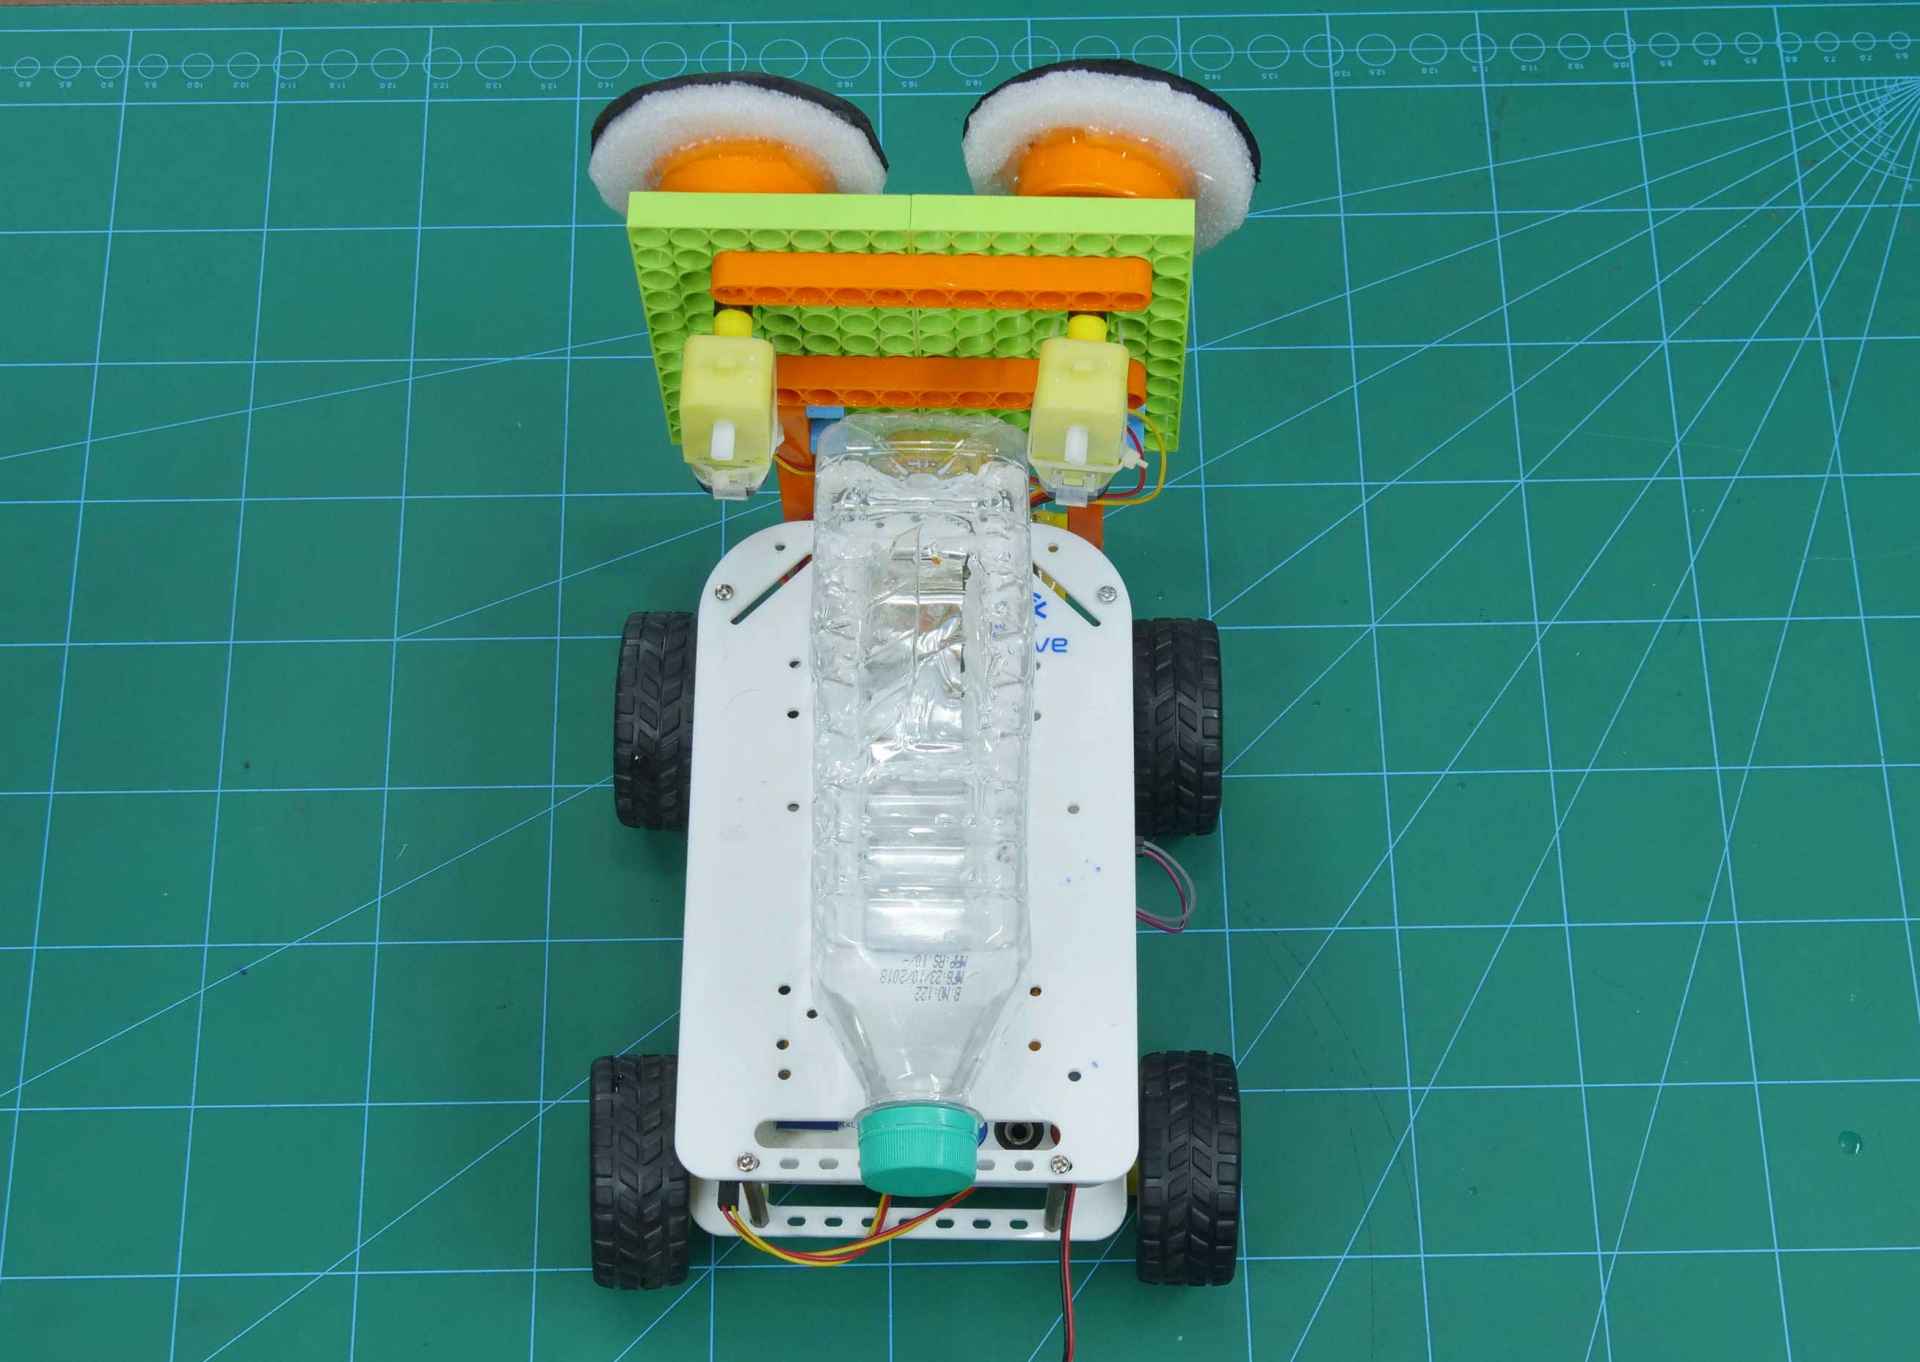
Fill the bottle.
We will be needing a pump to take water from the bottle to the shower head.
Thus, insert the pump from the cut and fix the pipe into one of the spaces on blix.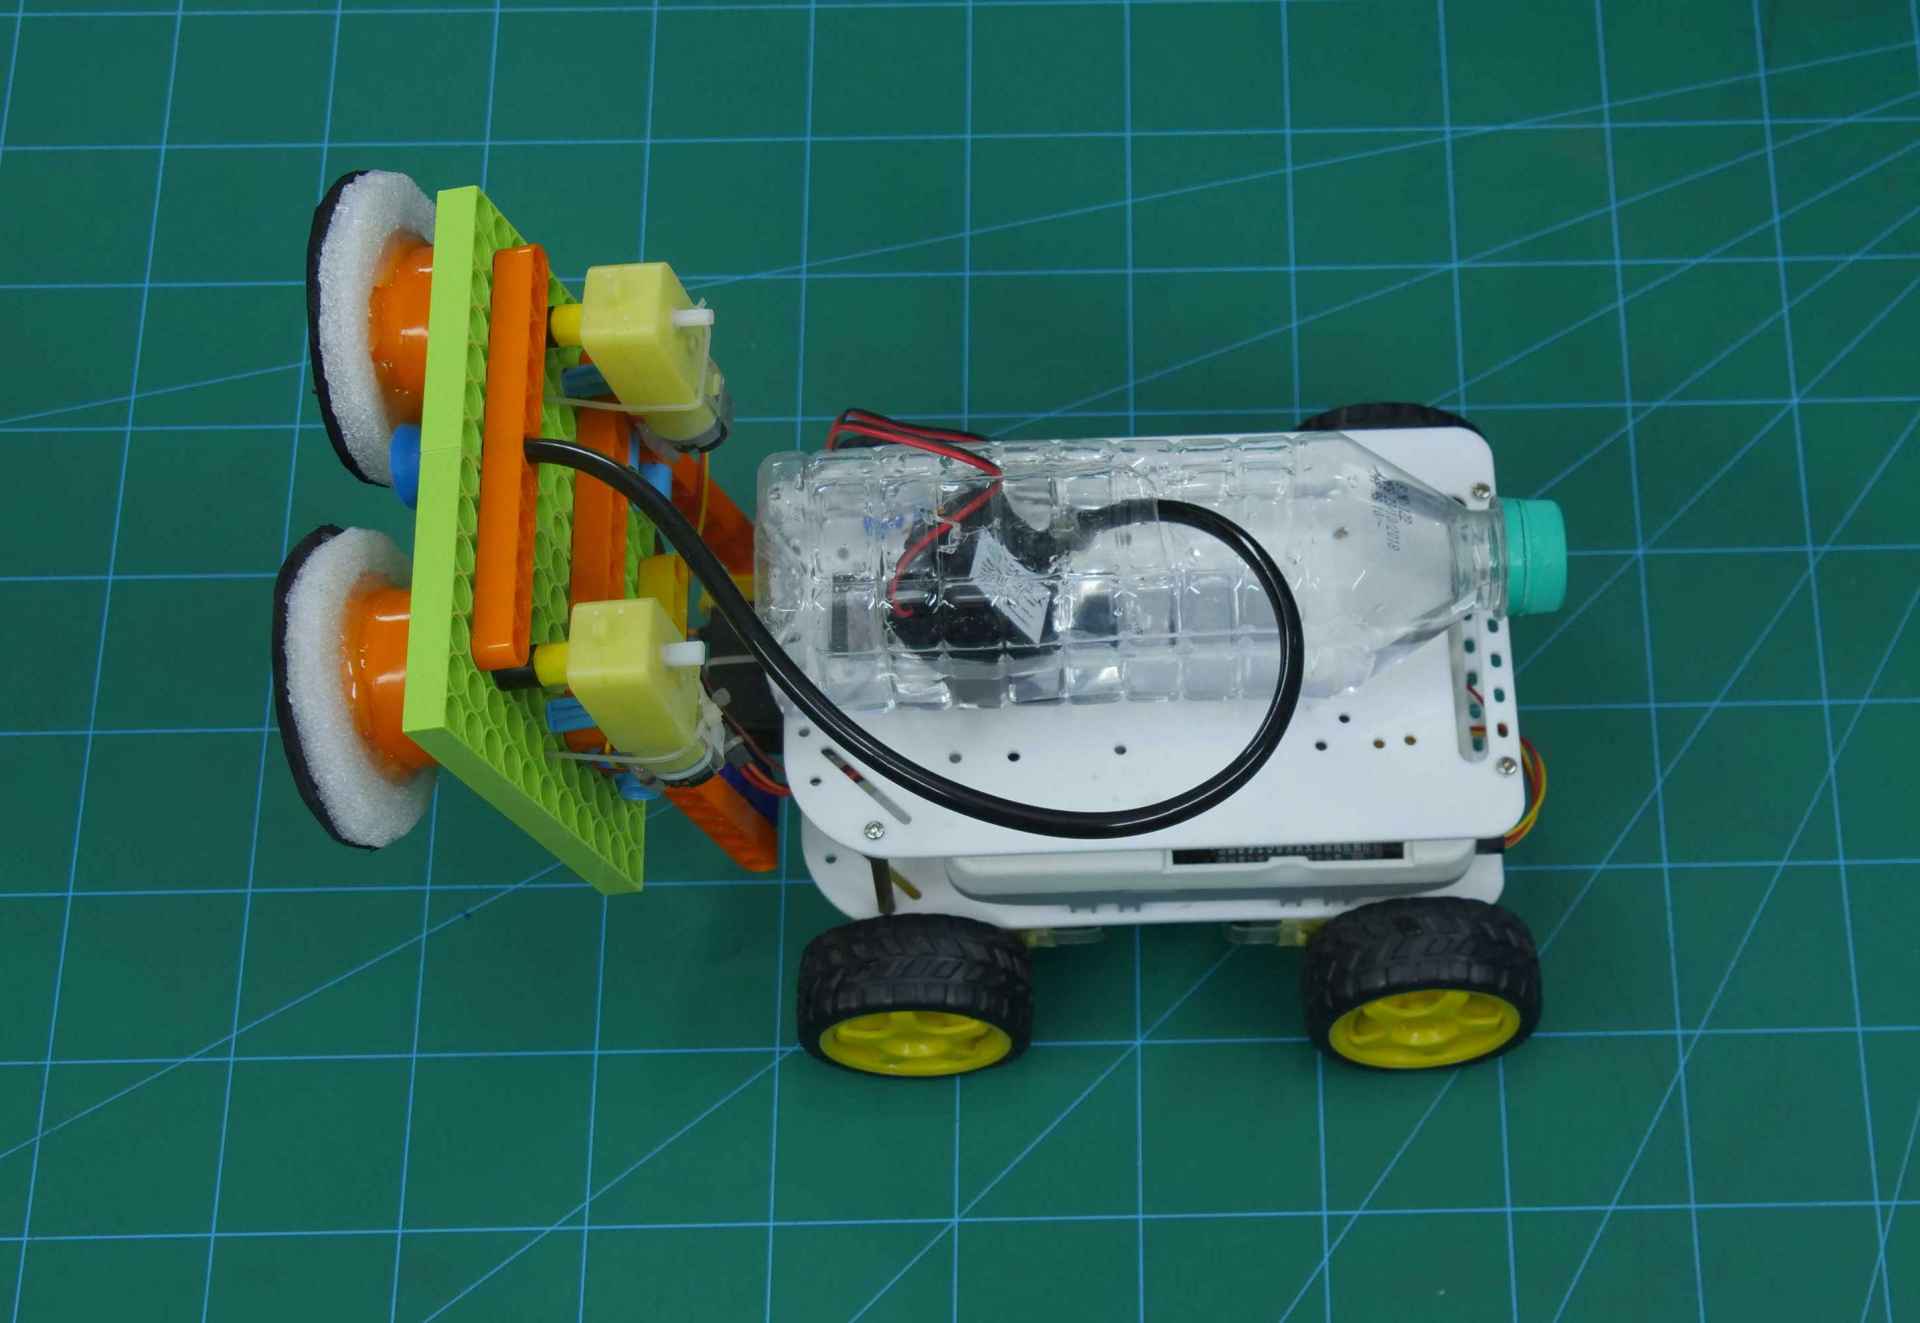
Now, we need a shower or sprayer.
For this, we will add a 3D printed shower and fix it at the centre of the blix assembly.
Fix the pipe to this shower.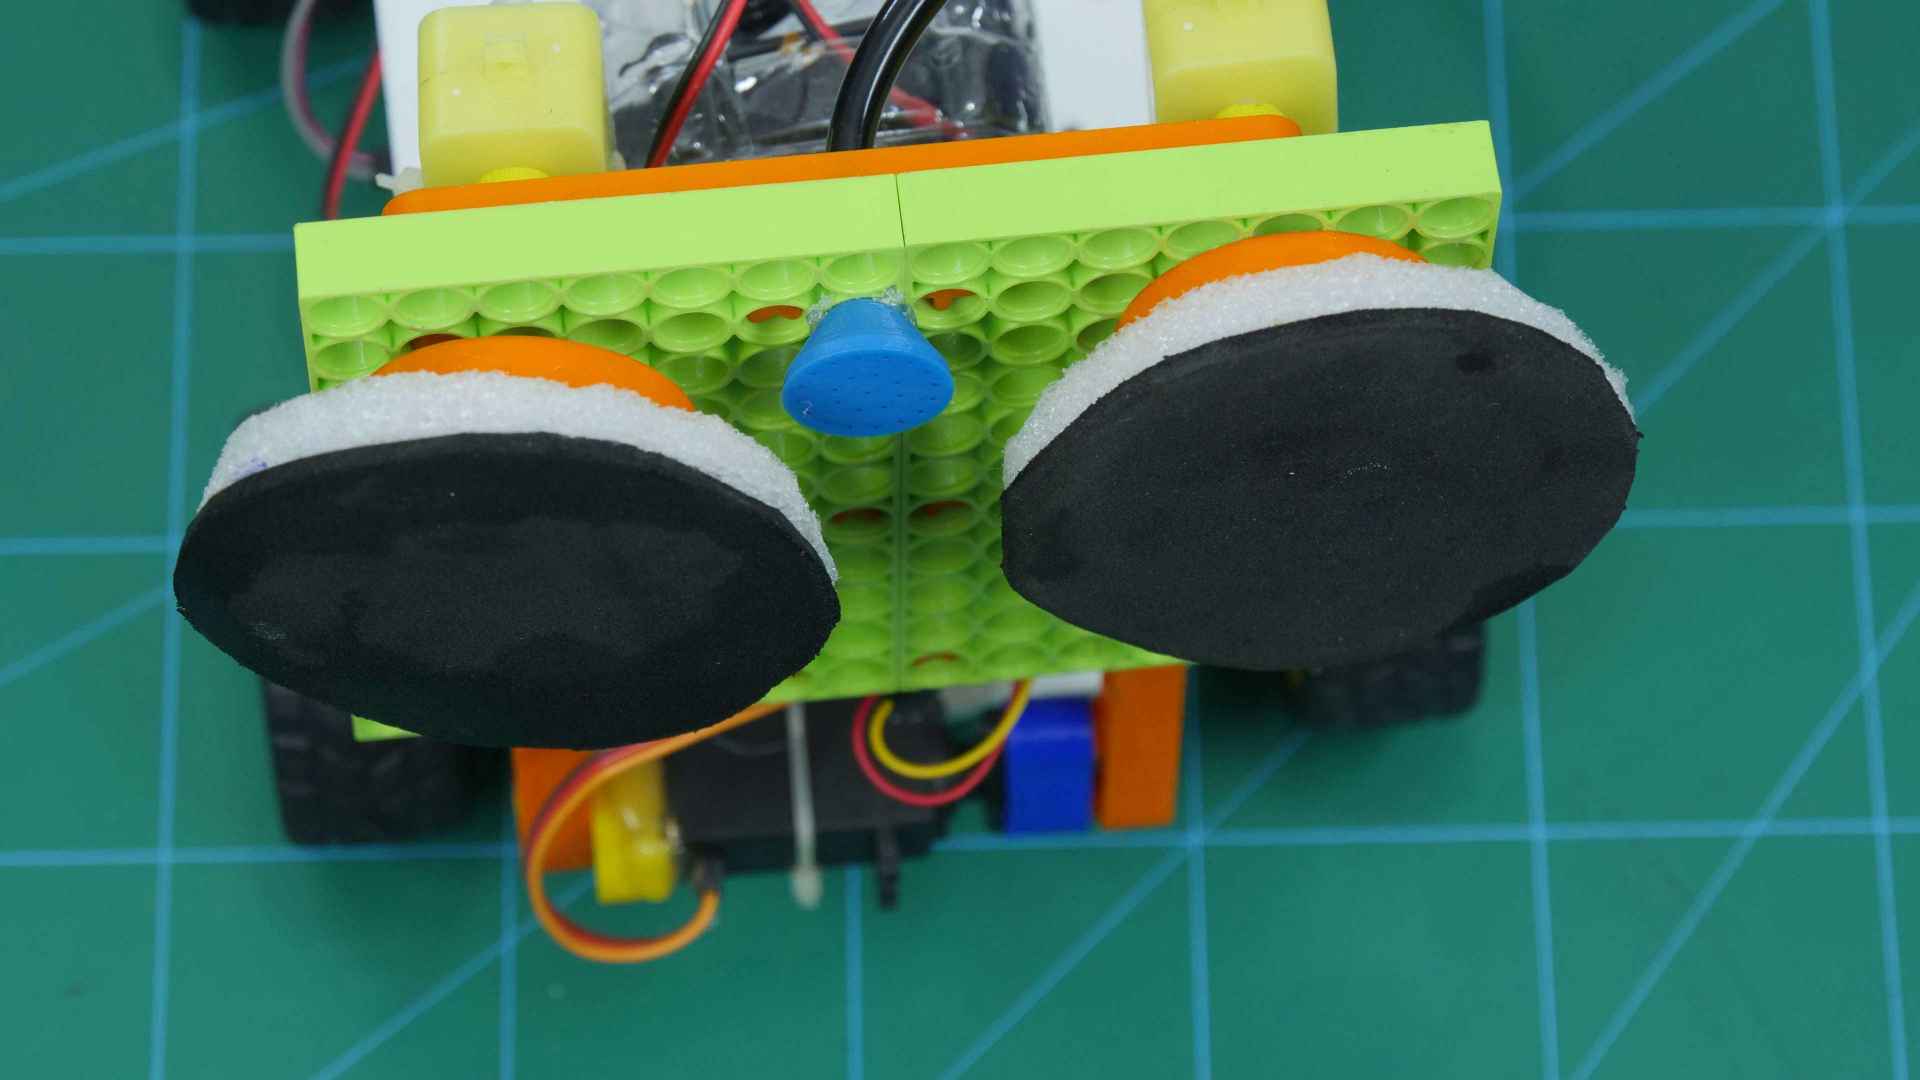
Lastly, we need to add an external power source, thus we will be connecting the Lipo battery to the evive.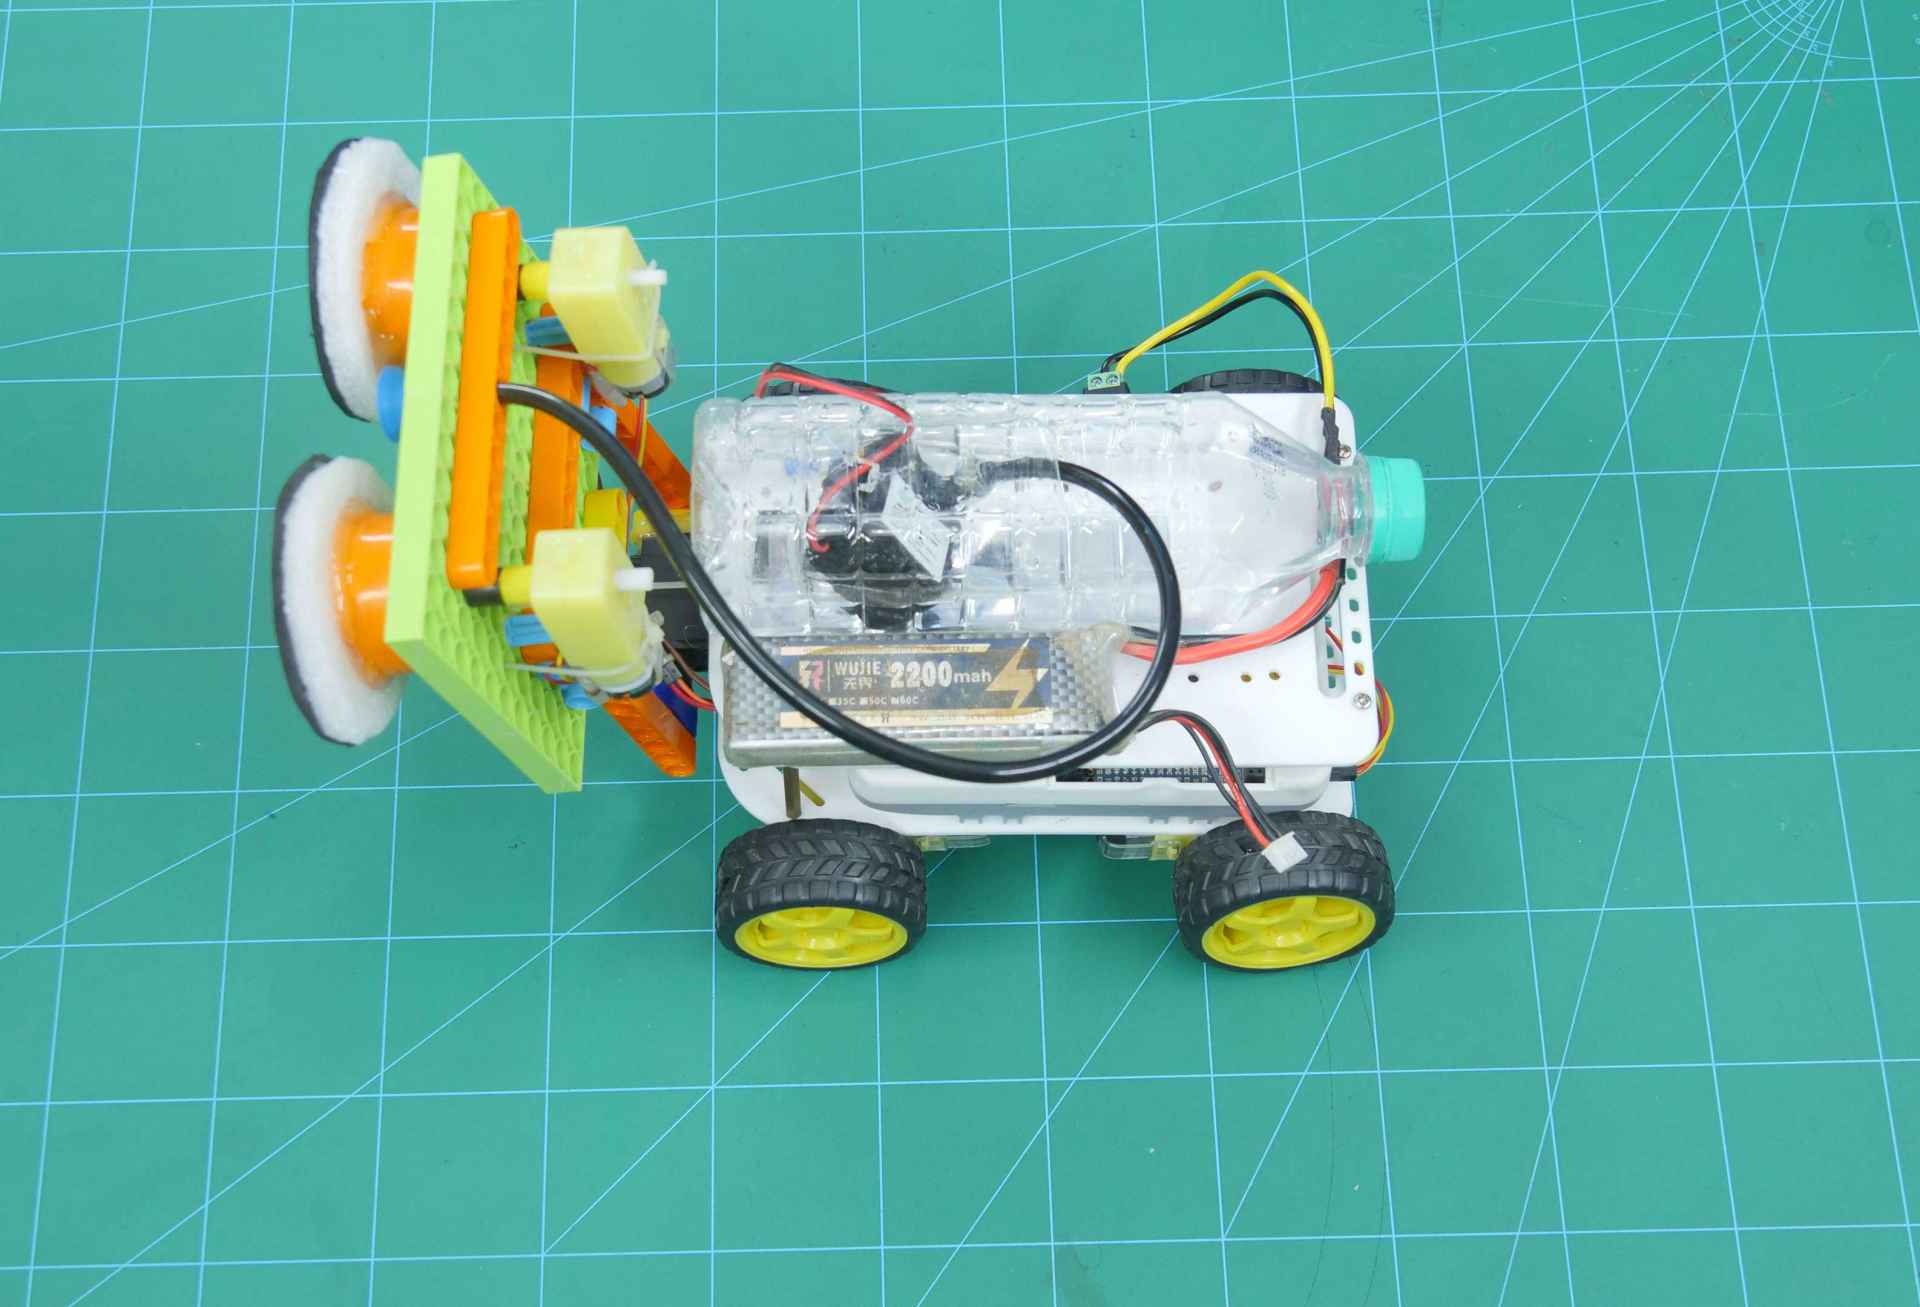
Thus the making of the robot is completed.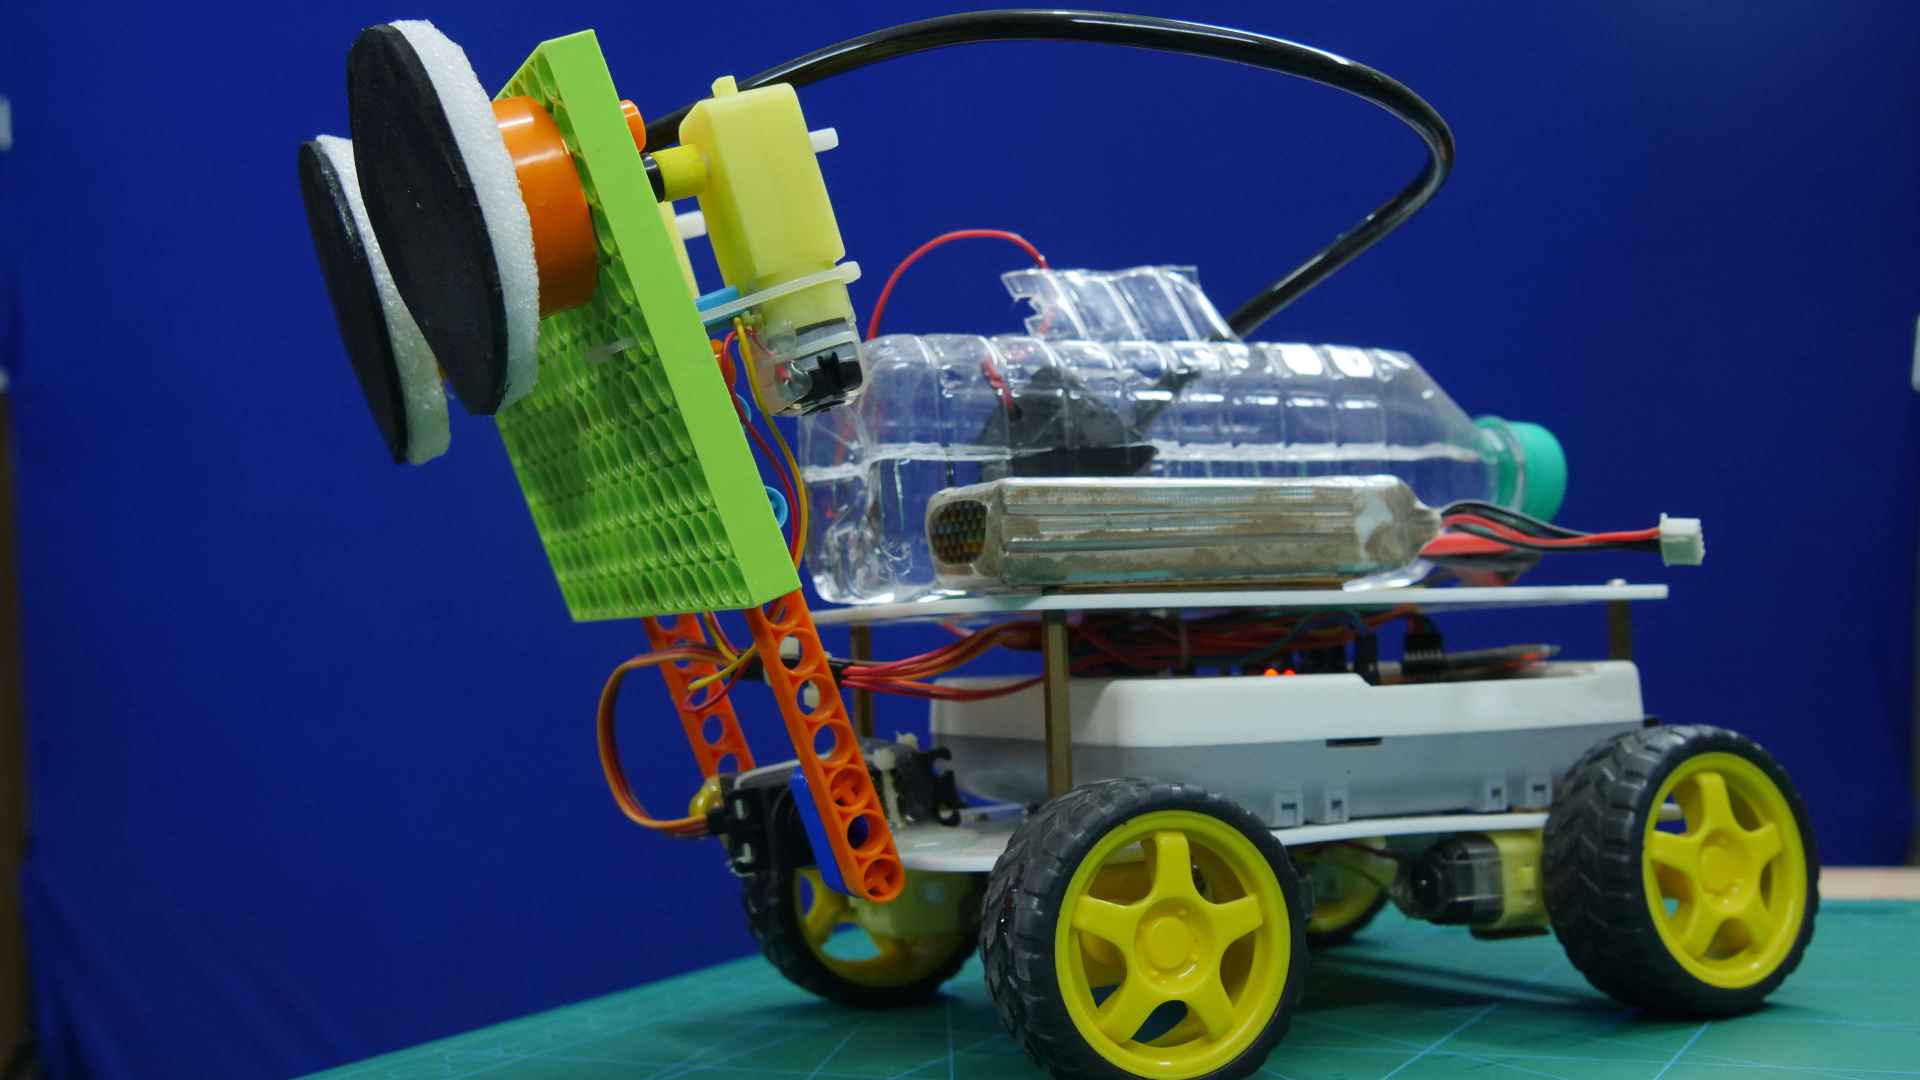
Logic
We will control the robot via Bluetooth using the
Gamepad module in Dabble, a project-making mobile application developed by STEMpedia, is used. You can install it on your phone from Google Play.
To pair Dabble with the Bluetooth Module, follow the steps below:
-
Install the app and open it.

-
Then, pair it with the HC-05 Bluetooth module.

-
Open Gamepad. You can now control your robot using the keys of the GamePad.

The servo is used to set the angle at which you want to clean the surface.
The pump will push the water out through the shower.
The DC Motor is used to rotate the cleaning cloth thus wiping away all the water making your surface shiny.
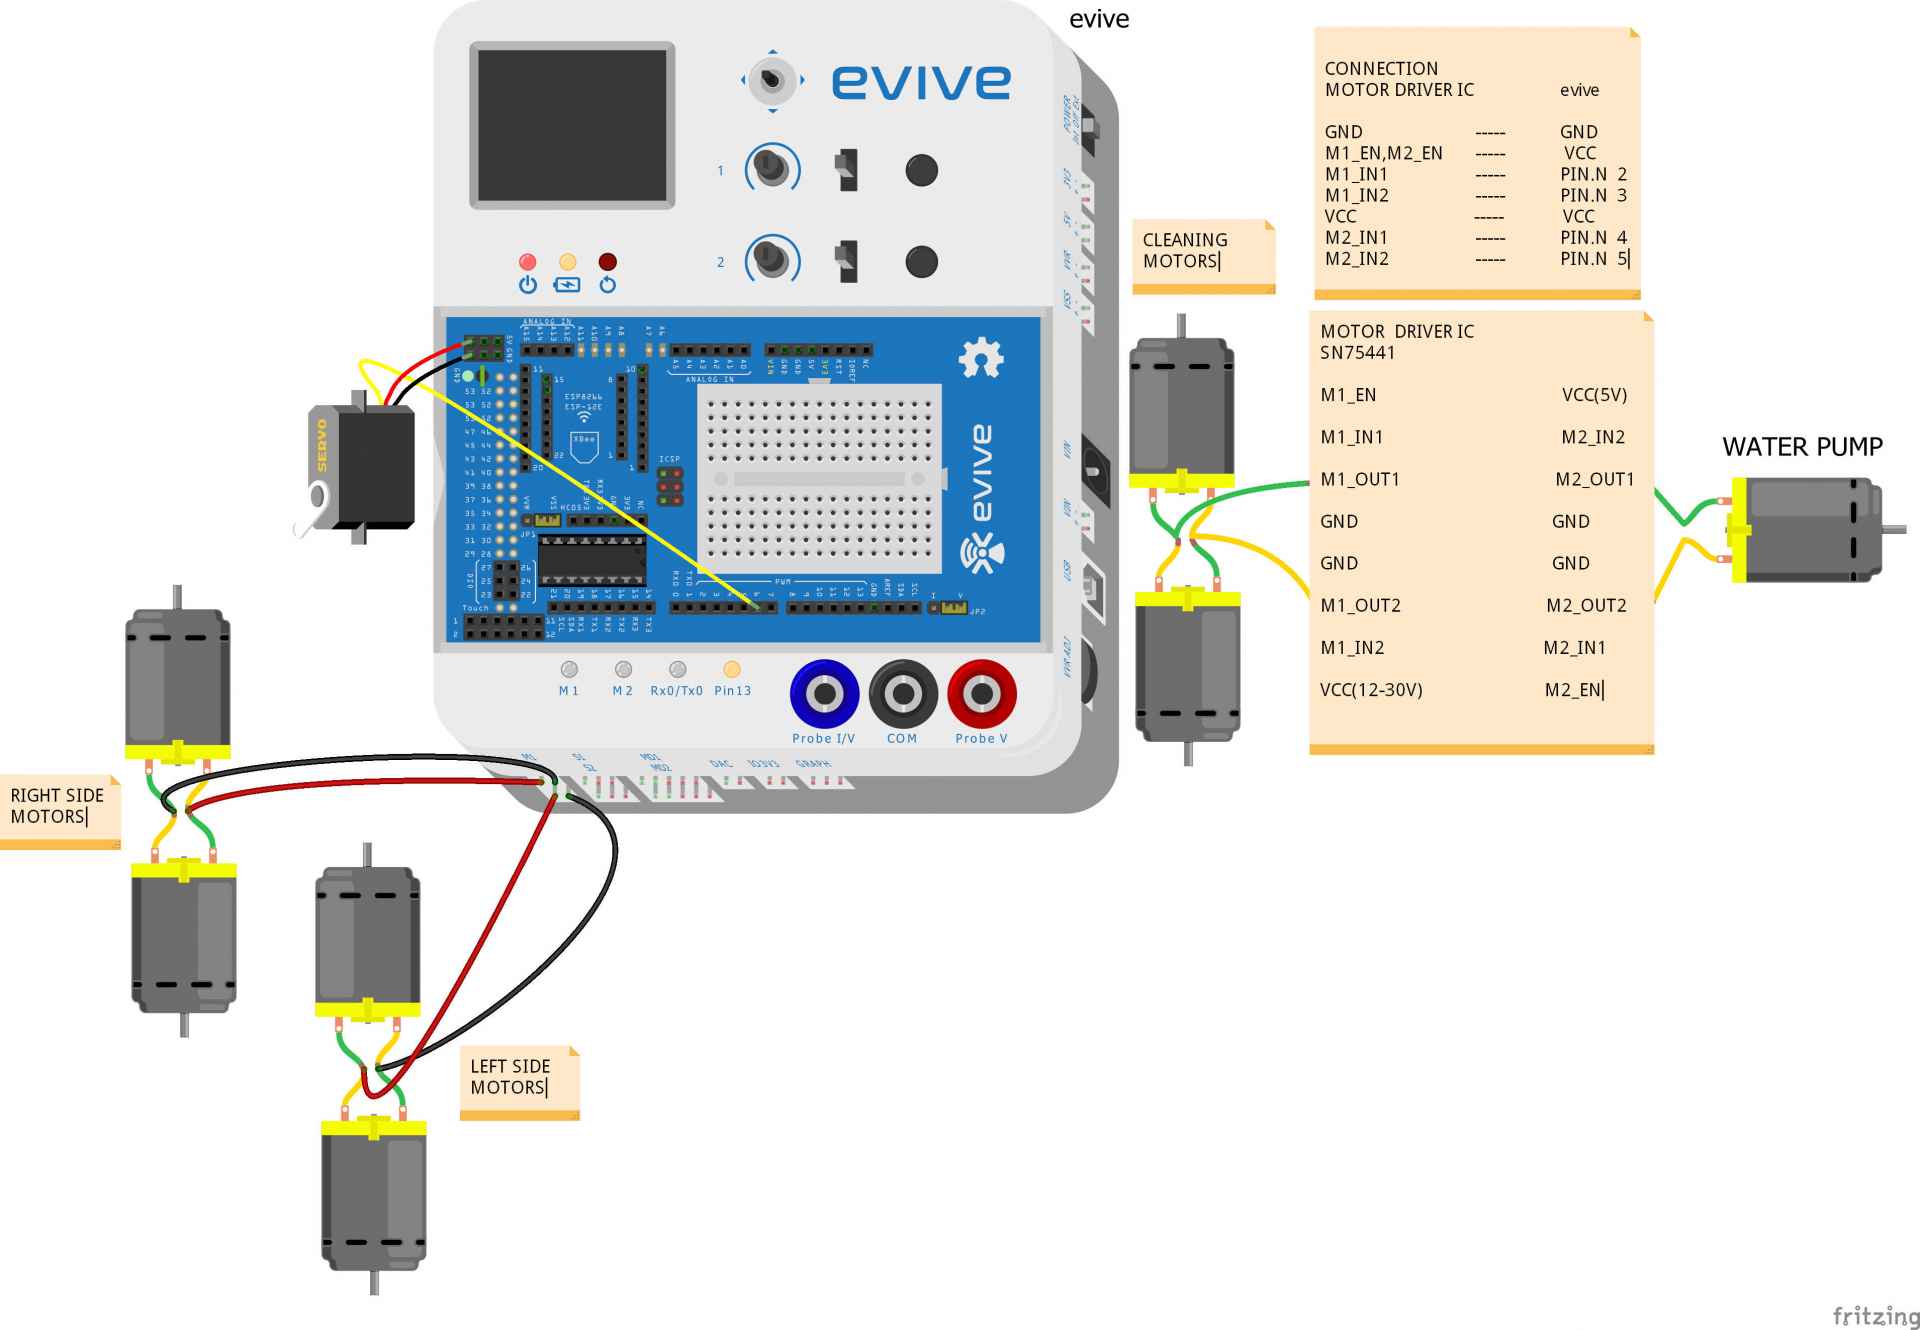
Circuitry
Make the connections as shown below:

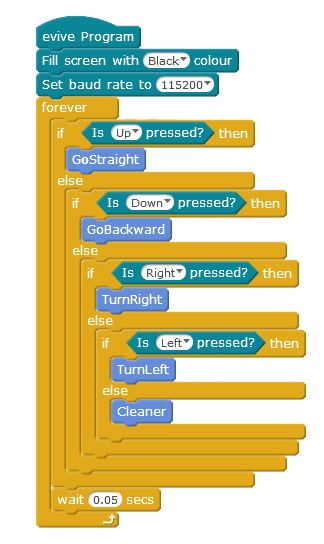
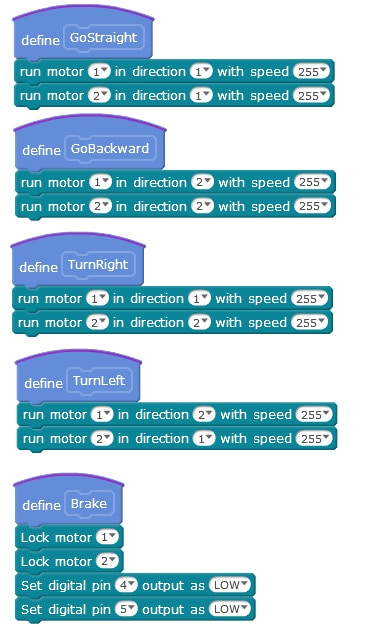
Code
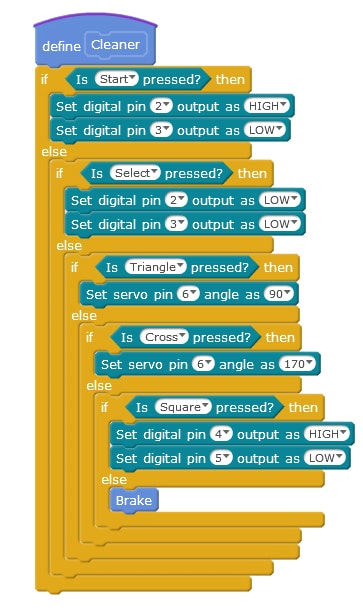
We will be assigning the functions to the button of the Gamepad as follows:

- Left Set of Buttons:
- Up = Move Forward
- Down = Move Backward
- Left = Turn left
- Right = Turn Right
- Right Set of Buttons:
- Up = Blix Assembly moves upwards
- Down = Blix assembly moves down
- Left = To shower the water
- Extras:
- Start = To rotate the cleaning Motors
- Select = To stop the cleaning Motors
Conclusion
With this, your DIY Smart Cleaning Robot is ready to make every corner of house your spick and span!


.mp4.00_00_00_00.Still001-c58cec4c")


