
Introduction
Control, control, control your boat
Wirelessly with your Smartphone
Via an app with super cool features
Get ready to have your mind blown!
Well, that pretty much sums today’s project, perhaps. All you need to make your own electric boat is some polystyrene, DC motors, a fan, evive, and loads of DIYing. To control the boat you’ll need Dabble, our in-house developed project-making mobile application, which you can get here.
So, what are you waiting for? Get on board!
Making
We will start by making the hull of the boat.
Take 1-meter piece polystyrene (thermocol) and cut it in the shapes as shown in the below figure.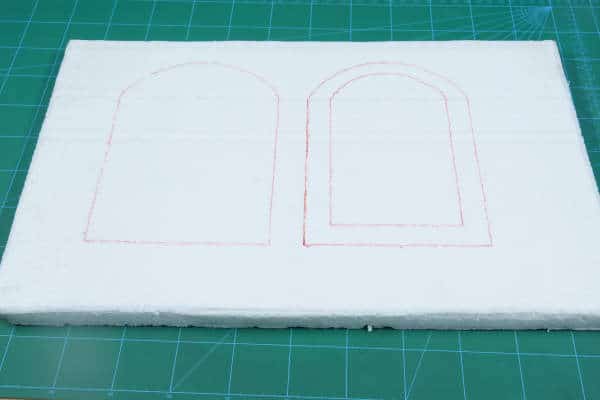
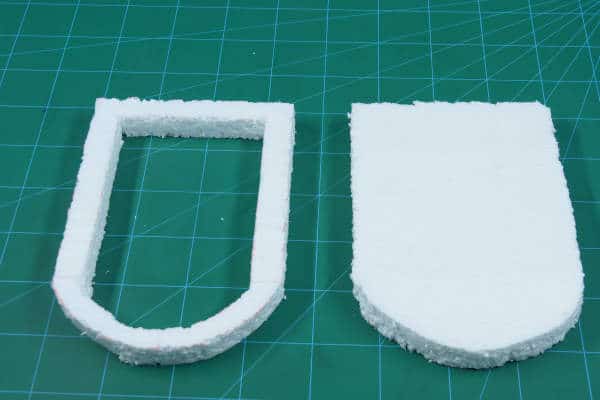
Take the lower part of the hull of the boat which is the solid piece and fix the hollow part on it using glue.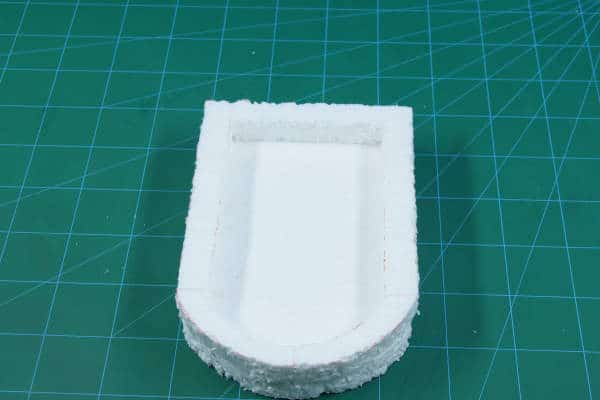
Take another small piece of thermocol and fix the DC motor on it. Attach a small fan on the shaft of the motor.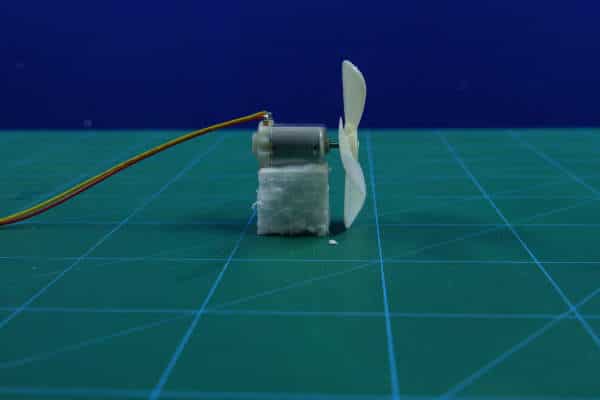
Attach this motor assembly on the hollow thermocol sheet.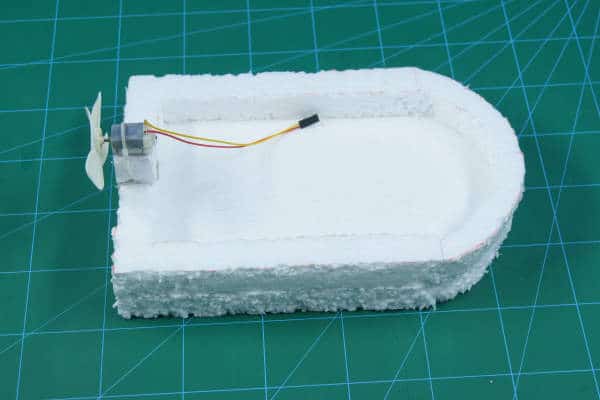
We need a small piece on which the water has no effect to make the rudder. For this, we’re going to take a small piece of metal.
Take a micro servo. Fix a double-sided servo horn on the servo head. Glue the metal piece to this horn using hot glue.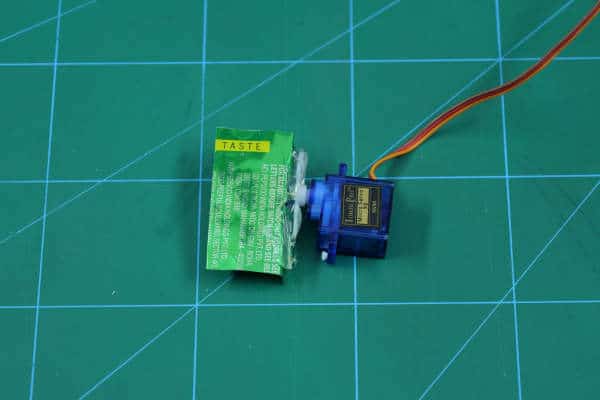
Attach the servo motor below the DC Motor using glue.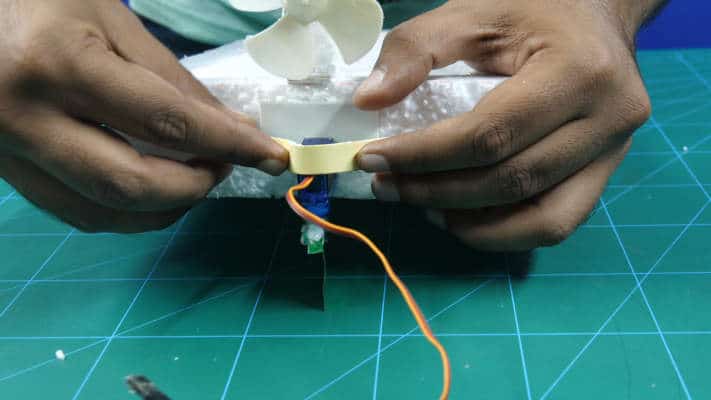
The assembly is thus complete.
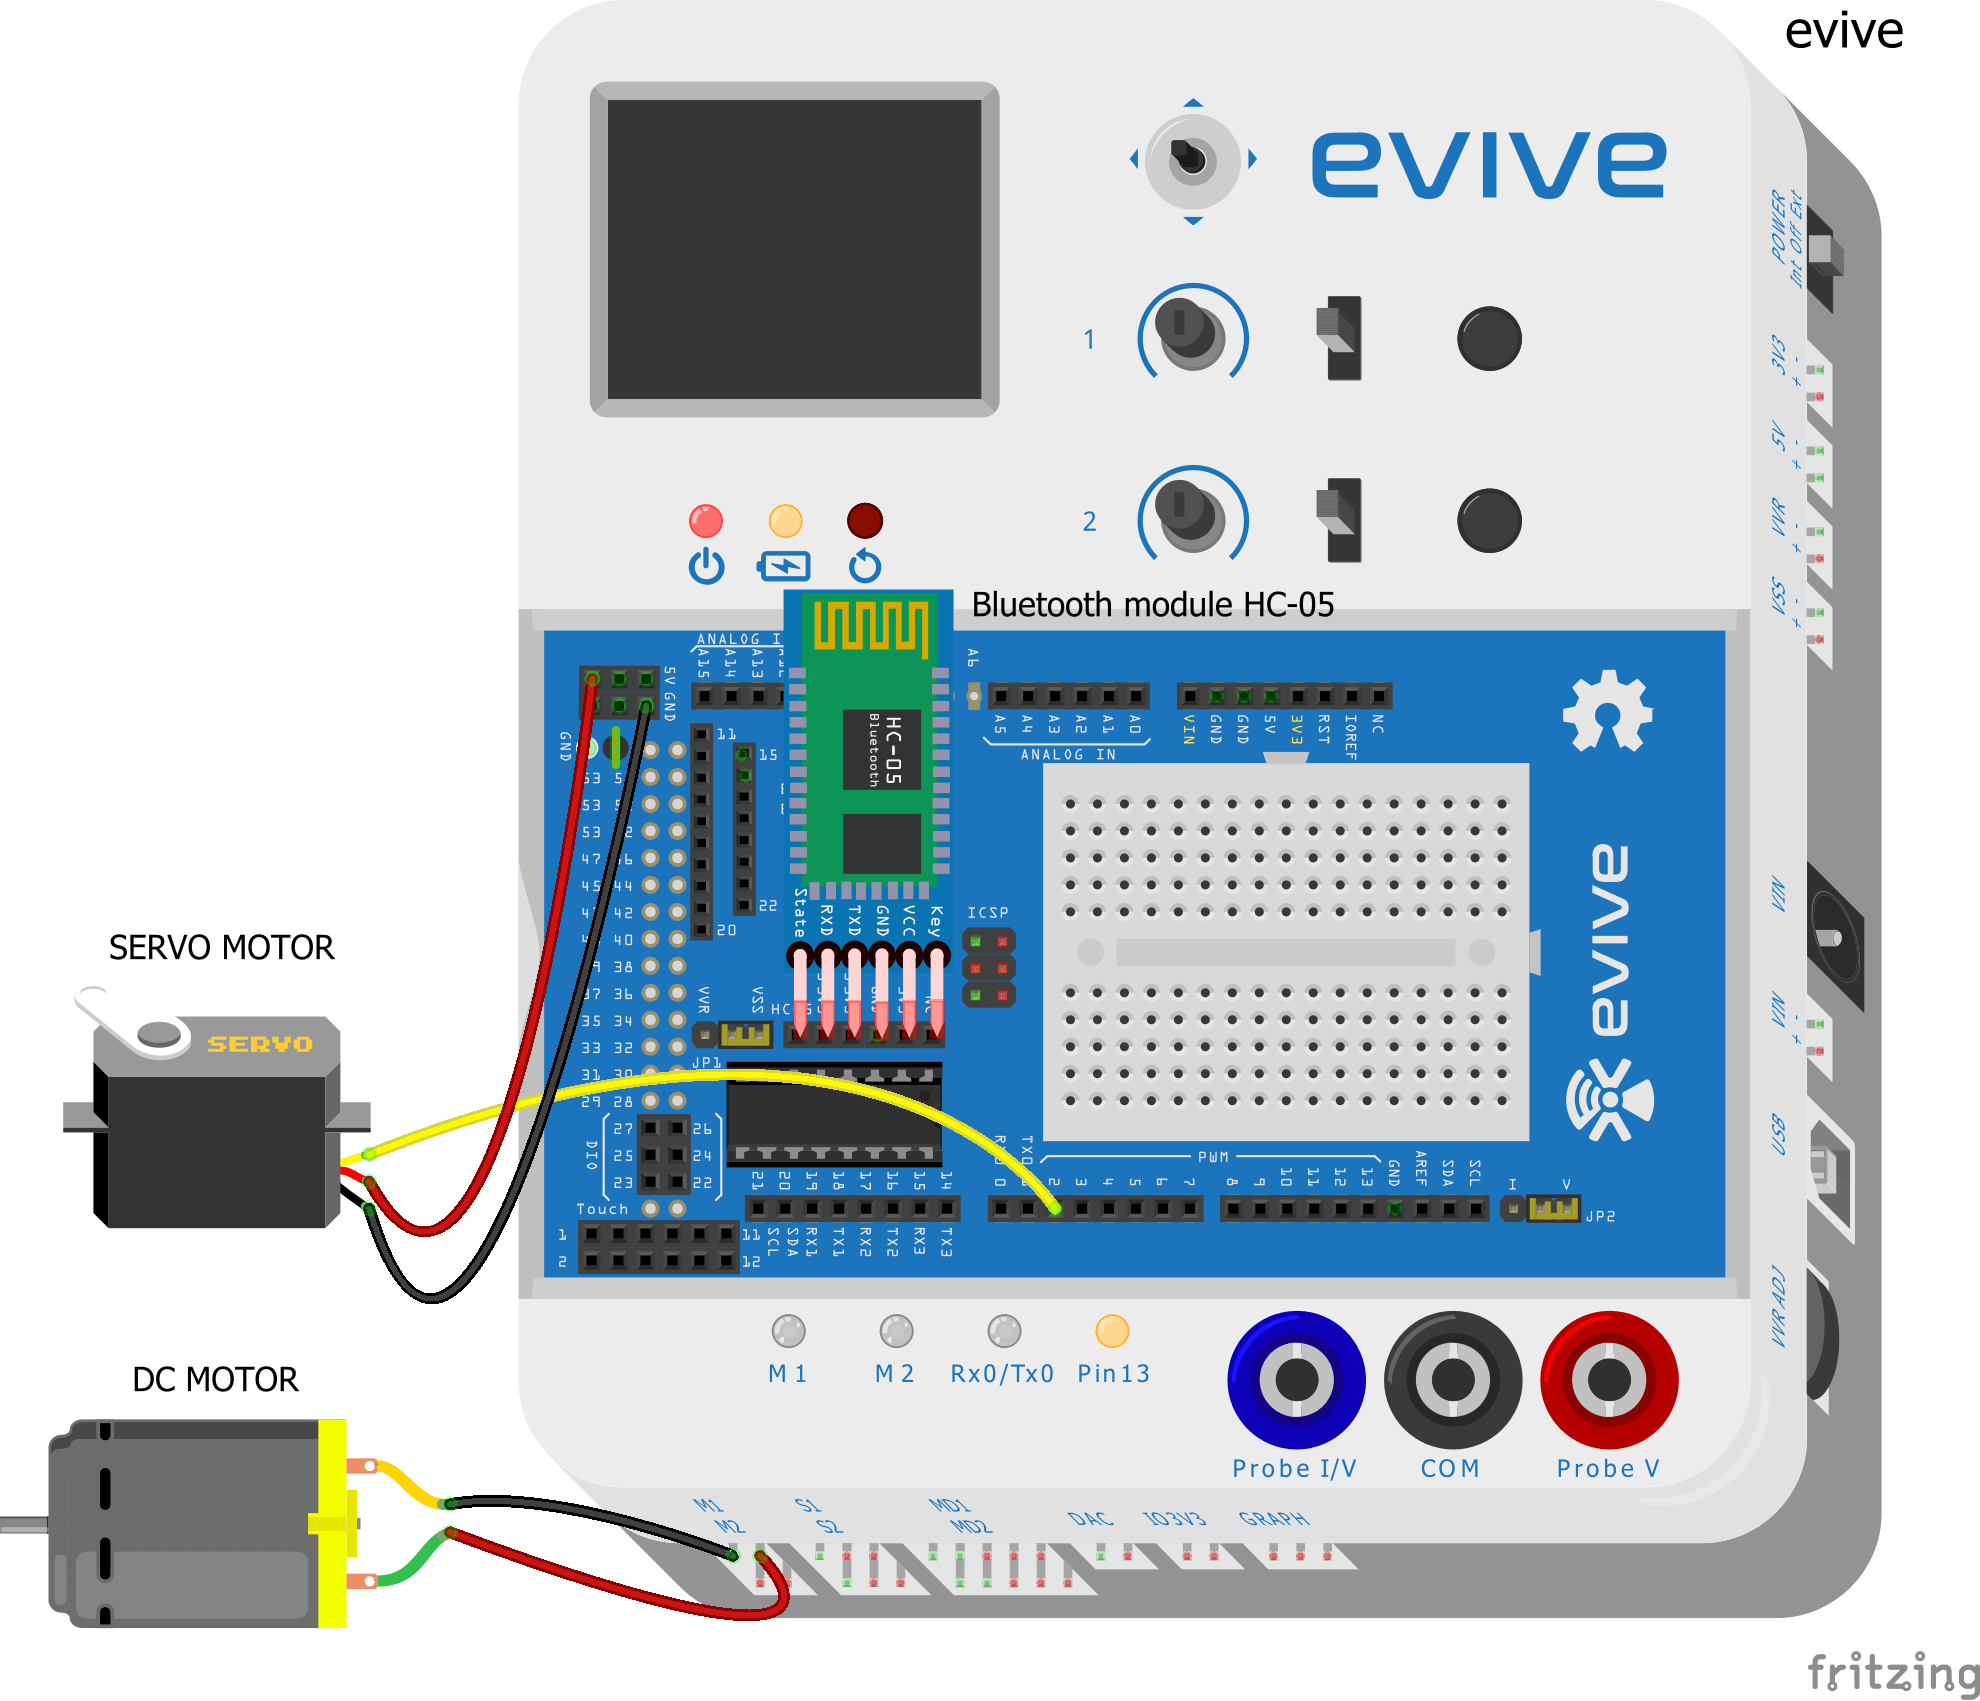
Connection
Connect the motors as shown in the fritzing diagram:
Connect the DC motor to M1 Motor channel.
Servo to:
- GND- GND of evive
- VCC- +5V of evive
- Signal- Digital Pin 2
Code
Upload the following code to evive:


Logic
The boat we have made here will be controlled via a mobile application. The Bluetooth module is used to connect it to your Smartphone.
The fan attached to the DC motor is used for the movement of the boat.
The servo is used to steer the boat.
We are going to use the Dabble’s Gamepad module for steering the boat.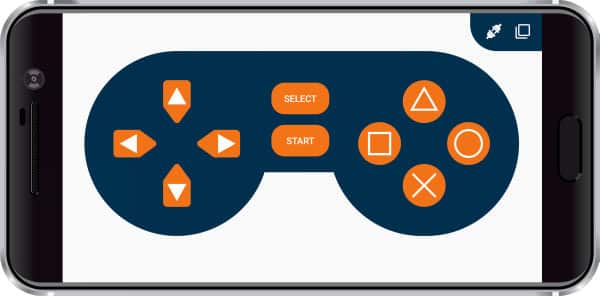
- Start key – Start the motor
- Select – Stop the motor
- Up key – Move the boat forward.
- Left – Turn Left
- Right – Turn Right
Conclusion
With this, your DIY Smartphone-controlled electric boat is ready to go out and explore the unexplored!
BTW, hope you’re as excited as we are for the launch! It’s getting closer and we couldn’t be any more psyched! Know all about it over here.


 0-1 screenshot")


