Introduction
The greatest Breakdance showdown is back in town, and the best breakdancer the town has ever seen, i.e. your best friend, is all set to break the floor! However, like any other showdown, there are rules:
- As long as you don’t play the drums, the dancer cannot dance.
- The dancer should finish his moves during the time the drums are played; as soon as they stop, her should stop as well.

Let’s make the game and watch the dancer steal the show!
A quick recap of Scratch
Scratch is a visual programming language that helps kids and budding programmers, to learn how to code, i.e. how to write a program in a fun, educational, and easy way using pieces known as blocks. This makes learning coding nothing but a jigsaw game that helps develop problem-solving and decomposition skills.
We will be using mBlock, a software based on Scratch for making our game. If you don’t have mBlock installed in your laptop/PC, visit here for detailed instructions on how to install it.
There are four basic elements for programming in mBlock:
- Stage
- Sprites
- Script
- Blocks
There are two modes in Scratch using which you can work:
- Scratch Mode
- Arduino Mode
Scratch Mode
In Scratch mode, which is the default mode in mBlock, you can run the script and control evive as long as it is connected to your laptop/PC; the moment you remove the USB you cannot use the script to work with evive anymore.
Arduino Mode
In Arduino mode, the blocks are transferred to Arduino C++ in Arduino IDE, and then you can modify the code in Arduino IDE. Another important aspect of Arduino mode is that you can upload the code to evive using this mode only.
To know more, please visit here.
We are going to make this game in Scratch Mode.
Setting up the Stage
Before beginning with anything else in the game, it would be best to change the boring white backdrop to some quirky and lively. Follow the steps below to change the backdrop:
- Open mBlock; if already open and working on a project, save that project. Then, click on New.
- Go to the Stage palette and right click on the image icon; the Backdrop Library will open.
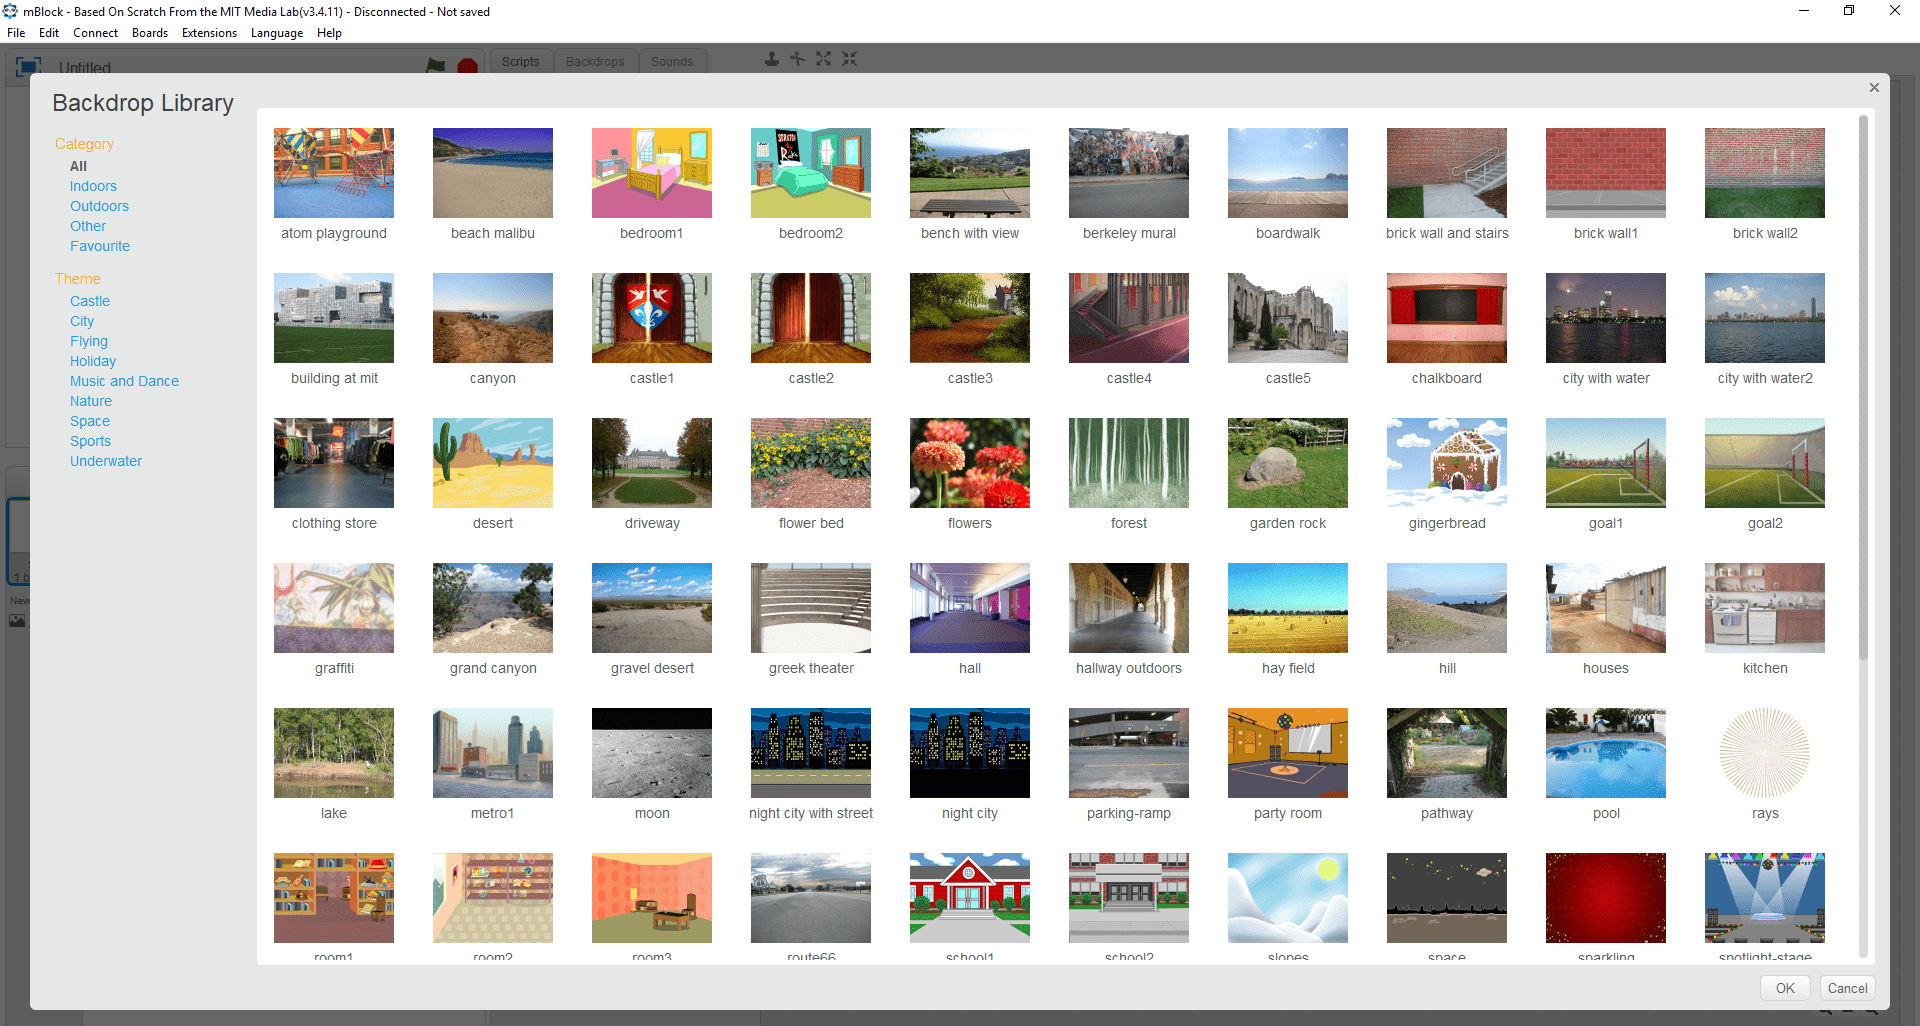
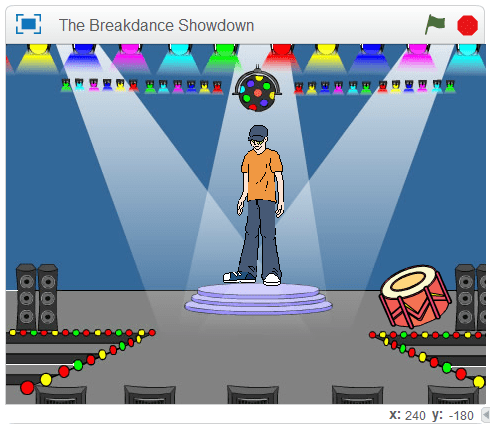
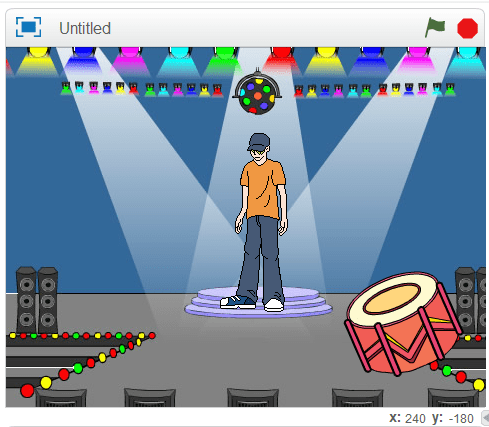
- From the library select the spotlight-stage backdrop and click on OK.
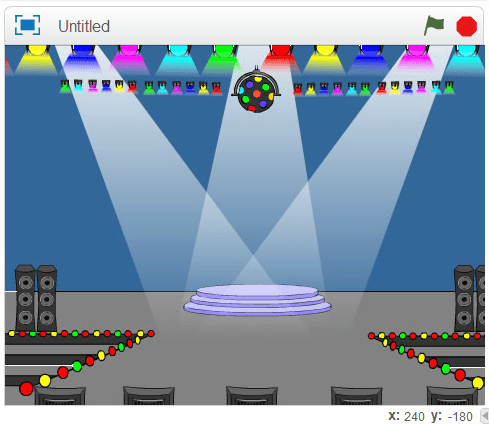
The stage is all set for the showdown to begin!
To know more about Stages, please visit here.
Bringing in the Dancer
Now that the stage is ready, it’s time to bring in the Dancer sprite. Follow the steps below to import the Dancer sprite:
- Go to the Sprite palette and right-click on the Panda sprite. select delete from the drop-down menu.
- Now, click on the cartoon-like character icon; it is in the top-right corner of the Sprite palette. On doing so, the Sprite Library will open.
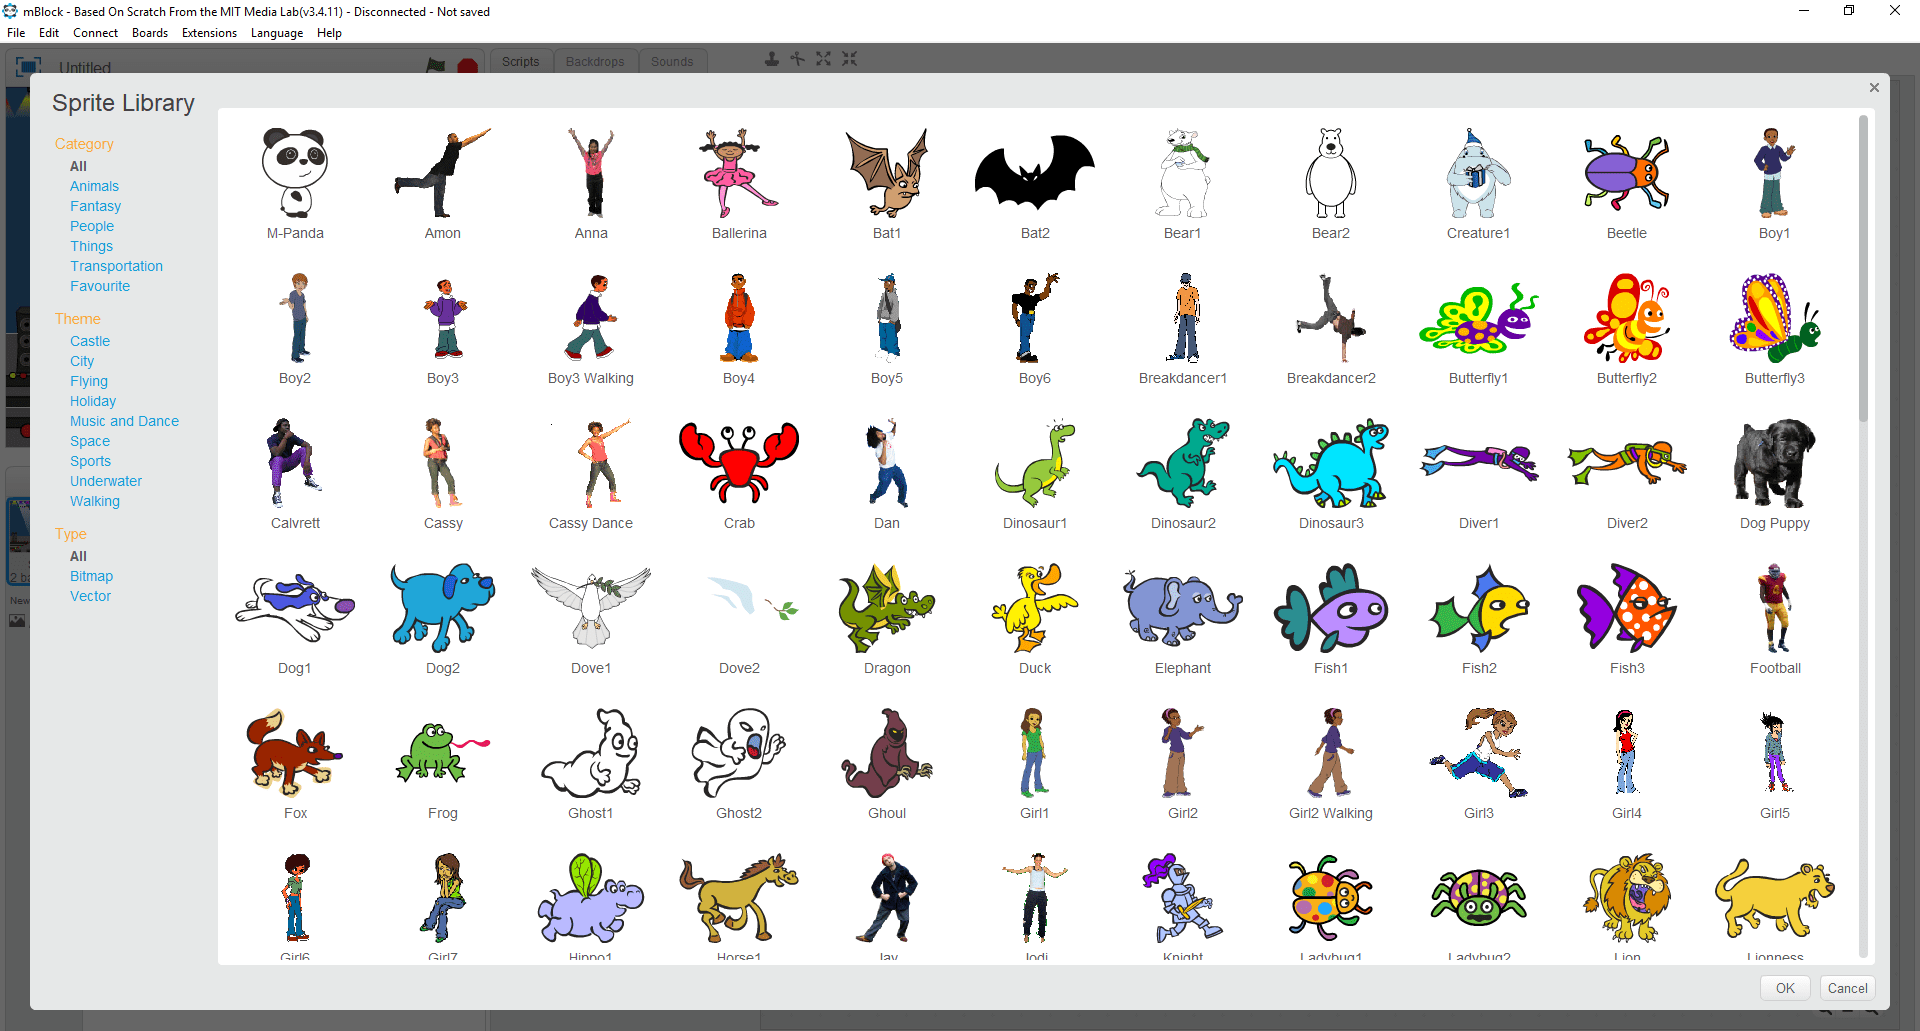
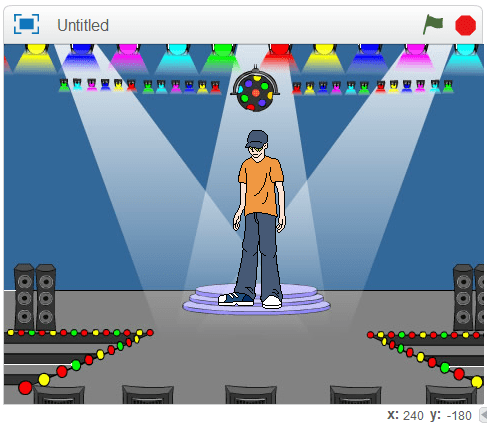
- Select the Breakdancer1 sprite from the library and click on OK.
Script for the Dancer
Now that the dancer is on the stage, it’s time to write his Scratch Script. Follow the steps below to write the script:
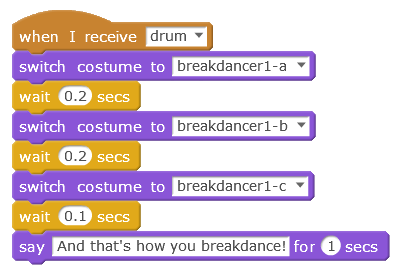
- Go to the Events palette and drag and drop the when I receive () block in the Scripting Area. Select new message… from its drop-down menu and write drum in the dialogue box that appears; click on OK.
- Go to the Looks palette and drag and drop the switch costume to () block below the when I receive () block. Select breakdancer1-a from the drop-down menu.
- Go to the Control palette and drag and drop the wait for () secs block below the switch costume to () block and write 0.2 in the space.
- Repeat step 2; this time select breakdancer1-b.
- Repeat step 3.
- Repeat step 2; this time select breakdancer1-c.
- Repeat step 3; this time write 0.1 instead of 0.2.
- Go to the Looks palette and drag and drop the say () for () secs block below the third wait for () secs block. Write ‘And that’s how you breakdance!’ in the space next to the word say, and 1 in the second space.
Below is the complete script:
Assembling the Drum
The procedure for placing the drum on the stage is the same as bringing in the dancer. After importing the Drum1 sprite from the Sprite Library, drag and drop the drums in the bottom-right corner of the stage.
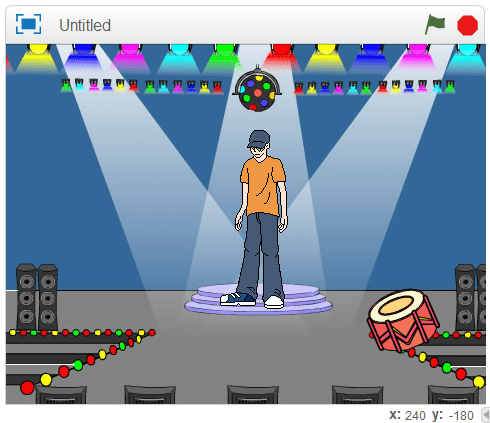
You must have noticed that the drums are a bit big for the stage! In the Block palette there is a block inside the Looks palette that can help us reduce the size of the drums to suit stage. Follow the steps below for reducing the size of the drums:
- Go to the Looks palette and drag and drop the set size to () % block in the Scripting Area.
- Write 55 in the space in the set size to () % block.

- Double click on the block; as soon as you do so, the drum will become almost half its original size.
Script for the Drum
Now it’s time to write his Scratch Script. Follow the steps below to write the script:
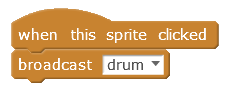
- Go to the Events palette and drag and drop the when this sprite clicked block in the Scripting Area. This block ensures that script for the drum sprite will run whenever you click on it in the stage.
- Drag and drop another when this sprite clicked block in the Scripting Area; or you can simply copy the first block by right-clicking on it and then selecting duplicate from the drop down menu.
- From the Events palette drag and drop the broadcast () block below one of the when this sprite clicked block and select ‘drum‘ from the drop-down menu.
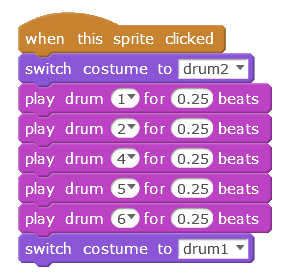
- Go to the Looks palette and drag and drop the switch costume to () block below the second when this sprite clicked block; select drum2 from the drop-down menu.
- Now, go to the Sound palette and drag and drop the play drum () for () beats block below the switch costume to () block; select 1 from the drop-down menu and let the number of beats be 2.5.
- Repeat step 5; this time select 2 from the drop-down menu.
- Repeat step 5; this time select 3from the drop-down menu.
- Repeat step 5; this time select 4 from the drop-down menu.
- Repeat step 5; this time select 5 from the drop-down menu.
- Repeat step 5; this time select 6 from the drop-down menu.
- Go to the Looks palette and drag and drop the switch costume to () block below the second when this sprite clicked block; select drum1 from the drop-down menu.
Below are the 2 scripts for the drum: