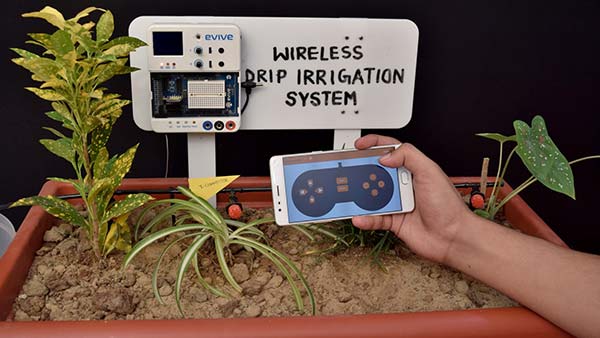

Introduction
Drip irrigation system is critical to agricultural operations to ensure water distribution to crops. Irrigating crops with the exactly right amount of water is a tedious task. Drip irrigation system is most commonly used in farms to irrigate land based on crop, water source, and field size. To work smarter, farmers are adopting wireless technology to manage the different aspects of their different irrigation systems. With varied terrain and structures, a wireless control system provides real-time visibility into the operating status of the pump and other parameters of the Drip irrigation system.
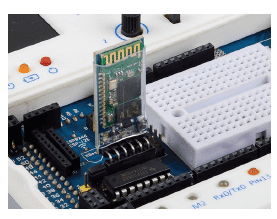
HC-05 bluetooth
HC‐05 module is an easy to use Bluetooth SPP (Serial Port Protocol) module, designed for transparent wireless serial connection setup. The HC-05 Bluetooth Module has 6 pins. They are as follows:
- ENABLE: When enable is pulled LOW, the module is disabled which means the module will not turn on and it fails to communicate.
- VCC: Supply Voltage 3.3V to 5V
- GND: Ground pin.
- TXD & RXD: These two pins act as a UART interface for communication
- STATE: It acts as a status indicator.
- BUTTON SWITCH: This is used to switch the module into AT command mode. To enable AT command mode, press the button switch for a second.
Interfacing of Bluetooth HC-05 with evive
The headers pins are inserted with an HC-05 Bluetooth module as shown in the figure. As soon as the Bluetooth is inserted in the evive board the led will start to blink continuously.
Dabble App – Gamepad Module
The GamePad Module is one of the input modules, using which user can give commands to the device using the programmable buttons.

Connecting Dabble with evive
- Switch ON evive, the Bluetooth module will start blinking.
- Open Dabble app. Click on Connect icon that appears at the top right corner of your screen beside Settings icon.
 Note: As soon as you click on Connect icon a dialog box appears asking for permission of turning on location in your smartphone. If you are using HM-10 module then you must grant location permission else you can press skip for now. For HM-10 tap on the screen as asked in dialog box followed by selecting “ALLOW” in the next dialog box.
A list of nearby available Bluetooth will be visible on your screen.
- Check if the name of your Bluetooth module appears in the list. If you have configured name of your Bluetooth module then search for that name. However, if you have not done this then look for names like “HC-05” for HC_05 modules and “HMSoft” for original HM-10 module and “BT-05” kind of name for HM-10 clones. Select that name and you can see the change in state of Connect icon suggesting app has connected to your module successfully.
Note: A dialog box asking for the Bluetooth password may appear. Enter your Bluetooth module password if you have kept any password or try some default passwords like 0000 or 1234 in case of HC-05 and HC-06 and try 000000 or 123456 for HM-10.Note: If you are facing some trouble in connecting your module then first try to pair module from your smartphones Bluetooth settings. Follow the troubleshooting page for guidance
-
As soon as the app is connected to your Bluetooth module you can see the notification in your smartphone telling you which board you have connected.

Drip irrigation system setup
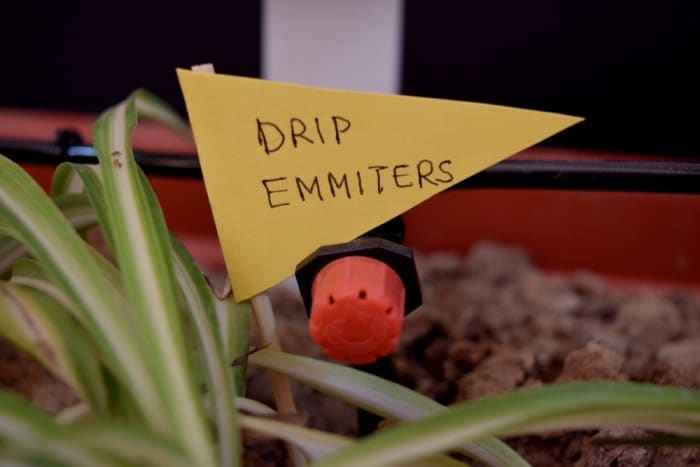
- The feeder line pipe is cut according to the required dimension of our setup. Feeder line pipe is cut in different sizes so as to fix the connection between T connector and Drip emitters.
- One end of the Tee junction fully connects the pipe as shown in the figure. Make sure the length of the pipe is not too long or too short.
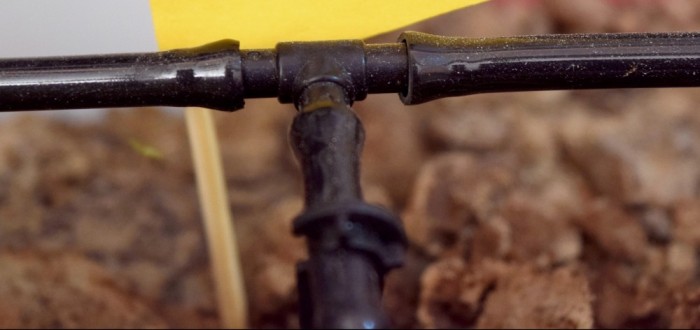
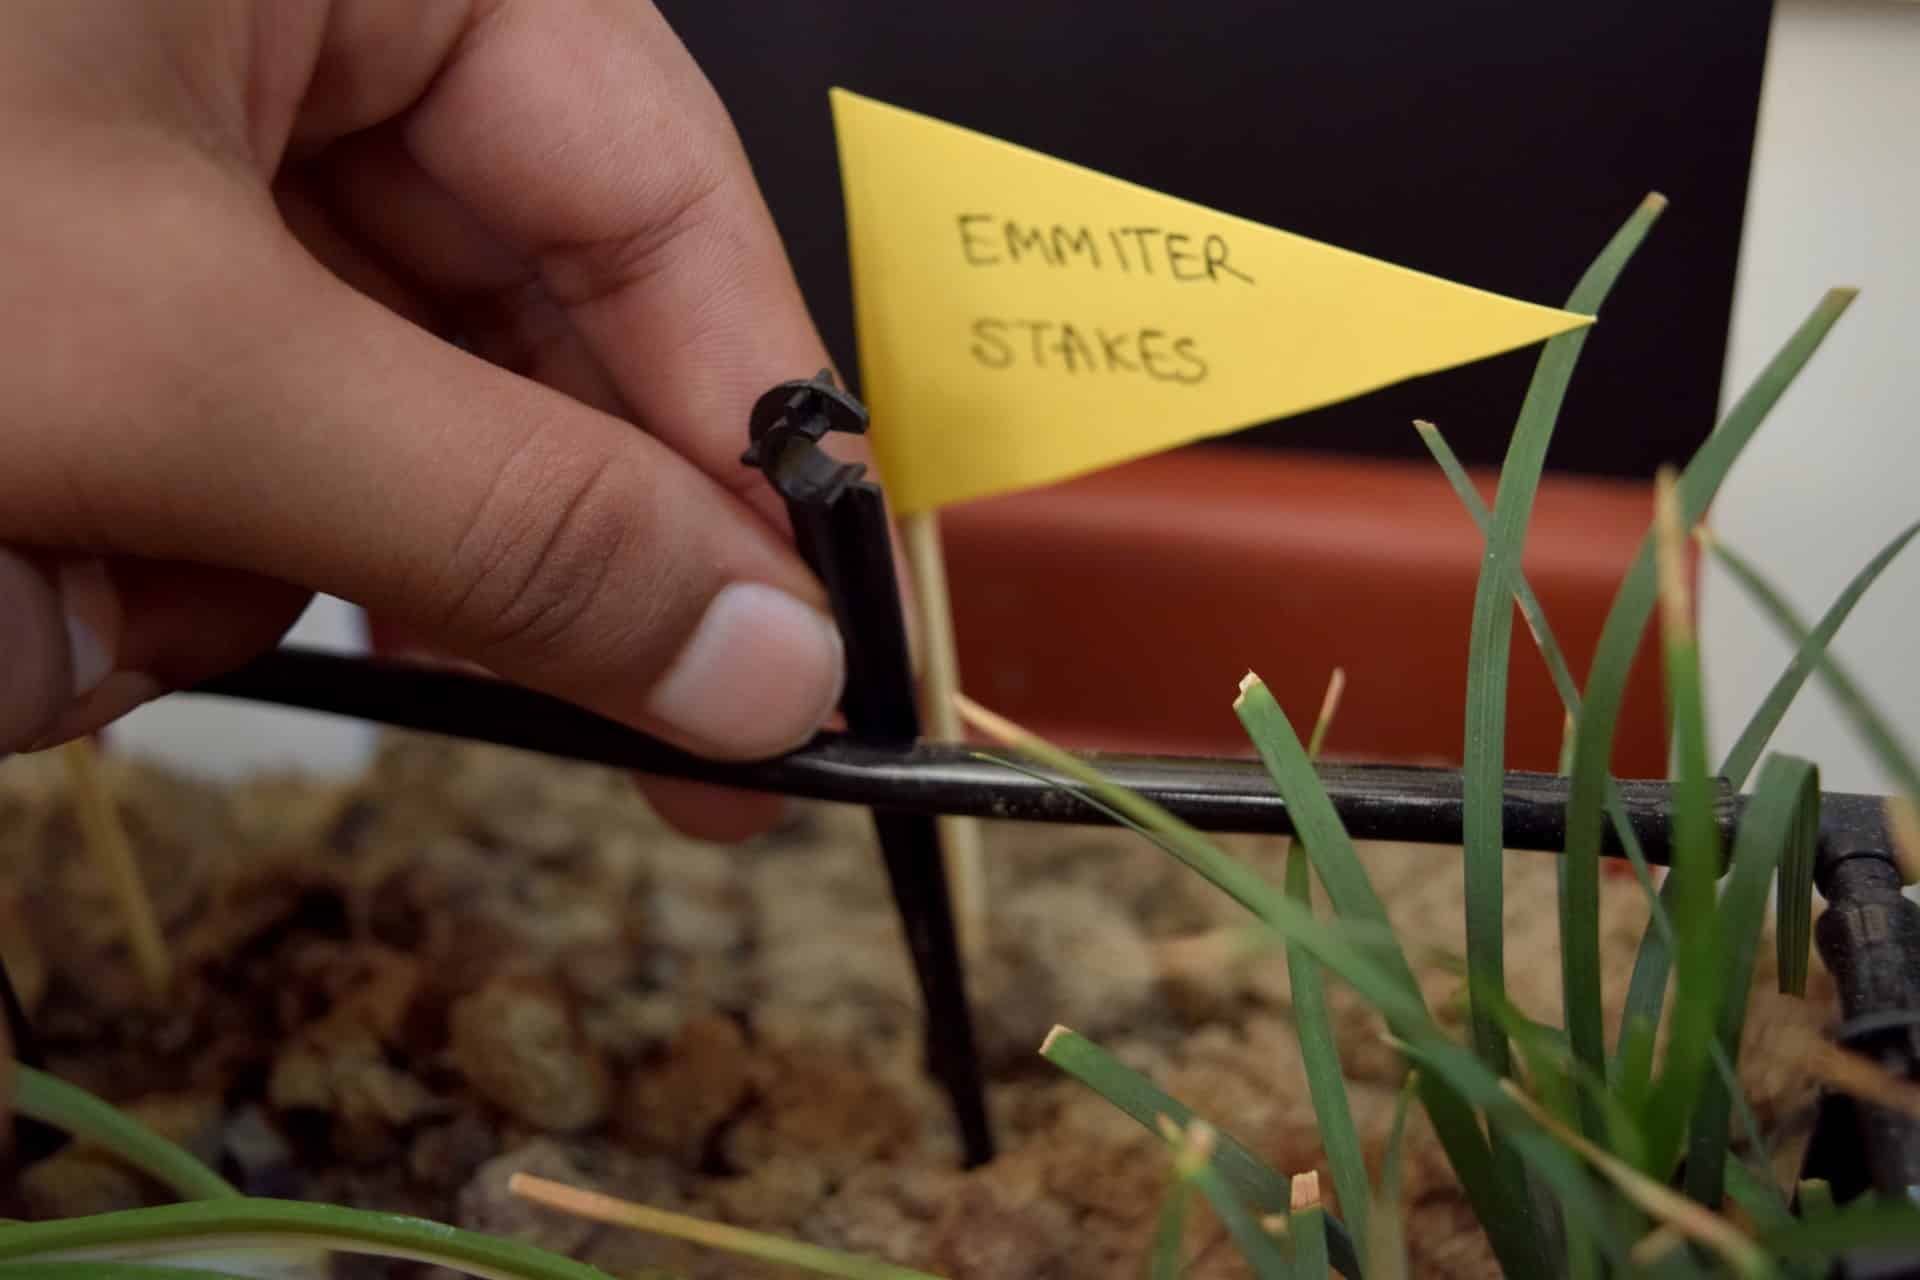
- Insert the adjustable emitters to the other end of the pipe as shown in the figure.
- Now the setup consisting of one Drip emitter looks like as shown in the figure.
- We can connect the above setup in a series according to the required setup.
- Both the ends of the setup are open. One end is connected with the water pump, while the other end is sealed with the help of glue gun so that water does not escape out from another end.
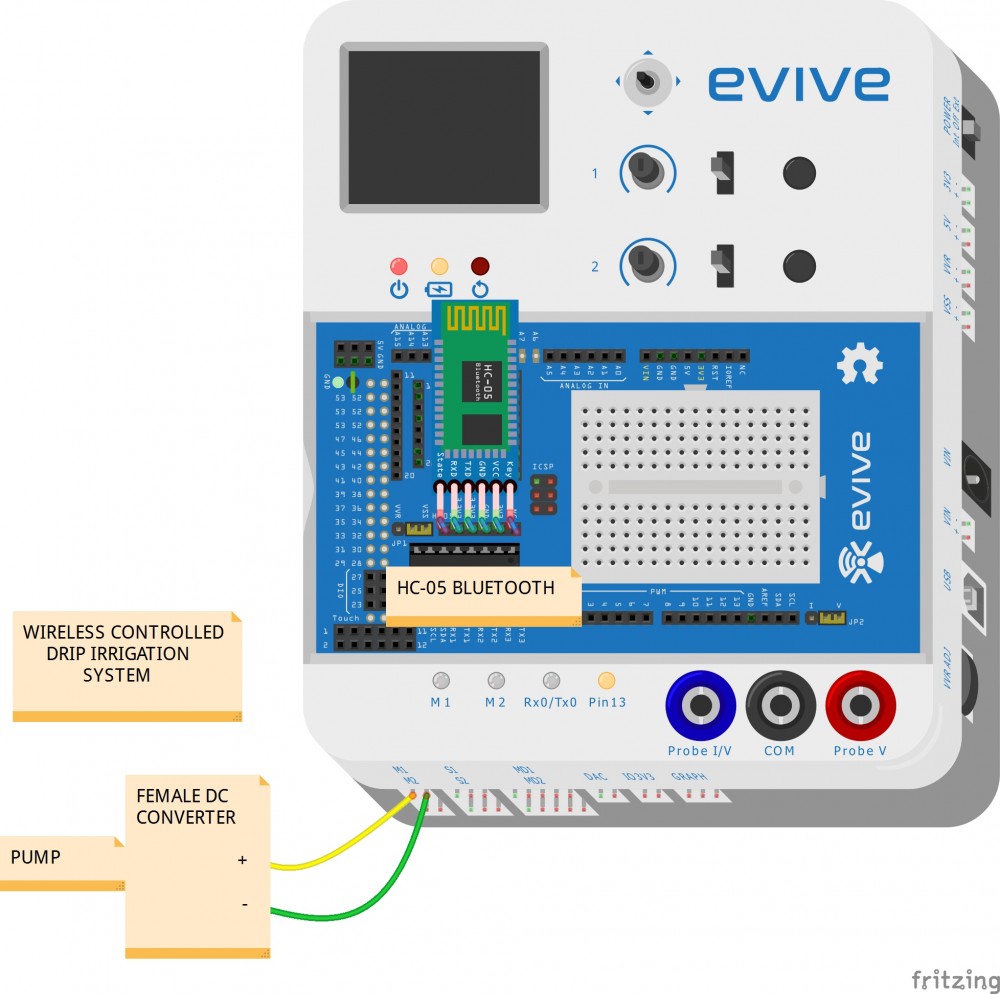
- Now the water pump is interfaced with evive. The end wire contains a male connector which is connected to the female DC connector.
- The male end of jumper wires(2 wires) are connected to female DC connector as shown in the figure.

- The other end of female jumper cables is connected to evive motor M1 as shown in the figure.
- The circuit is finally set up.


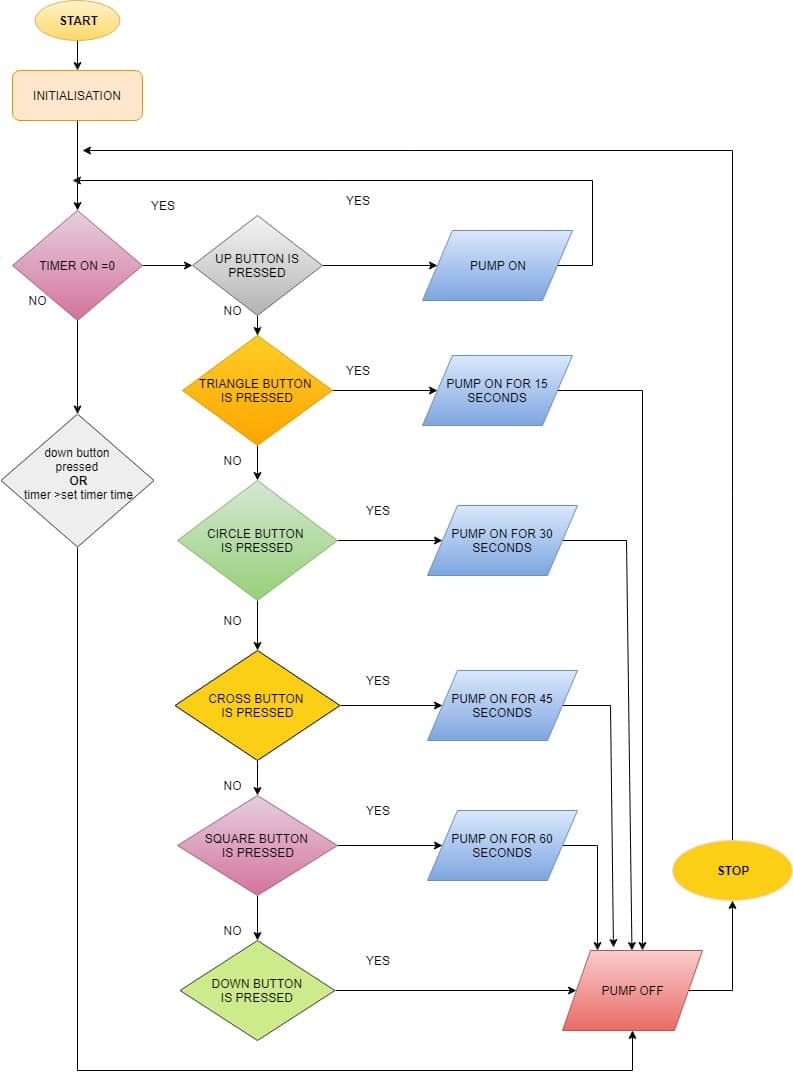
Flow Chart
The working of the wireless drip irrigation system is explained in the flowchart as shown in the figure.
- The circuit is initialised and if the timer on is 0 and the up button is pressed, the pump will remain on till the next command is given by the evive gamepad app.
- If the timer on is 0 and down button is pressed or the timer is greater than the timer on variable the water pump will automatically turn off.
- If the timer on is 0 and the traingle button is pressed, the pump will run for 15 seconds and the pump will stop.
- If the timer on is 0 and the circle button is pressed, the pump will run for 30 seconds and the pump will stop.
- If the timer on is 0 and the cross button is pressed, the pump will run for 45 seconds and the pump will stop.
- If the timer on is 0 and the square button is pressed, the pump will run for 15 seconds and the pump will stop
- If the timer on is 0 and the down button is pressed,the pump will stop.
Control the system using evive app
We will now control the drip irrigation system wirelessly using the evive app. As shown in the evive gamepad
- When the up button is pressed the pump will start and run till another button is pressed.
- When the down button is pressed the pump will be turned off till another button is pressed.
- When the triangle button is pressed the water pump will run for 15 seconds.
- When the circle button is pressed the water pump will run for 30 seconds.
- When the cross button is pressed the water pump will run for 45 seconds.
- When the square button is pressed the water pump will run for 60 seconds.
PictoBlox (Scratch) Program
- Open PictoBlox, select the board as evive and connect to the appropriate USB port.
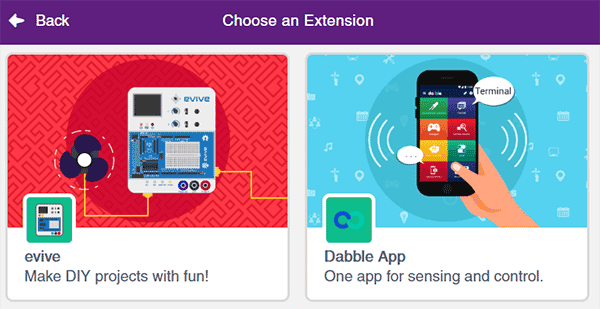
- Add the Dabble extension in PictoBlox.
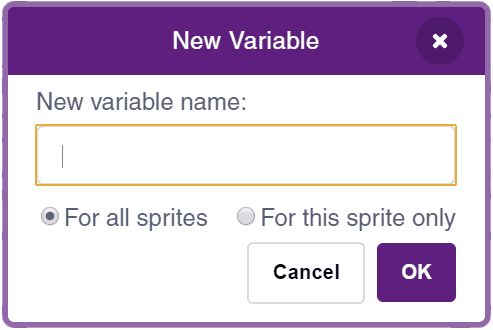
- Make two variables:
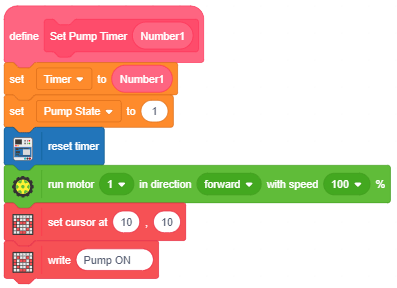
- Timer – To store timer value.
- Pump State – To store the state of pump. 0 if the pump is OFF and 1 if the pump is ON.
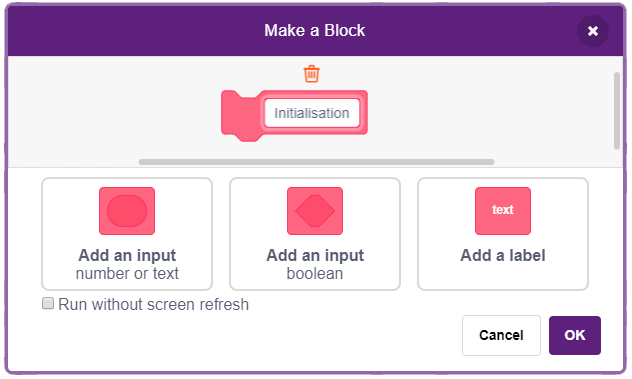
- Make a block to set the timer value with integer input:
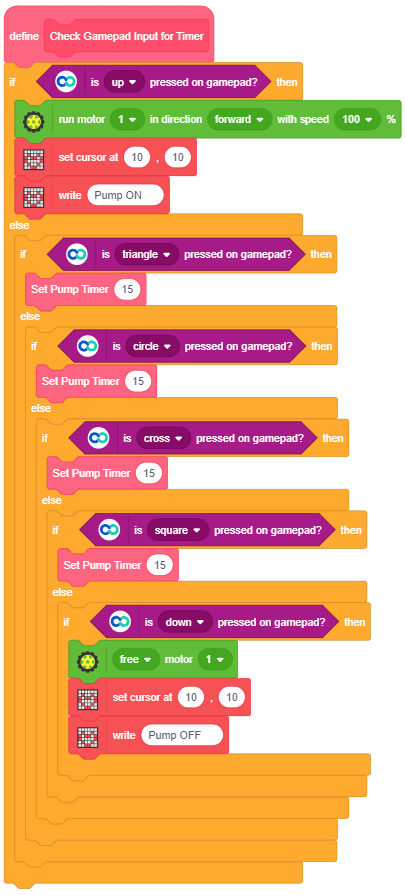
- Make a Block to check the input from Dabble app and set the actions accordingly:
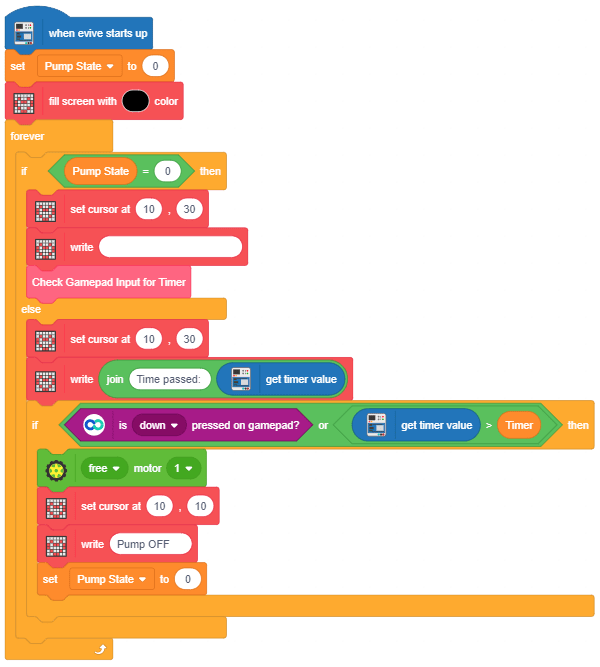
- Make the final script using when evive starts up block.
- Upload the code onto evive in the upload mode.
You can control the overflow of water in your irrigation field by making wireless drip irrigation system at our home. HAPPY LEARNING…


 0-1 screenshot")


