Introduction
A loop statement allows us to execute a statement or group of statements multiple times.
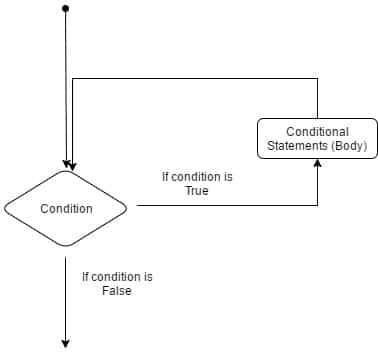
Below is the general form of a loop statement in most programming languages :
The for loop
A for loop executes statements a predetermined number of times. The control expression for the loop is initialized, tested, and manipulated within the for loop parentheses. It is easy to debug the looping behavior of the structure because it is independent of the activity inside the loop.
Each for loop has up to three expressions, which determine its operation. The following example shows the general for loop syntax in Arduino IDE. Notice that the three expressions in the for-loop argument parentheses are separated with semicolons.
Body of for loop
}
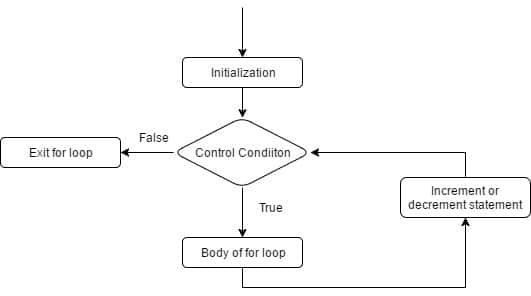
Below is the flow chart showing how a for loop works:
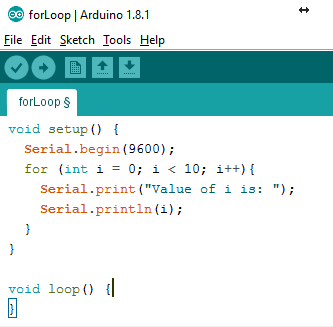
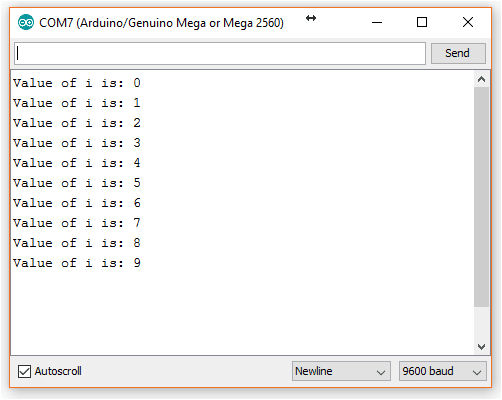
Example:
void setup() {
 Serial.begin(9600);
 for (int i = 0; i < 10; i++){
 Serial.print("Value of i is: ");
 Serial.println(i);
 }
}

void loop() {
}
Conclusion
In conclusion, loops are powerful tools used in programming to repeat a set of statements multiple times. The most common loop used in Arduino IDE is the for loop, which is capable of performing a set of instructions within a set range of values. With the right understanding of the syntax and flow chart, the for loop can be used efficiently and effectively to save time and resources.


