Introduction
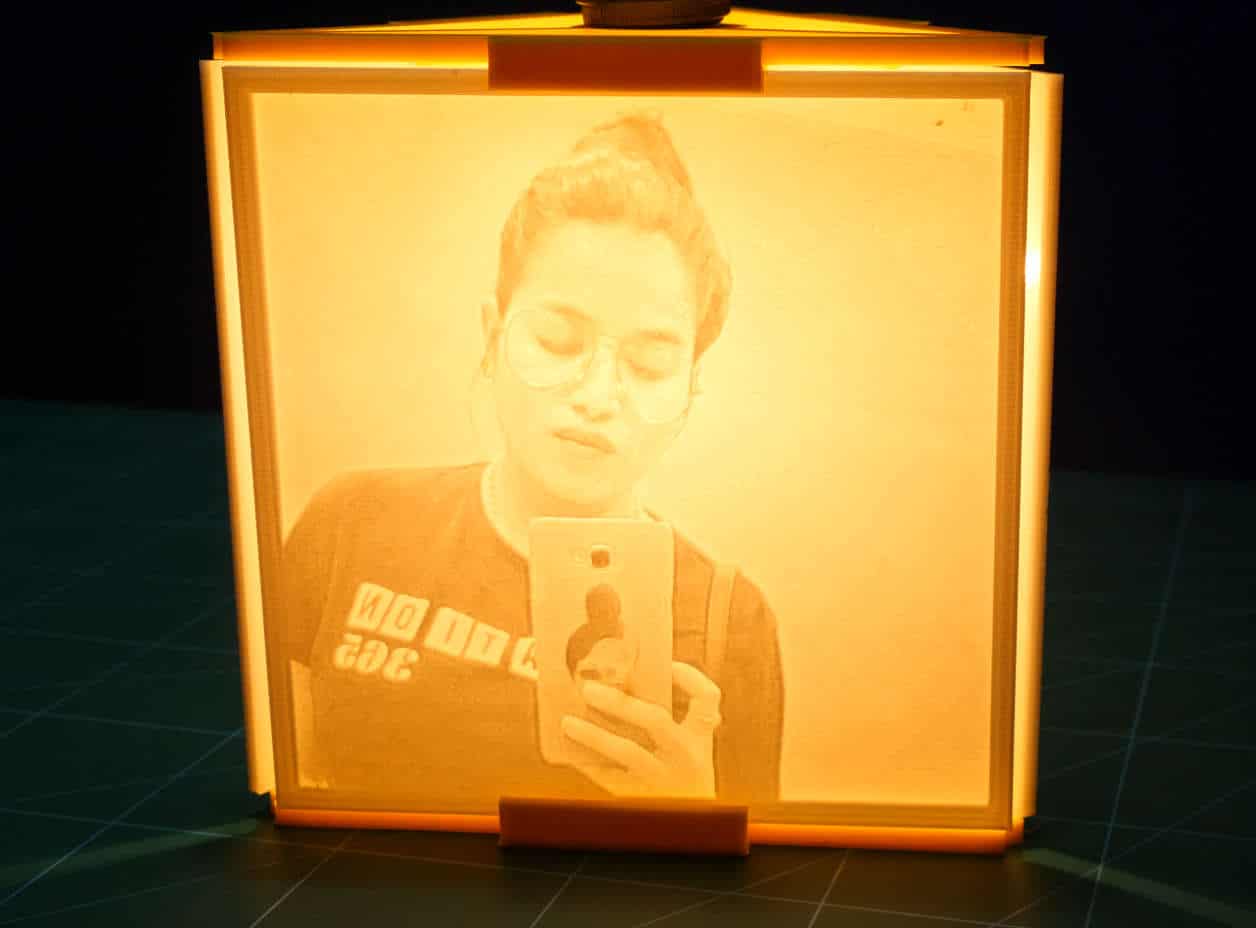
We all know how precious to us the photos in our Smartphones of our loved ones are. How about transforming those photos into Lithophanes that will light up your face as the lithophane lits up when light passes throw them?
They are not merely a decor item, you can use them in many ways as you want. In a lantern or lamp, cup, dome, or anything that you like.
Image to Lithophane Process
The process of converting an Image to Lithophane is quite simple. The following step should be followed.
- The first thing you need to do is to make sure that the image you choose is of good quality. It should be high in contrast. The object in the image should be clear.
- In case if you don’t have so clear photo, you can blur the background using some photography apps or Photoshop.
- Once you choose the photo or have edited the photo it’s time to convert it. We need to do is to convert your PNG or JPEG image to .STL file. As for 3D printing, the file format that can be sliced in Cura is .STL (Stereolithography).
You may find many online web pages providing the same functions.
There are many ways of converting it. We will be converting it using the web application.
The one we are using can be found here.
Converting Images to STL File
As soon as you open the link, you will find the following screen. 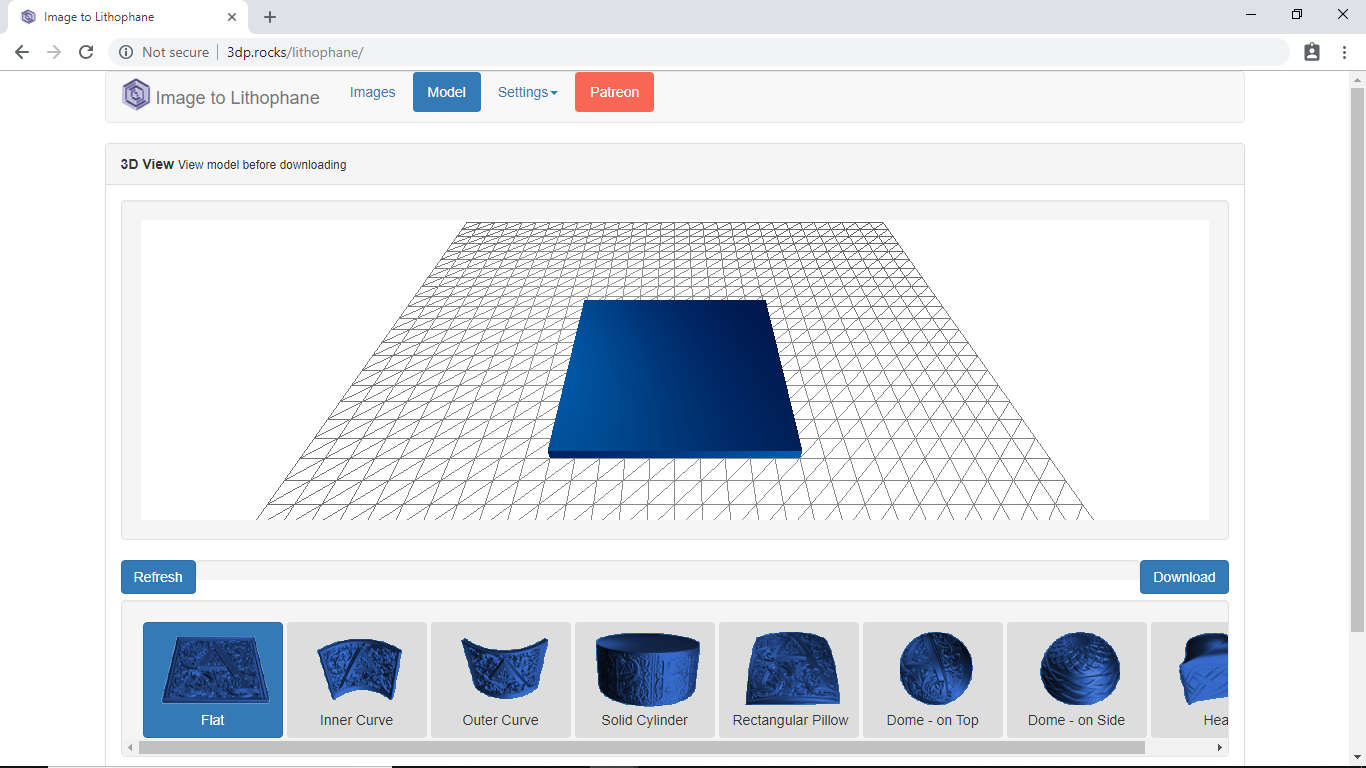
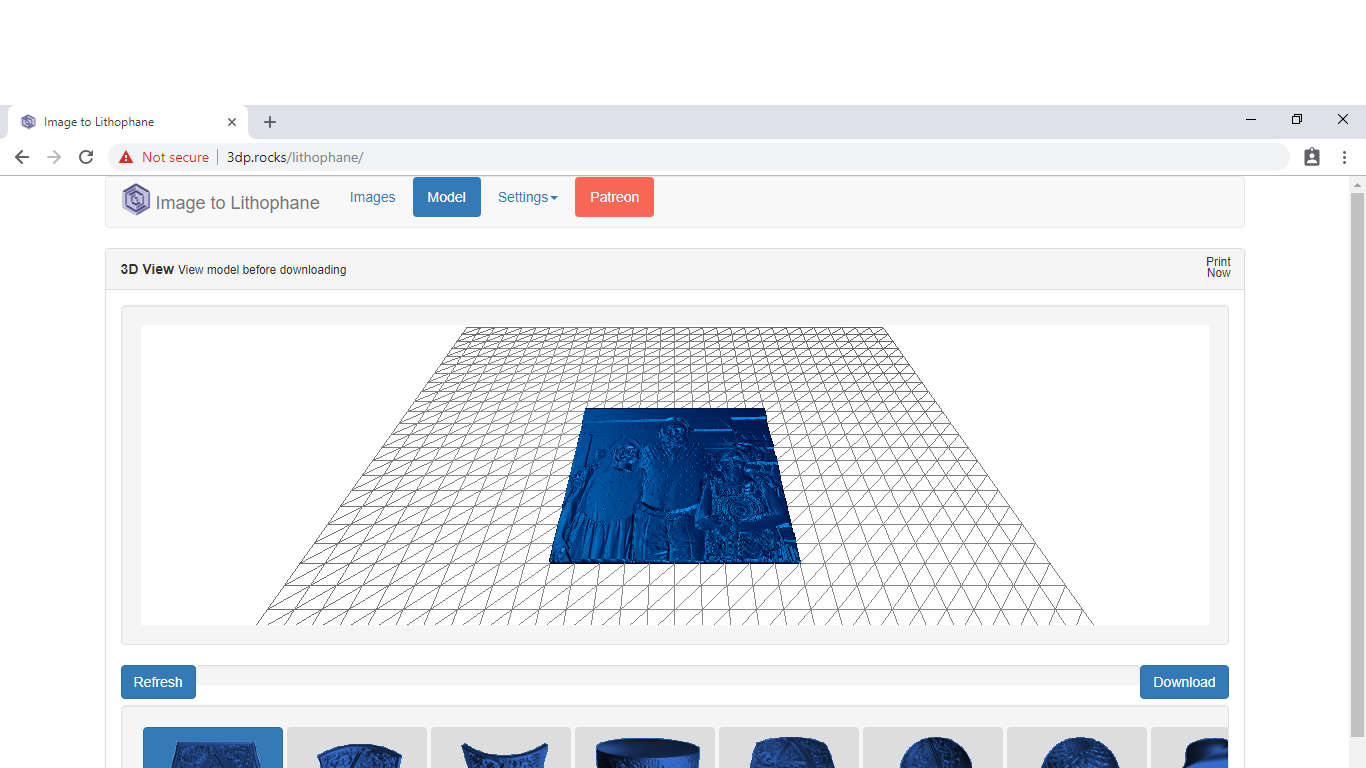
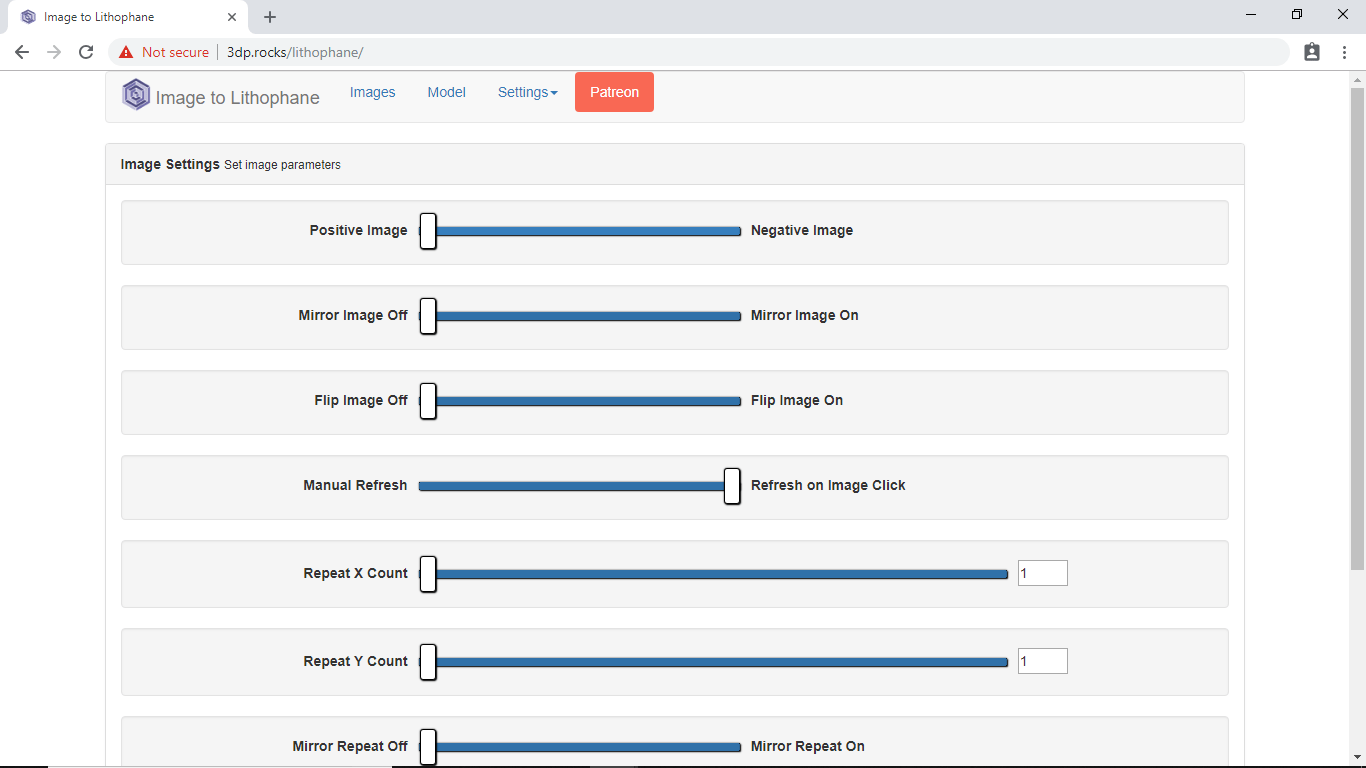
- Import the image you want to convert choosing the IMAGE option from the toolbar. Once you upload the image you will see the following image.
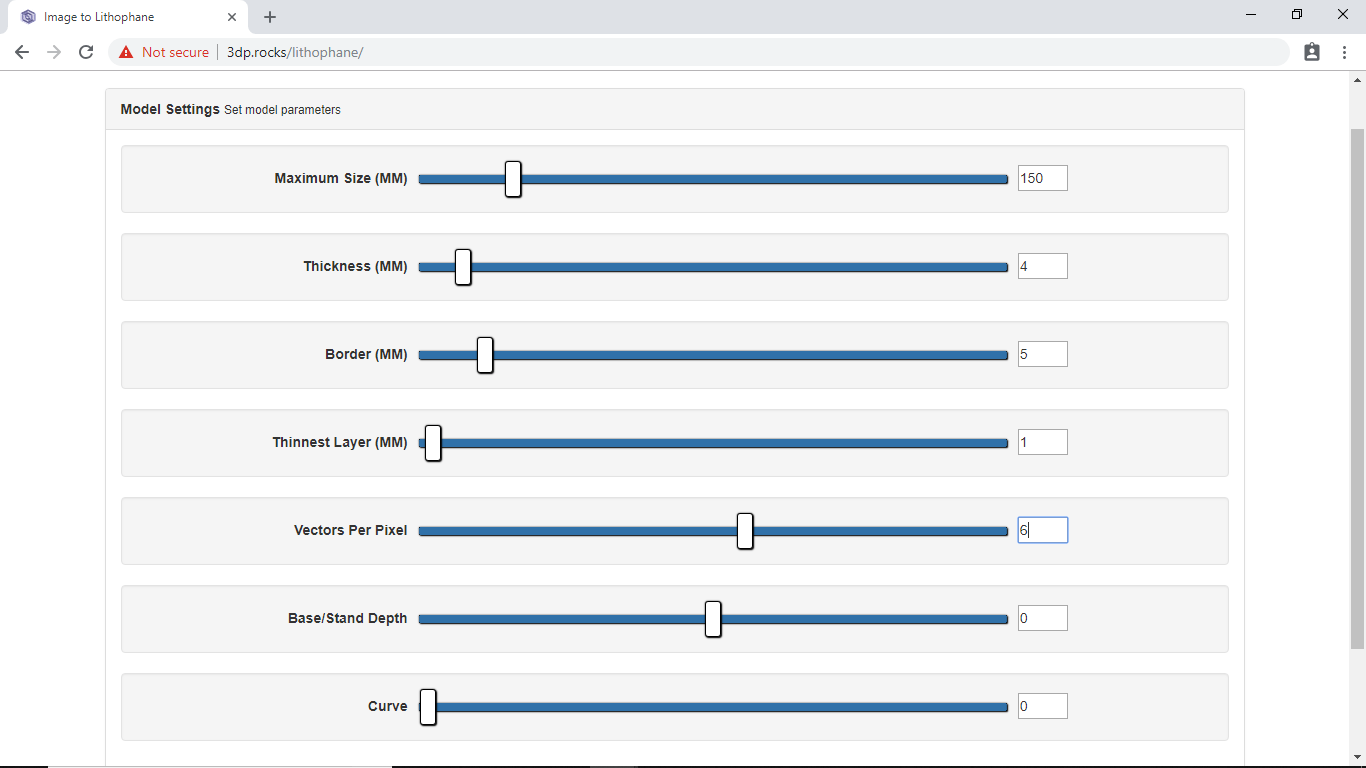
- Then we will be changing some of the model settings:
- Max Size: 150
- Thickness: 4
- Border: 5
- Thinnest Layer: 1
- Vector Per Pixel: 6
 Note: You can change any of the above settings as per your requirement.
- Do the following change in the image setting: Make sure that you change the setting to Positive Image from Negative Image.
- Once done with the setting go to model and Refresh.
- When it is completed, download the .STL File.
Slicing and Printing
- Open this file in Cura and slice it. While slicing, make sure that you keep the Layer Height to 0.1 and Infill Density to 100%.
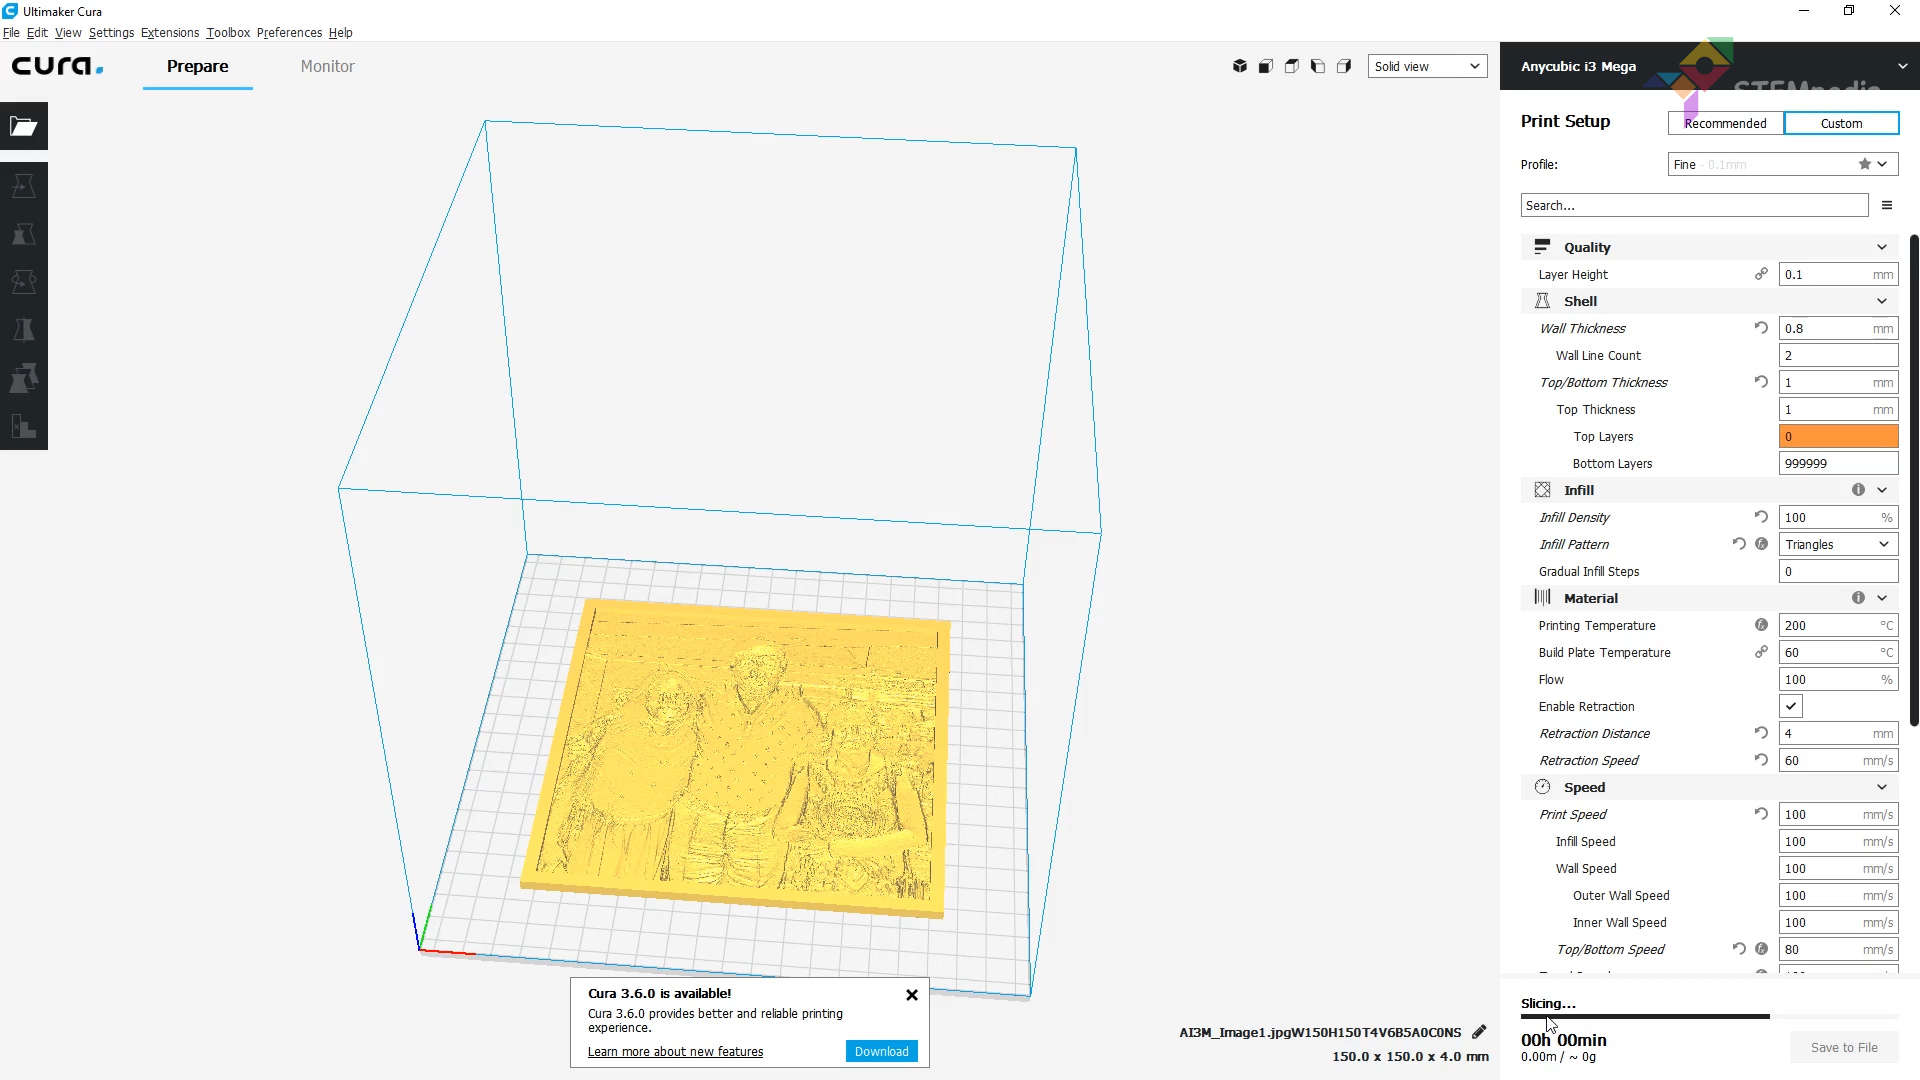
- Then save it to the SD Card and print it.
Conclusion
In conclusion, transforming a photo into a lithophane is a fun and easy way to create a lasting memory. By following the steps outlined in this lesson, you can create a beautiful lithophane that will light up your face and bring back fond memories. With the right tools and a little bit of patience, you can create a unique and special gift for someone special.


