
Introduction
In many projects, we need some numerical input which is not always available by Computer Serial so a 3X4 keypad can be used as an alternative
Primarily, it contains some rows and columns, and where they intersect there is a push button that connects row and column.
This hard work can be reduced by installing Keypad.h library which can be downloaded by clicking here.
Software
- Arduino IDE
- Keypad Library
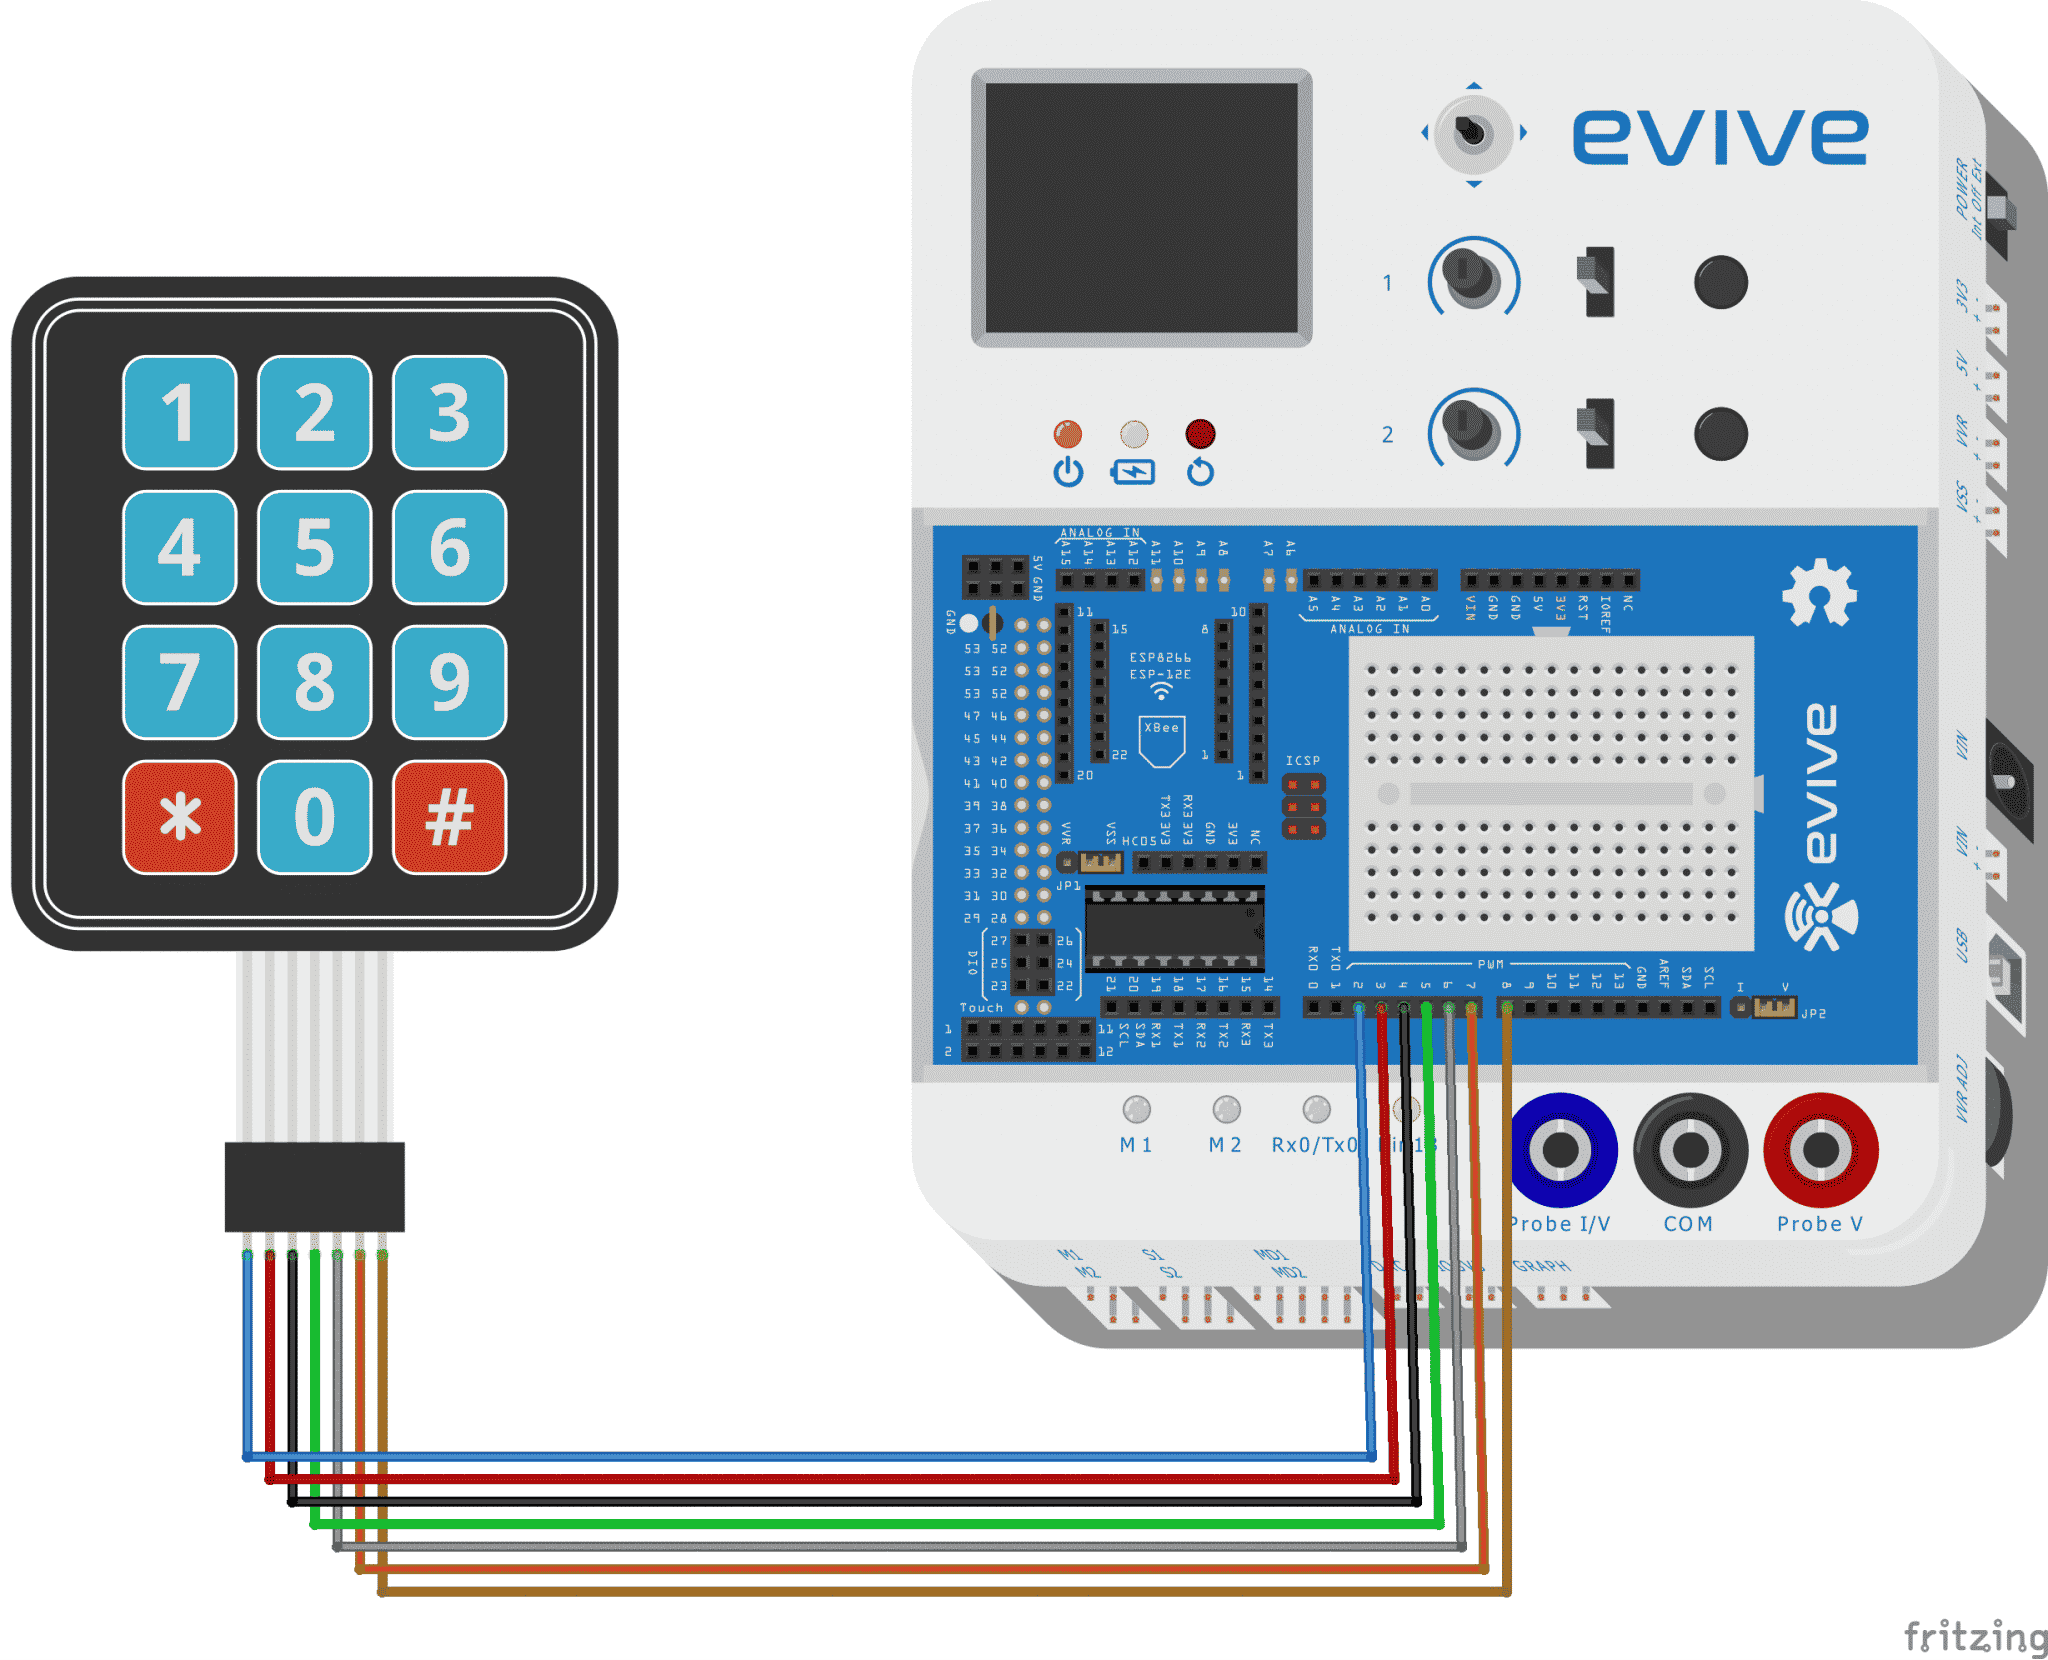
Hardware Connections
Code
#include <Keypad.h>  // include keypad
const byte ROWS = 4; //four rows
const byte COLS = 3;//three columns

char keys[ROWS][COLS] = // this shows the keypad elements in rows and columns
{
 {'1', '2', '3'},
 {'4', '5', '6'},
 {'7', '8', '9'},
 {'*', '0', '#'}
};

byte rowPins[ROWS] = {2, 3, 4, 5}; //connect to the row pinouts of the keypad
byte colPins[COLS] = {6, 7, 8}; //connect to the column pinouts of the keypad

Keypad keypad = Keypad( makeKeymap(keys), rowPins, colPins, ROWS, COLS ); // makes a keypad with character map in with pins atteched to row keys and column keys with number of rows and columns
void setup() {
 // put your setup code here, to run once:
 Serial.begin(9600); // start Serial communication
}

void loop() {
 char keypressed = keypad.getKey(); // checks if any key is pressed or not?

if (keypressed) //if key is pressed
 Serial.println(keypressed); // print key

}


