
Introduction
PIR sensors allow you to sense motion, almost always used to detect whether a human has moved in or out of the sensor range. They are small, inexpensive, low-power, easy to use, and don’t wear out. For that reason, they are commonly found in appliances and gadgets used in homes or businesses. They are often referred to as PIR, “Passive Infrared”, “Pyroelectric”, or “IR motion” sensors.
Working of PIR motion sensor
Every object above absolute zero temperature emits radiation, infrared radiation depending upon the temperature of the object, this is detected by the sensor. How? Suppose the sensor initially faces something when a human body passes in front of it, its temperature rises and then drops as the body temperature is higher than room temperature, this phenomena triggers a change in the output voltage which triggers the detection.
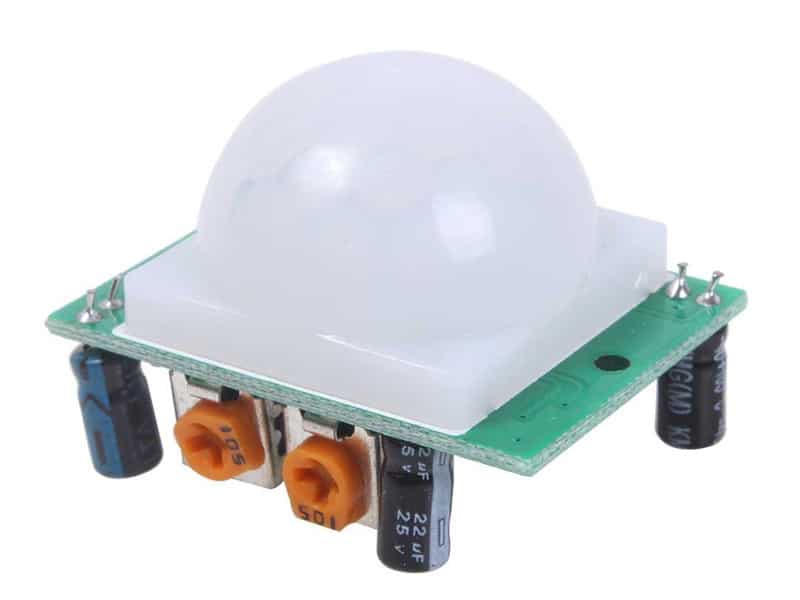
The two potentiometers present in the PIR circuit board allow us to control the delay ( for how much time the output will be high after some motion is detected, we normally adjust this to the lowest possible) and the sensitivity (the how far away from the sensor is it possible to detect motion).

The HC-SR501 PIR sensor module
The module has just three pins, a Ground and a VCC for powering the module, and an output pin which gives high logic level if an object is detected.
Also, it has two potentiometers. One is for adjusting the sensitivity of the sensor and the other is for adjusting the time the output signal stays high when the object is detected. This time can be adjusted from 0.3 seconds up to 5 minutes. The module has three more pins with a jumper between the two of them. These pins are for selecting the trigger modes.
- The first one is called “non-repeatable trigger” and works like this: when the sensor output is high and the delay time is over, the output will automatically change from high to low level.
- The other mode called “repeatable trigger” will keep the output high all the time until the detected object is present in the sensor’s range.
Circuit diagram
The white dome of the PIR sensor can be lifted and checked for the connections of the pins VCC, ground, and signal
- Connect “VCC” of “PIR” sensor module to “VCC” of evive
- Connect “GND” of “PIR” sensor module to “GND” of evive
- Connect “Dout” of “PIR” sensor module to pin number 2 of evive
 PictoBlox Program
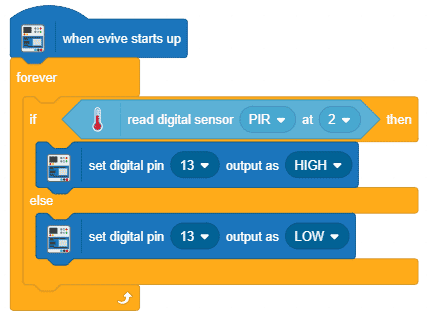
In this example, we will turn the LED ON if the motion is detected and OFF if the motion is not detected:
- Open PictoBlox.
- Select the board as evive:

- Connect the evive.

- Create the following script using when evive starts up block:
- Upload the code onto evive:

You can download the PictoBlox program from here: Motion Sensor
Conclusion
In this lesson, we learned about PIR motion sensors, how they work, and how to use them with PictoBlox. We learned that PIR sensors can detect the presence of a human body in its range and the two potentiometers present on the PIR circuit board allow us to control the delay and the sensitivity of the sensor. We learned to use the HC-SR501 PIR sensor module with evive, and the PictoBlox program to turn the LED ON if the motion is detected and OFF if the motion is not detected. With this, we come to the end of the lesson.


