Introduction
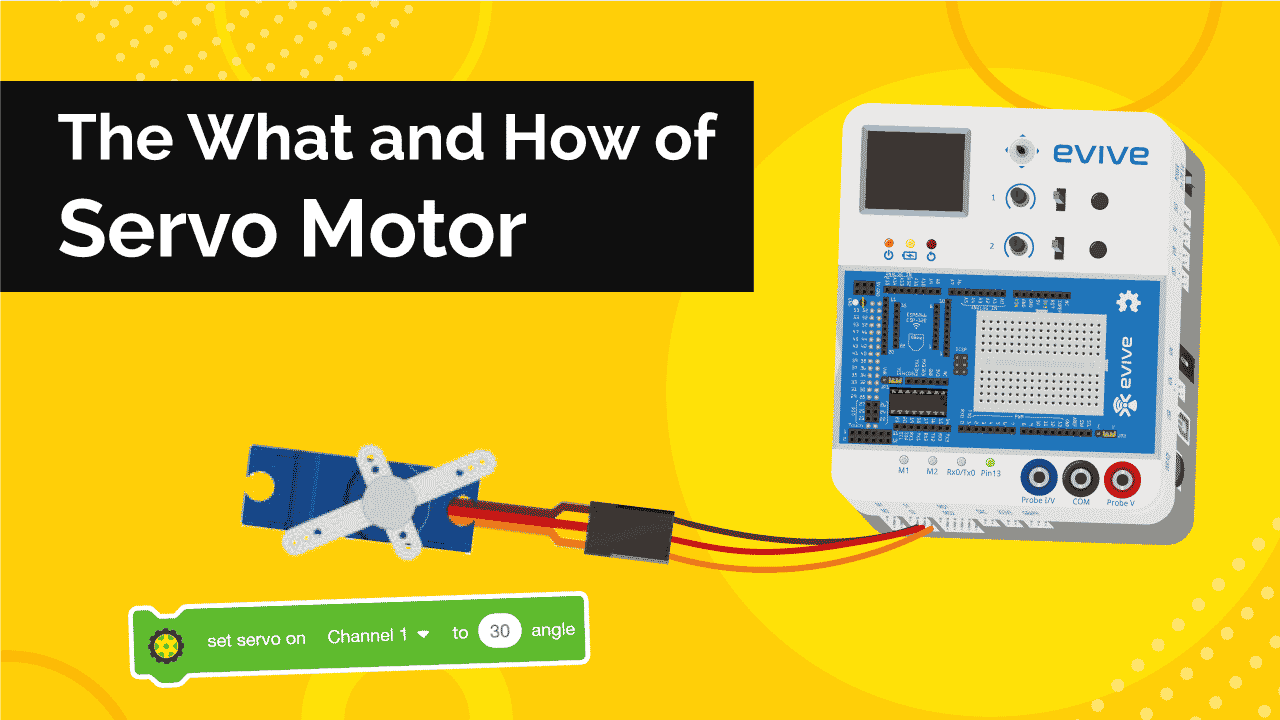
Learn all about servo motors with us in this tutorial on electronics for beginners: what is a servo motor, how it works, how to interface it with evive and program it with ease in PictoBlox – our Scratch blocks-based graphical programming platform with advanced hardware interaction abilities. Once you’re equipped with the basic knowledge about the IR sensor, we’ll show some DIY projects that you can make using the servo motor.
To work in PictoBlox, you’ll first need to download it from HERE.
Ready? Set. Go!
What is a Servo Motor and how does it work?
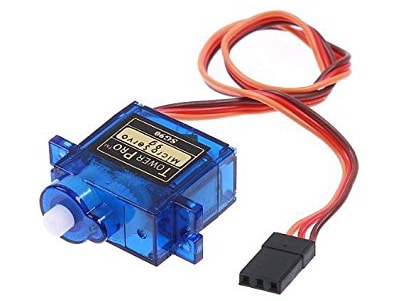
A servo motor, or simply, a servo, is a device that is used to rotate or push parts of a machine to which it is connected with precision. Unlike DC motors, they generally rotate to a particular angle and then stop.
If you pull apart a servo motor, you’ll find the following inside it:
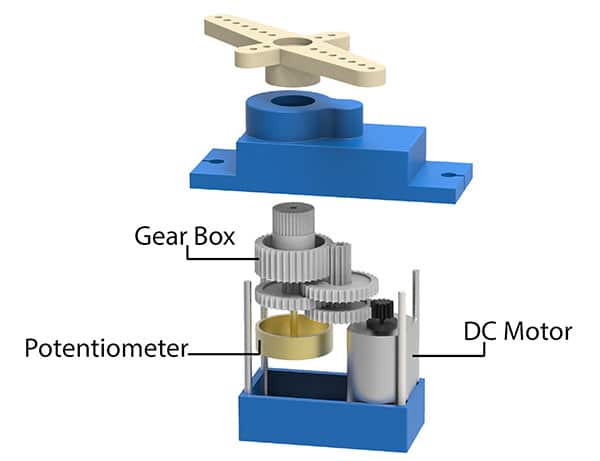
- A DC Motor
- A Potentiometer
- A gear train i.e. a series of gears that are connected such that their teeth are engaged/interconnected.
- A control circuit: This circuit is the actual brain behind the precise working of the servo. It controls how much the servo should move or rotate depending upon the input it receives.
How to interface a Servo motor with evive
Now that we have a little idea about servo motor’s working, let’s take a look at how to interface it with evive and see it in action.
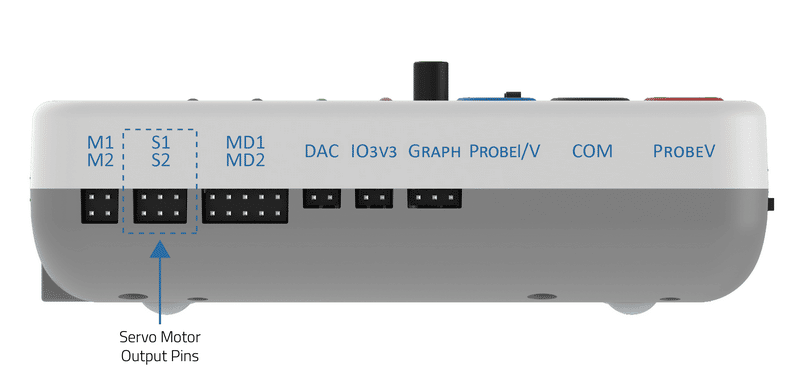
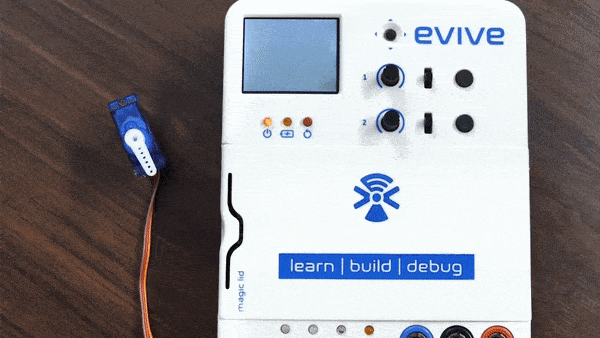
- You can directly connect and control 2 servo motors at a time with evive as it has two dedicated motor channels for it, S1 and S2.
- To visualize the working of the servo better, attach a servo horn to the servo head.
- Once you have attached the servo horn, let’s connect the servo to the Servo Channel 1 i.e. S1.
 Make sure that the brown wire goes to the leftmost pin.

Controlling the Servo Motor using evive’s firmware
To control the servo directly using the servo motor, follow the instructions given below:
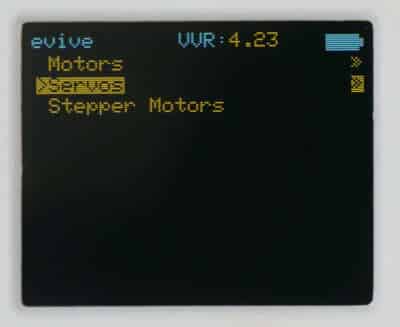
- Switch evive ON.
- Then, from its menu, select Controls.
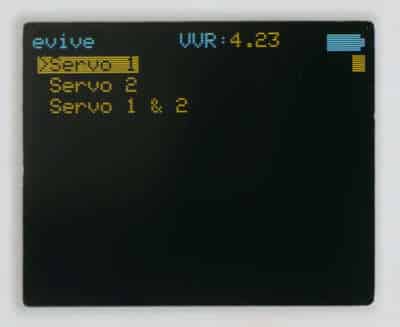
- Next select Servos.
- Finally, navigate to Servo 1.
You will observe that the value of the current angle of the servo motor is displayed on evive’s screen. You can control the angle using the respective potentiometer knob to which channel servo is connected to.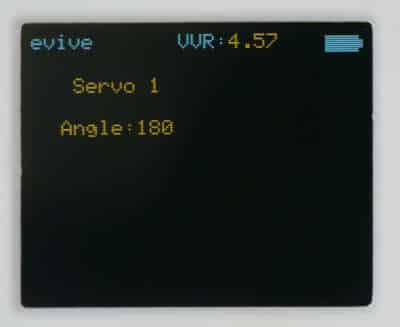
Working of Servo motor in Real-Time
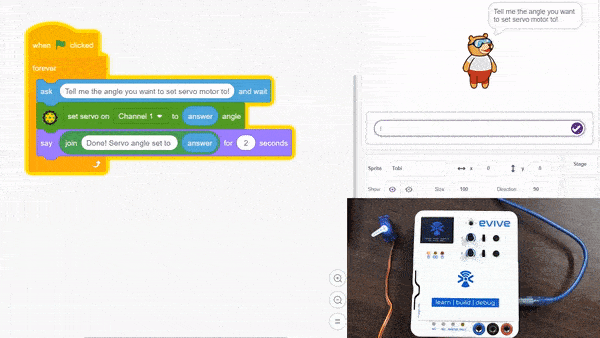
Follow the steps below to write the script to control the servo motor in real-time. The servo motor set the servo motor angle to the value entered by the user.
Follow the steps below to write the script:
- Connect evive to your computer and open PictoBlox.
- Go to the toolbar and click on the Board menu. Then select evive as your board.
- Next, select the Port to which evive is connected e.g. COMXX or ttyXX from the dialogue box that appears. Once you select the port, the icon beside the Connect tab will become connected.
Before writing the script, make sure that the firmware is uploaded. If not, upload it using the Upload firmware button. - You can control a servo motor in PictoBlox with the help of the set servo on () to () angle block. You can find these blocks in the Actuators palette.

- We’ll use an ask block to ask the user to enter the desired value to which they want to rotate the
- Once, the user enters the value, the servo should be set to that angle. Thus, into the white space of the set servo on () to () block, drag and drop the answer of the user.

- Now that the angle is set, Tobi should say out the loud that the servo angle is set to the value entered by user. Thus, drag-and-drop a say block, into the space given, place the join block, write “Done! Servo angle set to ” in the first block and drag and drop the answer in the second space.
- To run the script continuously, we’ll use the forever block.
- Place a when flag clicked hat block above the forever block. It will ensure that the script runs when the green flag is clicked.
- Click the flag and press the arrow keys to test the script to ensure that it is working perfectly fine.
Below is the complete script: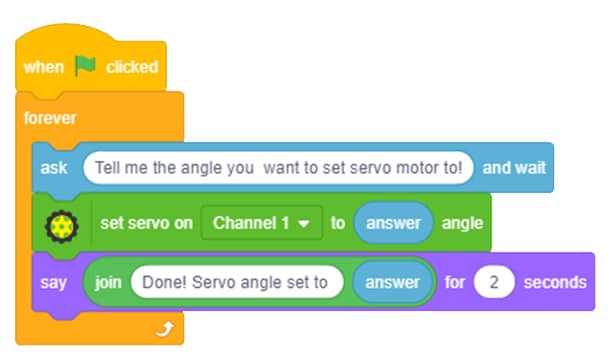
You can download the code to control servo motor in real-time from here.
Working of Servo Motor in Upload Mode
Now, let’s make a script to use the Servo motor without having evive connected to the computer. For that, we’ll have to work in Upload mode. We’ll write the script to run the servo in to and fro motion i.e. from 0° to 180° and then back to 0°.
- To work in the upload mode, click the toggle button.
- Lets first create two variables to store values of the Angle and a Factor(the value by which the servo angle will change).
- Set the initial value of angle as 0 and factor as 5.
- Use a forever block to run the code continuously.
- Now let’s set the servo angle. The angle should change every time by a factor of 5. Thus drag and drop the set servo on () to () angle block and in the white space place the angle’s value.
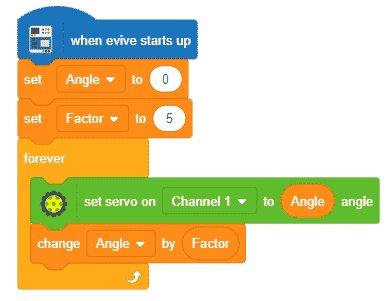
- Now that the angle should change by factor, drag and drop, change variable by () block and place factor in the space given.
- The servo has a minimum and maximum values which are 0 and 180 respectively. Thus, upon reaching the extreme values the servo should change the rotation direction. Thus, we need to multiply the value of the factor by -1.
- Therefore, drag-and-drop the if block, into the hexagonal space, write the script to check whether the Angle is less than 0 or more than 180.
- Into the if arm, set the Factor value to (Factor * -1).

- Next, let’s add a wait () block for the smooth functioning of the servo.
- Place the when evive starts up hat block to execute the program.
- Finally, upload the code using the upload button.
Below is the complete script: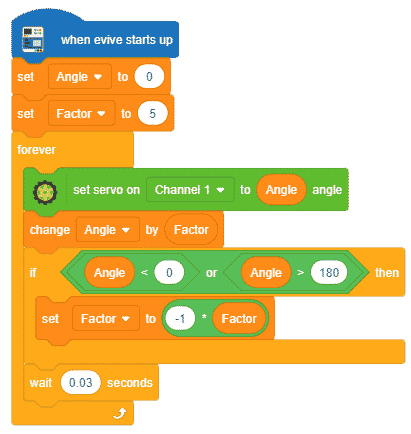
You can download the code from here.
Conclusion
In this tutorial, we learned about how to use the servo motor with evive and program it in PictoBlox. We saw two ways in which we can control the servo motor – real-time mode and upload mode. We also wrote scripts for each mode to control the servo motor in different ways. With this tutorial, you have equipped yourself with the knowledge to make some cool projects using the servo motor. With evive and PictoBlox, you can make your projects interactive and smarter. So, what are you waiting for? Go ahead, and make yourself some cool projects with the servo motor!


