Introduction
IoT is something that we, if not hear then at least see quite often in our daily lives nowadays. We can integrate it with almost every field from home automation to manufacturing, from medical care to environment and energy management. In this tutorial on getting started with IoT, learn what is IoT, how IoT works, what is the IoT lifecycle, what is a cloud, how to work with IoT using Adafruit IO and PictoBlox – our Scratch blocks-based graphical programming platform with advanced hardware interaction abilities, and finally how to make a project on home automation based on IoT using the evive IoT Kit.
To work in PictoBlox, you’ll first need to download it from HERE.
Ready? Set. Go!
What is IoT?
The Internet of Things is the network of physical objects or “things” embedded with sensors, actuators, and internet connectivity, which enables these objects to collect and exchange data.
A “Thing” in the context of the IoT, is an entity or physical object that has a Unique identifier, which is a unique sequence of characters used to identify or refer to it, combined with an embedded system and has the ability to transfer data over the internet.
These devices collect useful data and then autonomously flow share it between other devices.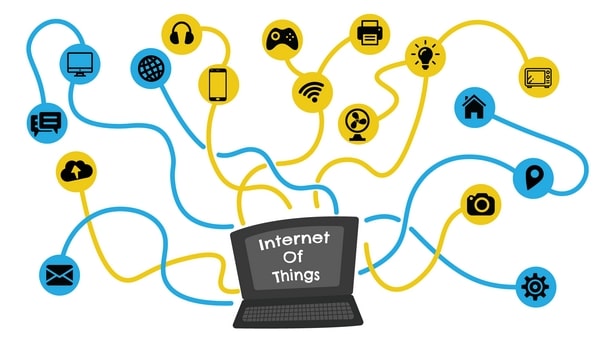
What is IoT Lifecycle?
Now we know in brief, what is IoT, let’s understand how the IoT ecosystem works in the real world using what is known as an IoT lifecycle.
The IoT life cycle comprises systems for
- Collection
- Communication
- Analyzing
- Acting

Collection
Let’s start with the first phase i.e. the collection. For any device or any system to perform any action, first, it needs some data to act on. This data can either be generated from any sensors or any IoT devices about the thing.
The data generated can be from any sensor be it temperature sensors, motion sensors, moisture sensors, air quality sensors, light sensors, you name it.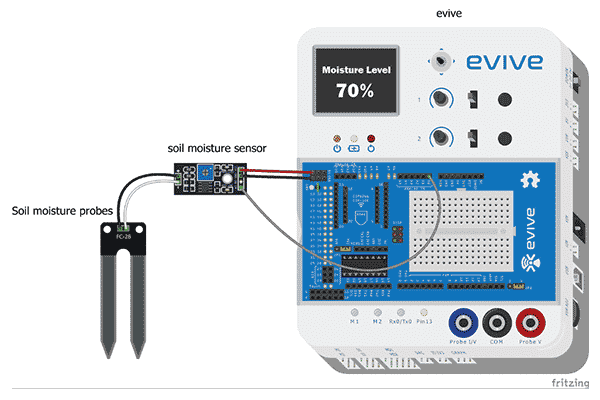
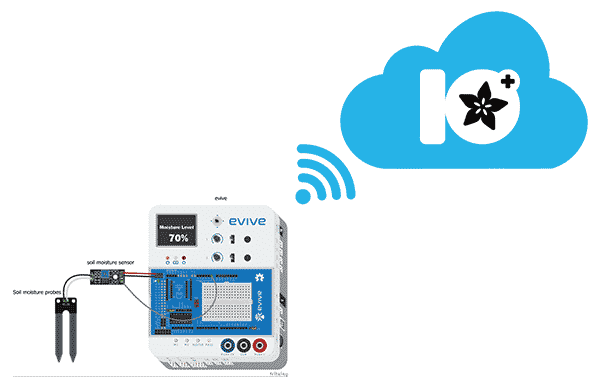
Communication
Next, onto the Communication phase. The data collected from the sensors is then sent to the Internet to some destination with security and reliability. The devices like routers, switches, etc. are used to sent data across the destination devices. The destination devices could be
- A cloud platform like Google or Alexa
- Private data center like Indian Defence Data Centers
- Home networks like Smart-home networks.
Analysis
In the next phase, that is the Analysis phase, the data which we collected needs to be analyzed to create a meaningful format. It could be
- Visualizing the data like temperature variation during the day
- Building reports to analyze the manufacturing system cause
- Setting up events like should you the Air Conditioner ON or OFF depending on the temperature.

Acting
Now that we have the final form of data we need to perform an action according to it. The actions based on the information and data could be
- Communicating with another machine- like turning the AC ON or OFF
- Sending a notification (SMS, E-mail, or Text)- like notifying that the plants have been watered.
- And much more.
Application of IoT
We use IoT in normally all the fields of life.
- Building and Home Automation
- Manufacturing
- Medical and Healthcare systems
- Environmental monitoring
- Energy management
- Transportation
- Better quality of life for the elderly and what not!
What is the Cloud?
In an IoT system, the most important component is the cloud service on which we can store or retrieve data as per the applications. A cloud service is any service made available to users on demand through the internet. Cloud services are designed to provide easy & scalable access to applications, resources, and services. Cloud is the collection of data servers used to provide services like computing, analyzing, networking, etc.
There are a number of cloud service providers out there, like Amazon, Microsoft, Salesforce, Apple, etc. One such cloud service is Adafruit.io which we are going to use. 
Getting Started with Adafruit.io
Adafruit.io is one of the websites that provide the cloud service to us. It can
- Collect data
- Display the data in real-time, online
- You can get access to any data that has been stored anywhere across the globe
- Make your project internet-connected
- Connect your project to other internet-enabled devices
Go to https://io.adafruit.com to get access to this cloud service. Once you are there you need to create an account to use it. If you already have an account on it you are good to go else you need to create one. You can create the account by clicking on the Get Started for Free tab. Fill up your details and voila!
Understanding the Feed of Adafruit.io
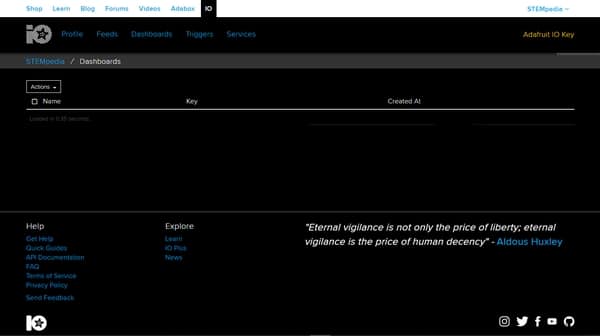
Now that you have signed into Adafruit.io, click on the IO button above to get to the Adafruit Dashboard. Your dashboard will look something like the image below:
Let’s get started by understanding what feed in Adafruit means.
Feeds are the core of the Adafruit IO system. A feed contains information about the data you push to Adafruit IO and also the sensor data values that get pushed to Adafruit IO from your device. It allows you to visualize the data you send from the source. You will need to create one feed for each unique source of data you send to the system. Follow the steps below to make a feed for your self.
- First, click the Feeds tab.
- Then, select view all feeds.
- Now click the Actions menu.
- From its drop-down menu, select Create a New Feed from it.
- Give the feed a name and description and then click Create.
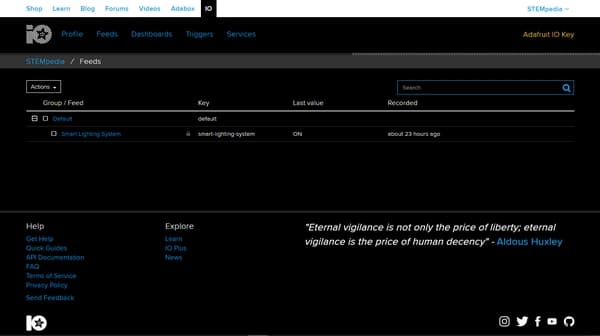
- Double click the feed to see it.
Understanding the Dashboard of Adafruit.io
Now that we have created our Adafruit Feed, it’s time to look into the Adafruit Dashboard. It is the place where you will interact with the system and the information from the dashboard can be visualize in the Feed section. Let’s create the Dashboard. Follow the steps to create the Dashboard.
- Click the Dashboards tab.
- Then, select view all dashboards.
- Now click the Actions menu.
- From its drop-down menu, select Create a New Dashboard from it.
- Enter the name and the description of the dashboard and click Create.
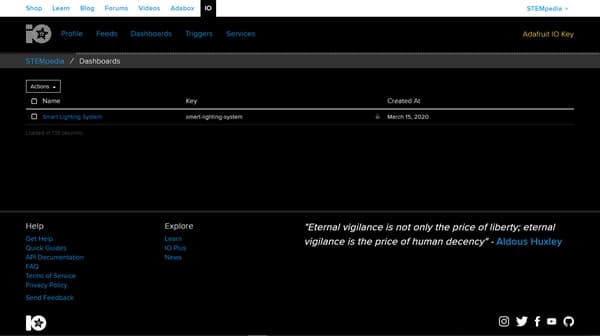
- Double click the dashboard to see it.
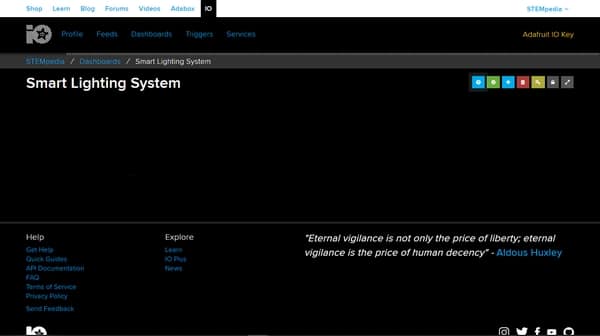
Adding the Widgets on the Dashboard
Now that we have created the Dashboard and Feed in Adafruit, let’s add a block in the Dashboard. Blocks are nothing but widgets that you can add in your Dashboard. Follow the steps below to add a switch on the Dashboard.
- To add blocks, click on the plus symbol.
- You can see a variety of blocks.
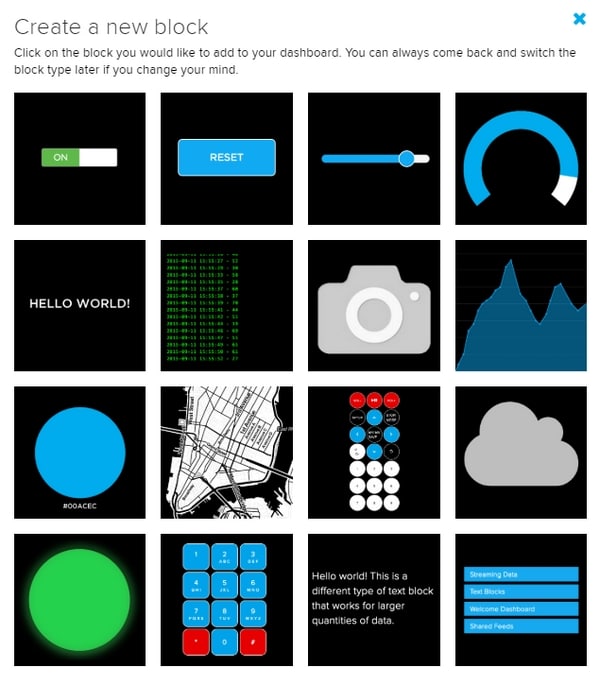
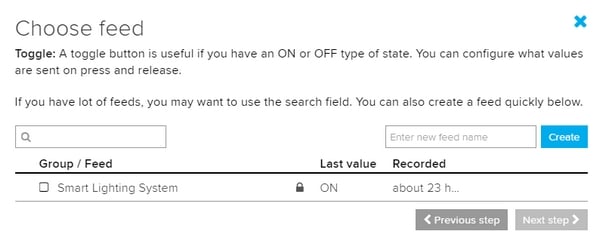
- From them, select toggle.
- Next, select the feed that we created.
- Add the title Switch, click Create block.
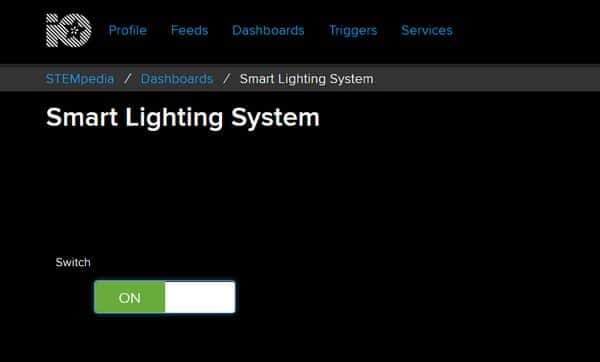
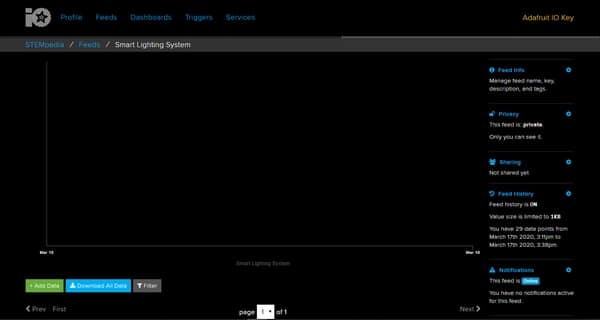
Now Let’s test this button first by toggling the switch. Next, let’s visualize the data by opening the feed. When you open the feed, you can observe the data obtained from the switch with the given timestamp on the Adafruit Feed.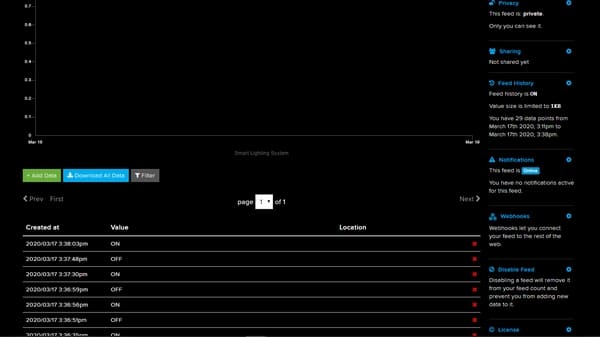
Controlling the Light Bulb Using Adafruit Dashboard
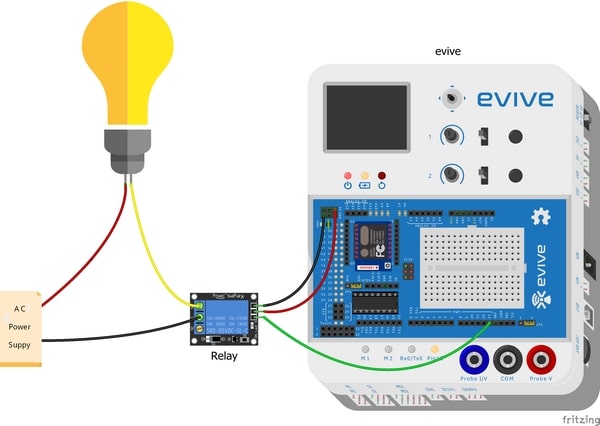
Now that we saw how Adafruit IO works, let’s see it in action. Let’s begin by connecting the light bulb to evive.
- Connect VCC of Relay to +5v on evive
- Connect GND of Relay to GND on evive
- Connect Signal pin of Relay to evive’s digital pin 13
- Connect the Esp8266 module to its headers on evive
Programming the Lighting System Using PictoBlox
Now that we have connected the relay with evive, let’s program it in PictoBlox- it is a graphical programming software based on Scratch blocks. Follow the steps below to program is.
- Before doing anything else, connect evive to your computer using a USB cable. Next, open PictoBlox.
- Then, click the board button and select evive from the drop-down. Now, from the dialogue box that appears, choose the appropriate serial port.
- We will write our code in upload mode, thus click the Stage and Upload Toggle button.
- First, add the Internet of Things extension in PictoBlox by clicking the Add extension button in the bottom left corner.
- The block connect to Wi-Fi () with password () connects the ESP8266 module connected to evive to the Wi-Fi. Enter the Wi-Fi name and password in their respective spaces into the blocks.

- The connect to Adafruit IO username () & AIO key () block connects to the Adafruit Feed using Username and AIO Key. You need to enter the Username and AIO Key in the block.
 You can get it from your Adafruit dashboard.
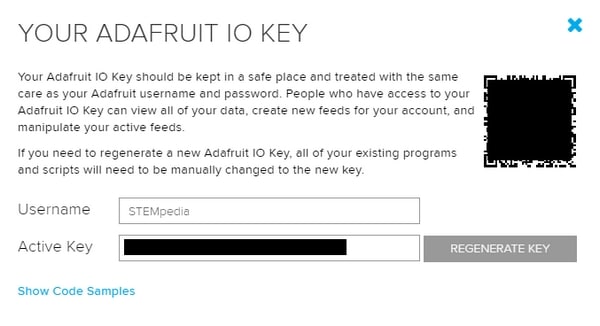
- To find the AIO key click on the AIO key button on the Adafruit IO website.
- Find your Active key and copy-paste it to your block in PictoBlox.
- To find the AIO key click on the AIO key button on the Adafruit IO website.
- Use the forever block to run the script continuously.
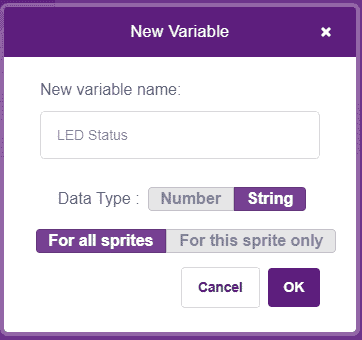
- Now, to store the data from the Adafruit block, we will make a variable that will store the string. Name the variable LED State and set it as a string type.
- Now we will set the value of the variable as data coming from the feed. For that, drag and drop the get last data from the feed () as a () block. Write the name of the Feed from which you want to get the data from and select string as the variable type.

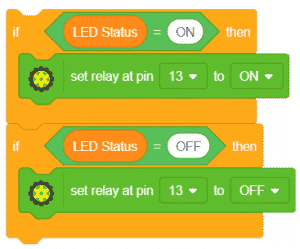
- Now, using an if block, we will check if the value we got is ON or OFF. If the value is ON, set the relay on pin 13 as ON. And if the value of the LED state is OFF, set the relay as OFF.
- Let’s fill the display with black color. Add this block above the entire script.
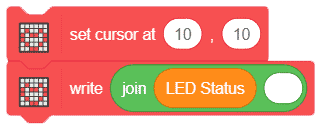
- Set the cursor location as 10, 10 by adding its block inside the forever block and display the value of LED state on the screen using a join block.
- Drop a when evive starts up hat block above the entire script to execute the program.
- Now that our script is ready, upload it to evive by clicking on the Upload Code Button.
 Alert: Make sure that you disconnect the wire from Pin13 before uploading the code.
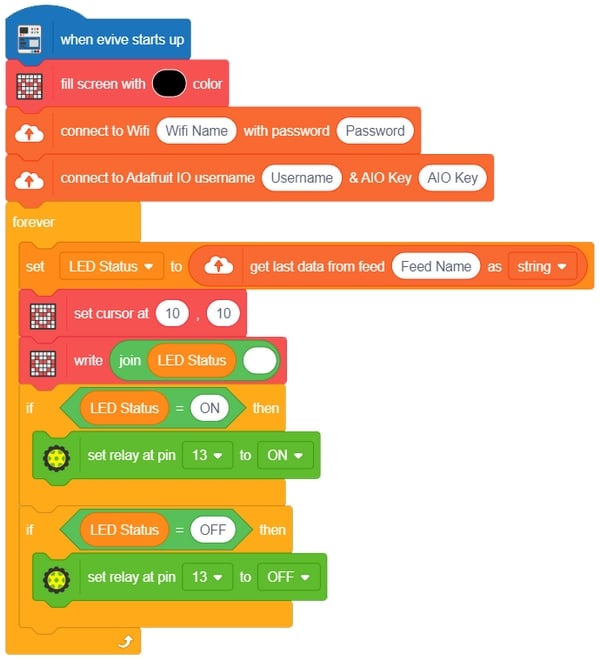
 - Here is the entire script. Also, you can download it from here.
Identifying whether the Wi-Fi and the Adafruit IO is connected or not?
Once you have uploaded your code in evive. Switch evive ON. You will notice two things happening.
- The LED color of M1.
- If the LED color is Yellow it means that evive is connected to Wi-Fi.
- If the LED color is Red, it means that evive is not connected to Wi-Fi. Thus, you need to check if your Wi-Fi name and password into the PictoBlox’s block.
- The LED color of M2.
- If the LED color is Yellow it means that evive is connected to Adafruit IO or cloud.
- If the LED color is Red, it means that evive is not connected to the cloud. Thus, you need to check if your Adafruit username and AIO Active key into the PictoBlox’s block.
Once when both the Wi-Fi and the Cloud are connected, toggle the switch on the Adafruit dashboard, the bulb will turn on and off respectively.
Conclusion
In this tutorial, we learned about IoT and its applications, the lifecycle of IoT, Adafruit IO and PictoBlox. We also created a project on home automation using the evive IoT kit, Adafruit dashboard and PictoBlox. We learned how to set up the board, create a dashboard, add the widgets, connect the light bulb, program the light bulb and how to identify whether the Wi-Fi and the Adafruit IO are connected or not. Finally, we tested the project by toggling the switch on the Adafruit dashboard and the bulb turned on and off respectively. With this, we have come to the end of this tutorial on getting started with IoT.


