Table of Contents

connect motor () direction 1 () direction 2 () & PWM ()

connect motor

Description

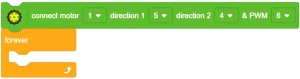
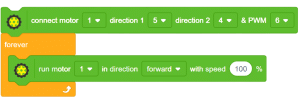
This block is a stack block that is available in the actuator extension for all Arduino boards, such as Uno, Mega, and Nano. It is necessary to use this block at the beginning of the program in order to initialize the motor and set its direction 1, direction 2, and PWM control pins. This block is required in order to use other motor functions, as it is the first step in the process.

Input Parameters

  1. Motor channel: This assigns a unique identifier for the motor which can be used in other blocks.
    connect motor options
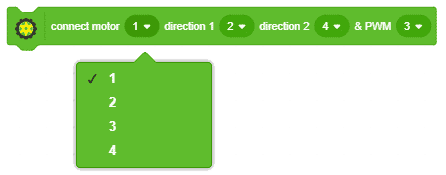
  2. Direction 1 Pin: This assigns the direction 1 pin for a particular motor.
  3. Direction 2 Pin: This assigns the direction 2 pin for a particular motor.
  4. PWM Pin: This assigns the PWM pin for a particular motor.

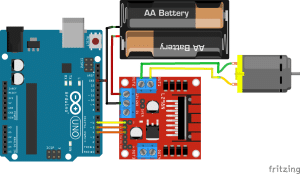
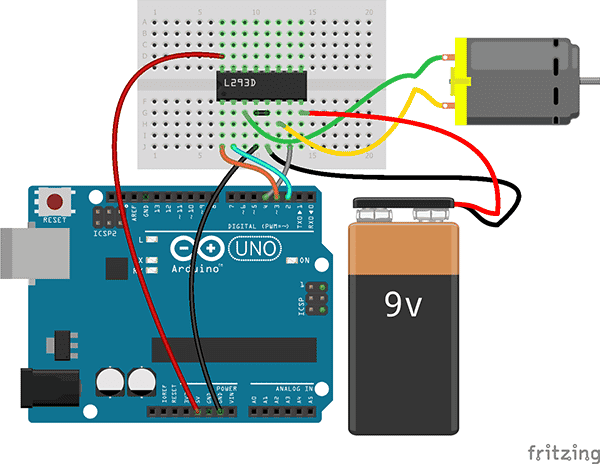
Circuit Diagram for Arduino Boards

In this example, we are connecting a DC motor to Arduino using an L298 motor driver IC.
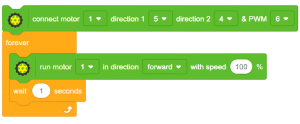
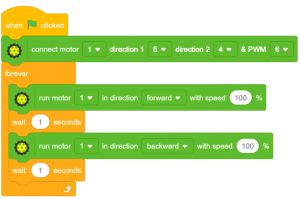
Motor Driver Arduino

Example

In this program, we will control the above motor.

notor uno

Example

interfacing of DC motor with Arduino and it's control.

Motor driver and it’s working

Arduino Uno is a controlling device which is capable to control the things we are connected to it, it is not a power source. motors works on the principle of electromagnetism so draws a lot of load current which can’t be maintained by Arduino, for this we need a motor driver which is integrated circuited (IC) which maintains this load current for the motors.

this is of 16 pin chip among which 2 are enable pins used to control the speed of the motor, 4 for the input pins are 4 for  output pins for the motors, remaining are GND and VCC.

Circuit

connection. 

Arduino uno            Motor driver

D5                             IN1

D4                             IN2

D6                             EN1

GND                          GND

In this example, we will be controlling the direction of rotation of the motor using the motor driver.

code

  • From the actuators palette drag connect motor () direction 1 () direction 2() and PWM()
  • from control palette add forever block

  • From the actuator palette add run motor () in direction () with speed()

  •    from the control palette Add a wait block

  • Repeat the above 2 steps and change the direction from forward to backward

  • Now add when flag clicked event 

Script

OUTPUT

Read More
All articles loaded
No more articles to load