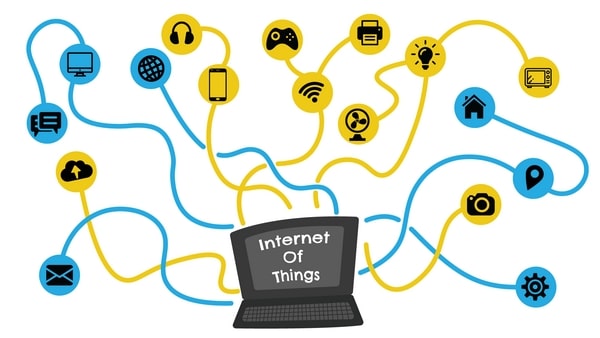
What is IoT?
The Internet of Things is the network of physical objects or “things” embedded with sensors, actuators, and internet connectivity, which enables these objects to collect and exchange data.
A “Thing” in the context of the IoT, is an entity or physical object that has a Unique identifier, which is a unique sequence of characters used to identify or refer to it, combined with an embedded system, and has the ability to transfer data over the internet.
These devices collect useful data and then autonomously flow and share it between other devices.
What is IoT Lifecycle?
Now we know in brief, what is IoT, let’s understand how the IoT ecosystem works in the real world using what is known as an IoT lifecycle.
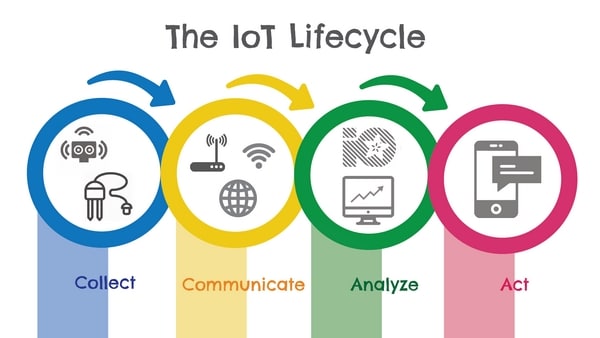
The IoT life cycle comprises systems for
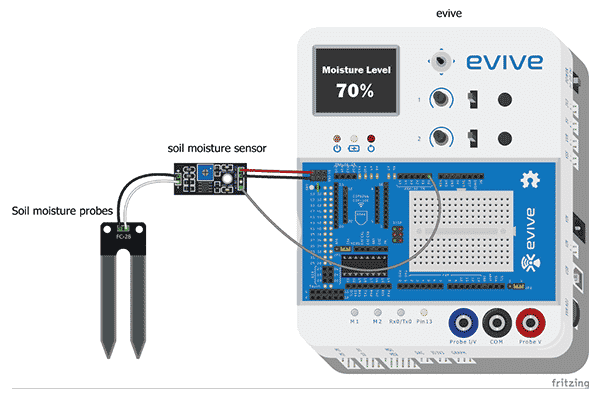
- Collection: Let’s start with the first phase i.e. the collection. For any device or any system to perform any action, first, it needs some data to act on. This data can either be generated from any sensors or any IoT devices about the thing. The data generated can be from any sensor be it temperature sensors, motion sensors, moisture sensors, air quality sensors, light sensors, you name it.
- Communication: Next, onto the Communication phase. The data collected from the sensors is then sent to the Internet to some destination with security and reliability. The devices like routers, switches, etc. are used to send data across the destination devices.
 The destination devices could be
- A cloud platform like Google or Alexa
- Private data centers like Indian Defence Data Centers
- Home networks like Smart-home networks.
- Analyzing: In the next phase, that is the Analysis phase, the data we collected needs to be analyzed to create a meaningful format.
 It could be
- Visualizing the data like temperature variation during the day
- Building reports to analyze the manufacturing system cause
- Setting up events like should you the Air Conditioner ON or OFF depending on the temperature.
- Acting: Now that we have the final form of data we need to perform an action according to it.
 The actions based on the information and data could be
- Communicating with another machine- like turning the AC ON or OFF
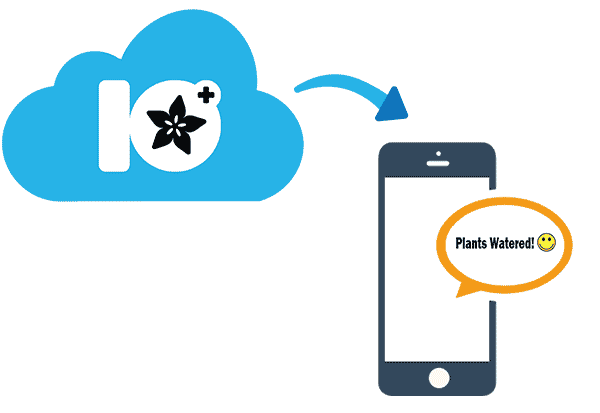
- Sending a notification (SMS, E-mail, or Text)- like notifying that the plants have been watered.
- And much more.
Application of IoT
We use IoT in normally all fields of life.
- Building and Home Automation
- Manufacturing
- Medical and Healthcare systems
- Environmental monitoring
- Energy management
- Transportation
- Better quality of life for the elderly and whatnot!
What is the Cloud?
In an IoT system, the most important component is the cloud service on which we can store or retrieve data as per the applications. A cloud service is any service made available to users on demand through the internet. Cloud services are designed to provide easy & scalable access to applications, resources, and services. Cloud is the collection of data servers used to provide services like computing, analyzing, networking, etc.
There are a number of cloud service providers out there, like Amazon, Microsoft, Salesforce, Apple, etc. One such cloud service is Adafruit.io which we are going to use.
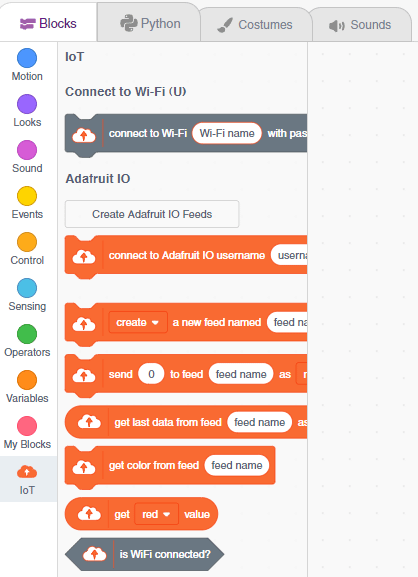
IoT with Adafruit IO
Adafruit.io is a cloud service – that just means we run it for you and you don’t have to manage it. You can connect to it over the Internet. It’s meant primarily for storing and then retrieving data but it can do a lot more than just that!
PictoBlox supports the IoT applications for Adafruit IO in this extension.
Create an Account in Adafruit IO
Follow the steps:
- Go to the website and Sign up: https://accounts.adafruit.com/users/sign_in
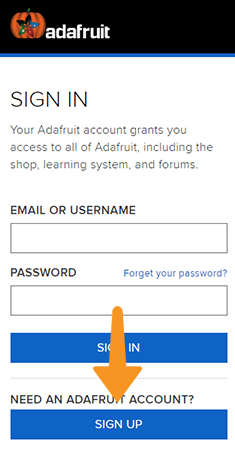
- Add the details and click on Create Account.
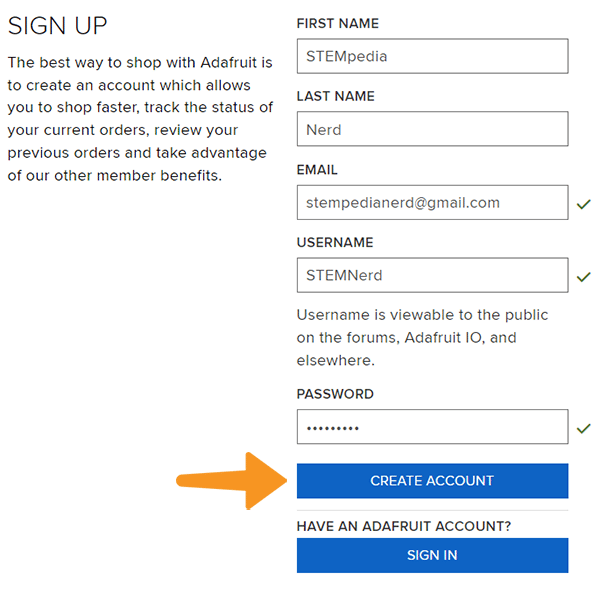
- You will be signed in to the account.

From here, you’ll want to learn about two important features of Adafruit IO before proceeding further – Feeds and Dashboards
Feeds
Feeds are the core of the Adafruit IO system. The feed holds metadata about the data you push to Adafruit IO. This includes settings for whether the data is public or private, what license the stored sensor data falls under, and a general description of the data. The feed also contains the sensor data values that get pushed to Adafruit IO from your device.
You will need to create one feed for each unique source of data you send to the system. For example, if you have a project with one temperature sensor and two humidity sensors, you would need to create three feeds. One feed for the temperature sensor, and one feed for each humidity sensor.
Creating a Feed
Follow the steps:
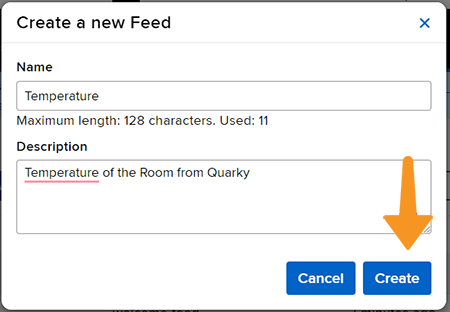
- Go to the Feeds tab. Click on New Feed.
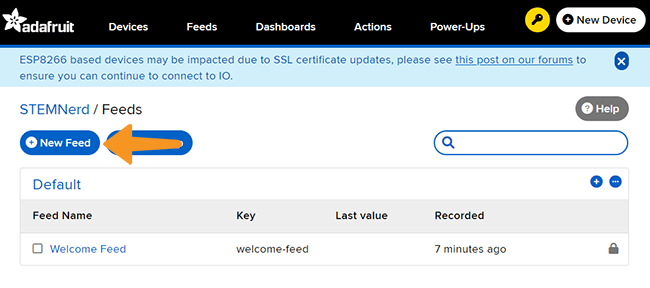
- Add the name and description and click on Create.
- You will find the feed in the list.
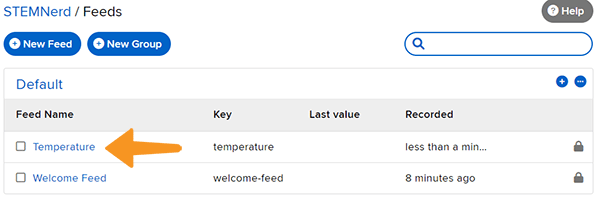
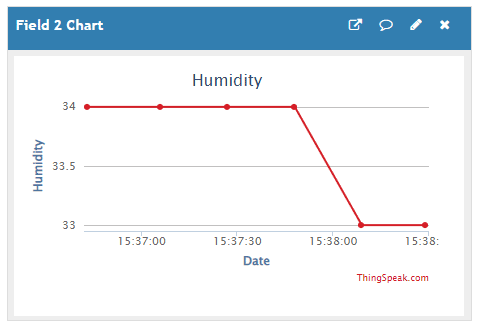
- You can click on the feed name and visualize the data.
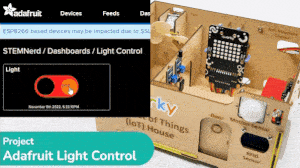
Dashboard
Dashboards allow you to visualize data and control Adafruit IO-connected projects from any modern web browser. Widgets such as charts, sliders, and buttons are available to help you quickly get your IoT project up and running without the need for any custom code.
Creating a Dashboard
Follow the steps:
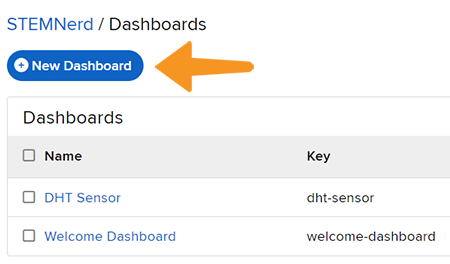
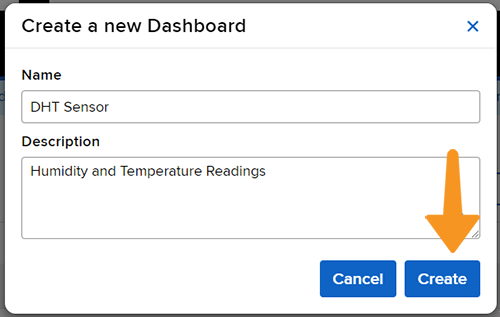
- Go to the dashboard and click on New Dashboard.
- Add the Dashboard Name and Description and click on Create.
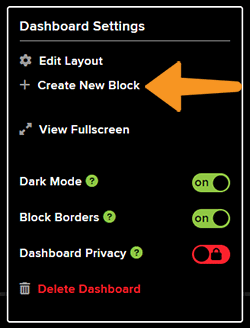
- Open the New Dashboard. Click on the Setting icon in the top right corner and then click on Create New Block.
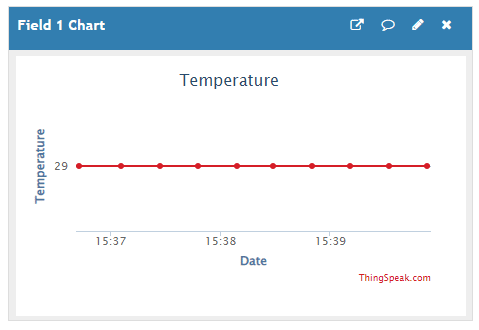
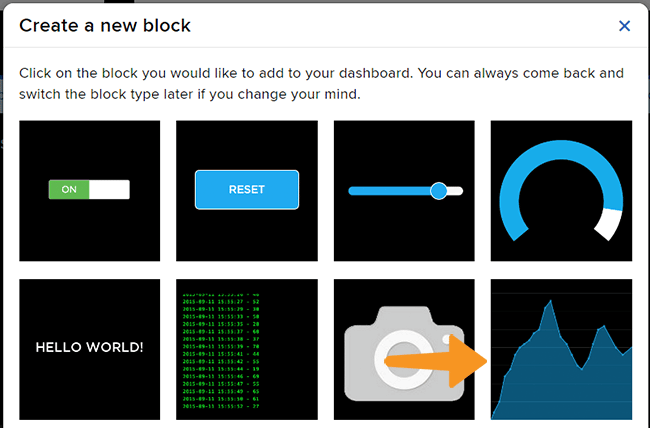
- From the options, click on the line chart.
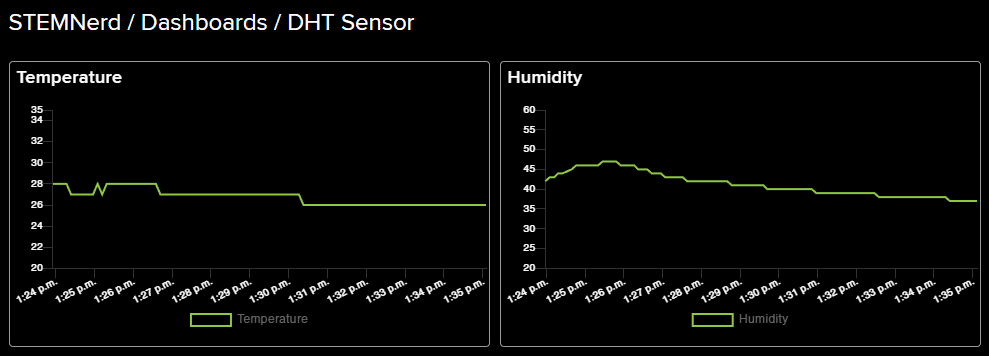
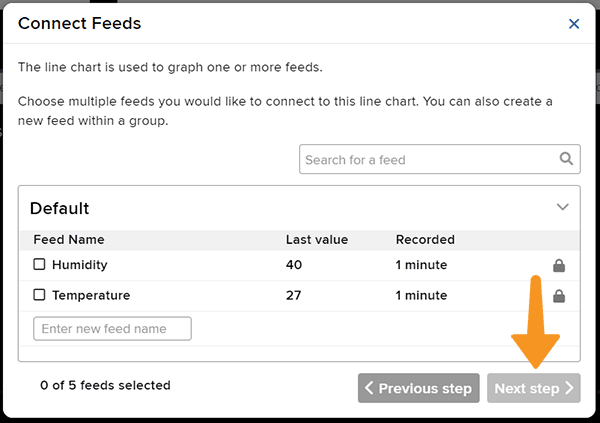
- Select the Temperature Feed and click on Next Step.
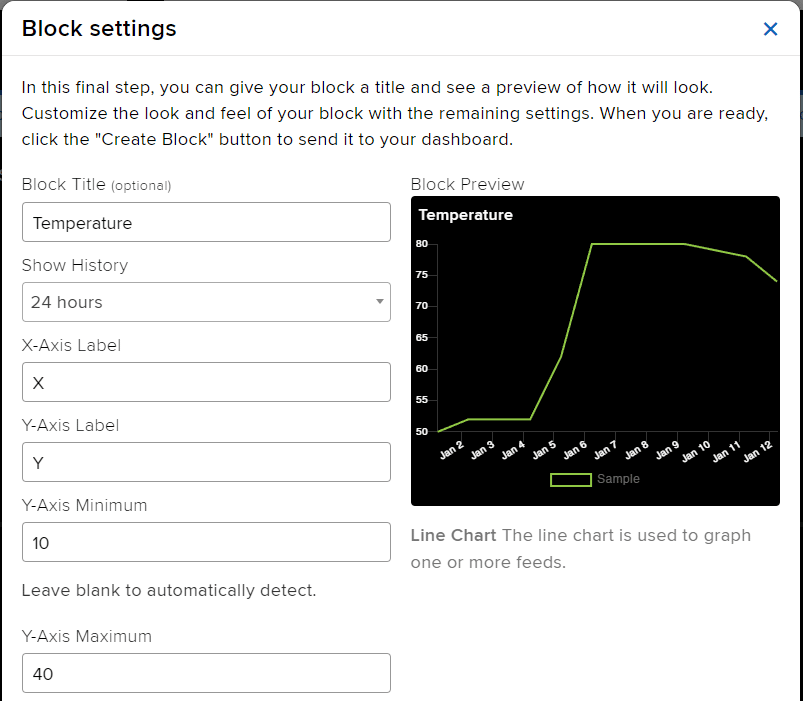
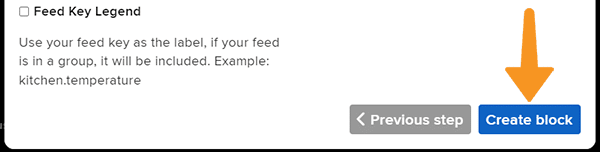
- Add the Block Title and the Y-Axis Minimum – Maximum value. Click on Create Block.
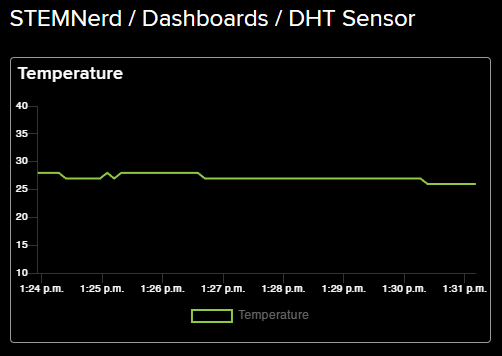
- You will find the block added on the dashboard.
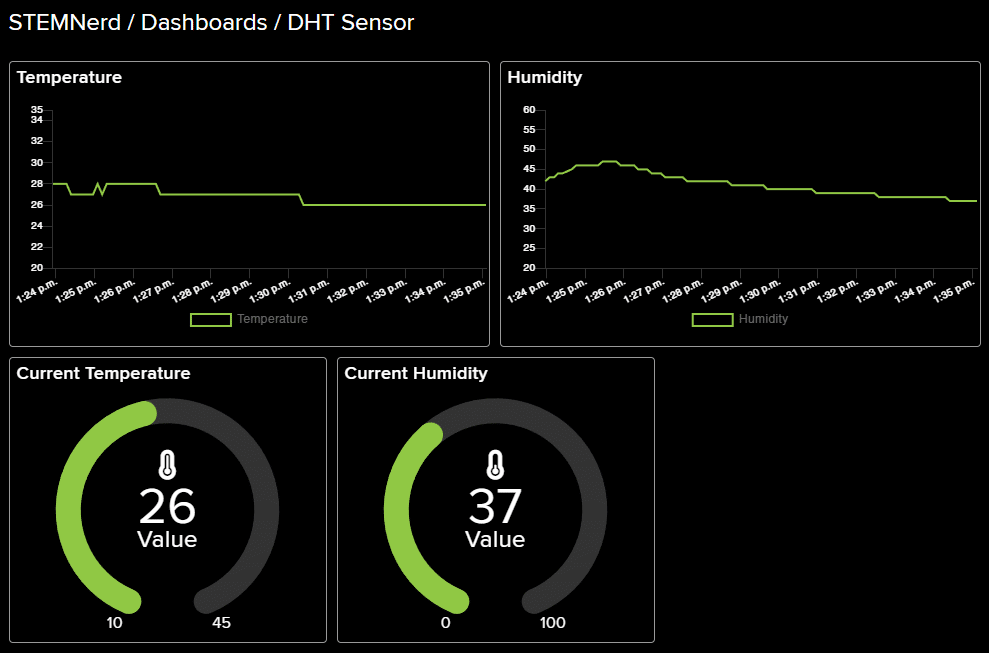
- Add a Humidity block as well. Also, add two gauge elements showing the current temperature and humidity value.
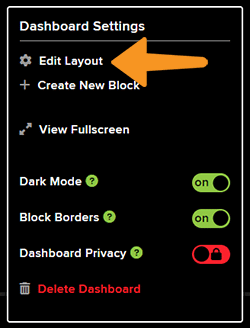
- Click on the Setting button and Edit Layout to align all the buttons.
IoT with ThingSpeak
ThingSpeak is an IoT analytics platform service that allows you to aggregate, visualize, and analyze live data streams in the cloud. You can send data to ThingSpeak from your devices, create instant visualization of live data, and send alerts.
PictoBlox supports the IoT applications for ThingSpeak in this extension.
Creating a ThingSpeak Account
Follow the steps:
- Go to https://thingspeak.com/ and click on create a new account.
- Add the details and click Continue.
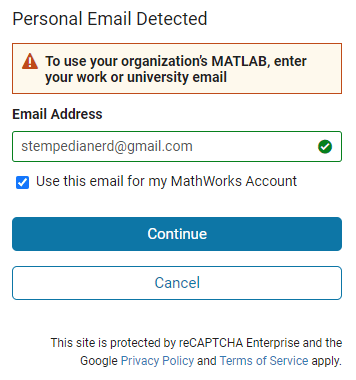
- It will show – Personal Email Detected. Click Continue.
- Next, you have to verify your account.
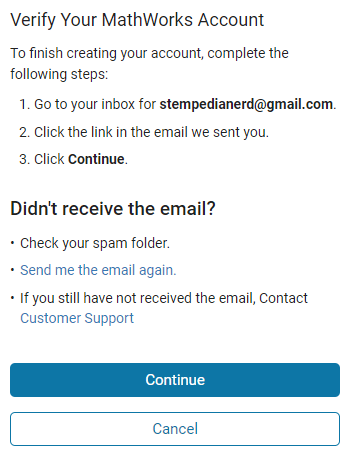
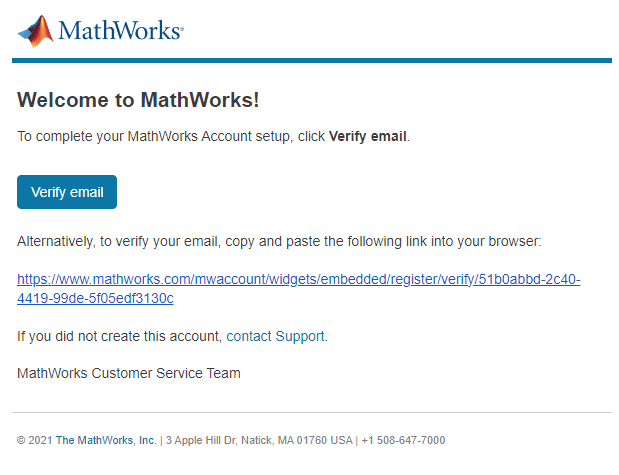
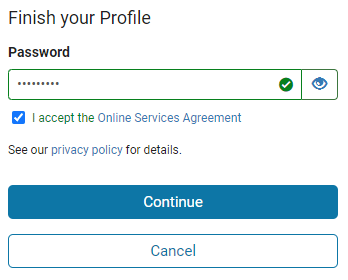
- Once verified. Click on Continue. It will ask you to set the password.
- Once completed. You will be greeted by your dashboard.
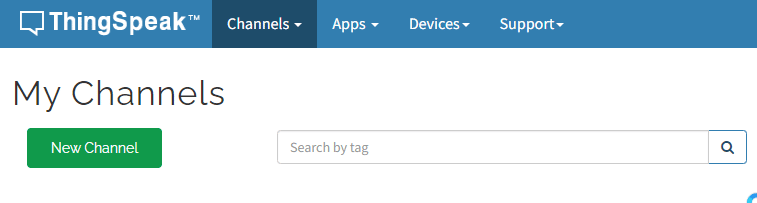
Creating Channel in ThinkSpeak
Collect data in a ThingSpeak channel from a device, from another channel, or from the web.
Follow the steps:
- Click on New Channel.

- Add Channel information such as name, description, and field names. There can be 8 fields for 1 channel.
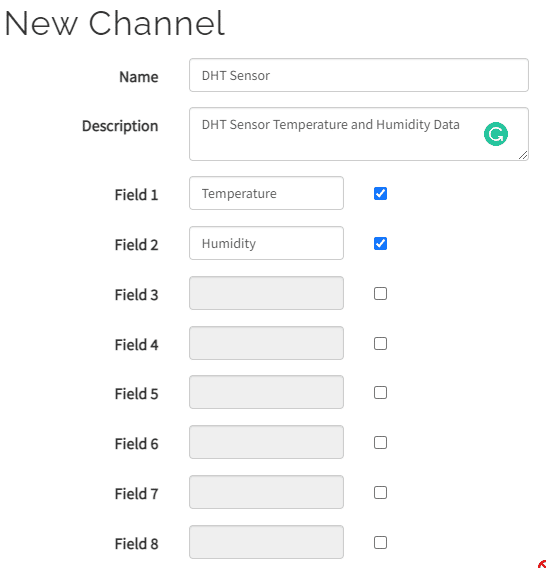
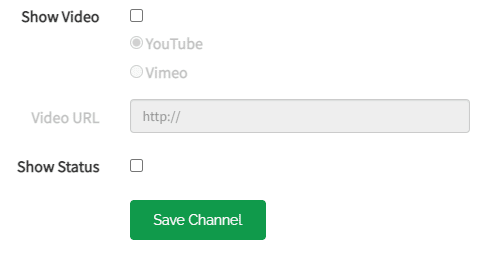
- Click on Save Channel.
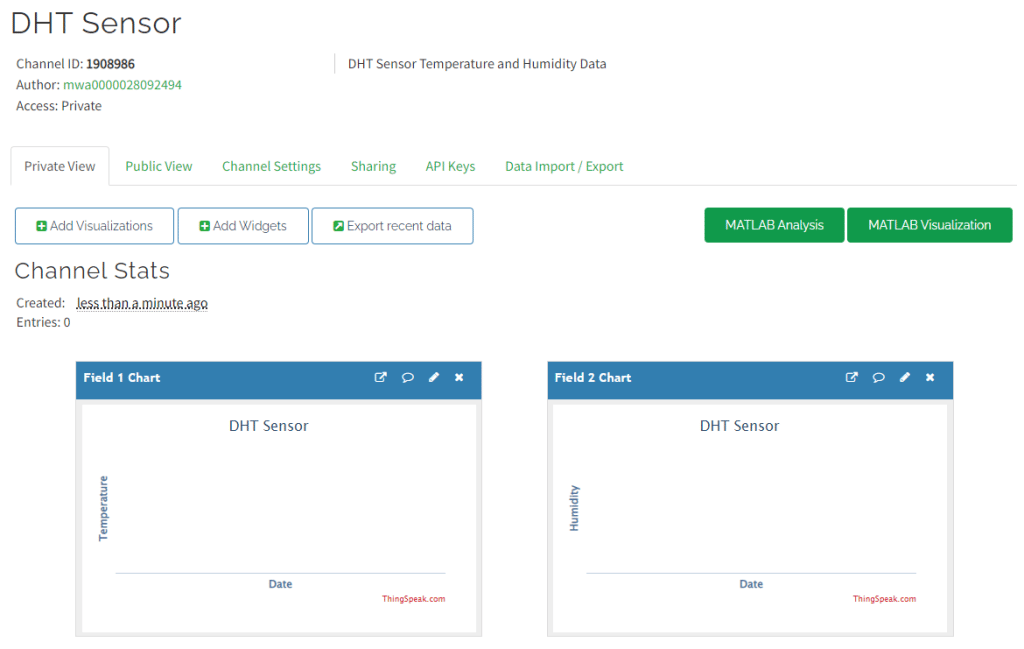
- Your channel is created.
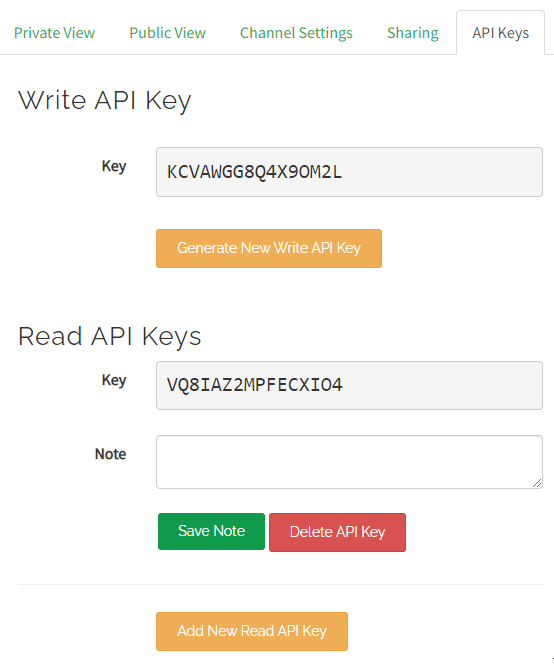
API for ThingSpeak
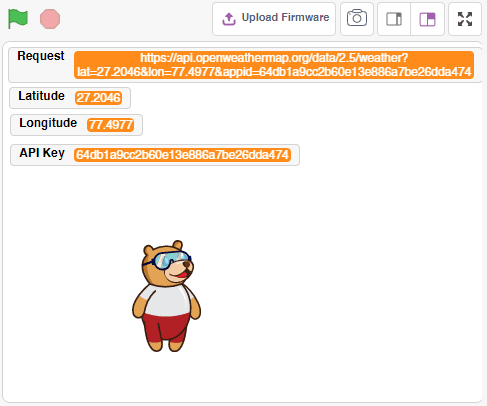
You will need the following data for making code in PictoBlox:
- Channel ID: This is the unique ID by which the channel data can be identified.
- Read and Write API: These is the unique API keys for performing data read and write operations. You can locate it in the API section of the channel.
Accessing IoT Extension in PictoBlox
Following is the process to add Internet of Things capability to the PictoBlox Project.
- Open PictoBlox and create a new file.

- Select the coding environment as Block Coding.

- Next, click on the Add Extension button and add the Internet of Things extension.
- You can find the Internet of Things blocks available in the project.