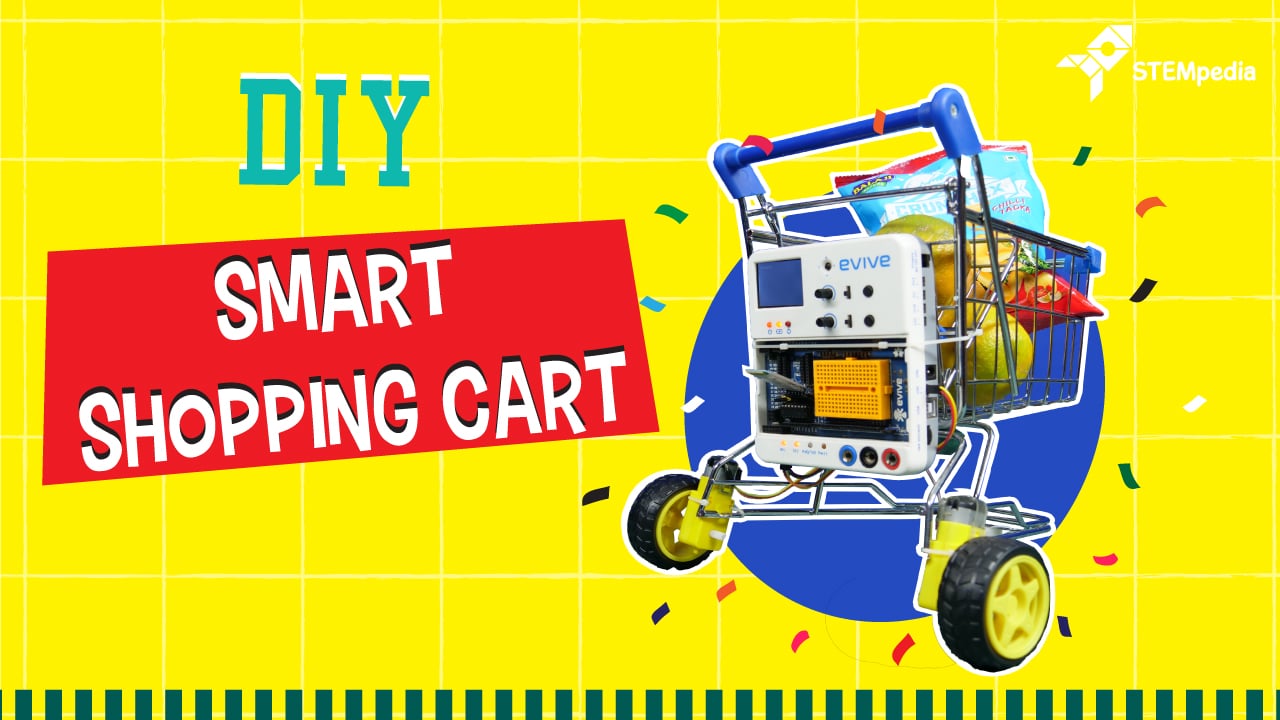

Introduction
Visiting malls can be fun. But dragging the Shopping Cart along as you fill it with stuff is something that is downright annoying. The pain of pushing it through those narrow aisles, making those sharp turns! So, here’s (kind of) an offer that you can’t refuse – how ‘bout transforming that regular, boring Shopping Cart into a cool DIY smart shopping cart that you can control with a few taps on your phone?
Sounds like exactly what you need, right?
Let’s get started then!
Making of Shopping Cart
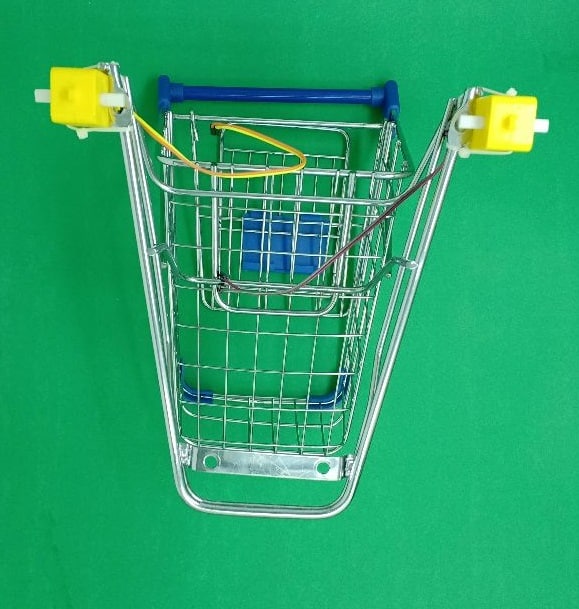
- Take the cart and remove its wheels using Nose Plier.
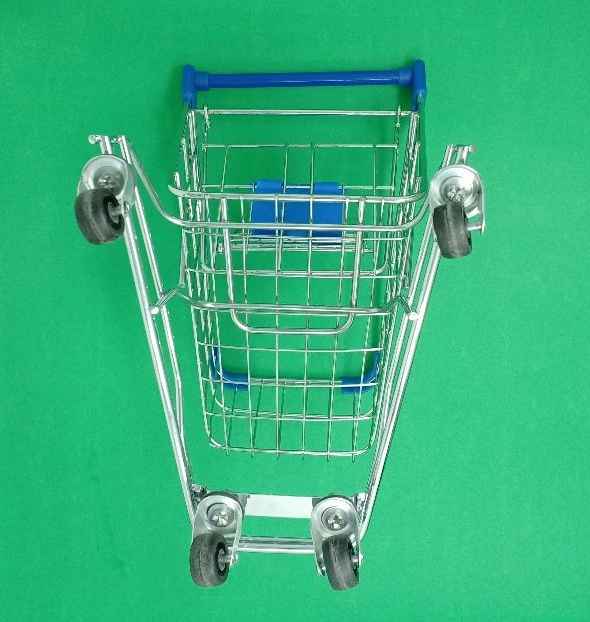
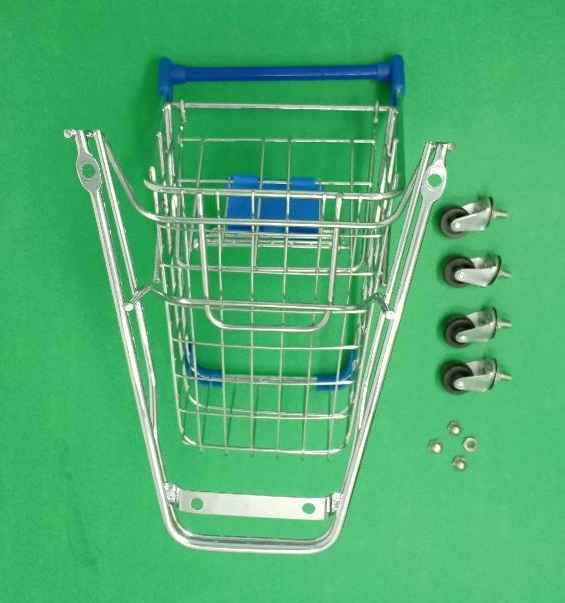
- Now, all you have is a cart without wheels.
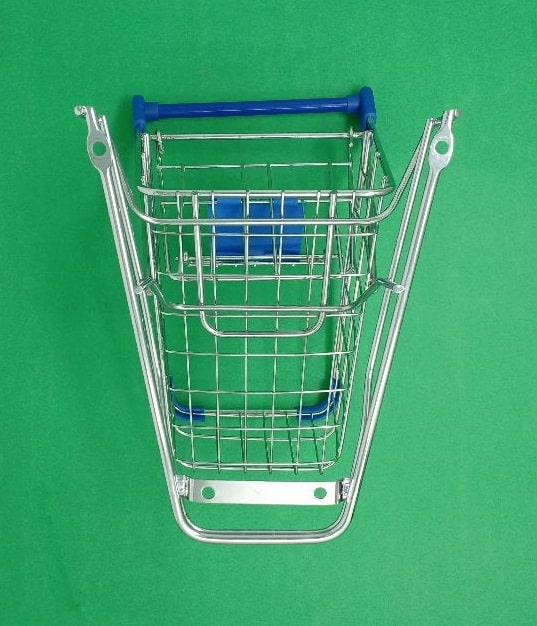
- Attach two DC motors, one of each side of the back end of the cart using the cable tie.
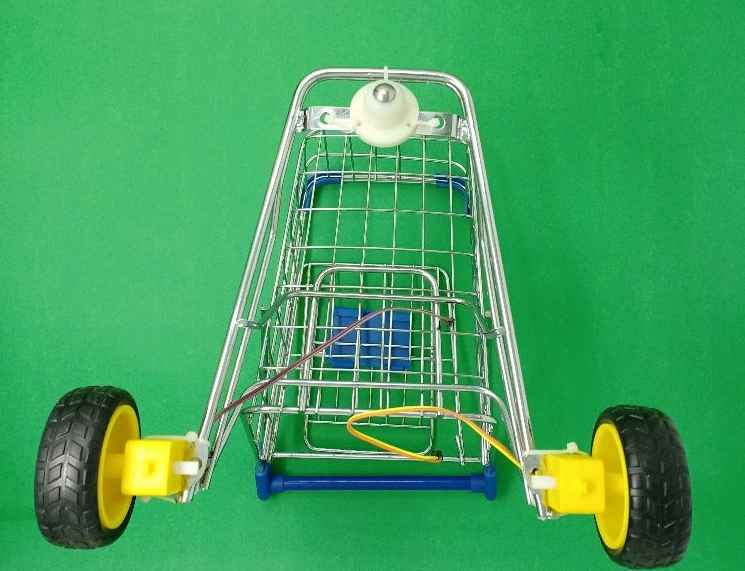
Now, its time to give wheels to the cart.
- Attach the wheels on the DC Motor.

- Now, attach the castor wheel on the front end of the cart with the help of cable ties. Finally, cut the extra cable tie using the wire cutter.
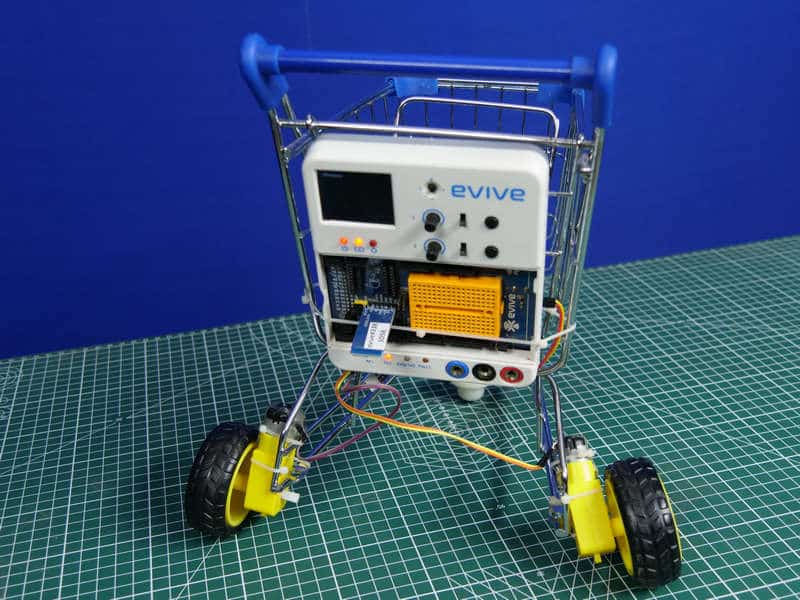
- Now, all you need to attach evive to the cart using the cable ties.

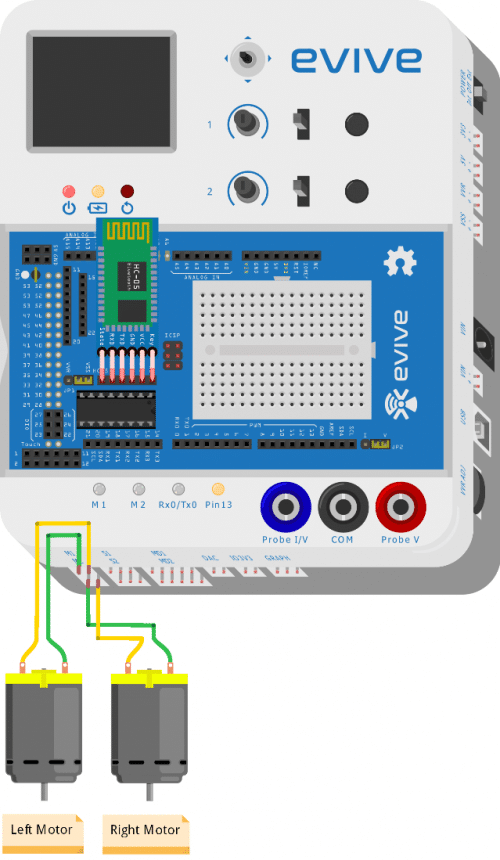
- Attach HC-05 Module on evive at its dedicated slot provided. You can clearly see the connections from the Connection Section Below.
- We are using Bluetooth HC-05 module for wireless connectivity.
- Thus, your shopping cart is now ready.
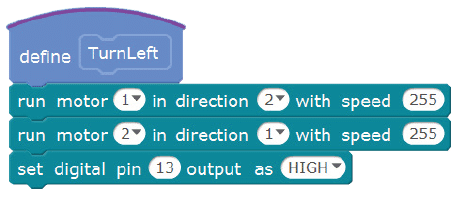
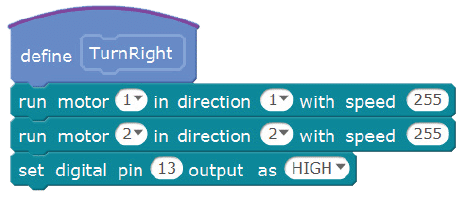
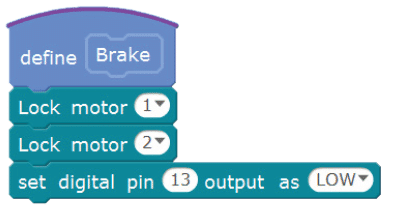
Logic and Flowchart
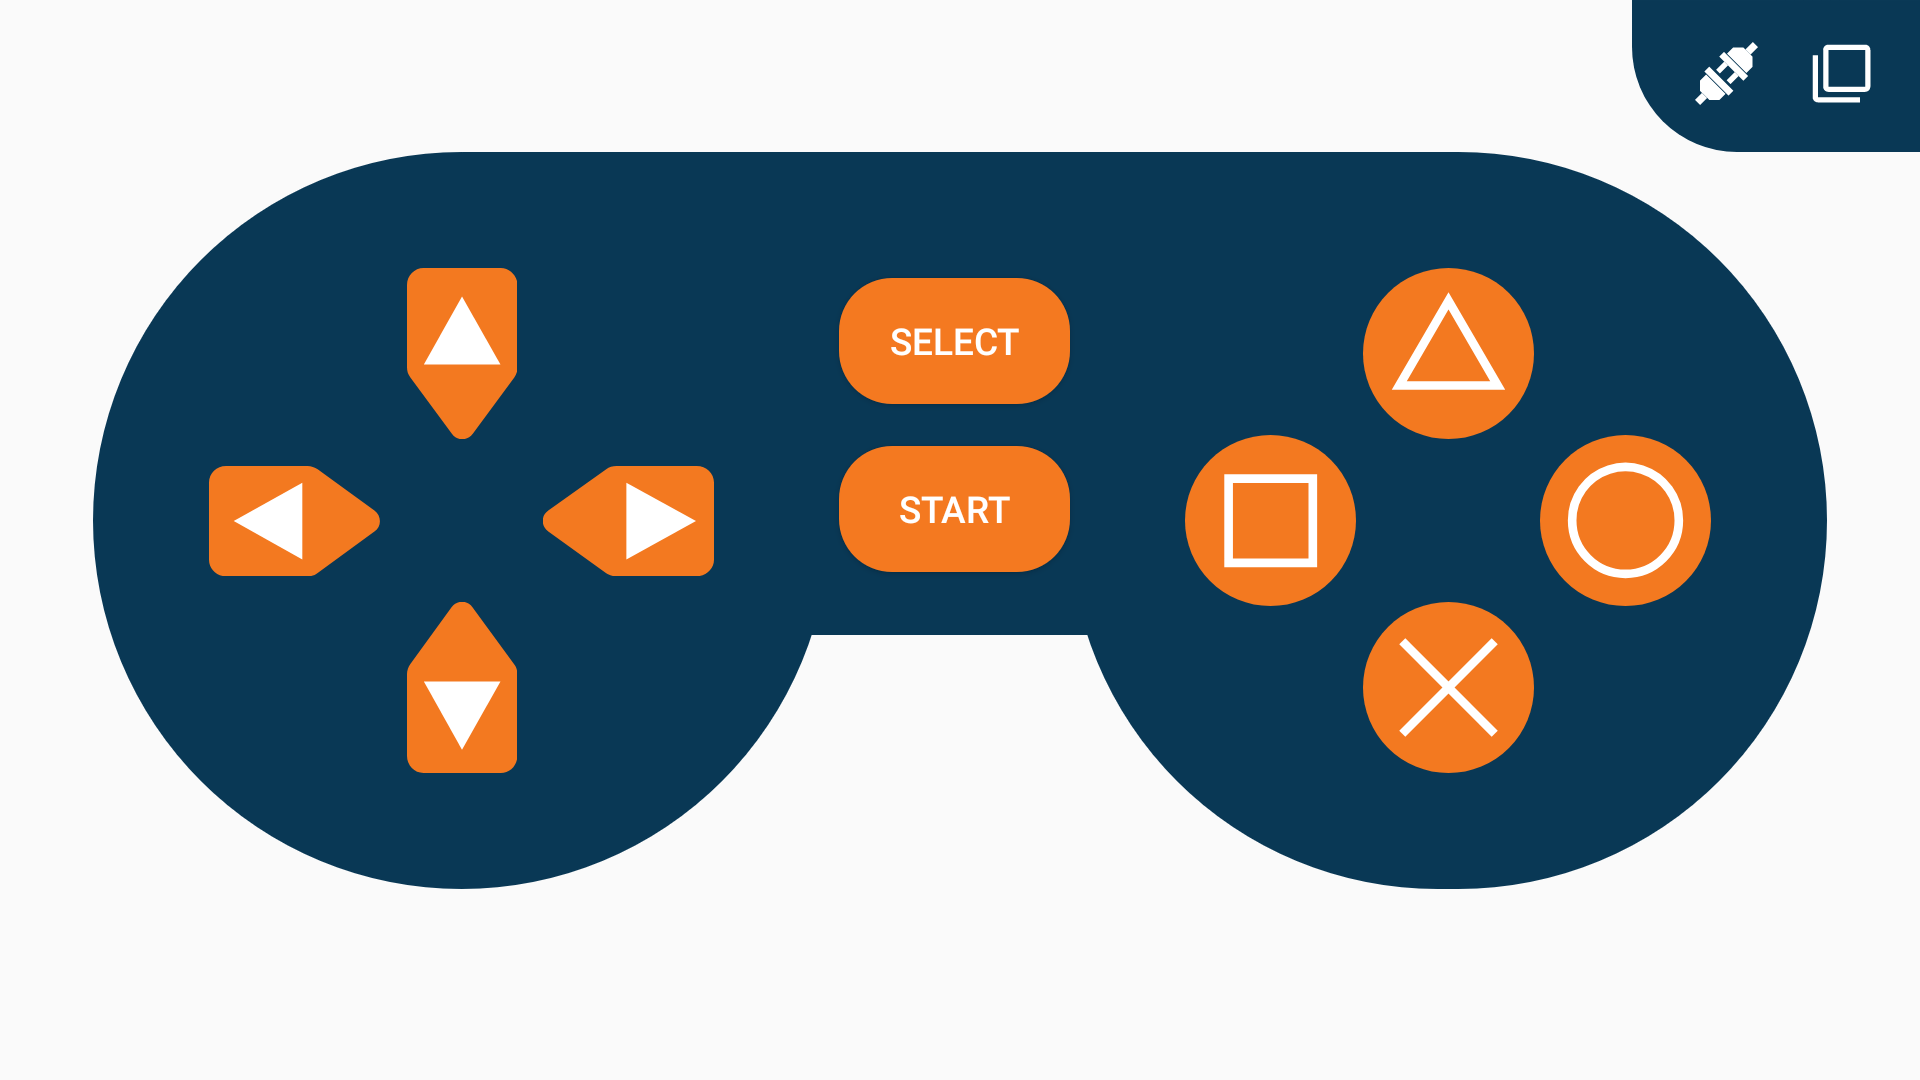
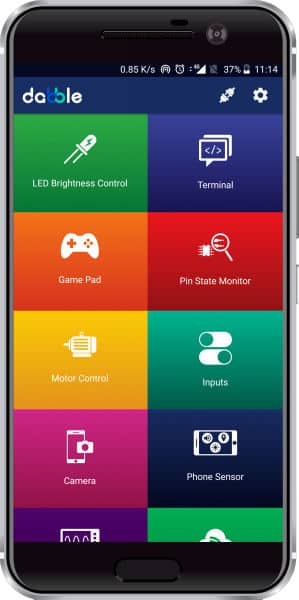
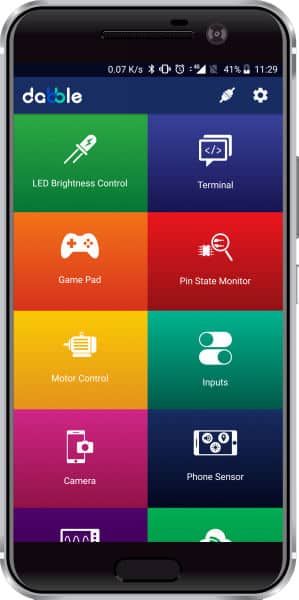
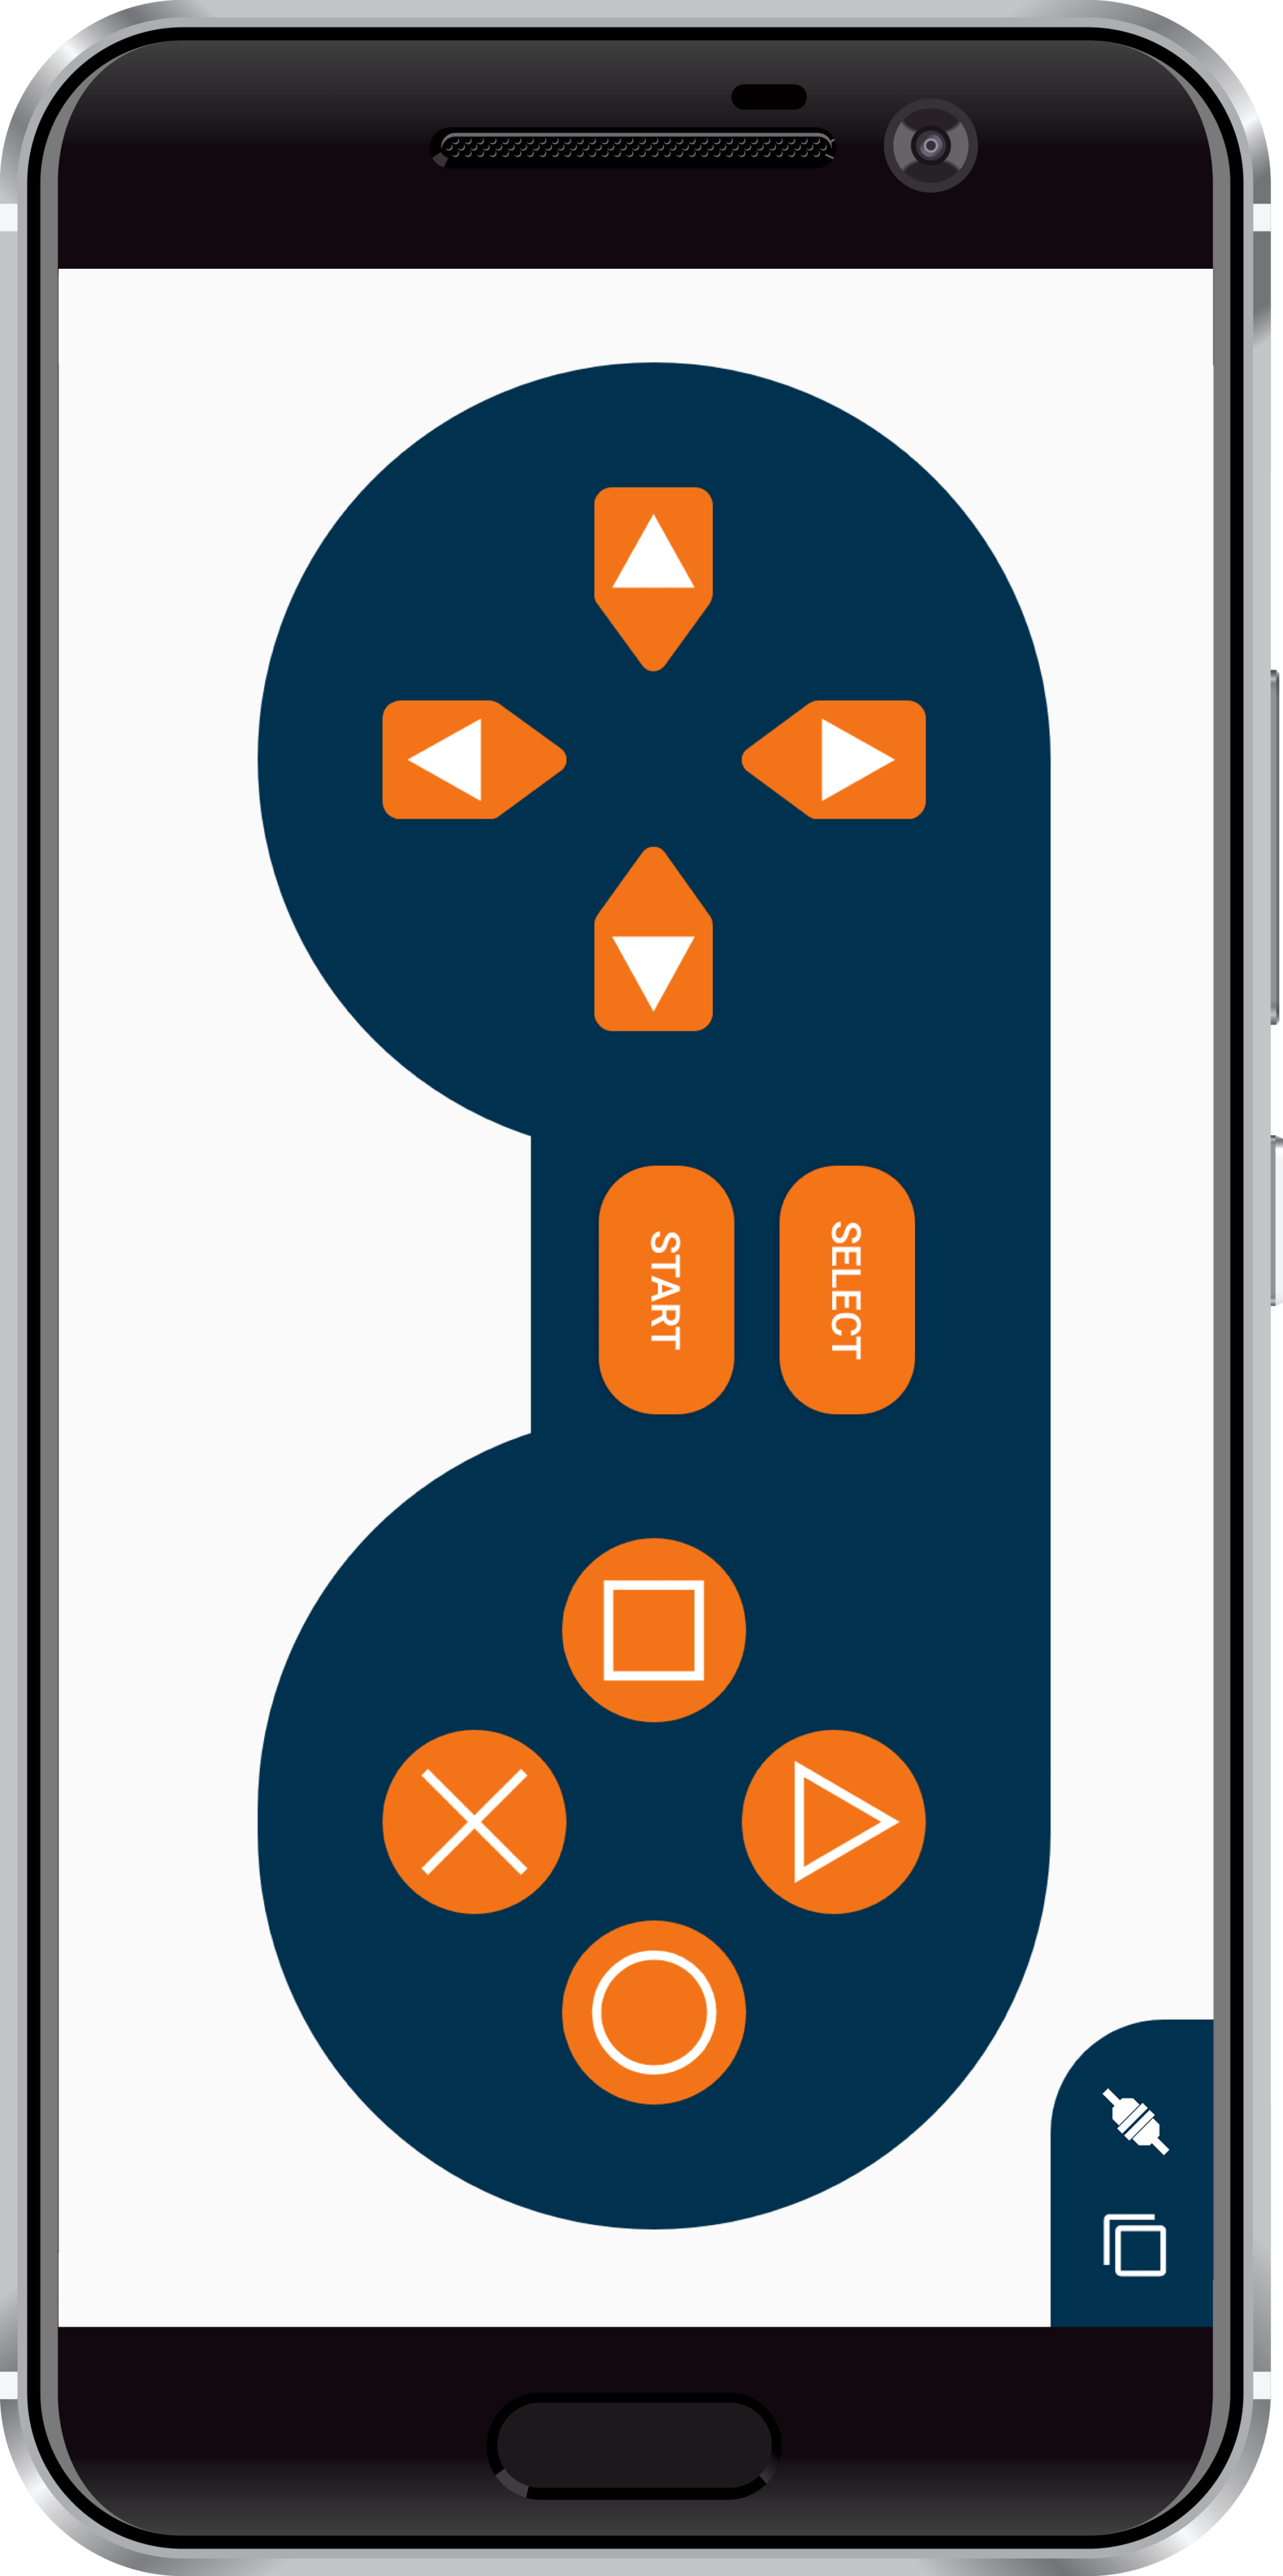
In this case, we are communicating wirelessly. The user gives instructions by pressing the buttons on the Gamepad module in Dabble, a project-making mobile application developed by STEMpedia. You can install it on your phone from Google Play.
The robot takes actions according to the button pressed.
For example, if Down is pressed the robot will move backwards; if none of the buttons is pressed, the robot will stop.
Below is the complete flowchart: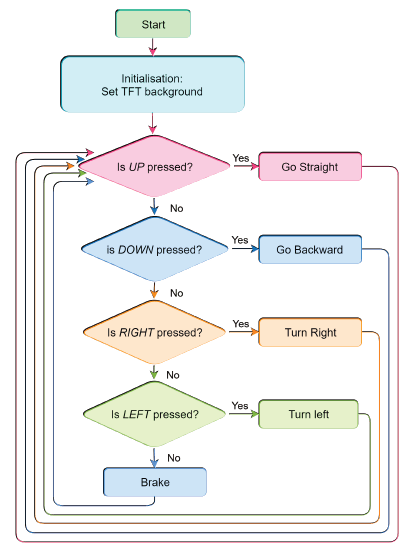
Circuitry:
For the Shopping Cart, we have to connect the Bluetooth module (HC05). In the following figure, you can observe where the Bluetooth module’s 6 pin connectors are plugged on evive.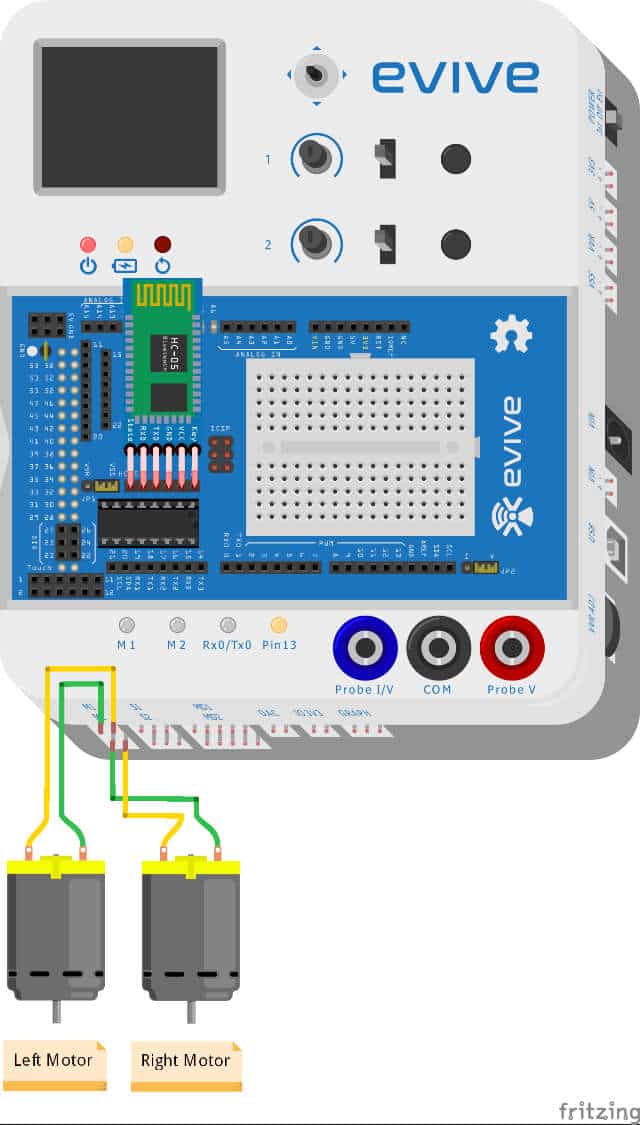

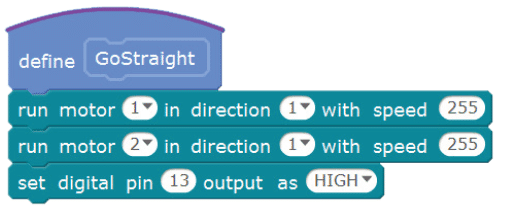
Scratch Script
The following image shows the Scratch Script which you need to upload to evive to control the Shopping Cartfrom our smartphone. We will assign the actions with respect to each button on the app. 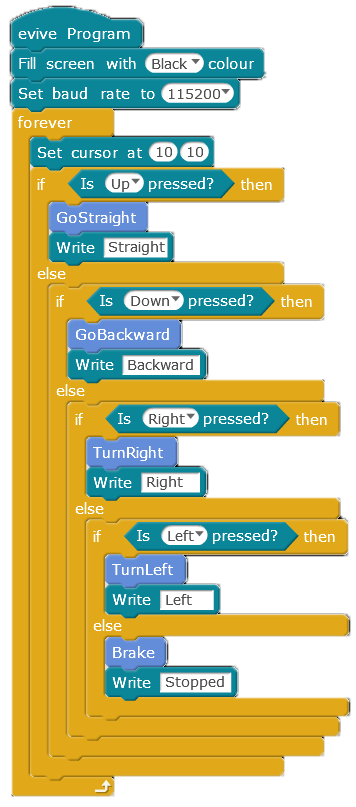

Connecting HC-05
To pair Dabble with the Bluetooth Module, follow the steps below:
-
Install the app and open it.
-
Then, pair it with the HC-05 Bluetooth module.
-
Open Gamepad. You can now control your robot using the keys of the GamePad.
Conclusion
With this, your DIY Smart Shopping Cartis ready! Next time you visit the mall, get ready for some attention as it makes heads turn when you pass by others!


 1-18 screenshot")


![[CODEAVOUR 2021] project demonstration video 4-12 screenshot](https://ai.thestempedia.com/wp-content/uploads/elementor/thumbs/CODEAVOUR-2021-project-demonstration-video-4-12-screenshot-q7ynxvlv2t918md2w9xsnjiaauhor82z0jm2g1in34.png "[CODEAVOUR 2021] project demonstration video 4-12 screenshot")


