
Introduction
Kids play games on Smartphones.
Men play games on PC, with a game controller.
But legends? Legends make their own game controller and then play!
Wish to be a legend? Then hop right in! We’re going to make a DIY Arduino Game Controller using which you can play so many games! You can defeat Bowser and rescue Princess Peach, you can help Pac-man eats as many Pac-Dots and many more!
So, what are you waiting for?
Ready. Set. Game!
Making of the Controller
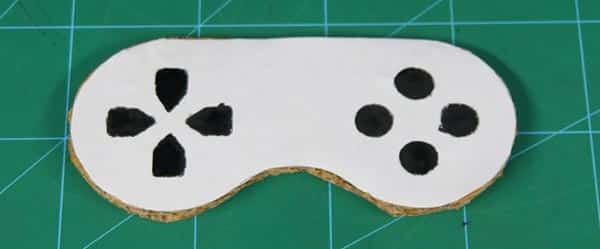
The controller will have the following design. You can save this image and take the print out. Or you can make one as you wish to.
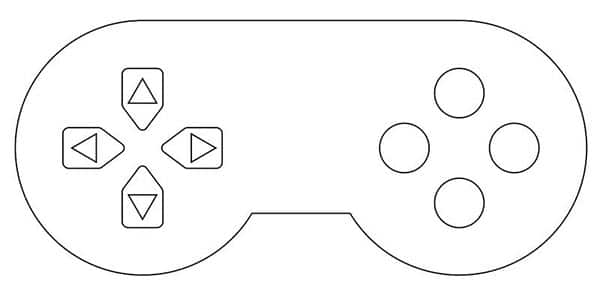
- Once you have the design on paper, take its cutout.

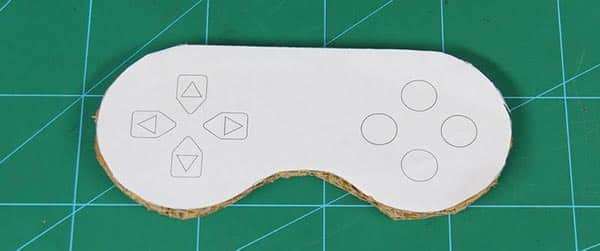
- Take the cardboard and cut it in the shape of the Controller with the help of the paper cutout.

- Thus the base of the Controller is now ready.
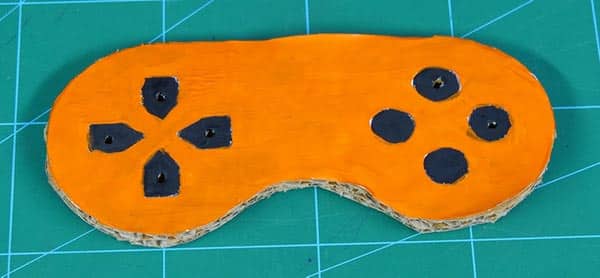
- Stick the paper cutout on top of the cardboard cutout.
- Now, one of the most important parts, coloring with the Conductive Ink or Electric Paint.
- We will next paint the buttons which we are going to use using electric paint.
- We will now cover the remaining Controller using the normal water paint.

- Next, to connect it to evive, we need Jumper Cables.
- We have combined two combined them to make it longer so that we can move the Controller freely. You can make it as long as you want.

- Take, male to male jumper cables and insert one of the ends of each jumper cables into the cardboard such that the ends come out from the front end.
- To fix the cables at its place, you can use hot glue to attach it to the cardboard.
- Finally, to make the whole button conductive, we will also paint the end of the jumper cable with the electric paint.
Now, the Game Controller is ready. It’s time for connecting the other ends to the evive.
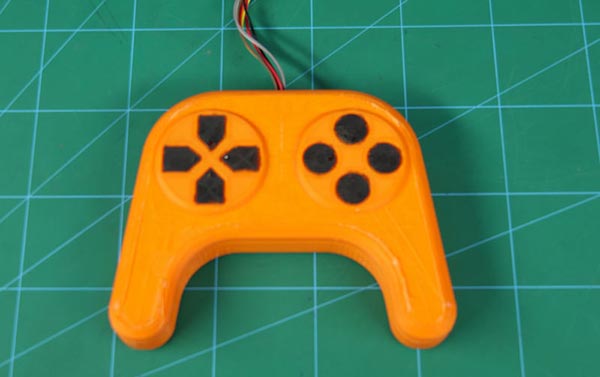
We have 3D printed the Game Controller for ourselves and painted the same conducting paint as we did on our cardboard controller. And attached the jumper cables similarly.
Working of Controller
You must be wondering, we will not be pressing the button actually, we will just be touching the buttons. How will we play the games?
Now, here is the secret of using the conducting paint.
One end of each jumper cable is connected to the evive’s capacitive touch sensor. Thus, when you touch the other end which is connected to the cardboard, the charge changes and the touch is being detected.
Now, due to the conducting paint all over the button as well as the pin, the signal is sent even when we do not touch the pin but the corresponding button.
The following figure shows the action performed when that respective button is pressed.

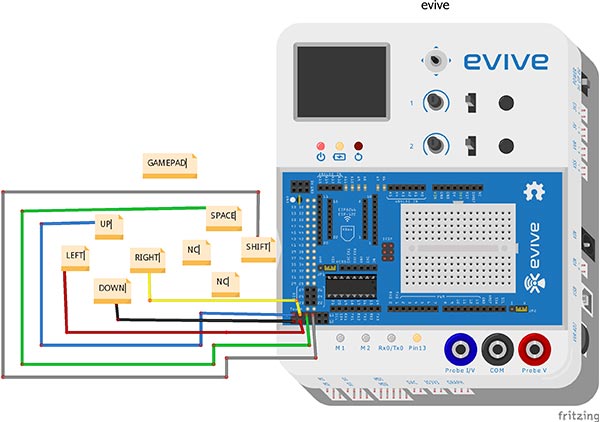
Circuit Diagram
The Pins of the Controllers are being connected to the Touch Pins of evive.

Code
Unlike other projects we will be using two platforms for coding:
- Arduino
- Processing
Here, we will not be interacting with evive only, but with PC too.
Once the key is pressed, Arduino assigns the number to it according to the code.
We use processing as the interface between Arduino and the PC.
Arduino then sends the signal number to Processing.
Eg., when we press UP key. Arduino sends ‘1.’ to Processing. Processing performs the action that it corresponds too.
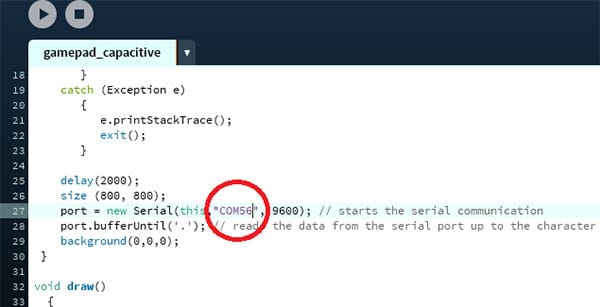
Make sure that you change the COM port in the processing. The COM port should be similar to the COM port in the Arduino.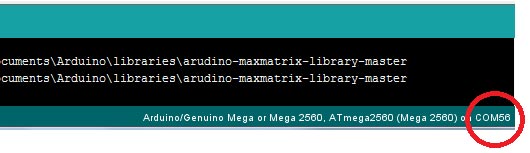
We have assigned the numbers as follows:
- UP
- RIGHT
- DOWN
- LEFT
- SPACE / JUMP
- SHIFT / SHOOT
The Arduino code is as below:
The Processing code can be downloaded from the code section below:
Conclusion
With this, your DIY Game Controller is ready! Now you can have double the fun playing your favorite games!