
Introduction
You might have seen a couple of attendance Systems around, but the one that we are going to make today is one of a kind. In this project, we’re going to show you how to make a face recognition-based attendance system in PictoBlox AI using micro: bit.
We will use one of the buttons on micro:bit, i.e. button B to feed a new image into our system. To scan a face, we will use the other button – button A. Once the system matches the face detected with the sample image, it will display the name of that person on micro:bit’s LED matrix. and add the time stamp to an Excel sheet.
Let’s begin.
Prerequisites
To make this attendance system all you need is:
- A laptop or a computer
- Camera/Webcam
- The latest version of PictoBlox (Download the latest version from here)
- A good Internet connection.
- Micro: bit
- USB cable
Setting Up the Project
- Open PictoBlox.
- To work with the latest extensions you need to keep two things in mind.
- That your computer is connected to the Internet
- You need to log in to PictoBlox.
- Click on the Add Extension button and choose Face Detection extension and wait for a little while till the models get loaded.
- Now to log the timestamp of attendance, we need to add the Data Logger extension.
- Click on the Add Extension button again and choose Data Logger from the list. This extension lets you generate a CSV file according to your requirement and store data in it.
Connecting the micro: bit with the computer
- Connect your micro: bit using the USB cable to the laptop. Now, install the Scratch link from here.
- Click on the connect button and select the appropriate device.
Setting Up the Stage
- Let’s first set up the stage. Click on the Choose a backdrop button and select the backdrop of your choice. Here we will be using the blue sky backdrop for the same.
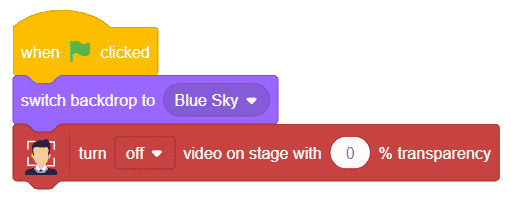
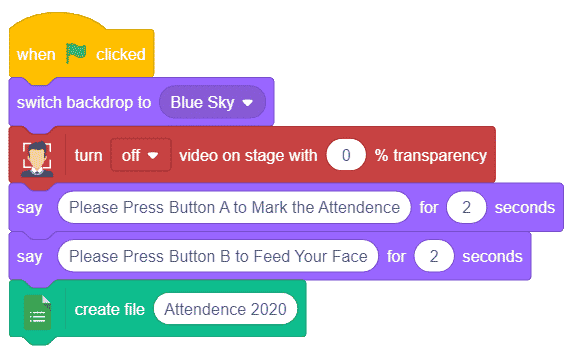
- Now, on pressing the green flag, the default backdrop which is the Blue sky backdrop should come, thus, place when flag clicked hat block from the Events palette and place switch backdrop to block below it. Make sure that Blue Sky is selected from the backdrop.
- Also, we first need the camera to be turned OFF, thus, from the Face detection palette, use the turn on video on stage with 0% transparency block and choose OFF from the dropdown menu.
- Now, we will make Tobi give instructions to the user.
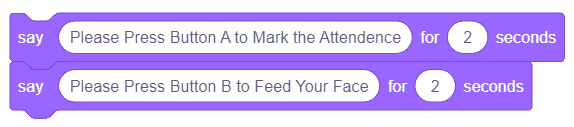
- Thus, place a say block from the Looks palette.
- To mark the attendance, we need the user to press the Button A on the micro: bit. Thus write “Please press Button A to mark the attendance” in the space given.
- Now, to instruct the user to press Button B to feed the face, duplicate the say block and write “Please press Button B to mark the attendance” in the space given.
- Now we will create a new file to store the attendance data. From the logger palette, choose a create block we will give it a name “Attendance 2020”.
The final script looks like this:
Making the Attendance System Store the Image
We will first write the script to store the sample images of whose attendance we need to track. Thus, let’s first recognize the image from the camera feed and store them in the computer’s memory. As soon as we Button B on the micro: bit the data should be stored on the computer’s memory.
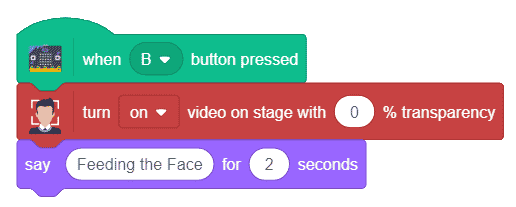
- Thus, from the micro: bit palette drag and drop when the B button pressed block.

- To analyze the images from the camera, we need the camera to be ON. Thus, from the face detection palette, place a turn on video on stage with 0% transparency block.
- Next, we will make Tobi say, “Feeding the Face”, thus place a say block from the Looks palette.
- Similarly, we will display “Feeding…” on the LED matrix too, thus, from the micro: bit palette, place display text block and write “Feeding…” in it.

- Next, we will store the images of the user into memory. Thus, from the Face detection palette, place adds class 1 as stage block. Select 1 from the first drop-down and stage from the second. To identify the user as his/her name, write the user name into the space given.

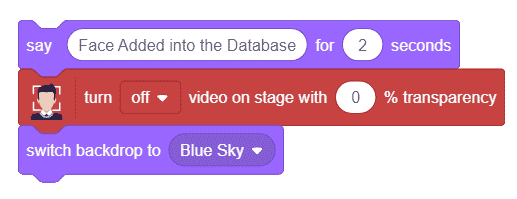
- Once the face is added into the memory, we’ll make Tobi say “Face Added into the Database” using the say block from the Looks palette.
- Next, we need to turn OFF the camera and come back to the default backdrop. Thus, from the face detection palette, place a turn on video on stage with 0% transparency block, and choose OFF from the drop-down menu.
- Finally, to come back to the default backdrop, place switch backdrop to block from the Looks palette and choose Blue Sky from the drop-down
With this, the script to enter the face into the memory for our face-based attendance system is completed. 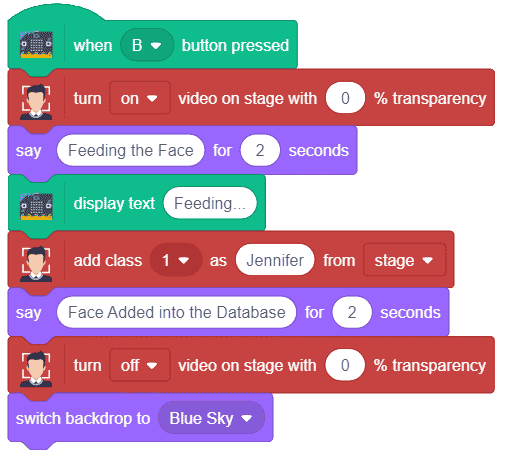
Marking the Attendance using the Micro: bit’s button
- To execute the program, whenever Button A is pressed on the micro: bit, thus, from the micro: bit palette, drag and drop when A button pressed hat block.
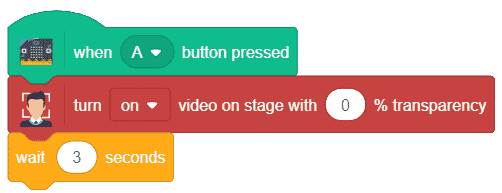
- As we want to verify the image from the camera feed, we will make sure that the camera is on, thus add the turn on video block.
- Add a delay of 3 secs using the wait block from the controls palette.
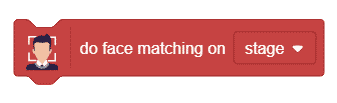
- We need to match the faces on the stage thus, drag and drop the do Face matching on stage block.
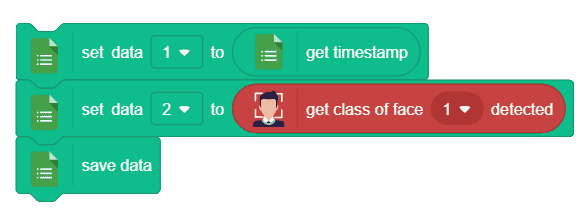
- Now to store the data we will add blocks from the data logger extension. To store the timestamp, place a set the data 1 to block and drag and drop the current timestamp block into the space given. The get current timestamp block contains all the date and time-related information.
- Now in the second data, we will store the class of recognized face which contains the name of a person whose face is recognized.
- Now that data has been loaded, but to permanently save the data onto the file we need to use the save data block.
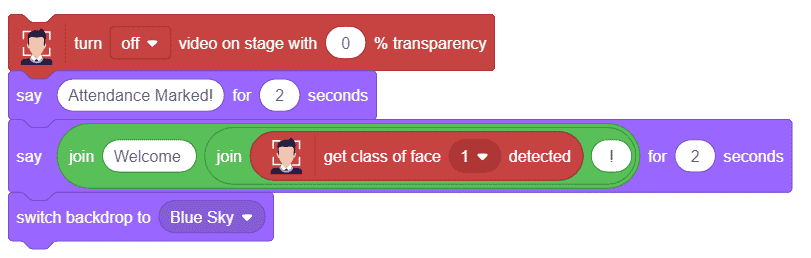
- Now, if the faces are matched, we need to print the name of the user on the LED matrix, thus, from the micro: bit palette, place display text block and drop the get class of face detected block in the space given.


- Also, we would like Tobi to inform the user that the Attendance is marked and greet. Thus, place a say block from the Looks palette and write Attendance Marked in the space given.
- Now to greet the user we want Tobi to say welcome along with the user’s name.
- Thus, from the Operators palette, place a join block, write “Welcome “ in the space in the first join block, drag and drop another join block into the second input. Place get class of face detected in the first input of the second join block and write “ !” in the second input of the second join block.
- Finally, let’s switch the backdrop to the default. Thus, place switch backdrop to and choose Blue Sky from the drop-down menu.
With this the script of our face-recognition-based attendance system is complete. 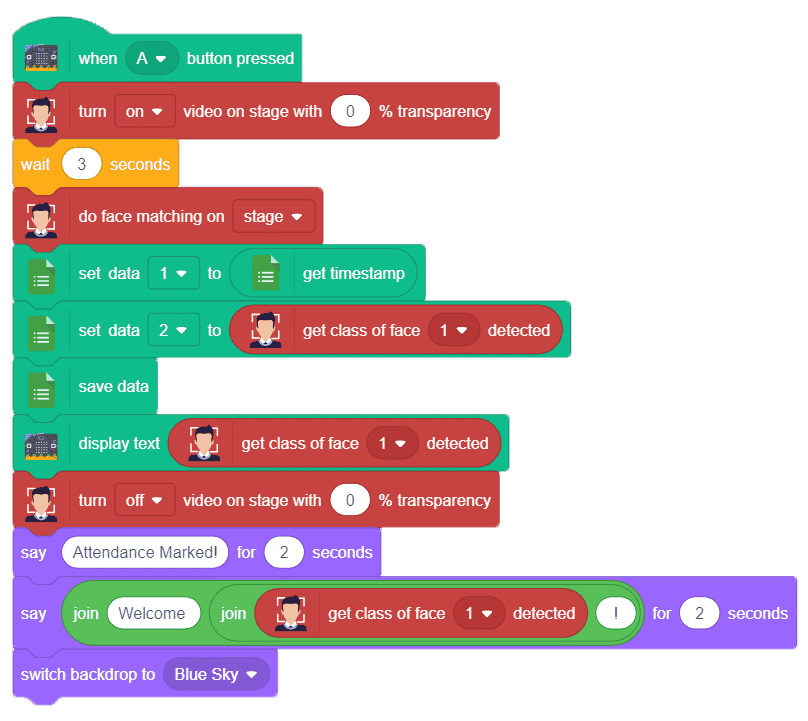
Conclusion
This project demonstrates how to create a simple yet powerful face recognition-based attendance system in PictoBlox AI using micro:bit. By the end of this project, you were able to understand how to use the Face Detection extension and the Data Logger extension to build an attendance system powered by face recognition technology. This project can also be extended further by adding more features to it as per your requirements. With this, the project is complete.


