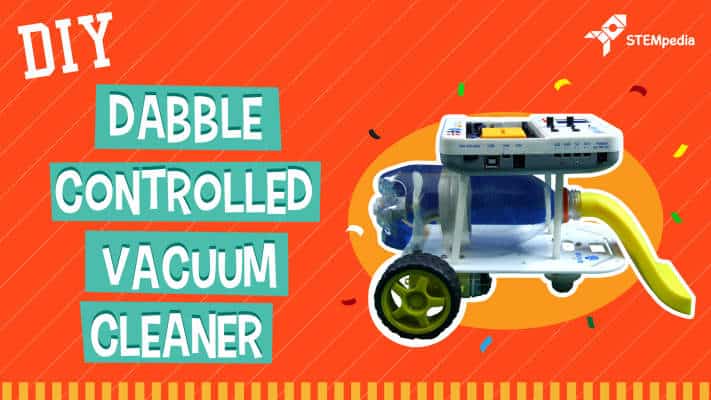

Introduction
Cleaning time isn’t quite enjoyable, is it? Especially when you’ve to leave the cool project with evive you’re making in the middle. So, how about transforming this activity into another exciting project?! Yes, sir! We’re going to make a vacuum cleaner all by ourselves from scratch using our hero, evive, some 3D printed parts, some wheels and motors, and of course, loads of DIYing!
Ready to make cleaning something to look forward to? Let’s get to it!
Making
Take a 250ml bottle and remove its label. You need to cut the bottle from into three parts. We will be using the bottom part and the upper part.
Take the bottom part and make 5 holes at an equal distance using a soldering iron or the glue gun.
In the center of the bottom part, make comparatively bigger size hole, as we are going to fix the DC Motor into this.
Once you have inserted the DC Motor fix it using hot glue. Make sure that you keep the shaft of the motor inside.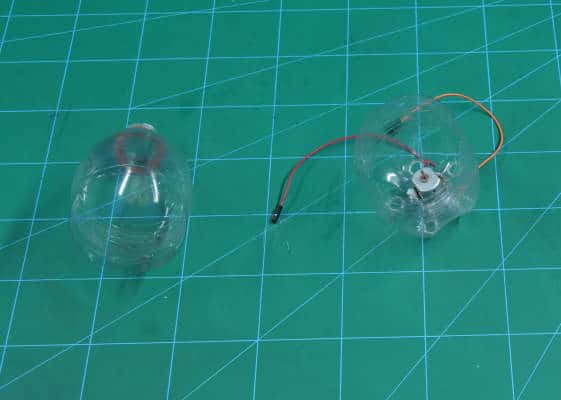
Take a fan and attach it to the shaft of the motor.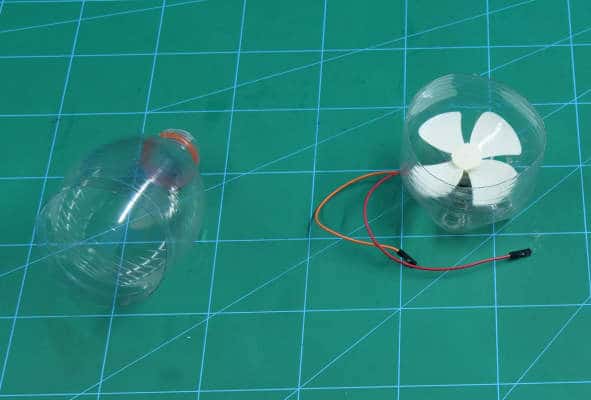
Now take the first or the top part of the bottle. At the bottom side of that part, attach a double-sided tape.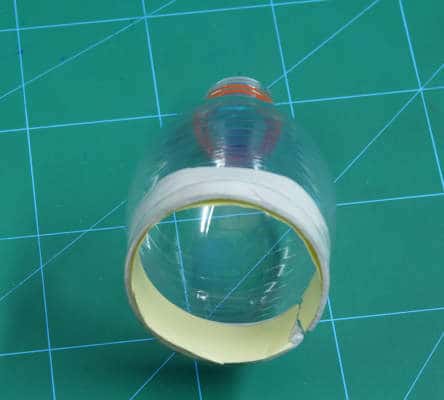
We have 3D printed filter. Fix it there on the double-sided tape. Fix the bottom part of the bottom to its top part using double-sided tape.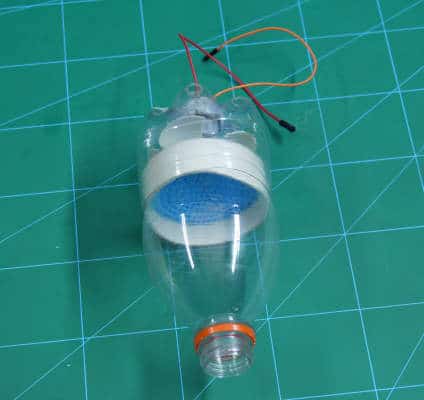
We need to fix this assembly onto the 2-wheel robot. Thus, we will be making one.
Take the base plate or chassis and attach two motor mounts at its base using M3 bolts and nuts.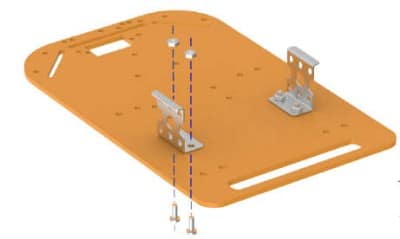
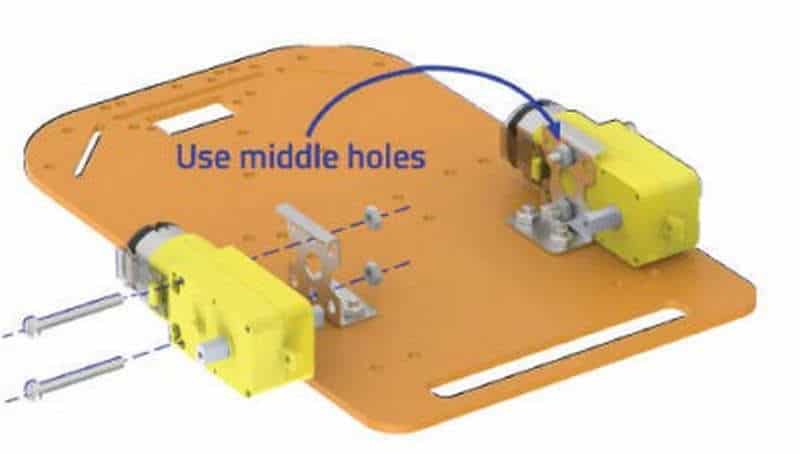
Fix the DC Motor onto these motor mounts. Fix the wheel onto the motor shaft.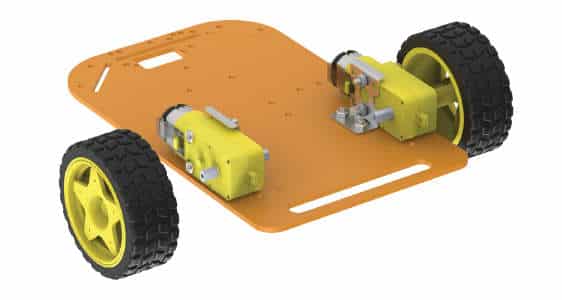
Now we need the third support, thus add a caster wheel and fix it using 15mm standoffs and M3 nuts.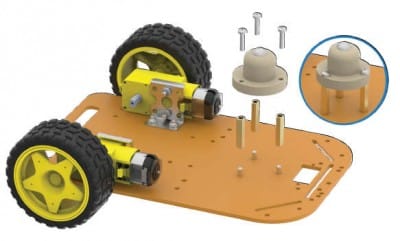
We need to place the evive. Take evive and attach 3 standoffs of 15mm at each side.
Fix the standoffs onto the chassis using M3 nuts. We have 3D printed vacuum head. Attach it to the nozzle of the bottle.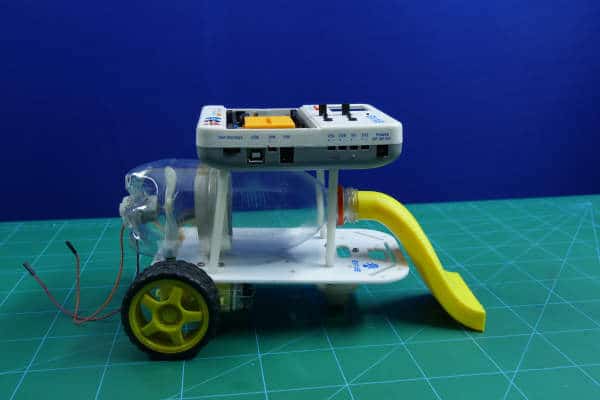
Thus our assembly is complete.
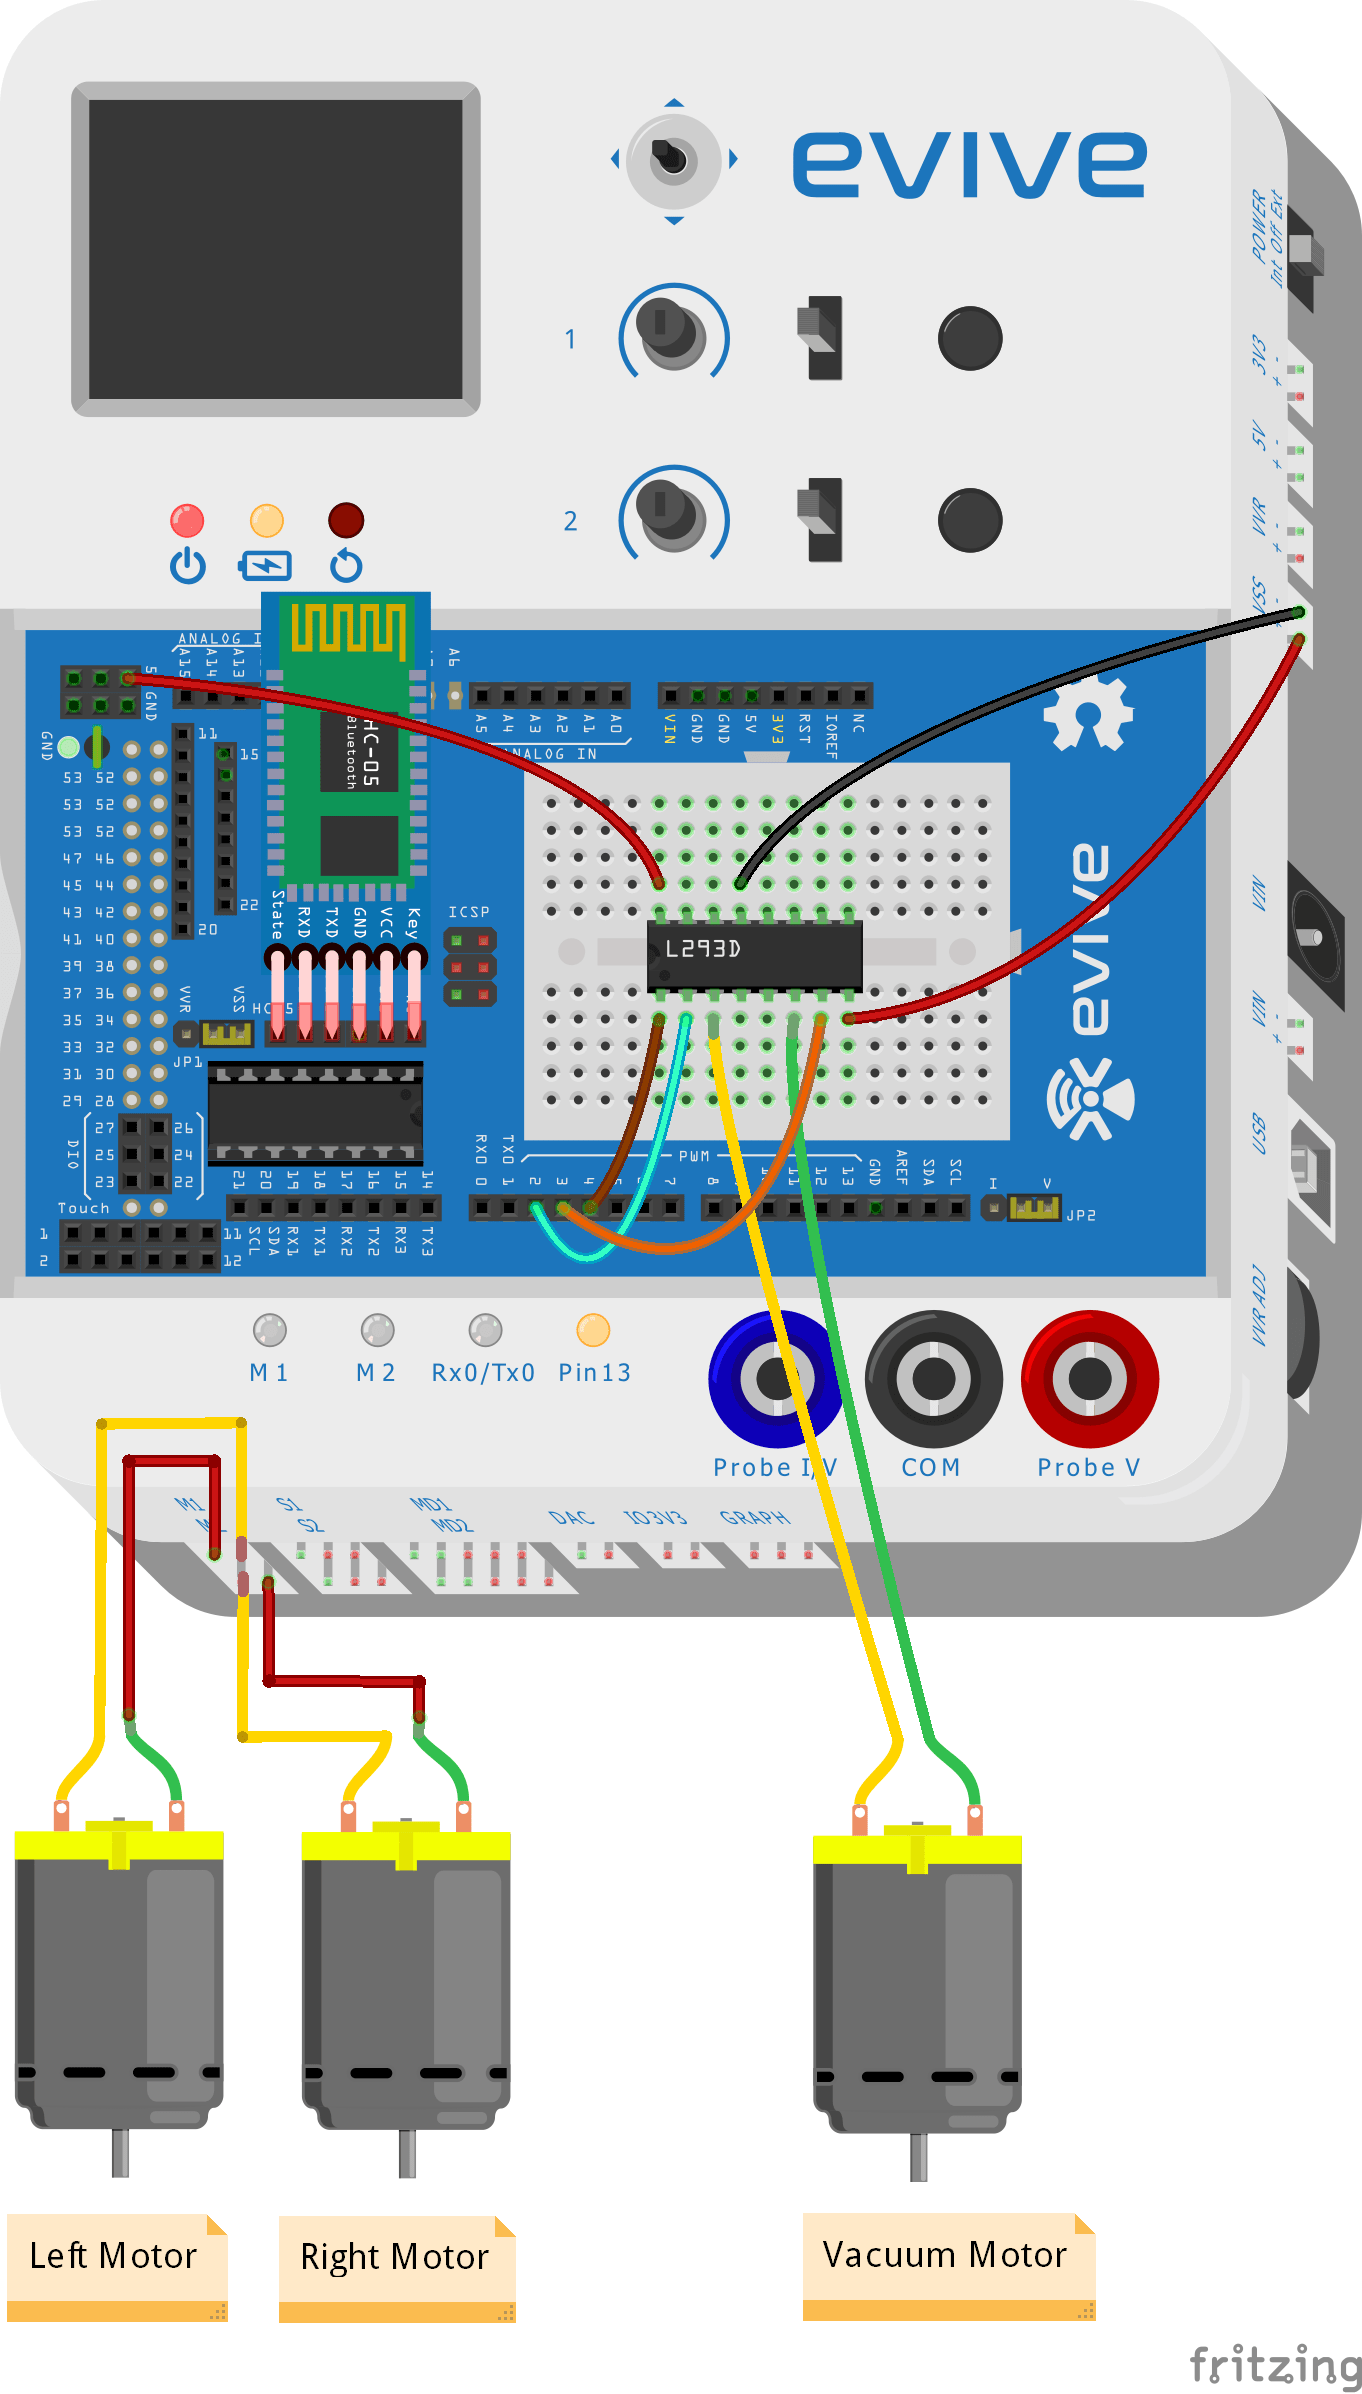
Connections
Make the connections as shown un the below figure:
Code
PictoBlox is a graphical programming software based on Scratch 3.0 that makes learning how to code easy and fun. It allows you to interface and control evive with your computer and even uploads code to it.
You can download PictoBlox from here.
Upload the following Script to evive:
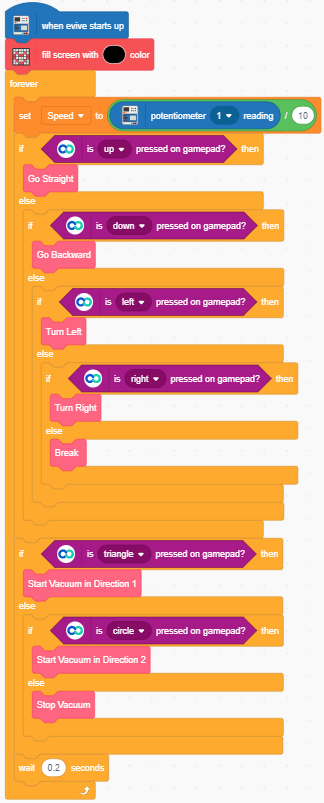
Logic
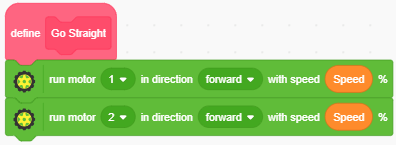
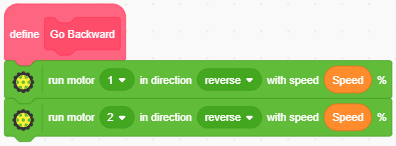
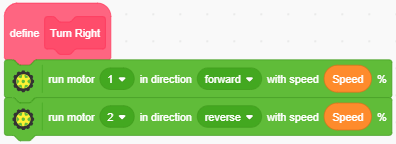
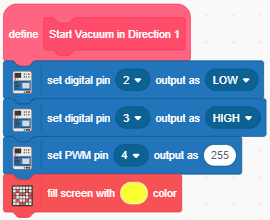
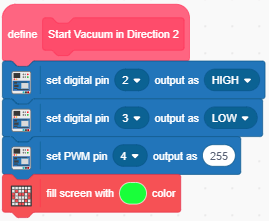
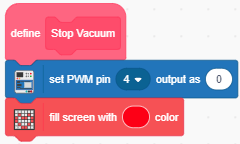
When the DC motor rotates, it makes the fan rotate. The fan creates the vacuum in the bottle. The vacuum thus created is used to take the dust from the vacuum head into the bottle. The filter is used so that the dust cannot go into the motor compartment.
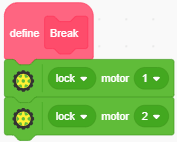
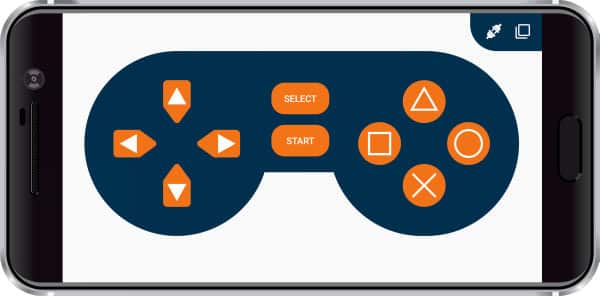
You can control the movement of the vacuum robot.
The left control keys of the gamepad:
- Top- Move Forward
- Bottom- Move Backward
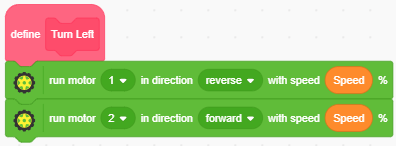
- Right- Turn Right
- Left- Turn Left
The Right control keys are used as:
- Triangle- For starting the vacuum in Dir1
- Circle- For starting the vacuum in Dir2
Conclusion
With this, your DIY Vacuum Cleaner is ready!