In today’s digital era, coding is becoming an essential skill for students, not just for building software but for developing logical thinking and creativity. However, traditional coding methods can often feel complex and intimidating for beginners, especially young learners who are just starting their journey.
PictoBlox solves this problem by introducing a visual and interactive way of learning programming. Instead of writing long lines of code, users can simply drag and connect blocks to create programs. This Scratch-like approach removes the fear of syntax errors and allows learners to focus on understanding how logic works.
What makes PictoBlox even more powerful is that it goes beyond basic coding. It allows users to create animations, games, and interactive stories while gradually introducing advanced concepts in a simple way. In this blog, you will learn how to use its Blocks and Junior Blocks environments to build your own animation step by step.
Storytelling Through Animation
Storytelling is one of the most powerful ways to express ideas. When combined with animation, it becomes even more engaging and interactive.
Instead of just writing a story, students can:
- Show characters moving and talking
- Add expressions and actions
- Create scenes with different backgrounds
- Use sound and timing to enhance emotions
This makes the story more immersive and helps learners connect better with their own creations.
Animation also encourages students to think about:
- Sequence of events
- Character behavior
- Scene transitions
- Timing and interaction
What is Block-Based Coding?
Block-based coding is a visual programming method where instructions are represented as blocks that can be dragged and connected together. These blocks fit like puzzle pieces, ensuring that the program is logically correct.
This approach helps learners:
- Avoid syntax errors
- Focus on logic and flow
- Learn programming in a fun and interactive way
Instead of worrying about writing correct code, users can concentrate on how their animation or story should work.
Junior Blocks Environment
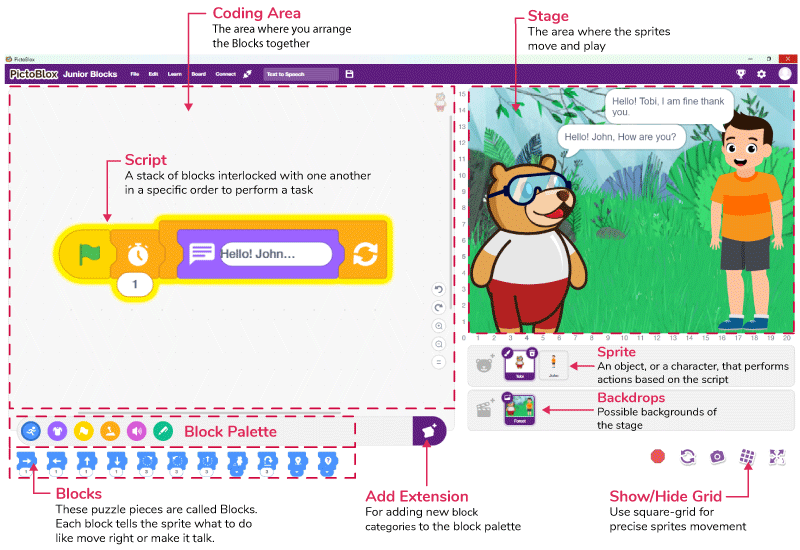
The Junior Blocks Environment is specially designed for beginners and younger students who are new to coding. It simplifies the overall experience by providing bigger blocks, fewer options, and a more visual interface.
Instead of overwhelming users with too many choices, it focuses on core concepts like sequencing and basic logic. This allows learners to understand how coding works in a playful and stress-free way.
With Junior Blocks, users can:
- Create simple animations
- Build small stories
- Experiment with movement and sound
It acts as a strong foundation, making it easier to transition to the full Blocks Environment later.
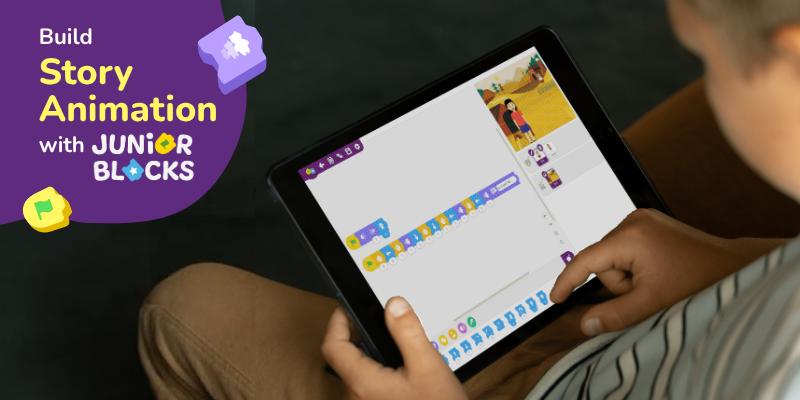
Build Your Own Story Animation with Junior Blocks
Creating animations is one of the most engaging ways to learn coding because it combines logic with creativity. Instead of just writing instructions, you get to see your ideas come to life on the screen.
To build an animation, you need a few basic elements:
- A sprite (character)
- A backdrop (scene)
- Movement and action blocks
- Sound for interaction
Let’s now create a simple animation step by step.
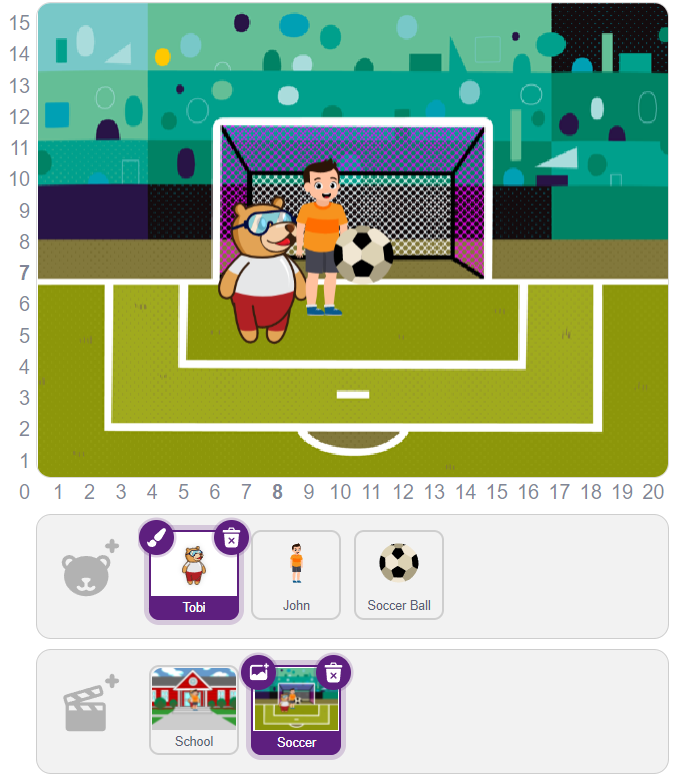
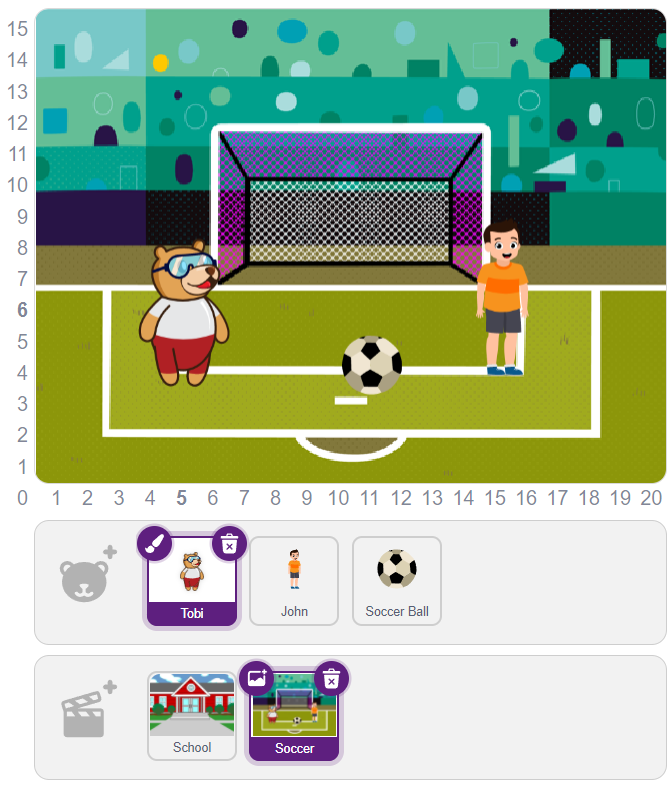
Activity: Tobi and John Play Football
For this activity, we’ll need two different backdrops in two different scenes, one for school and another one for the football ground, and then three sprite characters “Tobi”, “John” and “Soccer Ball”
Scene 1 – Setting Stage for Tobi and John Talking
- Open the PictoBlox application on your device.
- Now, Select the Junior Blocks from the Block Coding section.
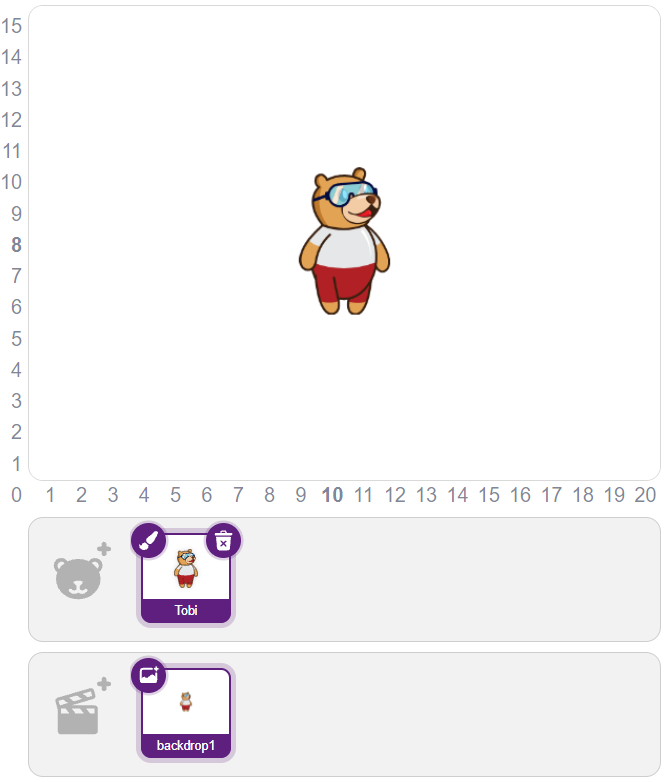
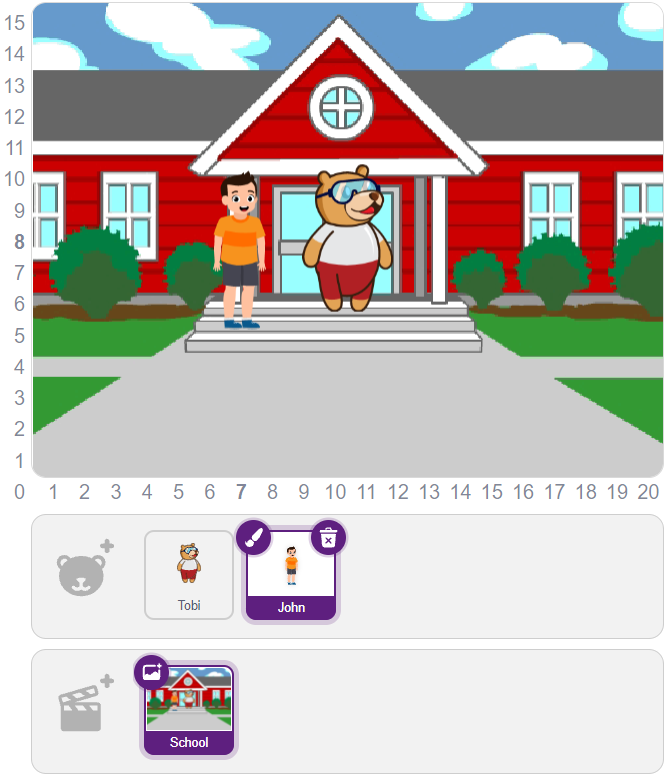
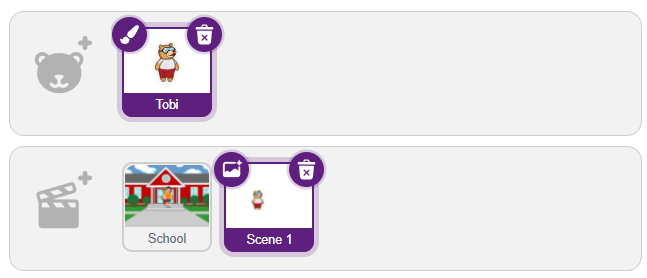
- Now, you’re on the main screen where you’ll find a character Tobi already added to the screen on an empty stage – Clear Backdrop (backdrop 1).
- Let’s quickly add a backdrop first by clicking on the backdrop icon located at the top left of the scene, to give a cool background.
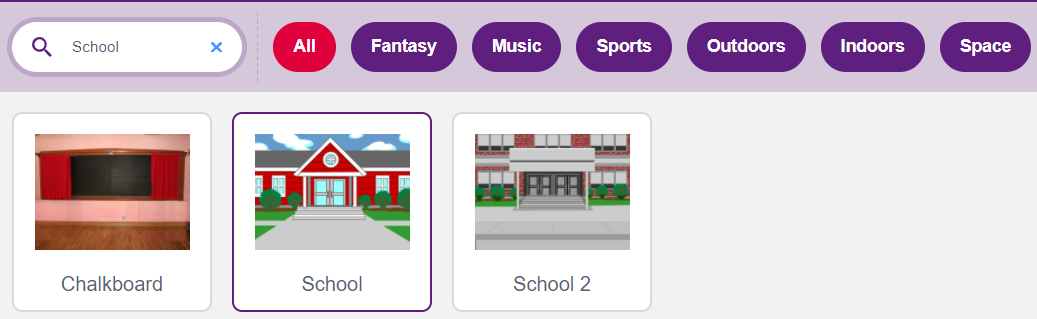
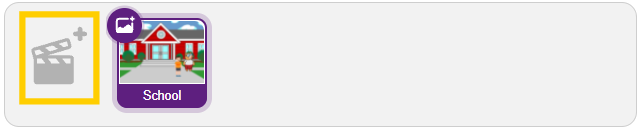
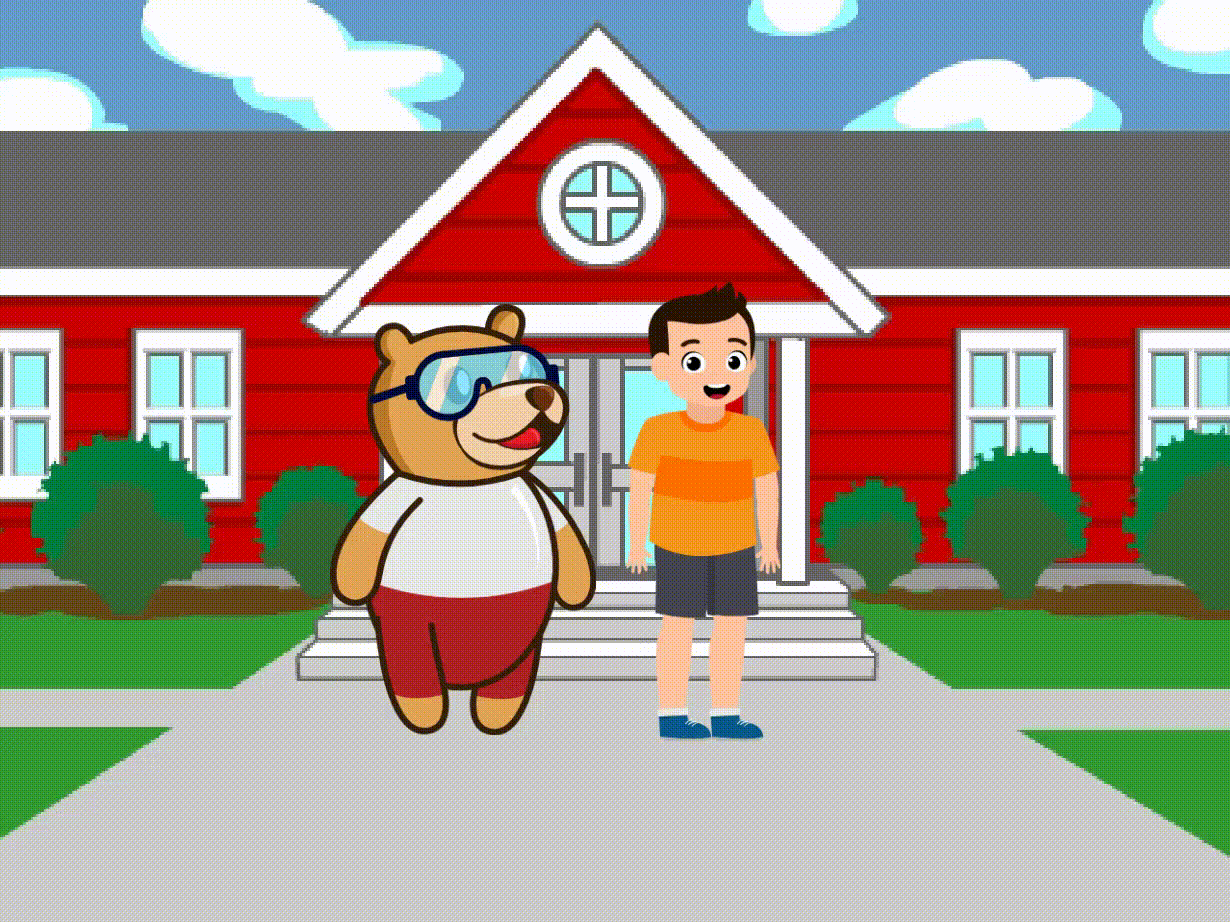
- Select your desired backdrop. Let’s add “School”.
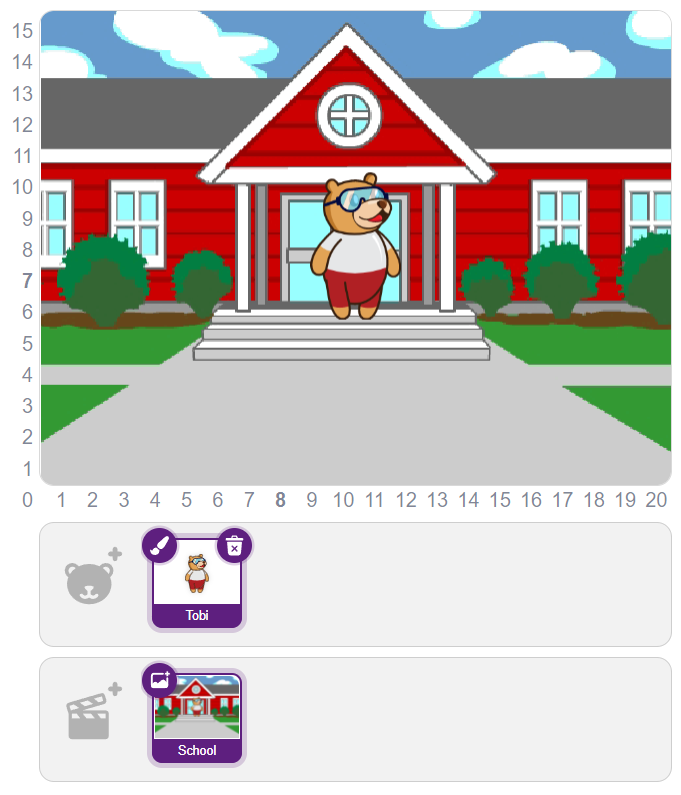
- Once the backdrop is selected your screen should look like the picture below.
- Now, it’s time to introduce another character John, so we make a story. To add another character, click on the “Choose a Sprite” option on the left side of Tobi as shown in the picture below.

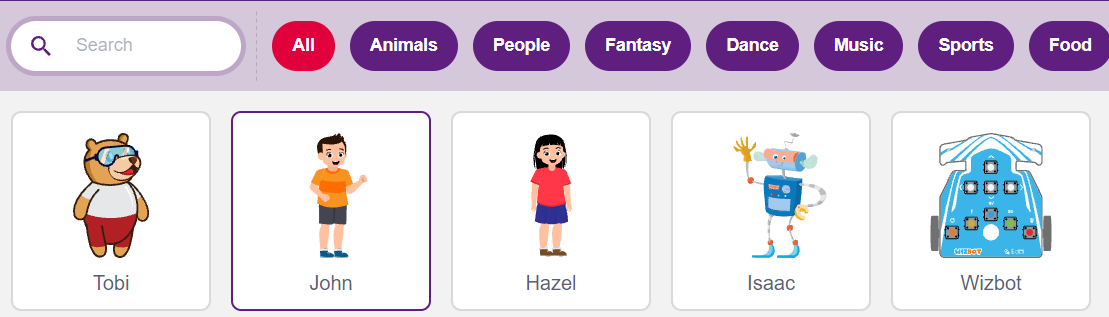
- On the “Choose a Sprite” Screen you’ll be able to see multiple characters. In this case, select John.
- Now, that we’ve all our requirements on the stage for the first scene, it’s time to modify them according to the situation/environment we need.
- Now, you can drag and drop your character(s) by selecting them. Place them on the stage according to your requirements.
- If you wish to change your character’s size, you can do it by selecting Grow & Shrink Blocks from the Looks Palette.

Let’s Code
Now, that our environment setup is done for the first scene let’s start to code.
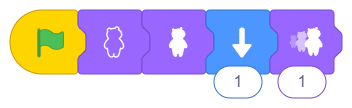
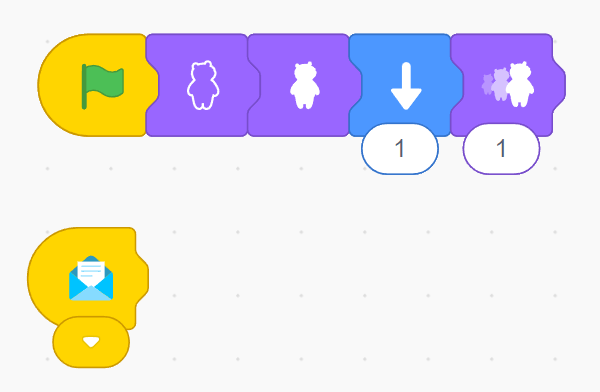
- Select John and go to the Looks Palette and then drag and drop Hide & Show blocks on the main screen, because we want John to look like he’s coming out of school. So, we’ll hide John using the Hide block and then Show him like a pop-up.

- Connect the Hide block first then Show. Once it’s done go to the Motion Palette, drag & drop Down the block, and attach it to the end of previous blocks. By this, as soon as the character becomes visible it comes a step down making it look like John is coming out of school.

- Now, from the Looks Palette add a Grow block. It will make it look like John is coming closer and hence its size is increasing. If you want to execute this by clicking on the Green Flag – Go, add a green flag block – Start from the Events palette at the start of the previous blocks.
- Repeat the Steps 3-5 for Tobi as well.

- Let’s again select John because we want John to start the conversation with Tobi. So, Drag and Drop the Say block from the Looks Palette and the Wait block from the Control Palette and arrange them as shown in the Picture below.

- After the conversation from the side of John is finished, we don’t want to continuously display the last printed message. So, again we will add a Say block at the end from the Looks Palette, but this time keep it empty – with no message inside.

- Now, the conversation from John’s side is completed and we want Tobi to reply to him. To reply, Tobi should get to know when John is finishing. So, we will be sending a message from John to Tobi. For this, we will use the Send start message block from the Events Palette.

- Drag and Drop the Send Start message block at the end of the previous block statements. After, adding click on the drop-down arrow in the Send start message block and select a specific color (for this case Light Blue).
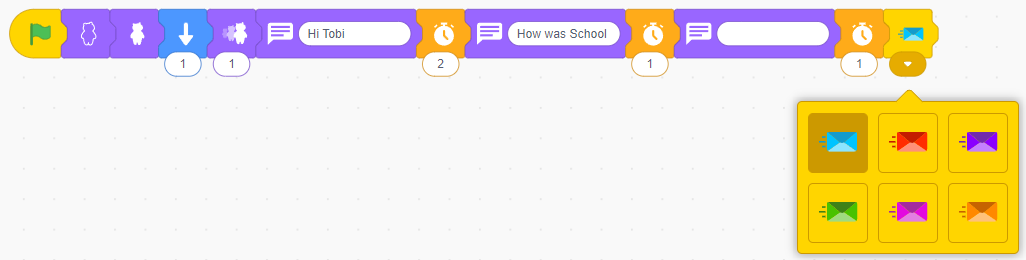
- Now, let’s select Tobi, and in the coding area drag and drop the When message received block from the Events Palette separately (Don’t add at the end of previous block statements, Obviously you can’t as it is a hat-shaped block😉). Don’t forget to select the same color that we’ve selected in John in Send start message.
- Now, we will add multiple Say blocks from the Looks Palette and multiple Wait blocks from the Control Palette and arrange them properly as shown in the picture given below. At last, we’ll also add an empty message to erase everything when the communication is done!

- Once the conversation is done, we can make them both move together to the football ground. To do this drag and drop a Send start message block with a different color Red for this case from the Events Palette and add it to the right of the empty Say block after a Wait of 1 second.

- Once a message is sent to John, we can move Tobi. Add a Wait block from the Control Palette, and then a Forward block with 10 steps from the Motion Palette.

- Now, let’s move back to John. Add a When message received with a red color from the Events palette. Now let’s reply to Tobi using the same step of adding say and wait blocks. Finally, we will move John too!

The conversation between John and Tobi is completed and they are moving towards the ground to play football, but wait where’s the ground? Don’t worry about adding the ground backdrop as another scene where both the characters will play football (3rd sprite).
Scene 2 – Setting Stage for Tobi and John playing Football
- So, let’s create another scene. To do this click on the big gray icon on the left of the school backdrop.
- As soon as you click on the icon a new scene is created named “Scene 1” but you’ll also notice that except for Tobi our second character John is not there and even there’s no backdrop in this scene! Yes, because we’ll need to add characters to this scene again.
- By clicking on the icon before Tobi add “John” and a new Sprite character “Soccer ball”.

- This time add a backdrop of “Soccer” similar to what we’ve done in Steps 4-5 of setting the stage for Scene 1.
Let’s Code
Now, that you’ve added all the requirements to the second scene you can adjust the stage environment accordingly.
- Before moving further with scene 2 let’s go back to scene 1 and add a trigger to switch the scene to the second scene. So, the last action in the first scene is performed by John so at the end of that block statement drag and drop the Change scene block from the Control Palette.
- Add a Change scene block at the end of the previous block statement by selecting the appropriate scene, for our case, it’s “Soccer”.


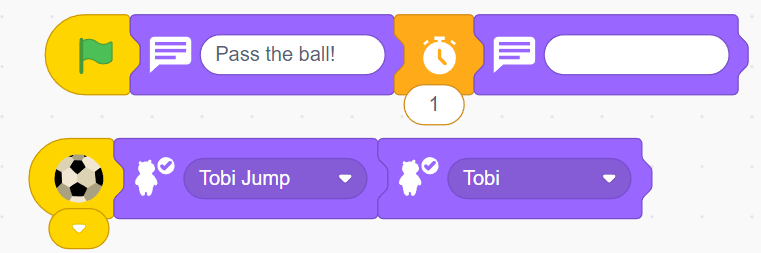
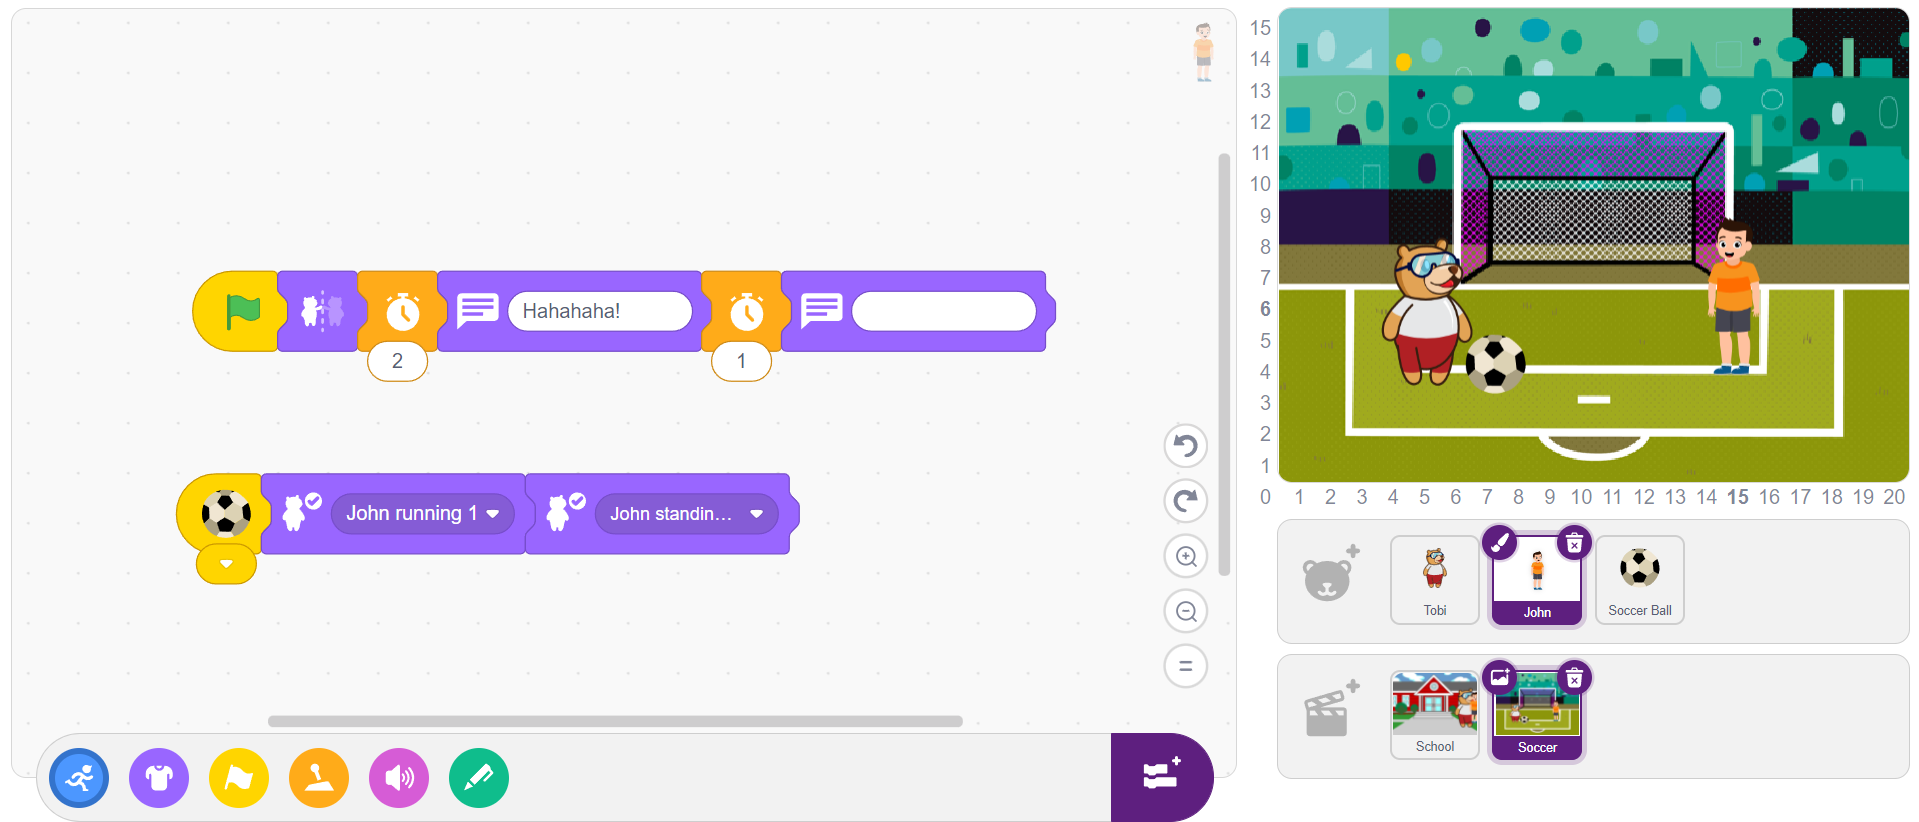
- In the second scene, we want the scene to start with Tobi asking John to pass the ball. So, select Tobi and add the Start and Say block with the text “Pass the ball!” and after a Wait of 1 second erase the message as we’ve done before by attaching an empty Say block.

- Now let’s select John. John is facing towards the right but we want him to look towards the left (Tobi). So, drag and drop the Mirror effect block from the Looks Palette.
 Remember to put a Start block.
- Now, John needs to revert to Tobi’s last message. So, add the blocks as shown below. We’ll understand the importance of the different numbers of seconds we’re adding in the Wait block after a few steps.

- Now, we want to show some animation when the ball touches the Tobi.
- To do this select Tobi, from the Events Palette drag and drop the Start on touching object block, and click on the drop-down arrow to select Soccer Ball as shown in the picture below.

- Let us add animation to Tobi when it touches the ball. We will add 2 different Jumping costumes of Tobi uisng the Change costume block from the Looks Palette twice. In the first block select “Tobi Jump” and in the second block select “Tobi” as shown in the picture below.
- Now, repeat the same steps for John after selecting John.
- Now your Interface looks like the pictures below.
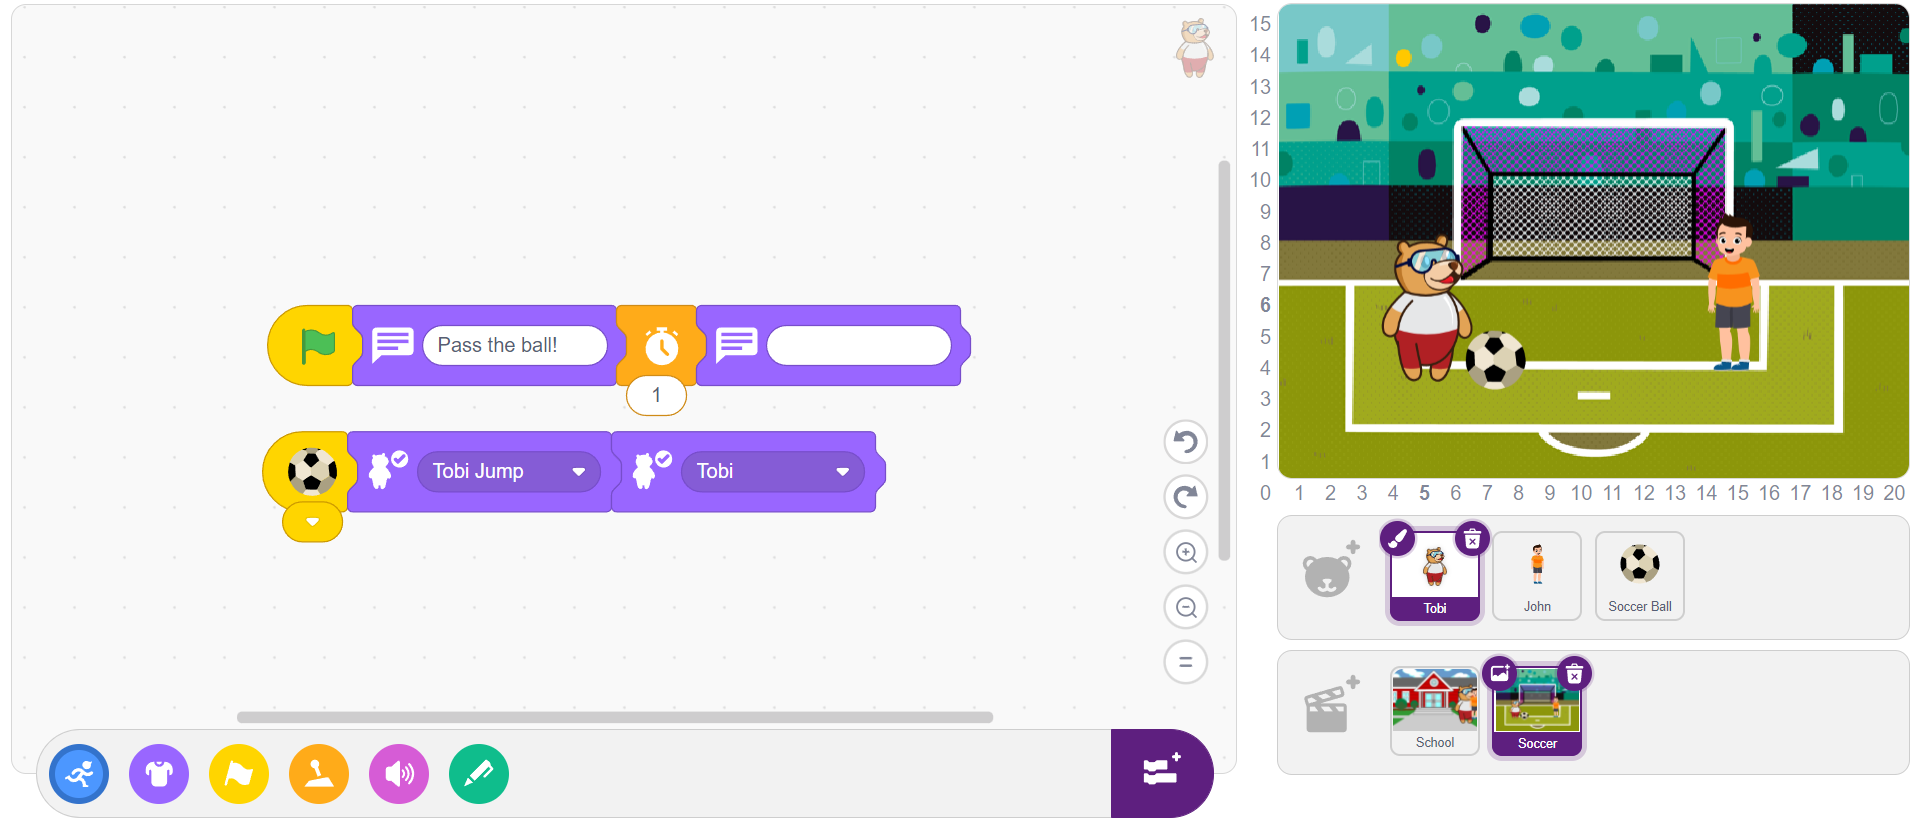
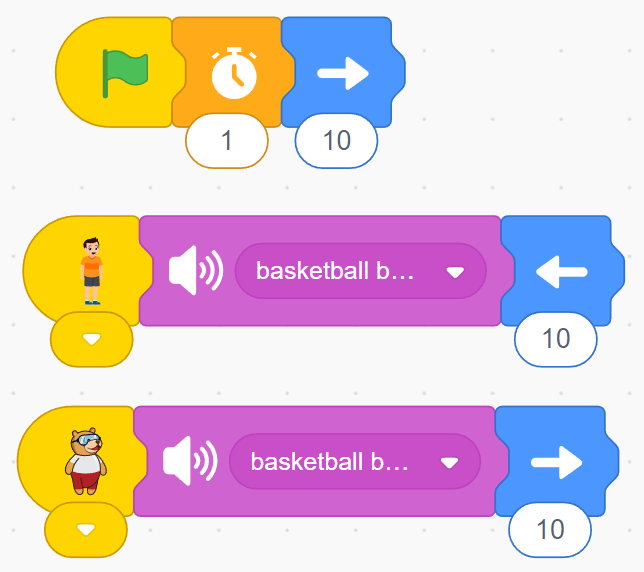
- Now, it’s time to code our final Sprite Soccer Ball. As soon as scene 2 starts Soccer ball starts moving 10 steps towards John,.
- Add a green flag – Start block from Events Palette, and then wait 1-sec block and Forward block from the Control Palette and Motion Palette.
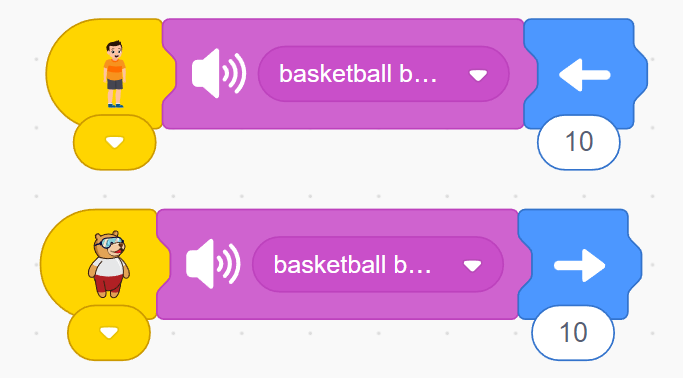
- Now, what we want is as soon as Tobi or John touches the Soccer ball it should start moving in the opposite direction and play a ball-hitting sound.
- To do this drag and drop Start on touching object block from the Events Palette in John and Tobi sprites.
- To play the sound we must first import the sound. So, click on the Sound palette and then click on the Add sound icon.
- In the Choose a sound screen search for “Basketball Bounce” and click on the sound to select and import it
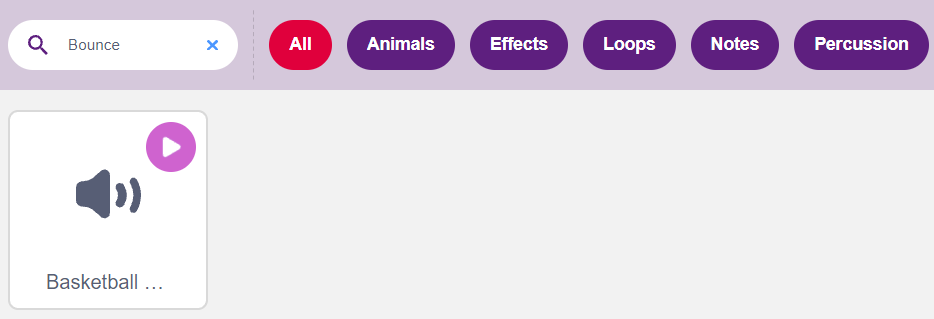
- After importing you’ll be able to see an option of “Basketball Bounce” in the drop-down menu of play sound block.
- Drag and drop the sound block after Start on touching object blocks in Tobi and John, as shown in the picture below.

- Now, to move the Soccer ball right towards John as soon as Tobi touches it add the Forward block from the Motion Palette with 10 as input and to move the Soccer ball left towards Tobi as soon as John Touches it add the Backward block from the Motion Palette with 10 as input and attach them as shown in the picture below. Make sure you have selected a Soccer ball sprite.
- Finally, you’ve completed the code for the Soccer Ball character.
Complete script for sprites:
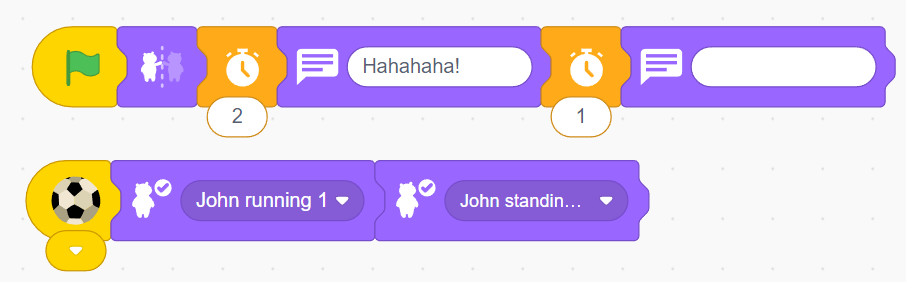
Scene 1 – Tobi:

Scene 1 – John:
Scene 2 – Tobi:
Scene 2 – John:
Scene 2 – Soccer Ball:
Now click on the Green Flag icon and enjoy watching your story made with Tobi and John.
In a Nutshell
PictoBlox provides a powerful yet simple way to start coding through its Blocks and Junior Blocks environments. It allows beginners to move from basic animations to more advanced interactive projects without needing prior coding experience.
By combining creativity with logic, you can turn simple ideas into engaging animations and stories. This is just the beginning—there is much more you can explore and build using PictoBlox.