Sale!

Quarky IoT House Addon Kit

$163$219

-19%

Explore the world of the Internet of Things with the IoT House kit! With 15+ activities, learn the basics of IoT by creating simple API requests, voice-controlled smart plugs, and RFID-trusted door-opening systems from a beginner-friendly kit.

  • Made for Kids: Easy to assemble and easy to code.
  • Discover the potential of a connected world: Begin by learning the basics of IoT, including building API requests, working with 8+ sensors, drip irrigation, and more. Plus, create custom dashboards and feeds with Adafruit IO as you create fully functional IoT systems.
  • Unlock the power of coding with PictoBlox: Create intelligent projects with ease using our user-friendly block and Python-based coding language. With PictoBlox, take your coding projects to the next level with AI and Machine Learning – imagine the possibilities!
  • 15+ Hands-on Activities: With step-by-step instructions, you can easily build projects like voice-controlled smart plugs, RFID-trusted door openers, and more!
  • Perfect for students of all ages and ideal for school or home use. Get the most out of your learning experience!
  • Get 10% discount on this product using code – AI10
  • Get your kit delivered anywhere in the World – Free Worldwide Shipping!
Guaranteed Safe Checkout

Create Internet of Things Projects with IOT House!

This IoT House kit is an ideal starting point for anyone exploring the world of the Internet of Things. It offers over 15 different activities that will walk you through the basics of IoT and provide you with a better understanding of how these systems work. Activities range from making simple API requests to creating voice-controlled smart plugs and trusted door-opening systems using RFID. You’ll learn about the different components of an IoT system and how to create a dashboard and feed in Adafruit IO.

Our kit comes with a book and online resources that provide a comprehensive step-by-step guide. The book includes detailed instructions on how to assemble the IoT House and program it for various applications in Block & Python coding.

Adafruit IO – Get Color – Remote Controlled RGB Light

Remote Controlled RGB Light

Get color from cloud and set Quarky lights to that color.

IoT Enabled Smart Plug

IoT Enabled Smart Plug

Creates an IoT-controlled smart plug that can turn lights on/off and retrieve cloud-based information.

IoT Based Air Pollution Monitoring System

IoT Based Air Pollution Monitoring System

Interface a gas sensor to Quarky for PPM reading and will create an air pollution monitoring system on Adafruit IO.

Face Recognition Controlled Door

Face Recognition Controlled Door

Use face recognition to identify authorized people and opens the door accordingly.

RFID Based Door Operating System

RFID Based Door Operating System

Use RFID to control an IoT house door with authorized tags.

Automatic Light Control with LDR Sensor

Automatic Light Control with LDR Sensor

Program Quarky to detect ambient light and control the light accordingly.

Flame Based Alarm System

Flame Based Alarm System

Detect heat or flame with a flame sensor and create an IoT enabled alarm system.

Voice Controlled Smart Plug

Voice Controlled Smart Plug

Create a voice-controlled smart plug using NLP, speech recognition, and a relay.

Drip Irrigation System

Drip Irrigation System

Make Drip Irrigation with IoT House and control it with Quarky button.

Automatic Plant Watering using Soil Moisture Sensor

Automatic Plant Watering

Use a moisture sensor to water plants when soil moisture is low.

ThingSpeak IoT House Monitoring – All Sensors

ThingSpeak IoT House Monitoring

Create an IoT House Monitoring system to send several sensor data to the cloud using ThingSpeak channel.

Automatic Temperature based Fan

Automatic Temperature based Fan

Learn to program Quarky to detect temperature using DHT Sensor and control the fan.

What's Inside the Kit?

Quarky Expansion Board – Quarky Mars Rover Component List

1 x Quarky Exapansion Board

IR Sensor – Quarky IoT House Component

1 x IR Sensor

Flame Sensor – Quarky IoT House Component

1 x Flame Sensor

RFID Sensor – Quarky IoT House Component

1 x RFID Sensor

Fan and Motor – Quarky IoT House Component

1 x Fan + 1 x DC Motor

Servo Motor – Quarky Mars Rover Component List

1 x Servo Motor

PIR Motion Sensor – Quarky IoT House Component

1 x Motion Sensor

Expansion Connectors

3 x Expansion Connectors

LDR Sensor – Quarky IoT House Component

1 x LDR Sensor

Gas Sensor – Quarky IoT House Component

1 x Gas Sensor

T Connector – Quarky IoT House Component

2 x T Connector

Emitter Stakes – Quarky IoT House Component

2 x Emitter Stakes

Feeder Pipe – Quarky IoT House Component

1 x Feeder Pipe

Drip Emitter – Quarky IoT House Component

2 x Drip Emitter

Battery – Quarky Mars Rover Component List

1 x Battery

Quarky Plastic Purple Set – Quarky Mars Rover Component List

1 X Quarky Purple Plastic Set

Humidity and Temperature Sensor – Quarky IoT House Component

1 x Humidity and Temperature Sensor

Soil Moisture Sensor – Quarky IoT House Component

1 x Soil Moisture Sensor

Water Pump – Quarky IoT House Component

1 x Water Pump

DC Power Adapter – Quarky IoT House Component

1 x DC Power Adapter

Jumper Wire Male – Female – Quarky IoT House Component

40 x Jumper Wires Male - Female

Jumper Wire Female – Female – Quarky IoT House Component

20 x Jumper Wires Female - Female

Front Wall – Quarky IoT House Component

1 x Front Wall

Relay and Socket Wall with Cable – Quarky IoT House Component

1 x Relay and Socket wall with Cable

Door – Quarky IoT House Component

1 x Door

Door Support – Quarky IoT House Component

1 x Door Support

Left Wall – Quarky IoT House Component

1 x Left Wall

Middle Wall – Quarky IoT House Component

1 x Middle Wall

Clip – Quarky IoT House Component

1 x Gear

Back Wall – Quarky IoT House Component

1 x Back Wall

Floor – Quarky IoT House Component

1 x Floor

Fan Mount Front – Quarky IoT House Component

1 x Fan Mount Front

Fan Mount Side – Quarky IoT House Component

2 x Fan Mount Side

Clip – Quarky IoT House Component

10 x Clip

M3 MDF Spacer – Quarky IoT House Component

4 x M3 MDF Small Spacer

Rubber Band – Quarky IoT House Component

30 x Rubberbands

Nuts – Quarky Mars Rover Component List

6 x M2 Nut | 17 x M3 Nut

Bolt – Quarky Mars Rover Component List

4 x M2 Bolt (6mm) | 2 x M2 Bolt (12mm) | 11 x M3 Bolt (8mm) | 4 x M3 Bolt (12mm) | 2 x M3 Bolt (20mm)

Metal Standoff – Quarky Mars Rover Component List

4 x M2 Standoff (30mm) | 2 x M3 Standoff (10mm)

Code IoT House with PictoBlox

PictoBlox Python for kids to learn Python in a fun and interactive way.

PictoBlox - Your Learning Companion

PictoBlox is a creator platform that allows students and teachers to create projects in AI, ML, and robotics. With the ability to code in both Block and Python environments, it’s easy to create projects with an array of features.

IOT House PictoBlox Extension

Quarky IoT House Extension & Library

The Quarky IoT House Extension allows you to easily control your IoT House by adding the control block and functions to your projects. The extension comes with detailed instructions to help you discover all the ways you can use your IoT House.

FAQs on Quarky IoT House Addon Kit

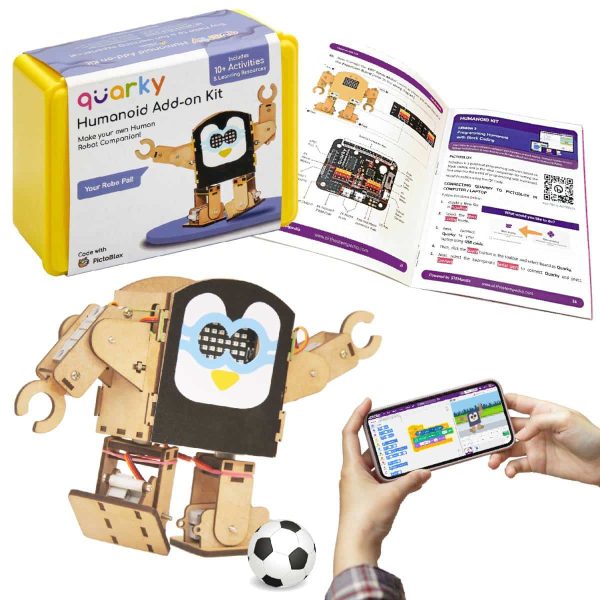
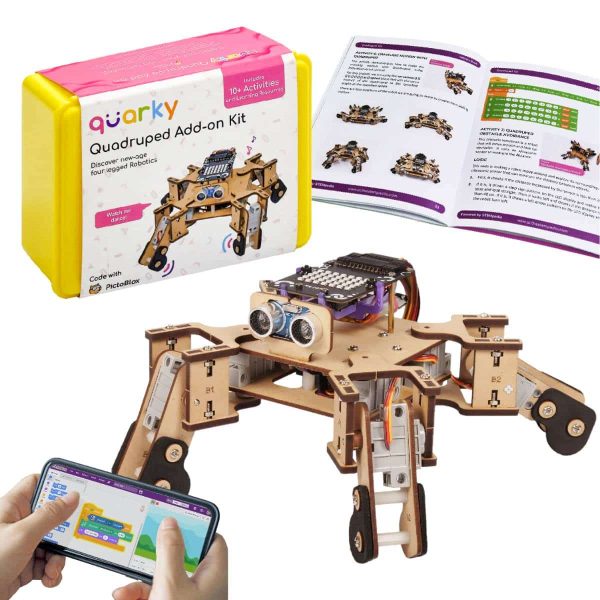
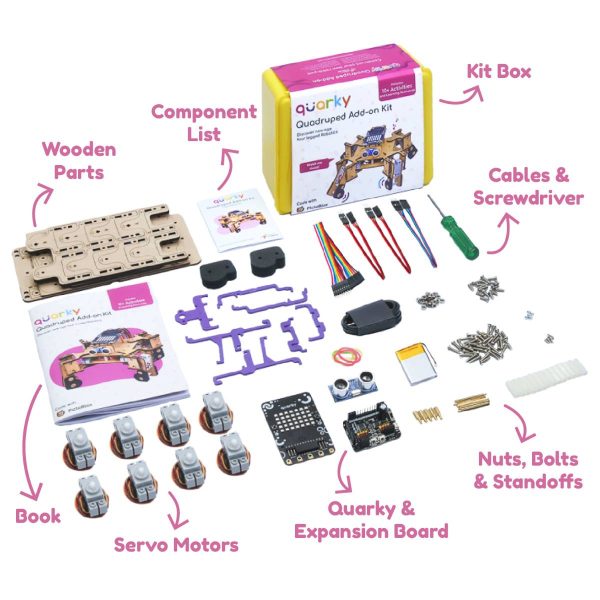
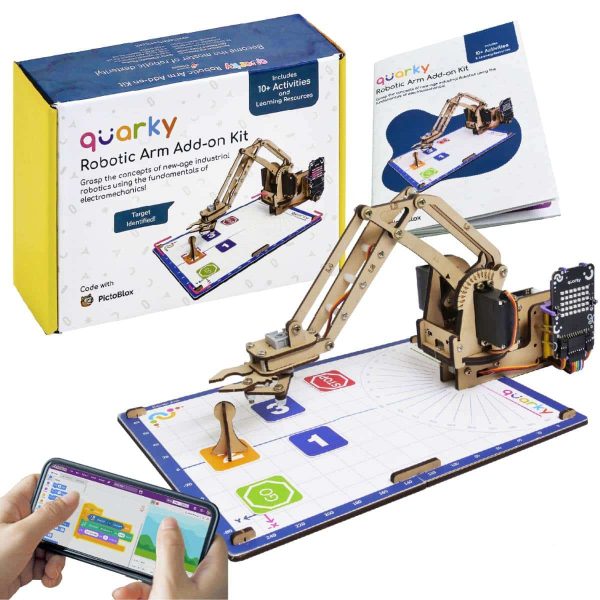
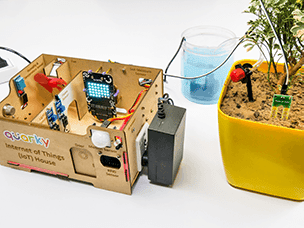
Quarky Addon kits are innovative do-it-yourself (DIY) kits that offer a wide variety of fields to explore, including Humanoid Robots, Mars Rover, Robotic Arm, Internet of Things, and more. Each kit comes fully equipped with all the necessary materials and instructions to create over 10 projects using coding, AI, and robotics. The opportunities to learn are endless.

There are two choices:

  1. With Quarky: You get a Quarky board with the kit. Quarky is needed to run any project. So, if you don’t have a Quarky board, choose this option.
  2. Without Quarky: The Quarky board is not included in the kit. You will need to get it separately to run the IoT House.

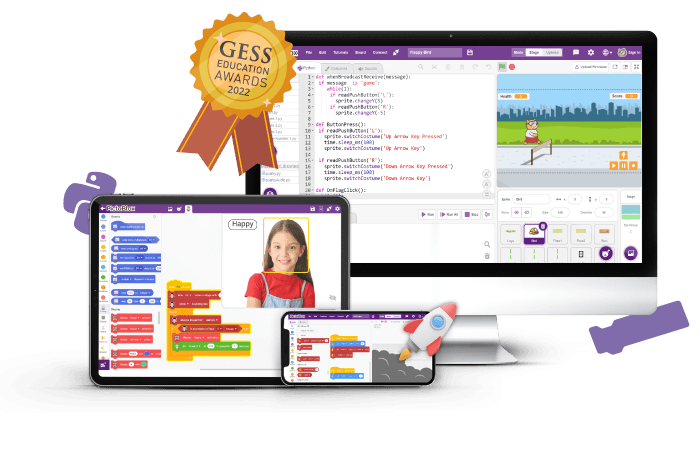
No, Quarky is an intuitive learning tool that is suitable for both novice and experienced coders. It is programmed using a graphical programming platform named PictoBlox which allows you to build your project by using Block Coding as well as Python. In addition, the interactive graphical programming interface adds fun to the learning and makes the whole experience even more immersive.

The kit includes a book and online resources to facilitate learning.

The kit is suitable for students aged 10 and up. Some students with a passionate interest in technology and learning have been able to create projects beyond their age range using the kit.

You can go through our online documentation for help: 

If the problem persists, send us a video of the problem to support@thestempedia.com. We will reach out to you to resolve the problem.

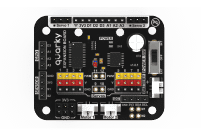
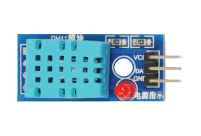
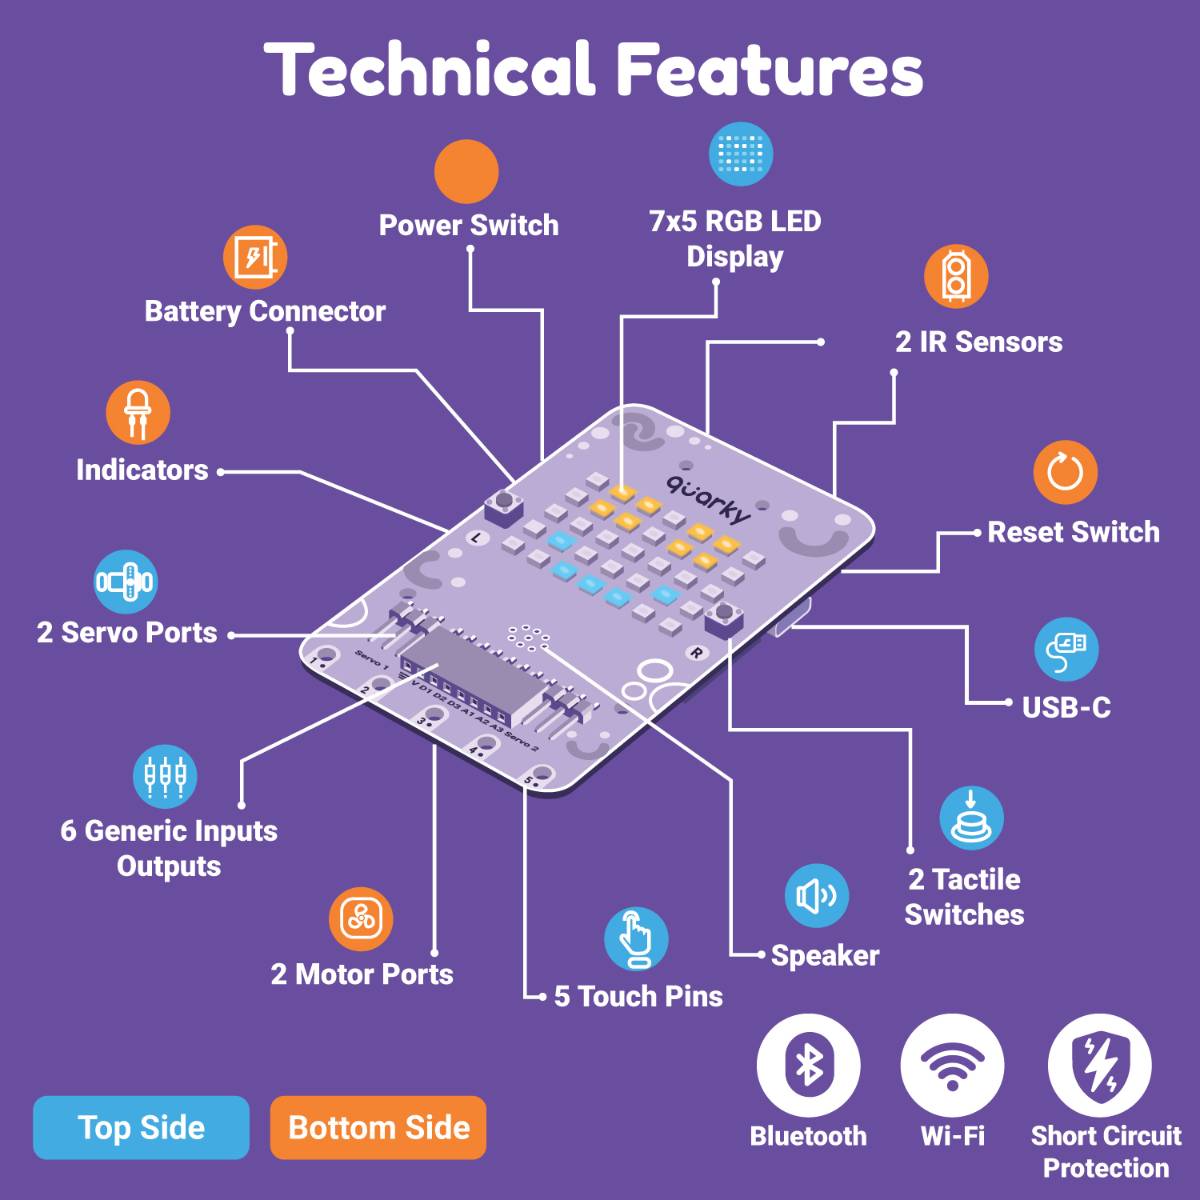
Quarky is a powerful, portable device that allows users to create complex projects with its 3.7V Li–ion battery support, two tactile switches, five capacitive touch sensors, two infrared sensors, and general–purpose input–output pins. It includes 35 programmable RGB LEDs in a 7×5 grid for creating animations, writing text, and displaying patterns, as well as a good-quality speaker for human-like audio or buzzing. Additionally, it has Wi–Fi and Bluetooth compatibility, and multipurpose input/output pins that can be used to interface with any third–party sensors. Quarky also has protections for reverse polarity, overvoltage, and overcurrent.


You can use the book or go to our learning resources here: https://ai.thestempedia.com/docs/iot-house-quarky-addon-kit-documentation/

To make a project you have to follow these essential steps:

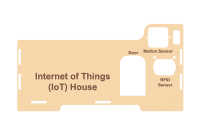
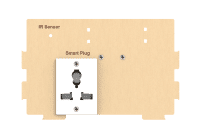
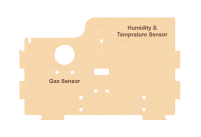
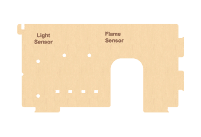
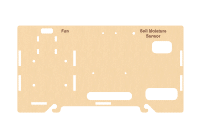
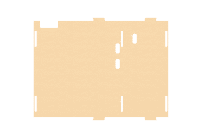
  1. Assembling the IoT House
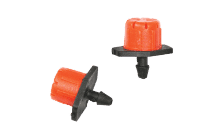
  2. Assembling the Drip Irrigation for 1 Plant or 2 Plants
  3. Start Project Building

If you face any issues contact us for support here: support@thestempedia.com

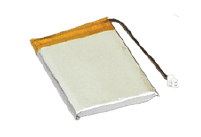
The robot uses the battery that comes with it. Don’t use any other batteries for this robot.

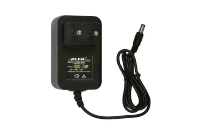
To charge the robot, simply plug in the USB cable to a laptop or adapter and connect it to the designated port on the Quarky board. Make sure the power switch on the robot itself is turned on.

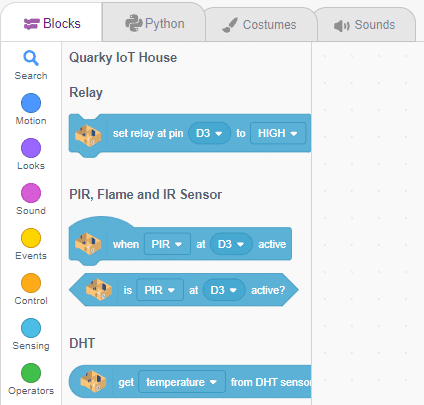
PictoBlox allows users to code Quarky IoT House with Block Coding. You can follow these instructions:

  1. Follow the steps below for connecting Quarky to PictoBlox on a Laptop:
    1. First, connect Quarky to your Laptop using a USB cable.
    2. Next, open PictoBlox and select Block Coding as your coding environment.
    3. Then, click the Board button in the toolbar and select Quarky.
    4. Next, select the appropriate Serial port if the Quarky is connected via USB or the Bluetooth Port if you want to connect Quarky via Bluetooth and press Connect.
  2. Follow the steps below for connecting Quarky to PictoBlox on a Mobile or Tab:
    1. First, power ON Quarky.
    2. Open PictoBlox on your smartphone. Go to My Space and make a new project by clicking the ‘+(plus)’ button in the bottom-right corner.
    3. Then, tap the Board button in the top-right corner of the toolbar. Select board as Quarky.
    4. Next, tap the Connect button. Select your device from the list.
  3. Click on the Add Extension button and add the Quarky IoT House extension.
  4. You can find the Quarky IoT House blocks available in the project.