95+
Countries Reached
4.5+
Rating on Play Store
20,000+
Teachers Trained
2M+
Students Impacted
Unlock the Possibilities of 21st Century Learning with PictoBlox!
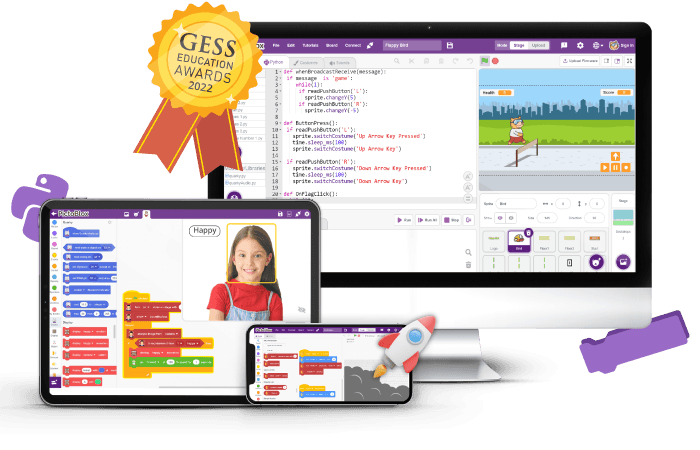
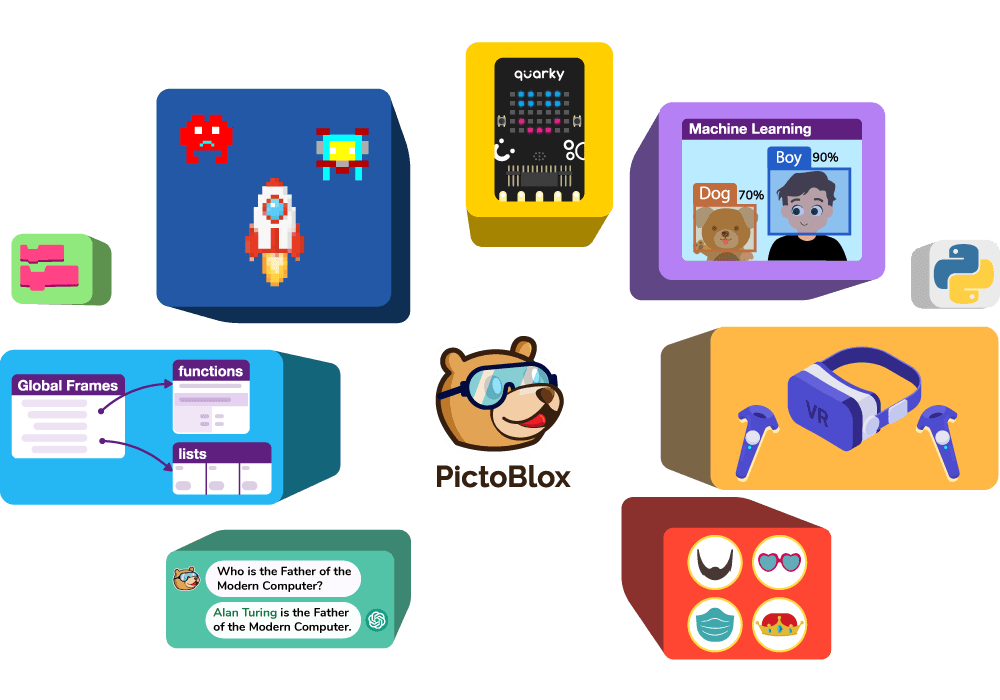
PictoBlox makes 21st-century learning accessible and engaging. It empowers students with tech education to build and bring their ideas to life with hands-on Coding, Artificial Intelligence, Machine Learning, the Internet of Things, Robotics, Game Designing, and Virtual Reality. Our mission is to arm students with the tools necessary to become active contributors to the digital age.

Block Coding
Learn to code with colorful puzzles like drag and drop block based coding for Kids.
Junior Blocks
Coding for kids ages 4–7 to develop creativity, critical thinking, and problem-solving skills.
Python Coding
Create robust programs with simplified interactive codes in Python programming for teens.
Machine Learning
Analyze complex data, train and import models to coding environment with ease.
3D and XR Studio
Create 3D models and explore new dimensions of creativity with AR and VR.
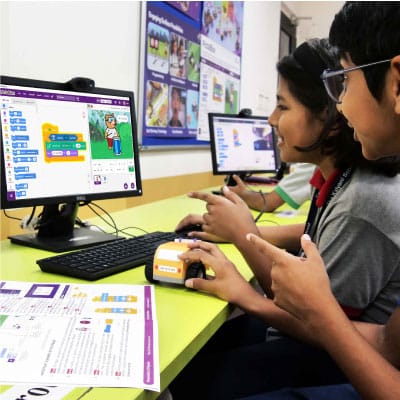
Students engaging in Coding and learning Self Driving Technology with PictoBlox in Arise International School, India.
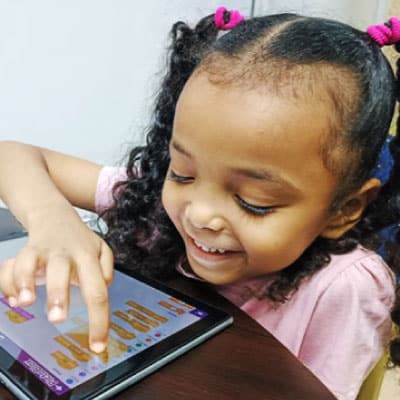
At the Orientation Centre in Sudan, a student immerses herself in the world of block-based coding using PictoBlox, unlocking her creativity.
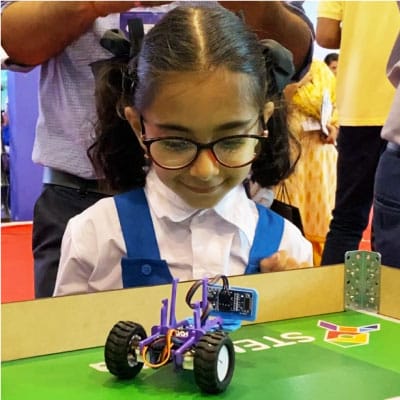
At Digital India Week, students are amazed by the Quarky Object Detection Robot, coded with PictoBlox, showcasing the power of technology and innovation.
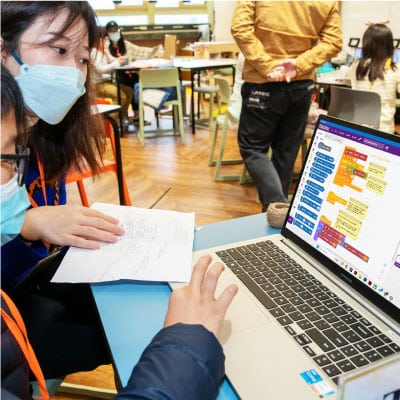
Makerbay organised a Challenge Day where students under the guidance of their mentors created AI solutions for energy saving and recycling using PictoBlox.
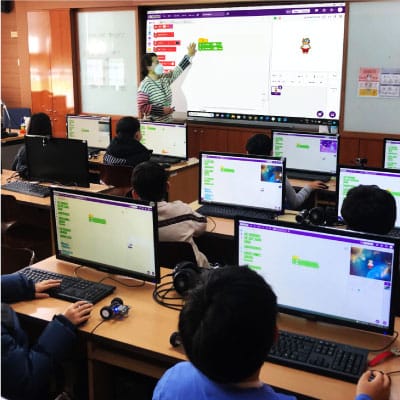
A Professor engages students in the world of coding using PictoBlox, fostering creativity and problem-solving skills in the classroom.
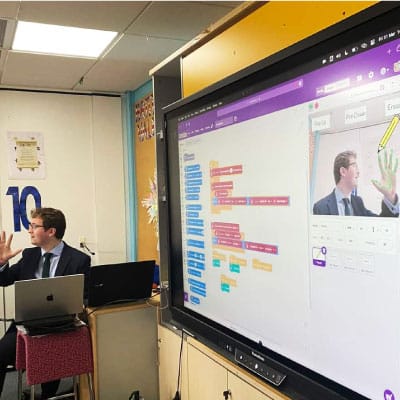
A professor from Willow Tree Primary School, London teaching Artificial Intelligence to its students using PictoBlox.
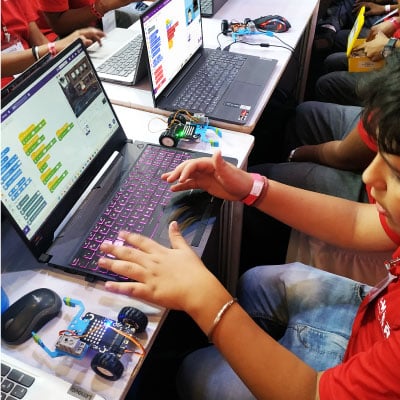
Adani Vidya Mandir students shine at the WSRO competition, showcasing their coding projects with PictoBlox and bringing home well-deserved prizes, a testament to their talent.
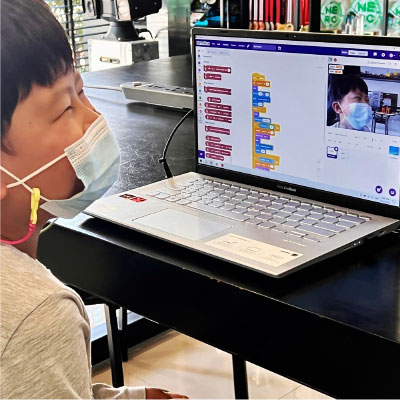
Students in South Korea learning delves into the world of Block-Coding with PictoBlox, exploring the fascinating realm of Face Expression Detection and nurturing their coding skills.
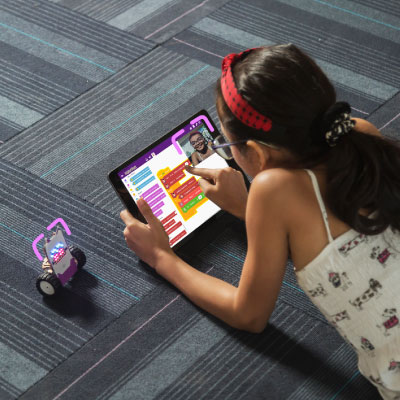
A young girl dives into the exciting realm of coding with PictoBlox, immersing herself in learning Face Expression Detection and unlocking her potential.
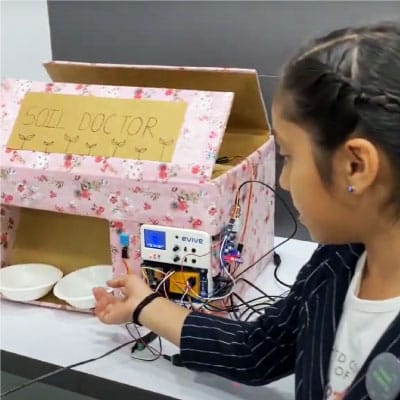
A project made with Evive and PictoBlox called Soil Doctor which is a smart irrigation system that irrigates the soil if the moisture is below 60.
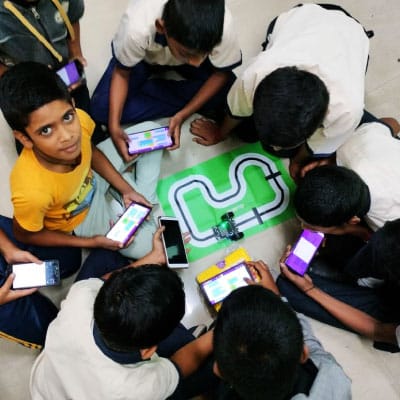
PictoBlox at Bharat e-Shiksha, a flagship initiative under Bharat Cares that aims to make quality education accessible for underprivileged students.
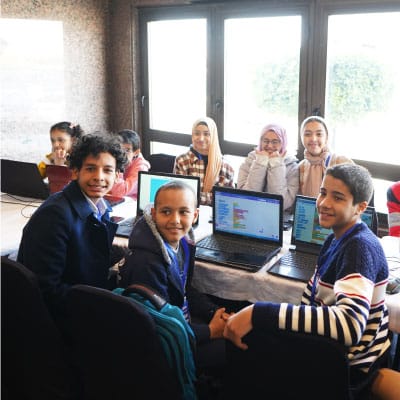
At Codeavour 2022 Egypt, students unleash their creativity and coding skills through engaging activities with PictoBlox, paving the way for innovation.
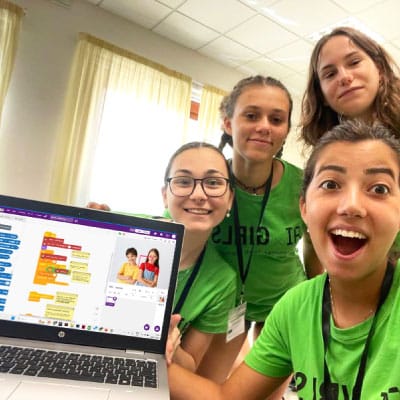
AIxGirls is the first all-female summer camp dedicated to AI. The girls were guided in programming their first application of AI with Pictoblox.
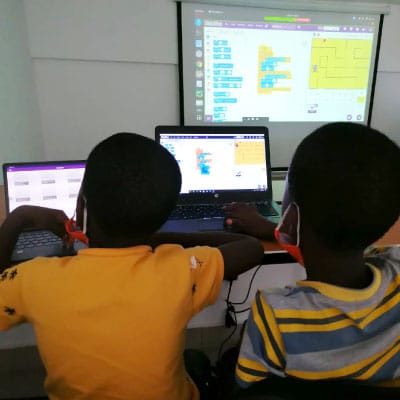
Close the Gap, Kenya to prepare young children for the 21st century by providing them exposure to DIY electronics, AI, and Robotics activities.
Unlock the Power of Digital Education with Our Cutting-Edge Platform
Discover the ultimate creator platform for students and teachers with PictoBlox! Easily create projects in AI, ML, AR, VR, IoT, and hardware with Arduino, LEGO, and Quarky while enjoying the ease, fun, and engagement that PictoBlox’s amazing features offer. From beginner coders to experienced developers, discover why PictoBlox is the best choice for all your coding needs!
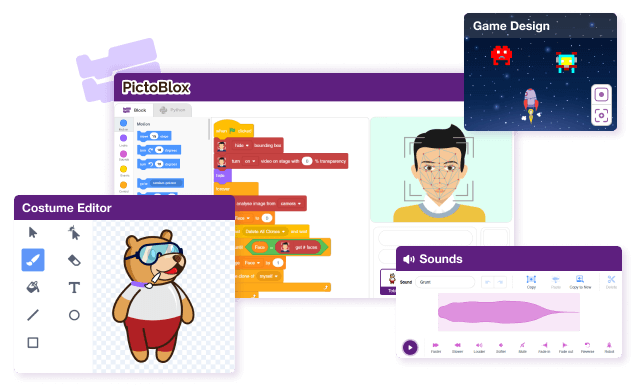
Create Games and Animations with Block Coding
- Kid-friendly interface to build interactive games and animation with costume and sound editor.
- Snap colorful blocks together to create scripts (Programs) to control characters.
- Search, copy and export blocks and save the scripts for future use. Record project output as videos with click of buttons.
Python Programming for kids with Powerful Features
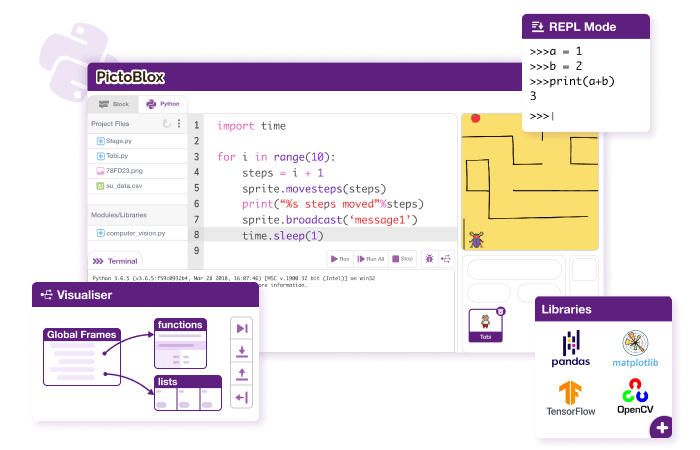
- Fully functional Python 3 editor with provision to add sprites, project files, Python libraries.
- Step-by-step code visualizer and debugger with auto-complete feature.
- REPL mode for interactive code interpreter with inbuilt PIP package manager. Interactive terminal to visualize output.
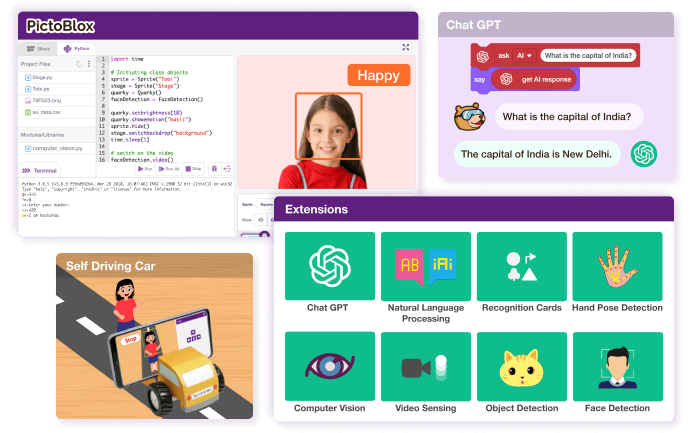
Artificial Intelligence to make Projects Interactive!
- Add AI capabilities to your projects with just one click! Code in Block or Python to incorporate AI features into your project.
- Use AI with hardware to make the projects like self-driving cars, attendance systems, etc.
- Create chatbot with Chat GPT, Speech Recognition and Text to Speech extensions!
Machine Learning for Kids
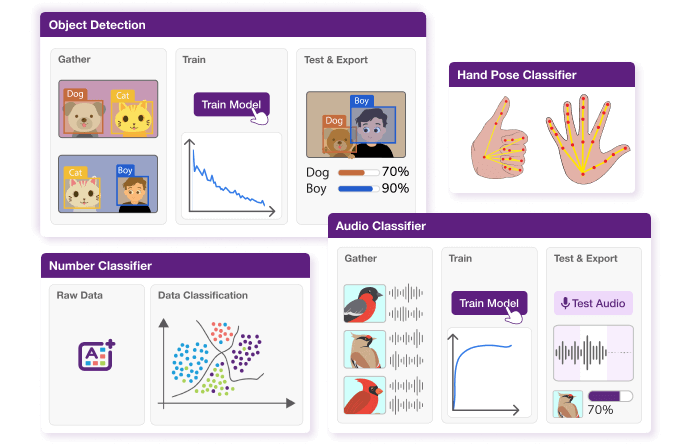
- Data import, training, testing and exporting ML models to Block or Python environment made ease.
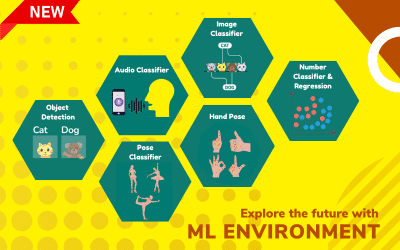
- Create Machine Learning models in 7 different types - Image Classifier, Object Detection, Hand Pose Classifier, Pose Classifier, Audio Classifier, Text Classifier and Number Classifier & Regression.
- No coding experience is required to build ML models.
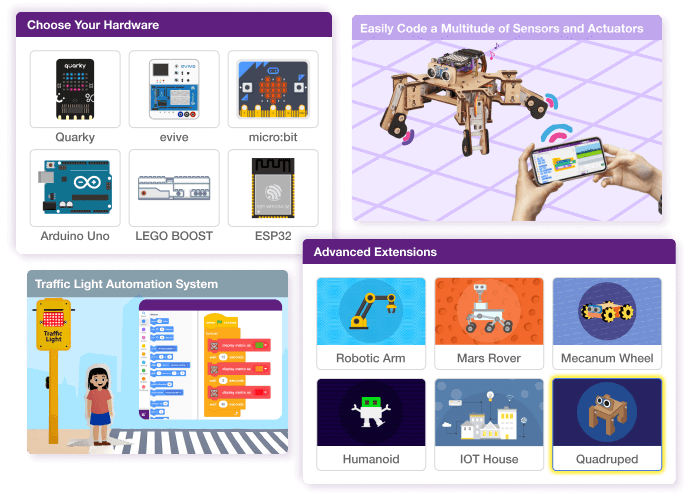
Control & Program Hardware with Ease
- Real-time control of hardware with connectivity over USB and Bluetooth.
- Upload code to the microcontroller board.
- Compatible with Arduino Uno, Mega, Nano, Quarky, evive, Lego, Micto:bit and many more.
- Code with Blocks or Python.
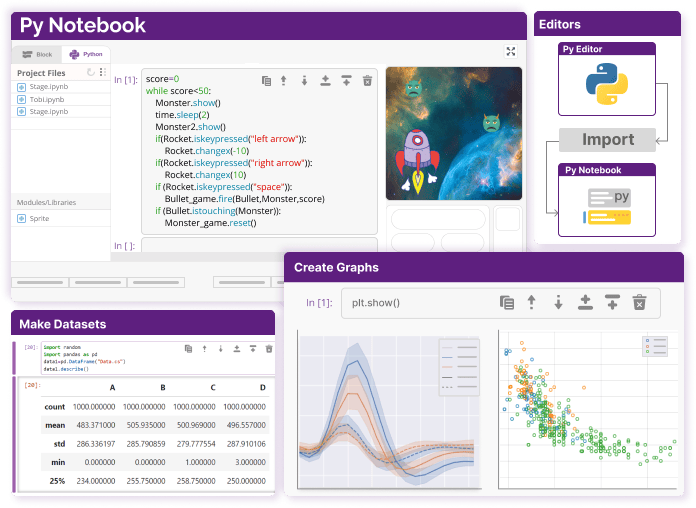
Integrated Python Notebook Environment for kids ages 12+
- Code, test, and twerk segments in real-time to better understand how each line affects the output.
- Enhance comprehension and presentation with graphs, charts, and other visual data representations.
- Easily share your notebook with classmates for a comprehensive view of your work process and findings.
- Py Notebook is an upgrade to the Python editor. Run a small code set independently and see instant results.
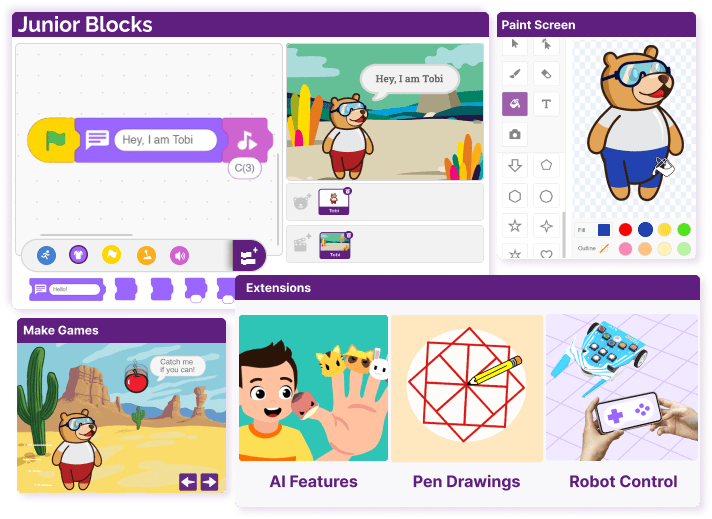
Junior Blocks with Play-Based AI Activities for Kids Ages 4-7
- Designed for Kindergartners, Pre-schoolers, and Elementary kids to learn Coding, AI, and Robotics.
- The interface is user-friendly and intuitive for young kids.
- Develop creativity, critical thinking, and problem-solving skills with activity-based learning.
- Animate characters and create engaging stories with AI hand gestures and face detection.
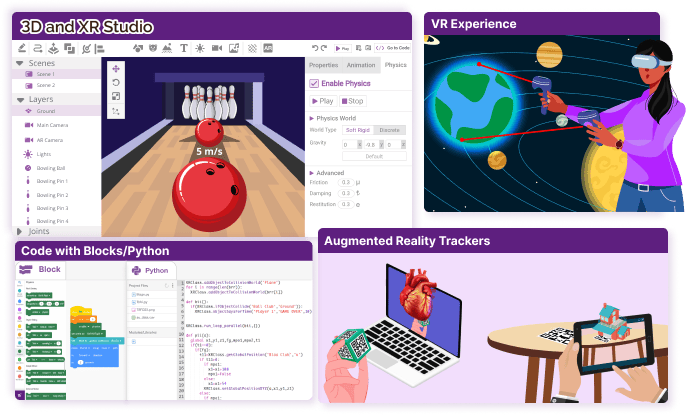
3D and XR Studio: Your Gateway to 3D, AR & VR Creation
- Build a 360° environment with PictoBlox 3D and XR Studio using 3D models, materials, cameras, lighting, physics, and trackers.
- Develop 3D models with features like sketching, extrude, boolean operations, and apply 3D animation.
- Create interactive 3D, AR-VR projects with Block-based coding or Python. Design VR games, AR filters, physics simulations, and virtual robots.
- Export your AR-VR Technology projects to devices like Google Cardboard VR, Pico VR, and Meta Quest to experience immersive technology.
Latest Version of PictoBlox with New Features and Extensions
Explore the updates and enhancements in PictoBlox, featuring advanced features and extensions. Download the latest version of PictoBlox and make your Coding, AI, ML, AR-VR and Robotics learning process engaging and enjoyable.

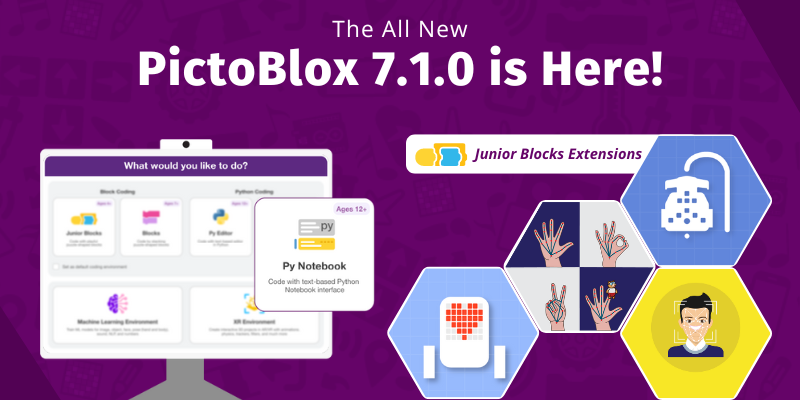
Latest PictoBlox | Introducing Junior Blocks for 4-7 years and Python NoteBook for 12+ years
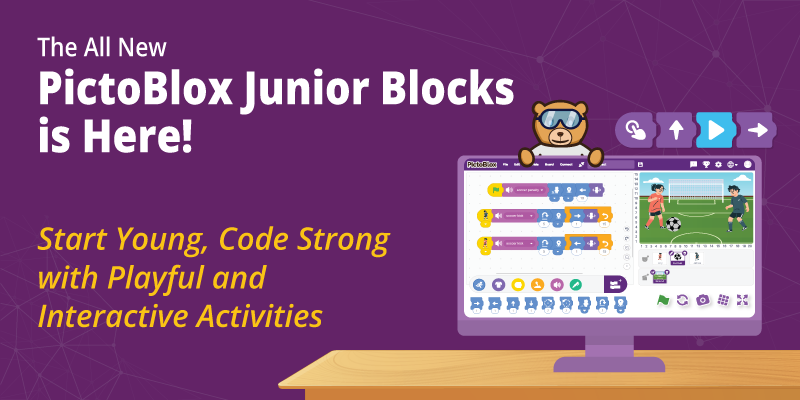
Introducing Junior Blocks in PictoBlox: An Engaging Way to Learn Block Coding for Kids Ages 4-7
PictoBlox Educational Programs to Learn AI and Coding
PictoBlox platform enables schools and activity centers to scale their learning stack to impart coding and tech knowledge to a large number of students at a low cost. It allows teachers to adopt educational tools such as block-based coding, python programming, and robotics to impart 21st-century skills to students with varying backgrounds, no matter their education or age.
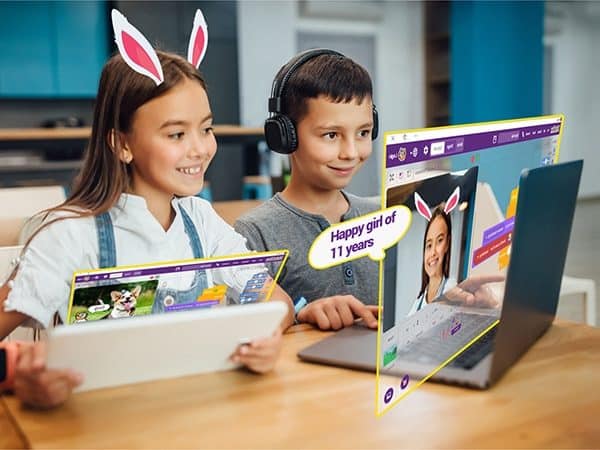
Skilling Courses for Home Learning
Personalized learning experience that equips Students with essential Coding, Python Programming, Artificial Intelligence and Robotics skills through Modular Courses!
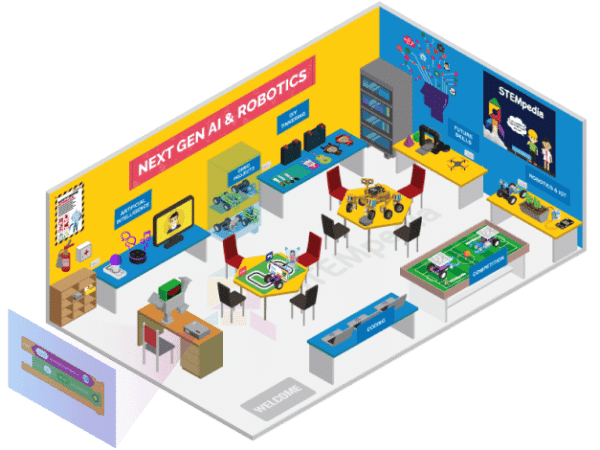
AI and Robotics Lab
AI Lab offers an engaging and comprehensive curriculum-led learning experience for classes 1 to 10 in Coding, AI and Robotics, designed to meet the criteria of CBSE, ISCE and other boards.
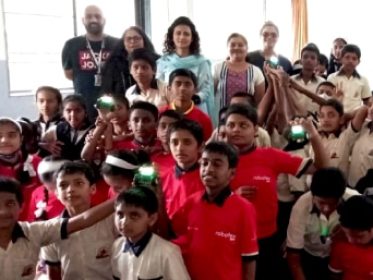
Impact Programs
STEMpedia provides the tech, program management, and execution support to help CSR, NGOs, and governments execute impactful programs at a large scale.
Voices of Inspiration: Student and Teacher Experiences
Discover the transformative power of PictoBlox through the words of our students and teachers. See how this innovative platform has revolutionized their learning experience and inspired their creativity.


India


Ready to Start PictoBlox in Your Classroom
Implement the PictoBlox curriculum in your classroom to teach kids coding, AI, Robotics, AR/VR and all the 21st Century Skills in an easiest and playful manner.
Codeavour: The Global AI and Coding Competition for Kids
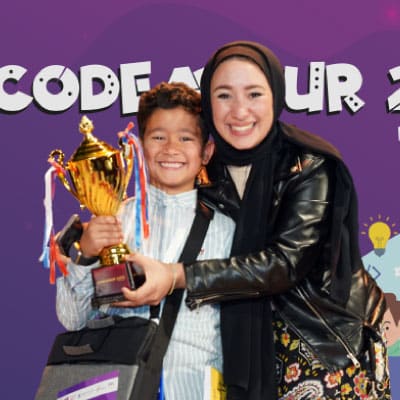
Codeavour is the Biggest Global AI & Coding Competition for students of age group 7-18 years, where they learn, create, and innovate different projects using PictoBlox. Codeavour aims to foster innovation and entrepreneurial skills among students and raise awareness about UN Sustainable Development Goals.

300,000+
Students

1000+
Schools

100,000+
Teams

70+
Countries
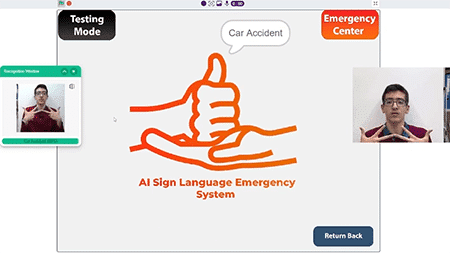
An AI emergency center for individuals with communication disabilities that utilizes hardware and software tools to identify emergency words and American Sign Language.
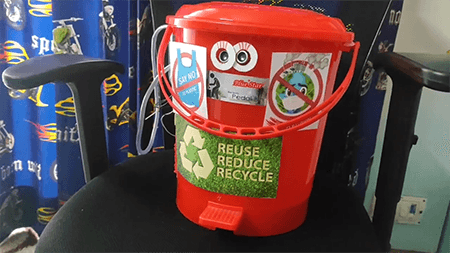
Eco-Bin is a revolutionary product that focuses on decomposing bio-degradable waste such as paper and vegetable peels.
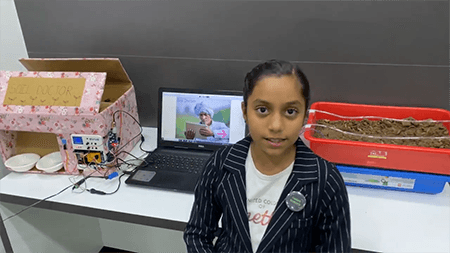
The project is an intelligent agricultural device designed to help farmers choose the most suitable crops to plant in their local environment in response to global warming trends.
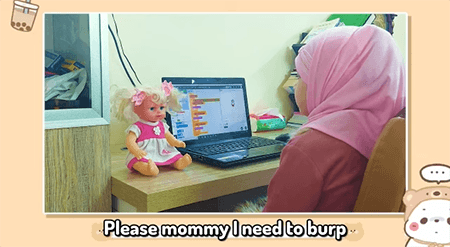
Smart Baby Crying Analyzer provides parents with comfort and confidence by accurately detecting and interpreting baby cries, helping them respond promptly and appropriately to the newborn's needs.
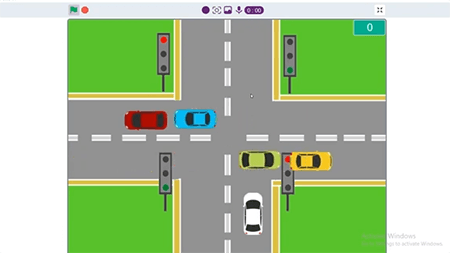
An AI-powered system to detect emergency vehicles and dynamically react to traffic scenarios by controlling traffic lights for faster and smoother transportation.
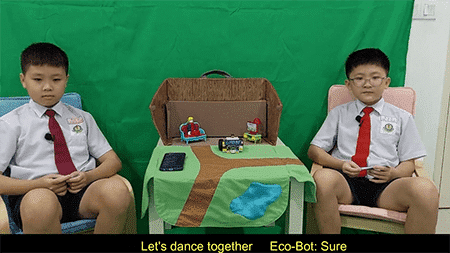
Eco-Bot is an Elderly Companion Robot designed to provide personalized care and companionship to elderly individuals staying at home by using Artificial Intelligence and Internet-of-Things Technology.
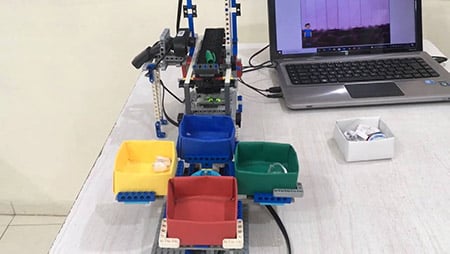
This project is an Automated Smart Dustbin based on Machine Learning that uses a Lego Mindstorm EV3 kit to automate the waste sorting process.
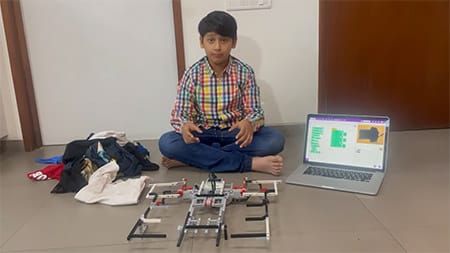
Students engaged in a workshop conducted by STEMpedia experts. Eklavya NEP Sandbox was created to promote the National Education Policy 2020.
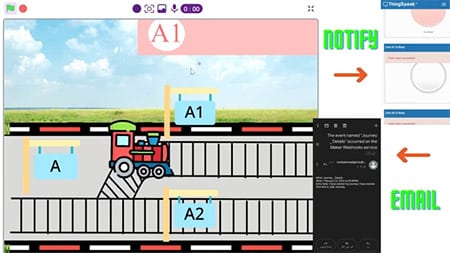
This project is an IoT-based train monitoring system that uses IFTTT technologies to track train movements, send detailed departure and arrival information via email, and simulate train movement.
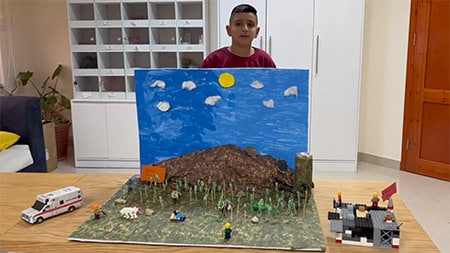
An Arduino-based system created to detect and respond to wildfires in Palestine, using gas sensors to trigger alarms and alert Civil Defence forces to take swift action.
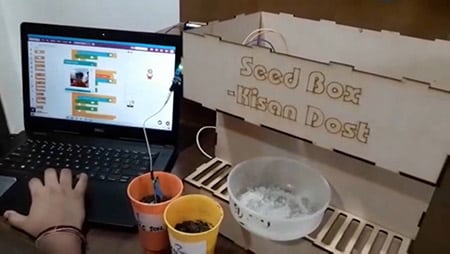
Student wining the Codeavour 2022 Egypt championship presented by Apex Coding Academy. Codeavour makes students fall in love with coding & AI.
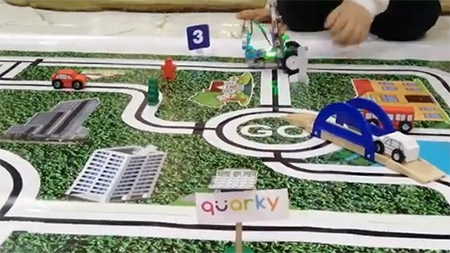
The project involves building a simulated smart city that runs autonomously using AI-driven smart cars to provide transportation service.
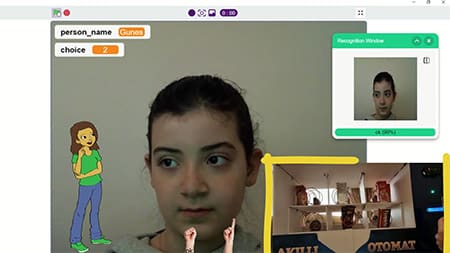
A smart vending machine system providing convenient, secure and contactless shopping experience using face recognition for personalization.
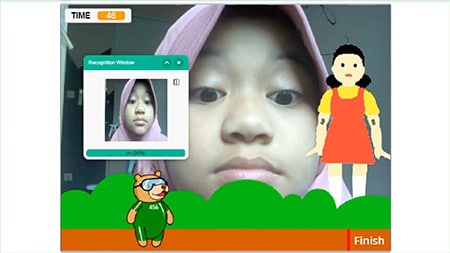
Squid Game v1.2 is an AI-powered game inspired by the hit 2021 movie. Players use their eyes to navigate a challenging obstacle course and race to the finish line without being caught by the AI.
Get Started with PictoBlox
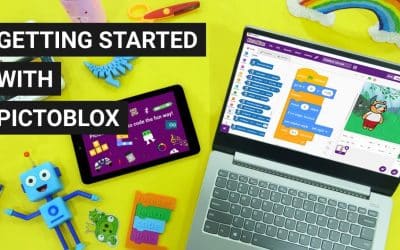
PictoBlox Software
Start programming with PictoBlox! Use sprites, stages, blocks, and more to make Tobi move.
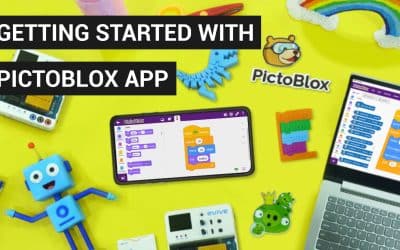
PictoBlox Mobile Application
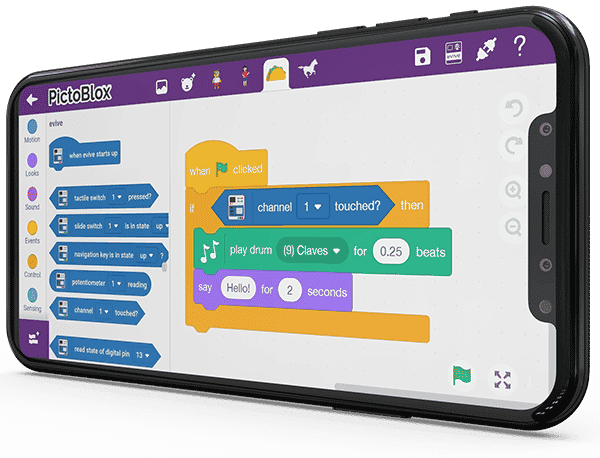
Use Mobile App to easily create games, animations, control robots, and program prototyping boards with a drag-and-drop interface.
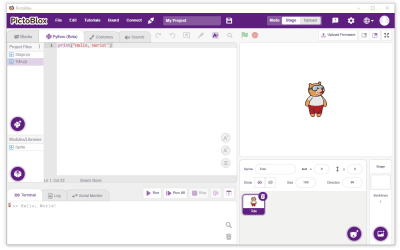
Python in PictoBlox
Learn Python coding in PictoBlox to control sprites, stages and create awesome projects.
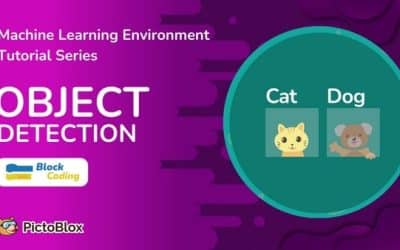
Object Detection (ML Envt.)
Learn to create custom object detection models in PictoBlox Machine Learning Environment for block coding.
Learning Resources for PictoBlox
Discover the amazing world of coding and robotics with series of easy-to-follow tutorials and videos that will have you up-and-running in no time!
Introduction to Programming
Learn coding basics and game development using graphical programming, covering concepts like sequence, loops, variables, arithmetic and logical operators, and conditional statements.
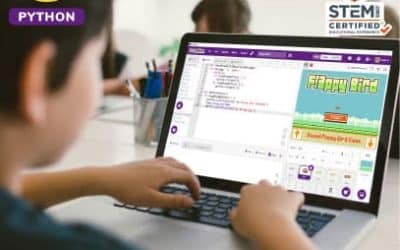
Introduction to Python
Learn Python fundamentals and game development in this course. Topics covered include algorithm, loops, sequencing, conditional statements, operators, list, and functions.
PictoBlox Extensions and Libraries
Learn how to use PictoBlox’s extensions, blocks, Python libraries, and functions by exploring their working and documentation.
Machine Learning Environment
Learn how to create your own machine learning models using the seven types of classifiers by exploring the working and documentation of the Machine Learning Environment.
PictoBlox is coding education software that uses both graphical block-based coding and Python programming. With a user-friendly interface and drag-and-drop functionality, it is the ideal companion for setting the first step into the world of programming. One can learn to code, make interactive animations and games, do interesting projects based on IoT, program actions for robots, and much more! PictoBlox gives students the ability to add AI capabilities to their projects, including Face Detection & Recognition, Computer Vision, Natural Language Processing, Object Detection, Human Pose Detection, Speech Recognition, QR Code Scanner, and Machine Learning.
PictoBlox is available free to use for individuals & non commercial purposes. If you are willing to use PictoBlox for commercial purposes, Please write to us on bd@thestempedia.com to discuss the collaboration.
Please read more about PictoBlox (or any STEMpedia’s product and services) terms and policies HERE
PictoBlox software is available for Windows, macOS, Linux, Android, Chromebook, Raspberry Pi, and iOS. PictoBlox App is also available on Google Play Store for android users and App Store for iOS users
You can download PictoBlox from HERE. Kindly select the device you want PictoBlox to download to.
You can learn about PictoBlox via examples/tutorials available inside PictoBlox software and many free tutorials and projects of PictoBlox with step by step instructions are available on the STEMpedia website. If you want to learn in a more detailed manner with the guidance of an educator, you can opt for STEMpedia online courses from HERE.
If you want to share your projects with friends who also want to make similar or want to make modifications in that, then you can share the project file(.sb3) and your friends can open that in PictoBlox to make modifications. If you just want to showcase the final output, then you can record/capture the output of the stage using the button available above the stage and can share that image/video file with your friends.
No, PictoBlox doesn’t store any pictures/videos of kids/users.
All the data generated or camera/video feed used in PictoBlox is used locally or via our secured servers with a fully automated system without any human interventions. It is not used for any kind of marketing or promotional means without the permission from the user (or guardians).
No, PictoBlox is not open source. It’s a copyright product of STEMpedia.
You can write to us at support@thestempedia.com.
If you need to create multiple accounts for your class, contact us at support@thestempedia.com.
PictoBlox is a programming software based on Scratch 3.0, hence basic functionality is similar. As additional features it has various extensions related to hardware, robotics, Artificial Intelligence and Machine learning. You can control generic sensors, actuators & microcontrollers like microbit, Arduino Uno, Mega, esp32 and many more in real-time by connecting via Bluetooth. It also has an upload mode where you can upload your code inside the hardware. You can also capture/record stage output inside the PictoBlox.
Yes, PictoBlox is available in multiple languages such as English, Hindi, Korean, Spanish, French, Italian, etc. You can use PictoBlox in your language as well.
FAQs on PictoBlox
PictoBlox is an educational programming software with block-based coding and Python Programming that makes coding fun and easy. With a user-friendly interface and drag-and-drop functionality, it is the ideal companion for setting the first step into the world of programming. One can learn to code, make interactive animations and games, interesting projects based on IoT, program actions for robots, create Artificial Intelligence or Machine Learning projects (like face expression detection, self driving car, object identifier, or speech recognition), and much more!
PictoBlox software is available for Windows, Mac, Linux, and Chromebook users. PictoBlox App is also available on the Google play store for android users and Apple AppStore for iOS users (iPad or iPhones).
You can directly use PictoBlox as a web browser on https://pictoblox.ai/
(preferred browser is Google Chrome).
You can learn about PictoBlox via examples/tutorials available inside PictoBlox software and many free tutorials and projects of PictoBlox with step-by-step instructions are available on the STEMpedia website. If you want to learn in a more detailed manner with the guidance of an educator, you can opt for STEMpedia Online Courses.
If you want to share your projects with friends who also want to make similar or want to make modifications in that, then you can share the project file(.sb3) and your friends can open that in PictoBlox to make modifications. If you just want to showcase the final output, then you can record/capture the output of the stage using the button available above the stage and can share that image/video file with your friends.
No, PictoBlox doesn’t store any pictures/videos of kids/users.
All the data generated or the camera/video feed used in PictoBlox is used locally or via our secured servers with a fully automated system without any human interventions. It is not used for any kind of marketing or promotional means without permission from the user (or guardians).
PictoBlox is available free to use for individuals & non commercial purposes.
If you want to start using PictoBlox in your schools for teaching AI, Coding, Robotics, AR/VR to students in bulk, school district, activity center, state education ministry or NGO for coding, AI, AR-VR, and Robotics education, please contact us at education@thestempedia.com
Please read more about PictoBlox (or any STEMpedia’s product and services) terms and policies HERE.
PictoBlox is a visual programming software designed by STEMpedia, and it is not released under an open-source license. It is a proprietary software that allows users to program and control hardware devices such as Quarky, Arduino and robotics kits and make engaging AI and ML projects.
If you are facing difficulties or have questions about using PictoBlox, there are several resources available to seek support:
- Official Documentation: Refer to the official PictoBlox documentation provided by STEMpedia. It contains tutorials, guides, and troubleshooting information that can help you understand and navigate the software.
- If this still doesn’t solve your query, you can write to us at support@thestempedia.com
If you need to create multiple accounts for your class, contact us at support@thestempedia.com.
PictoBlox’ block programming environment is based on Scratch 3.0 and Google Blockly, hence the basic functionality is similar. PictoBlox has a slightly different user interface compared to Scratch. While Scratch is an amazing educational platform for kids to start their first coding project, PictoBlox offers a more streamlined and simplified interface, making it easier for young learners to navigate and use. PictoBlox runs block coding even on Android smartphones and iPhones. The blocks in PictoBlox are also larger and more visually appealing with a more interactive User Interface. There are many additional features PictoBlox offers, a wide range of extensions, including ones for integrating popular hardware platforms like Arduino, Lego and micro:bit. These extensions provide additional blocks and functionalities to interact with specific hardware devices. It also offers various extensions related to Artificial Intelligence and Machine learning, Music, Animation, looks, motion, sensing, operators, face detection, object detection, NLP, Chat GPT and more that you can find out here.
While both PictoBlox and Scratch are used in educational settings, PictoBlox places a stronger emphasis on AI, Machine Learning, Robotics and STEM education and integrating physical computing. It aims to teach programming concepts alongside electronics, AI, ML, and robotics, making it suitable for schools and maker spaces with a focus on hands-on learning.
Yes, PictoBlox is available in multiple languages such as English, Hindi, Korean, Spanish, French, Italian, etc. You can use PictoBlox in your language as well.
Contributing to adding more languages to a software project or platform can be a valuable way to expand its reach and make it more accessible to a wider audience. If you want to contribute towards adding more languages to PictoBlox or translating PictoBlox in your language, you can connect with us at support@thestempedia.com
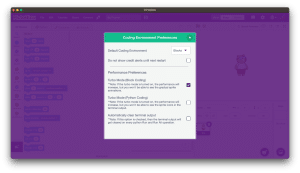
If you have set your default coding environment, click on the Setting icon given in the upper right corner of the PictoBlox window, Select the Coding environment preference, and choose your default coding environment according to your use or set it to None if you want PictoBlox to ask the coding environment every time you start the app.
*Click on the image to open in full screen.
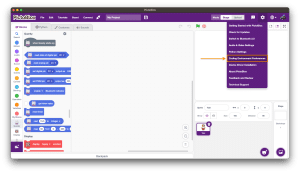
Follow the given instructions to enable the Turbo Mode
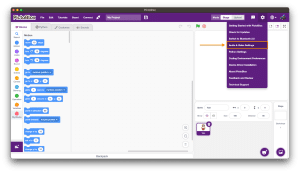
Step 1: Go to the PictoBlox setting
Step 2: Open Coding and Environment Preferences from the settings menu
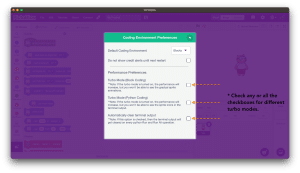
Step 3: In the Performance Preferences, You will see the Turbo mode option for both the coding environment.
Step 4: Check the box to enable the Turbo Mode
*Click on the image to open in full screen.
PictoBlox is compatible with various different hardware boards like,
- Evive
- Quarky
- Arduino UNO
- Arduino MEGA
- Arduino Nano
- ESP32
- T-Watch
- Boffin
- Micro: bit
- TECHbits
- LEGO EV3
- LEGO BOOST
- WEDO 2.0
- GO DFA
You can follow the instructions to select the hardware:
- Click on the Board option from the top Ribbon.
- Select the board you want to work with.
You can add multiple sprites in the PictoBlox.
For Desktop,
Click on the sprite icon given at the bottom right corner of the window
and choose the option according to your preference, you can get many different sprites directly from the gallery, you can create your own and also you can upload them from your local storage.
*Click on the image to open in full screen.
Depending on the application you can add as many as you require. You can follow the guidelines below to ad sprites:
Go to the sprite button, hover your cursor on it and you will see many options for the sprite, select the upload option to select the image or any gif you want.
*Click on the image to open in full screen.
Well, there is no direct way to open multiple files at the same time, so you can export the sprite along with the code and import that into your other project to get the code.
PictoBlox Software can run without an internet connection. but, there is a different extension that requires an internet connection.
You can perform AI, Ml, and Robotics based activities without an internet connection.
Yes, for hardware programming.
PictoBlox will convert the Block coding into syntax-based coding like Python, and C++ for upload mode. but, the block code won’t convert into the Python environment.
You can easily add various extensions in PictoBlox according to your need.However, it is dependent on your system RAM to load various extensions simultaneously.
Yes, you can program Arduino with PictoBlox Block-based coding. You can check out the video tutorials of Arduino with PictoBlox here.
PictoBlox is an educational software to learn python with interactive user interface and powerful features like Add Sprites, Electronic Boards, and AI-ML extensions with ease to make your coding journey superfun. Step-by-step code visualizer, error highlighting and debugger with intuitive code auto-completion. Kids can start learning Python by starting with the basics and writing simple codes after understanding its syntax and fundamentals such as variables, loops, and if/then statements. From there, they progress to working with graphics and eventually to building games.
Yes, PictoBlox Python Editor and Notebook is designed to be beginner-friendly and is suitable for users with little to no programming experience. The intuitive user interface, step-by-step tutorials, and interactive features make it easy for beginners to learn and start coding with Python.
When you open PictoBlox, you’ll see an onboarding screen with options to choose from: Block, Python Editor, Python Notebook, or ML Environment. You can select the Python environment from there.
If you are already in another environment, you can switch to the Python environment by following these steps:
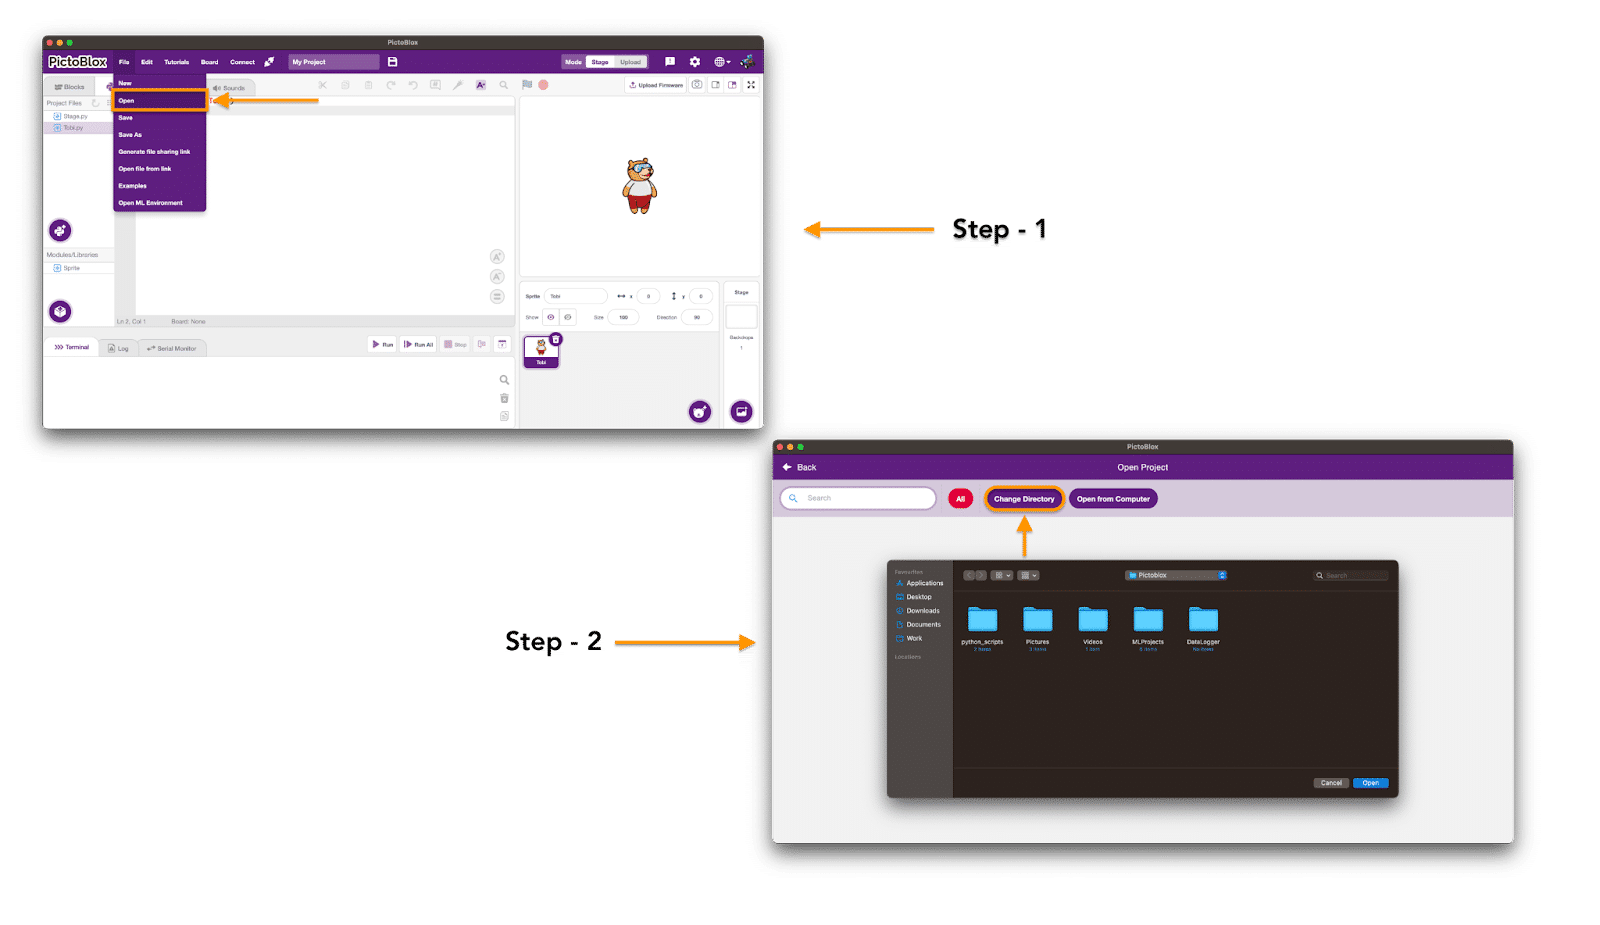
Go to File from the Navigation bar > Select New >From the onboarding screen, choose the Python environment of your choice: either the Python Editor or the Python Notebook.
If you want to switch from Block-based Coding to Python Coding, You can refer to the tabs just below the ribbon. Click on Python and you can switch to the Python Programming Environment from the Block-Coding Environment.
PictoBlox Python provides a wide range of built-in Python modules that you can utilize for various programming tasks. These modules cover many common functionalities and allow you to accomplish a lot within the PictoBlox environment.
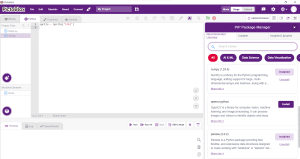
However, if you encounter a scenario where you require additional libraries or modules that are not already included in PictoBlox, you can leverage the PIP Package Manager feature. The PIP Package Manager allows you to install third-party Python libraries from the Python Package Index (PyPI) directly within the PictoBlox Python IDE.
There are two ways to install a library using PIP Package Manager:
- A) Recommended Libraries: This option provides a curated list of commonly used libraries. You can browse through the recommendations and select the libraries you want to install. Clicking the install button for each library will initiate the installation process.
- B) Installer: If you have a specific library in mind that is not listed in the recommended libraries, you can enter the name of the library directly. After entering the library name, click the install button to start the installation process.
You can view the installation logs in the Python terminal.
Once installed, you have the option to update the library if an update is available or uninstall it.
Note: In PictoBlox Python in a web browser, you don’t need to explicitly install libraries. When you run your code, PictoBlox will automatically install any required libraries based on the “import module” statements present in your code.
For instance, if you include the statement “import numpy” PictoBlox will handle the installation of the “numpy” library directly.
*Click on the image to open in the full screen.
Yes, you can program Arduino Board using PictoBlox Python and create innovative projects using Arduino with PictoBlox by interfacing display modules, sensors like RFID, keypad, fingerprint sensors etc, BLDC motors, and more.
No, Quarky is not programmable with any Python IDE other than the python environment available in PictoBlox.
PictoBlox Python has multiple extensions available based on AI, ML, Robotics, and IoT. You can check all the extensions of PictoBlox HERE
Absolutely! Python is an exceptionally student-friendly programming language, making it an excellent choice for K12 students, schools, and teachers. Compared to tools like Scratch, Python offers a versatile platform that supports an interactive stage for creating engaging games and stories. It comes packed with advanced functionalities, such as integrating Artificial Intelligence and effortlessly controlling robots via Bluetooth.
The transition from block coding to Python syntax is seamless, which is particularly beneficial for young learners. With tools like Python Editors and Notebooks, teachers find it convenient to teach block coding and Python on the same platform, enhancing the teaching and learning experience. Pictoblox, as an advanced version of Scratch, provides these features and more, making it a powerful tool for both students and educators.
In PictoBlox Python, you can debug your code using the built-in debugger. Simply set breakpoints in your code by clicking on the line numbers, and then run your code in debug mode. The debugger will pause execution at the breakpoints, allowing you to inspect variables and step through your code line by line to identify and fix any errors.
Yes, you can share your Python projects created in PictoBlox with others by exporting them as Python (.py) files. Once you’ve finished your project, simply go to the “File” menu and select “Export all as Python Script.” This will generate a .py file that you can share with others, allowing them to run your code outside of PictoBlox.
To access help and support resources for Pictoblox Python, you can refer to the detailed documentation available on the Pictoblox website. Here, you will find resources such as the getting started guide and example walkthroughs.
Additionally, you can reach out to the support team for assistance with any questions or issues you may encounter. Visit the support section on the website for contact details and further help.
Yes, PictoBlox Python provides tools and libraries for data analysis and visualization. You can import datasets, perform data manipulation and analysis, and create interactive visualizations using libraries such as pandas, matplotlib, and seaborn.
Yes, you can create GUI applications with PictoBlox Python using libraries such as Tkinter and PyQt. These libraries provide tools for building interactive and visually appealing user interfaces for your Python projects.
Yes, Pictoblox Python allows you to integrate with external hardware devices such as sensors, actuators, and microcontrollers. You can use the GPIO pins of microcontrollers like Arduino to control hardware components and create interactive projects involving robotics, IoT, and more. Additionally, you can use compatible hardware like Evive, Quarky, and Wizbot, which are our in-house hardware built for learning. These devices come with their user guides for easy reference if you need assistance on how to use them.
Yes, PictoBlox Python supports machine learning and artificial intelligence through its built-in extensions and libraries. You can use tools like TensorFlow and scikit-learn to build and train machine learning models, and integrate them into your Python projects.
Yes, you can create games using PictoBlox Python. The platform provides tools and libraries for game development, including sprite-based animation, collision detection, and event handling, allowing you to create a wide variety of games using Python programming language.
Yes, PictoBlox Python is available for different operating systems including Windows, macOS, and Linux. You can download and install PictoBlox on your preferred operating system from the official website here.
If your PictoBlox coding environment is set to default then PictoBlox will ask you every time you open the Pictoblox to choose the environment and you can select the ML environment.
If you are already in the coding environment and wish to open the ML environment, please go to File and you will see the last option Open ML Environment click on it and open your ML environment.
In the latest version of PictoBlox, You can use AI & ML extensions directly, i.e. no need to select a board. So, if it’s not showing in your PictoBlox, Please update it. [Updated version 3.2.X +]
ML Environment is only available in the English language, for now, our team will be working on more languages.
If you want to contribute to translating PictoBlox in your language, kindly write to us at support@thestempedia.com
Yes, you can access the PictoBlox ML Environment Tutorial HERE. The tutorials are based on different classifiers available in the Machine Learning Environment. These tutorials also provide an introduction to working with Machine Learning (ML) models in PictoBlox with Block coding and Python Programming for Kids. With a step–by–step approach, users will learn how to create and use ML models in PictoBlox.
The Python Notebook in Pictoblox Software is a feature that allows users to write and edit Python code in a notebook-style interface, similar to Jupyter Notebooks.
In the Python Notebook, users can write and execute Python code in individual cells, create markdown text, and visualize data using various libraries. It provides an interactive environment for experimentation and documentation.
You can switch between the Python Notebook and other environments, such as the Python Editor, by selecting the desired file type (.ipynb or .py) from the toolbar. Here’s how:
- Go to the toolbar and select File.
- Choose either New File or Open File.
- Select the file type of your choice: .ipynb for the Python Notebook or .py for the Python Editor.
The interface will adapt accordingly to provide the appropriate environment for editing and running your code.
Yes, you can access functions written in a Python editor file and call them in your notebook file. Both files should be opened in Pictoblox using the toolbar. This allows you to integrate and utilize functions across different Python environments within Pictoblox.
To share variables between a Python Editor file and a Notebook, ensure both files are open in Pictoblox. Save the editor file and use the %run magic command in the notebook to execute the editor file, making its variables accessible in the notebook environment.
Junior Blocks in PictoBlox is an innovative coding environment for kids aged between 4-7 years, specially designed for first and second-graders. Its easy-to-use interface and story-based learning allow you to drag and combine code blocks to make interactive stories, games, and animations playfully. You will be able to use different features such as Artificial Intelligence and Machine Learning in Junior Blocks to create different innovative projects.
Using Junior Blocks, children can enhance several skills such as problem-solving, critical thinking, creativity, and communication. Additionally, they receive an introduction to fundamental programming concepts including sequencing, loops, and conditionals.
You can access the Junior Blocks in PictoBlox by following these steps:
- Junior Blocks is available as an additional environment in Pictoblox software. You can download and install Pictoblox Software from here. It is available for Windows, Mac, Linux, and Chromebook users.
- Junior Blocks will also be available on Google Play Store and AppStore for Android and IOS users (phones and tablets). Just search Junior Blocks on these stores and install it.
- You can also directly use Junior Blocks as a web Browser on https://pictoblox.ai/ (preferred browser – Google Chrome)
You can learn about Junior Blocks via examples/tutorials available in the Junior Blocks environment in Pictoblox.You can also refer to the online Blocks Guide and User Documentation, If you want to learn in a more detailed manner with the guidance of a Teacher/educator, you can opt for Junior Blocks Books and Online Courses.
To access examples and tutorials in PictoBlox Junior Blocks, follow these steps:
- Go to the “Files” section and look in the drop-down menu.
- Select either “Examples” or “Tutorials” to access the respective resources.
- In the “Examples” section, you’ll find pre-made projects showcasing various features and ideas for inspiration.
- In the “Tutorials” section, you’ll discover step-by-step guides and instructions to help you learn different features and create specific types of projects.
These resources are designed to assist users of all levels in learning and experimenting with Scratch effectively.
Junior Blocks in PictoBlox are designed for children aged 4 to 7 years old. It’s meant to introduce them to the basics of coding and computational thinking in a fun and engaging way.
Yes, Junior Blocks is designed with children’s safety in mind. The app does not require any personal information to use, and there are no social features that allow children to interact with others online. Additionally, Junior Blocks complies with COPPA (Children’s Online Privacy Protection Act) regulations to ensure the privacy and safety of young users.
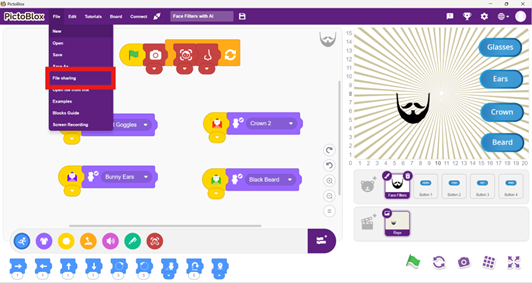
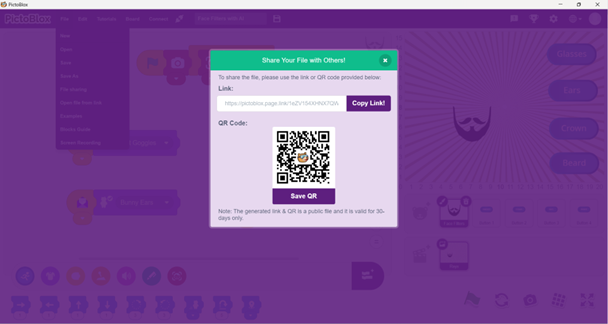
Share the project file (.sb3): You can save your Junior Blocks project as aan .sb3 file and share it with your friends. They can then open the file in Junior Blocks on their own devices to make modifications. Once you’ve saved your project, you can generate a cloud link and a QR code for the file. This makes it easy to share the project digitally with your friends
Step 1:
Step 2:
Showcase the final output: If you simply want to showcase the final output of your project, you can record or capture the output of the stage. Junior Blocks provides a button above the stage that allows you to capture the image or record a video of the project’s execution. You can then share the image or video file with your friends to showcase your creation.
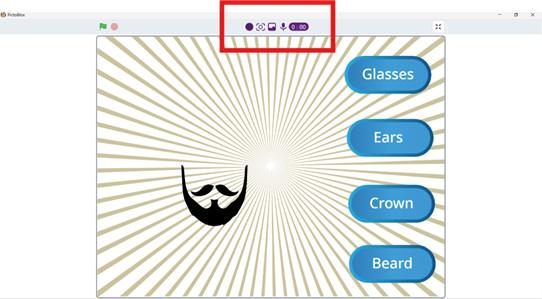
Yes, Junior Blocks can be used offline once it’s downloaded onto a device. Children can create and play with their projects without needing an internet connection.
Yes, PictoBlox is available in multiple languages such as English, Hindi, Korean, Spanish, French, Italian, etc. You can choose from 20+ languages from the settings in the Junior Blocks environment.
Extensions in Junior Blocks are additional features or functionalities like superpowers that users can add to their projects to extend the capabilities of the projects/programs.
You can access the extensions in Junior Blocks by clicking on this icon:
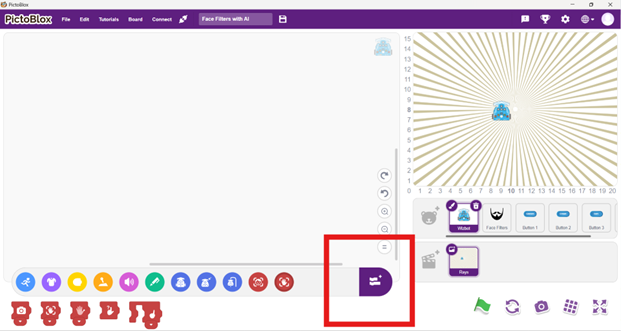
Junior Blocks offers AI and ML extensions such as Hand Detection and Face Detection, empowering users to easily integrate these advanced technologies into their projects for enhanced interactivity and functionality.

Junior Blocks supports the use of robots such as Wizbot and Quarky Robot, which can be connected and used with their respective extensions. This enables children to program and interact with these robots through Junior Blocks’ interface. You can purchase these robots from here.

