Your Cart

Arduino® with PictoBlox

Programming Arduino® has never been this easy! This series will guide you on how to program Arduino® using Scratch based block programming, interface sensors and actuators, and control your projects via your smartphone. Why waste your time reading this further, go jump on to the lessons right away!
Arduino with PictoBlox Image

Interfacing Arduino Sensors Actuators with PictoBlox

Interface Arduino® to PictoBlox

Get hands-on experience of PictoBlox’s interface and learn how to write a simple script to control the LED connected to the Arduino® Uno’s digital pin 13.

Interface Sensors to Arduino® Using PictoBlox

Learn how to interface sensors with the Arduino® Uno and how to control its pin 13 LED using an IR sensor by writing a script in PictoBlox.

Interface Motors to Arduino® using PictoBlox

Learn how to interface actuators with Arduino® Uno and how to control a servomotor using an IR sensor interfaced with the Uno by writing a script in PictoBlox.

Control Motors Via Smartphone With PictoBlox

Learn how to control actuators interfaced with the Arduino® Uno via a Smartphone using Dabble – an ingenious project interaction and Bluetooth controller app – by writing a script in PictoBlox.

Windows Installer (.exe)

STEP 1: Download the PictoBlox Installer (.exe) for Windows 7 and above (Release Notes).

  • Download the PictoBlox 8.0.1 (Beta) Version for Windows
  • Download the PictoBlox 7.1.0 Version for Windows

STEP 2: Run the .exe file.

Some of the device gives the following popup. You don’t have to worry this software is harmless. Click on More info and then click on Run anyway.
Note: Please uninstall your last version from your desktop before installing the above latest version for a seamless experience. This process would not affect your old projects saved on your desktop.

STEP 3: Rest of the Installation is straight forward, you can follow the popup and check on the option appropriate for your need.

Your software is now installed!

Still facing issues? Contact us directly

macOS Installer

STEP 1: Download the PictoBlox Installer Version 8.0.1 (Beta) (.dmg)  (Release Notes).

  • Download the PictoBlox Installer Version 7.0.0 (.dmg) (Old Version)

We will Update the Mac 8.0.0 PictoBlox Beta version soon.

STEP 2: Run the .dmg file.
Note: Please uninstall your last version from your desktop before installing the above latest version for a seamless experience. This process would not affect your old projects saved on your desktop.

Still facing issues? Contact us directly

Linux Installer

STEP 1: Download the PictoBlox Installer Version 8.0.1 (.deb) for Ubuntu (Linux) (Release Notes).

Old PictoBlox Version

STEP 1: Download the PictoBlox Installer Version 7.1.0 (.deb) for Ubuntu-Linux (Old Version).

Linux Mint Installer

STEP 1: Download the PictoBlox Installer Version 6.2.0 (.deb) for Ubuntu (Linux Mint) (Release Notes).

We will Update the Linux 8.0.0 PictoBlox Beta version soon.

STEP 2: Run the .deb file by clicking it or with the following command:

Note: Please uninstall your last version from your desktop before installing the above latest version for a seamless experience. This process would not affect your old projects saved on your desktop.

sudo dpkg -i PATH_TO_PICTOBLOX

STEP 3: Add User to the ‘dialout’ group (if not able to connect to the Serial port) with the following command:

sudo adduser ${USER} dialout

Your software is now installed!

Still facing issues? Contact us directly

Linux Mint Installer

STEP 1: Download the PictoBlox Installer Version 6.2.0 (.deb) for Ubuntu (Linux Mint) (Release Notes).

STEP 2: Run the .deb file by clicking it or with the following command:

Note: Please uninstall your last version from your desktop before installing the above latest version for a seamless experience. This process would not affect your old projects saved on your desktop.

$: sudo dpkg -i PATH_TO_PICTOBLOX

STEP 3: Add User to the ‘dialout’ group (if not able to connect to the Serial port) with the following command:

$: sudo adduser ${USER} dialout

Your software is now installed!

PictoBlox Android App

Make cool AI and ML projects on the go using your Smartphone. Click the button to get the app from Google Play Store.

If you are using Android 7 or below, please download the application from here:

PictoBlox iOS App

Make cool AI and ML projects using your iPhone. Click the button to get the app from App Store.

Chromebook Installer

PictoBlox runs in the Linux environment on Chromebook. To start the Linux environment on Chromebook and to install PictoBlox follow these steps:

STEP 1: Download the PictoBlox Installer (.deb) for Chromebook (Release Notes).

  • Download the PictoBlox Installer (.deb) for Chromebook.

STEP 2: Turn On Linux Environment on Chromebook.

    1. Linux is off by default. You can turn it on at any time from Settings.
    2. On your Chromebook, at the bottom right, select the time.
    3. Select Settings ->  Advanced ->  Developers.
    4. Next to “Linux Development Environment,” select Turn On.
    5. Follow the on-screen instructions. Setup can take 10 minutes or more.
    6. A terminal window opens. You have a Debian 10 (Buster) environment. You can run Linux commands, install more tools using the APT package manager, and customize your shell.
    7. Run this command in your terminal : sudo apt update. This will ensure you’re always installing the latest versions of tools in its repository.


STEP 3: Start PictoBlox on Chromebook.

  1. Upon doing the above steps successfully, Linux environment will be installed in your system and Linux files folder will be created in your My files with your allocated space. You can now install PictoBlox using any of the following methods.
  2. Installation using terminal:
    1. Copy the downloaded (.deb) file from Downloads folder to Linux files folder.
    2. Open the Linux terminal from applications and run the command:  sudo dpkg -i Package Name(eg: sudo dpkg -i PictoBlox_6.0.1_amd64_chromebook.deb)
  3. Manual Installation:
      1. You can just double-click on the deb file, which will ask you to install this package using Linux.Please click on Install with Linux option and your installation will start.
  4. If the installation fails due to some reason, please open the Linux terminal and type this command : sudo apt – -fix-broken install and continue the installation.

STEP 4: Access the serial port on Chromebook

  1. To access the serial port follow these steps:
    1. First, connect quarky (or any supported board) through the serial port.
    2. You will get a notification to connect that device to Linux. Select that option. Alternatively, you can also go to settings, search Linux USB preferences, and enable the serial connection.
    3. Please restart the PictoBlox.
    4. You will be able to use boards through the serial connection.

STEP 5: Access Bluetooth & Webcam in Chromebook (Beta)

  1. To access Bluetooth and Webcam in Chromebook, you will have to use Chromebook Link.
  2. To connect boards over Bluetooth, select the board in PictoBlox and go to the Bluetooth tab, you will be redirected to Chromebook Link or alternatively, you can also go to Chromebook Link and then click Connect to search for available devices. Once you find your board, connect it and go back to PictoBlox software. Now, you will be able to use your board over Bluetooth.
  3. To use Camera in PictoBlox software, first go to Chromebook Link and click on ‘Enable Camera’ option.You will be able to see the video feed on the Chromebook Link page. You can now go back to PictoBlox software and use camera.
    1.  
  1.  

Still facing issues? Contact us directly

FAQs

PictoBlox, the programming software is based on Scratch 3.0. It provides you all the functionalities of Scratch along with the plus features like interacting with the hardware such as Micro-controller Boards like evive, Arduino UNO, Arduino Nano, Arduino Mega, ESP32, and others. Just select the Arduino Extension in PictoBlox, and the Scratch blocks will be added. It also has extensions for most of the generic Sensors and Actuators. Also, PictoBlox allows you to work in two modes that is a real-time mode and the upload mode. Using this you can easily program your robots and other STEM projects just by dragging and dropping a few blocks.

ArduBlock is an old fashioned Arduino block programming software, which is based on Google Blockly. With Ardublock, the Arduino code cannot work with Scratch sprites in real-time.

S4A (Scratch for Arduino) is also a Scratch modification that enables block programming with Scratch for Arduino prototyping board. You cannot compile Arduino code using Scratch for Arduino, so it can only work in real time after uploading the firmware.
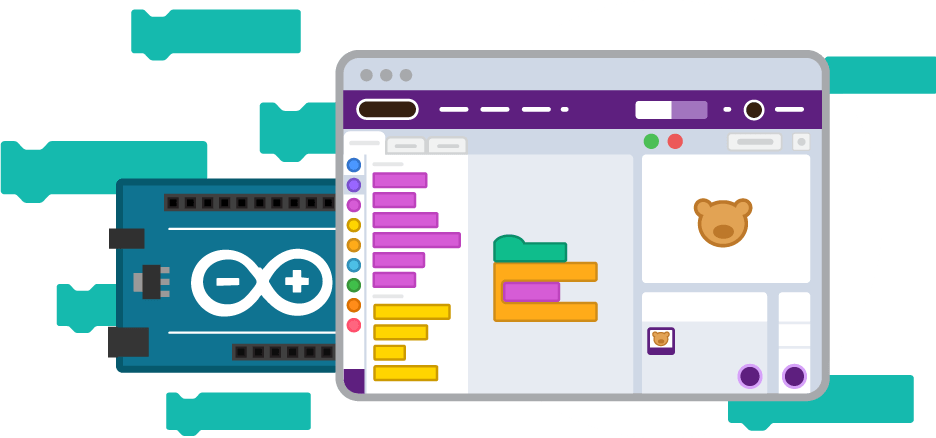
PictoBlox is compatible with popular Arduino boards like Arduino Uno, Arduino Mega, and Arduino Nano. Also, advanced board like ESP32 can be programmed using PictoBlox. You just have to choose your favorite board from the menu, corresponding blocks to that board will automatically appear into the Code palette. It will also show you blocks for compatible Sensors,  Actuators, and Dabble- Smartphone app to interact with hardware. You can also load more relevant extensions from the extension option. For an easy start, examples related to every board i.e Arduino UNO, Arduino Mega, Arduino Nano, evive and ESP32 are also available under the file tab.

A wide variety of sensors can be interfaced just using simple graphical blocks. PictoBlox has dedicated scratch blocks for most of the commonly used Sensors like:

  • Analog Sensors: LDR(Light sensor), Soil Moisture Sensor, Sound/Microphone sensor Raindrop Sensor, Sound Sensor, Gas Sensor
  • Digital Sensor: Ultrasonic sensor (distance sensor), DHT11 (humidity and temperature sensor), IR(Infrared) Sensor, PIR(Motion Sensor), Hall effect sensor, Touch Sensor, etc.

Also, advanced Sensors like RFID, Fingerprint Sensor, etc. can also be programmed using PictoBlox, you just have to add an extension for advanced sensors.

PictoBlox has dedicated graphical blocks for most of the commonly used Actuators like the Dual Shaft DC Motor, Servo Motor, Relay, and Stepper Motor, etc. Just arrange few scratch blocks and easily control motors be it a simple DC motor or a complex Stepper motor.

You can interface various displays like the 16 x 2 LCD, 4 x 7 segment, 8 x 8 dot matrix, using the Display Extention of PictoBlox.

You can control your projects wirelessly using the Bluetooth Modules like HC-05 or HM-10 or BLE via Dabble– one app for sensing and control. Using Dabble blocks will allow you to control your hardware using your smartphone or use Smartphone’s sensor into your projects. Just drag-and-drop the scratch like blocks from Dabble palette, complete your script, connect the Bluetooth module, and open endless possibilities using Dabble.

The Stage (real-time) mode is where you can interact with the character a.k.a the sprite using generic hardware Like Arduino Uno, Arduino Nano, Arduino Mega, evive and ESP 32 in real-time. The Stage mode or the real-time modes is where you can create games, animations, or when you can create your own story.

Upload mode lets your project function even when the hardware is not connected to the computer. Just write a scratch script for any of your boards i.e. Arduino UNO, Arduino Nano, Arduino Nano, evive or ESP32 and upload it to the board and break the shackles binding it to the computer

  1. Learning PictoBlox isn’t that difficult. You can find some basic tutorials inside the software itself. Just click on “Tutorials” button in the menu bar and various Arduino scratch tutorials and examples will be displayed.

    You can find the other tutorials, right from the getting started with PictoBlox guide here.

PictoBlox is just a click away!

Enter your email address and receive installation, getting started guide and updates over email. Don’t worry, it’s absolutely FREE!

PictoBlox is just a click away!

Enter your email address and receive installation, getting started guide and updates over email. Don’t worry, it’s absolutely FREE!

PictoBlox is just a click away!

Enter your email address and receive installation, getting started guide and updates over email. Don’t worry, it’s absolutely FREE!

PictoBlox is just a click away!

Enter your email address and receive installation, getting started guide and updates over email. Don’t worry, it’s absolutely FREE!

PictoBlox is just a click away!

Enter your email address and receive installation, getting started guide and updates over email. Don’t worry, it’s absolutely FREE!

PictoBlox is just a click away!

Enter your email address and receive installation, getting started guide and updates over email. Don’t worry, it’s absolutely FREE!

PictoBlox is just a click away!

Enter your email address and receive installation, getting started guide and updates over email. Don’t worry, it’s absolutely FREE!

PictoBlox is just a click away!

Enter your email address and receive installation, getting started guide and updates over email. Don’t worry, it’s absolutely FREE!

PictoBlox is just a click away!

Enter your email address and receive installation, getting started guide and updates over email. Don’t worry, it’s absolutely FREE!

PictoBlox is just a click away!

Enter your email address and receive installation, getting started guide and updates over email. Don’t worry, it’s absolutely FREE!

PictoBlox is just a click away!

Enter your email address and receive installation, getting started guide and updates over email. Don’t worry, it’s absolutely FREE!